sharepoint 创建个人网站
One of the SharePoint 2013 puzzle pieces which got some major improvements are My Sites, User Profiles and news feeds. This article describes step-by-step process of setting up the my site infrastructure in the SharePoint Farm.
Prerequisite for setting up My Sites is having user profiles import or sync up and running. You can read more on user profiles sync in my previous article.
When this has been configured, we can start configuring my sites:
The first step us to go create (according to the best practices) own web application for hosting my sites. Go to the central administration, Application management, “Manage web applications”
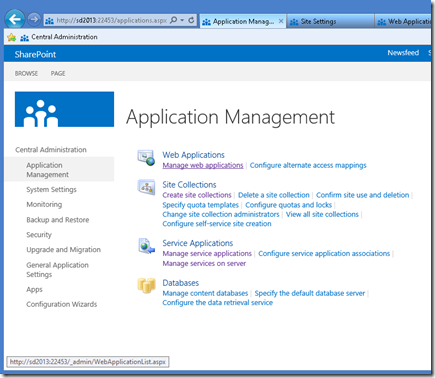
And create a dedicated web application (sd2013:101 in my example here)
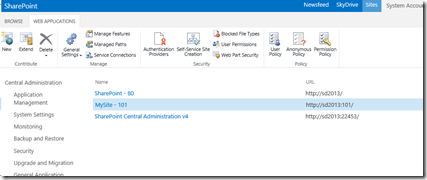
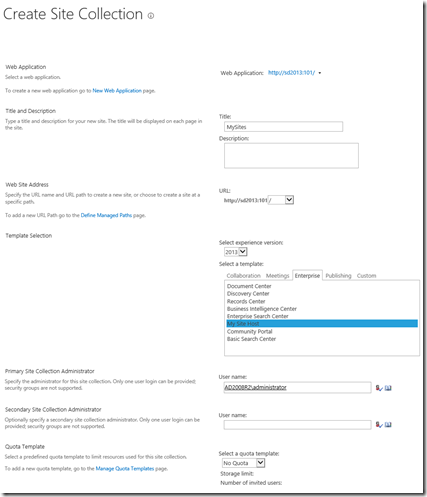
Now, the next step would be to create a site collection in the root of the newly created web application. You can of course create it inside some other managed path other than root, but since we have dedicated Web Application, root seems like an obvious choice.
Site Collection must have “2013” experience and use “My Site Host” template.
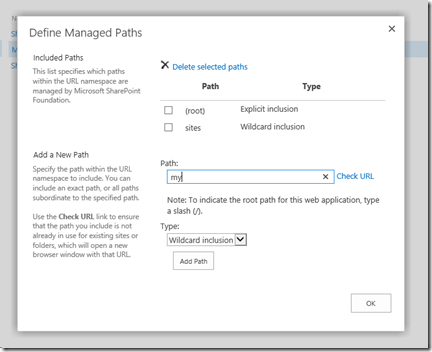
After Site Collection has been created, click on the “Managed Paths” in the web application that you created to host My Sites.
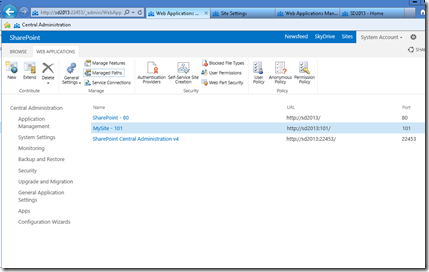
Add a new managed path with wildcard inclusion. I prefer to use “my” as the My Site managed path, but you can of course pick up anything else.
The next thing is to check service connections for the Web Application which will host my sites. Click on the “Service Connections” button to…
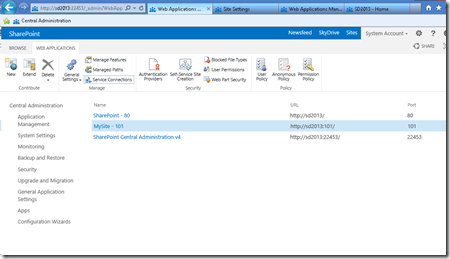
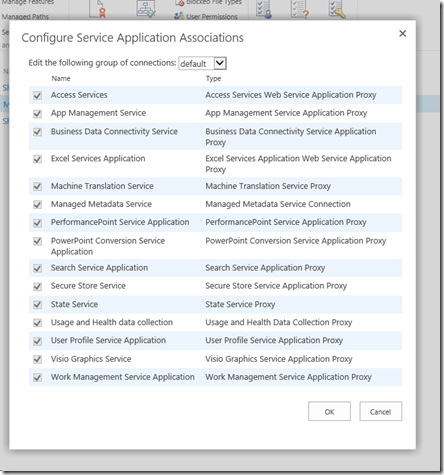
..see if right service applications are set up.
If you choose “Custom” (instead of the “Default”) in the Edit the following group of connections drop down, select any service applications to which you want to connect the web application. The most important ones re User Profile service application, the managed metadata service application, and the Search service application.
In my case, I’ll just proceed with “default”
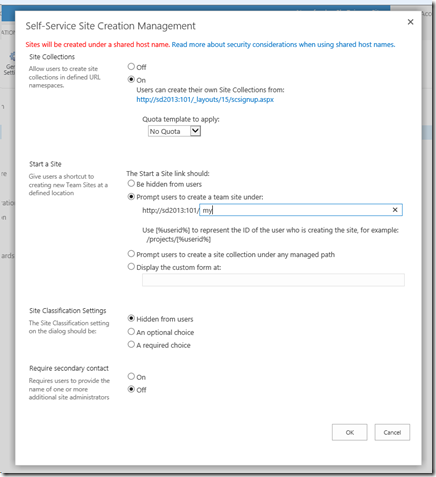
Now it’s time to set up the self service site creation. Go back to the Web application management, chose the application that you created to host My Sites, and click on the “Self Service Site Creation” button.
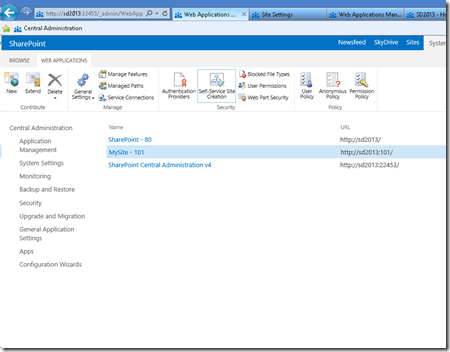
Click “On” in the “Site Collections” radio box, and enter your managed path in the “Start a Site” field (with “Prompt users to create a team site under” chosen)
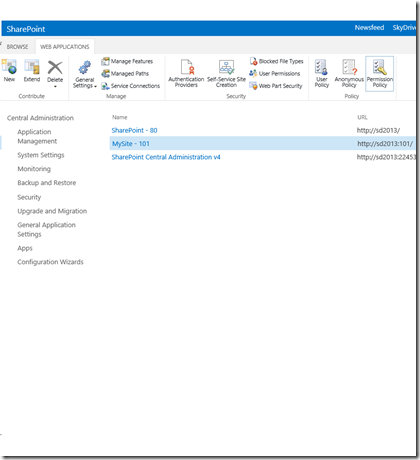
Now, the next step is to grant users permission to create new site collections (for my sites). Click on the “Permission Policy” button in the Web Application management, with the web application which hosts the my sites selected.
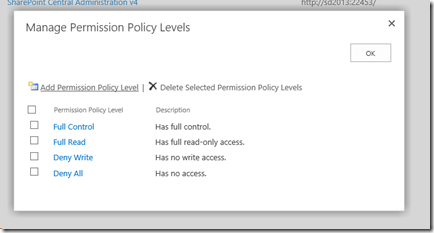
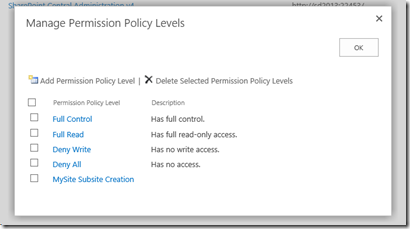
In the”Manage Permission Policy Levels”, click on the “Add Permission Policy Level”
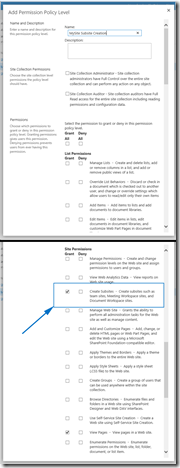
Call it however you want (“MySite Subsite Creation” in my case), and grant the “Create Subsites” permission.
Now, the new permission policy level should appear among other policy levels…
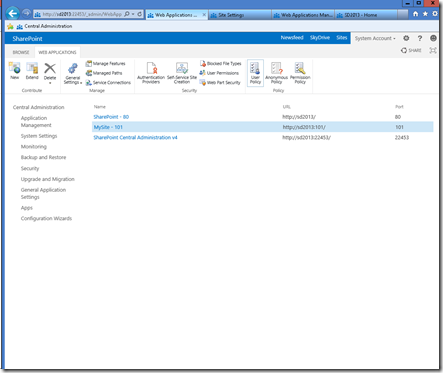
And we need to grant that policy level to the users. Click on the “Users Policy” button in the Web Application management, with the web application that you created to host My Sites selected…
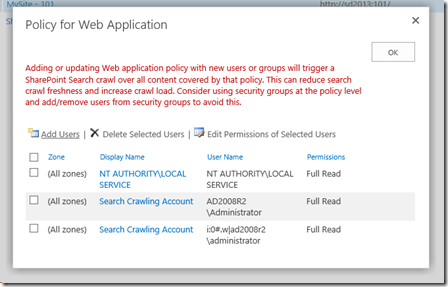
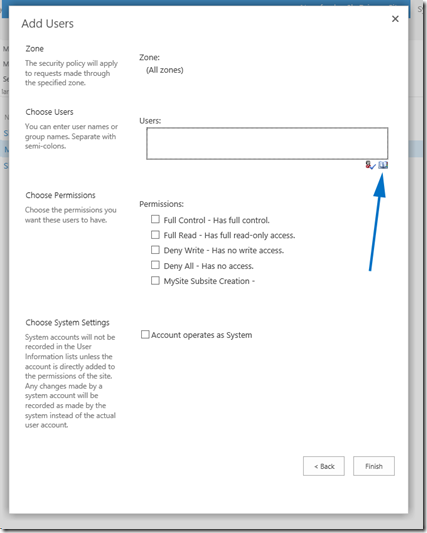
Click on the “Add users” link…
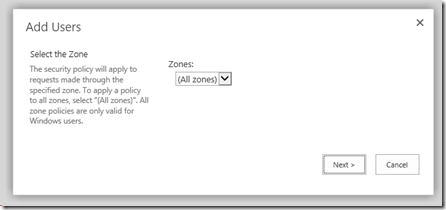
From all zones…
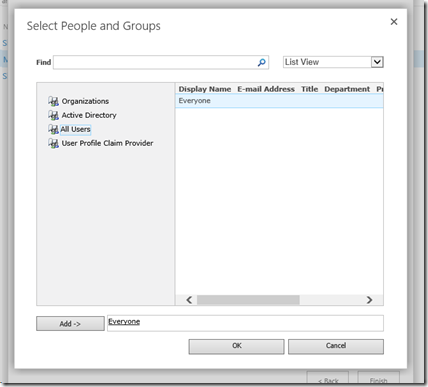
And select the users which you want to have rights to create my sites. On my case, it will be “Everyone”.
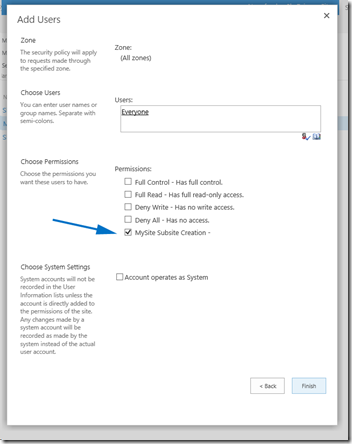
Select your newly created policy level…
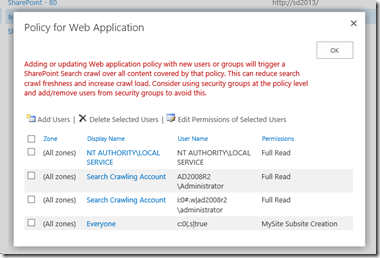
And now you should see “Everyone” with the new policy selected.
OK, everything has been set up and prepared so far. Now, finally, let’s set up the my sites. Go to the Central Administration –> Application Management, and select “Manage service applications”.
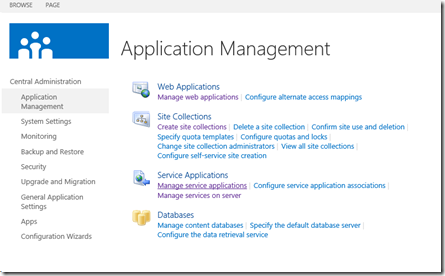
Then select the “User Profile Service Application”

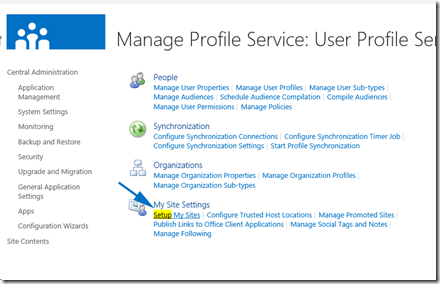
In the “User Profile Service Application”, click on “Setup My Sites”
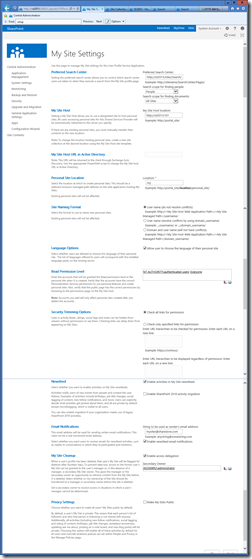
This is where you need to set up the search center, my host location (in my case – root site collection of the Web Application that serves as the host) and personal site location (managed path within the host web application – “my” in my case). Take a look at the screenshot for all the other fields (which I have used in my case):
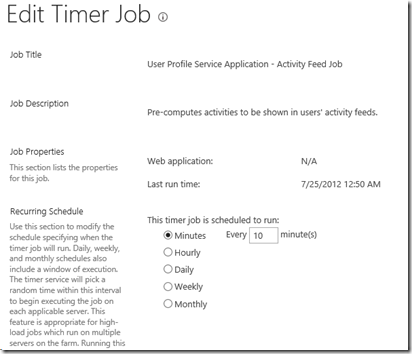
The only remaining thing would be to set up the timer job for activity feed. Go to the Central Administration –> Monitoring –>Timer Job –> Review job definitions
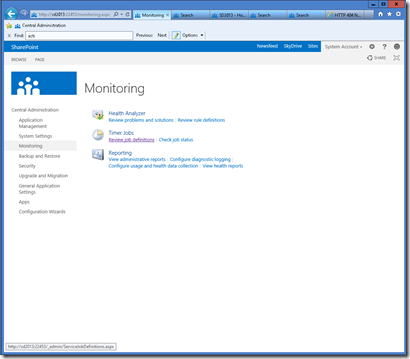
Find the “User Profile Service Application – Activity Feed Job”, and set up the activity feed sync timer according to your needs.

And, that’s it.
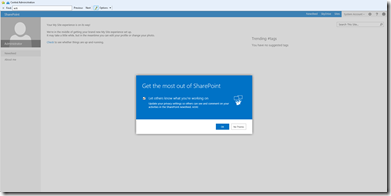
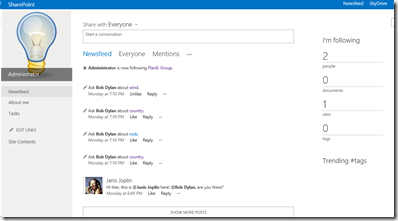
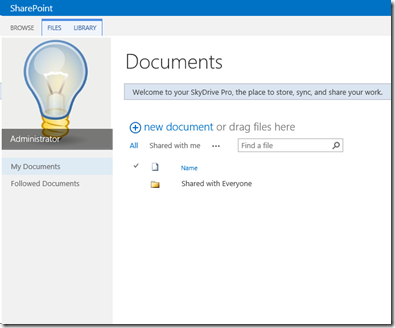
Go to the my site now, and you will be notified of my site creation for your self. Take care of your profile, follow people. Upload you private documents, share documents, follow documents – enjoy being social! ![]()
sharepoint 创建个人网站的更多相关文章
- SharePoint Online 创建门户网站系列之准备篇
前 言 门户是SharePoint自推出以来,就非常适合的一种站点类型,在Server版本中,发布站点的应用非常广泛.这里,我们以一个个简单的例子,然后以一个固定的项目Demo,为大家演示如何一步步在 ...
- 使用SharePoint创建和定义自己的网站页面
使用SharePoint创建和定义自己的网站页面 1. 打开SharePoint Designer 2010. 2. 点击网站页面导航. 3. 在功能区点击Web部件页面,新建Employee.axp ...
- SharePoint 创建网站地图树视图及格式枚举截图
SharePoint 创建网站地图树视图及格式枚举截图 SharePoint首页隐藏掉左側导航以后,假设要以树视图呈现站点地图也非常easy. 仅仅须要复制v4.mas ...
- SharePoint入门——创建一个网站
1.首先安装SP相关环境,可以百度到具体操作步骤: (以下步骤基于本人环境:本人用的Win10自带的Hyper-V虚拟机.Windows Server2012R2.SQL2014以及SharePoin ...
- SharePoint 2013 新建网站集图解
前言:接触SharePoint的人可能是越来越多,但是很多人一接触就很迷茫,在技术群里问如何新建网站集,这样一篇图解,帮助新手学习在搭建好SharePoint环境之后,如何创建一个网站集,做一个基本的 ...
- SharePoint 2013 跨网站集发布功能简介
在SharePoint Server 2013网站实施中,我们经常会遇到跨网站集获取数据,而2013的这一跨网站集发布功能,正好满足我们这样的需求. 使用SharePoint 2013中的跨网站发布, ...
- SharePoint 2013 新建网站集图解(绝对菜鸟篇)
前言:接触SharePoint的人可能是越来越多,但是很多人一接触就很迷茫,在技术群里问如何新建网站集,这样一篇图解,帮助新手学习在搭建好SharePoint环境之后,如何创建一个网站集,做一个基本的 ...
- SharePoint 创建 Lookup 类型的Site Column解决跨站问题
在某些情况下,我们需要去引用其他List中的数据,比如在网站集(Site Collection)上有个List叫Country,在其子网站(WebSite)有个List叫Employee,如果要在子S ...
- SharePoint创建内容类型
SharePoint创建内容类型 内容类型的用途是多种多样的.创建内容类型也非常简单. 1. 点击网站操作--网站设置. 2. 点击网站内容类型,点击创建. 3. 命名Beginning_ShareP ...
随机推荐
- 201521123008 《Java程序设计》第十四周学习总结
1. 本周学习总结 2. 书面作业 1. MySQL数据库基本操作 建立数据库,将自己的姓名.学号作为一条记录插入.(截图,需出现自己的学号.姓名) 在自己建立的数据库上执行常见SQL语句(截图) - ...
- 201521123066 《Java程序设计》第十四周学习总结
1. 本周学习总结 2. 书面作业 1. MySQL数据库基本操作 建立数据库,将自己的姓名.学号作为一条记录插入.(截图,需出现自己的学号.姓名) 在自己建立的数据库上执行常见SQL语句(截图) - ...
- apache-beanutil工具类的使用
BeanUtil工具类是apache commons中的项目 使用BeanUtil除了需要 commons-beanutils-1.8.3.jar 外,可能需要记录错误日志信息,再加入 commons ...
- python os语法
前几天做了一个文件替换功能用到些python os的功能,感觉python os模块的功能非常的强大, 如果你希望你的python程序能够与平台无关的话,这个模块是尤为重要的.即它允许一个程序在编写后 ...
- day12<常见对象+>
常见对象(Scanner的概述和方法介绍) 常见对象(Scanner获取数据出现的小问题及解决方案) 常见对象(String类的概述) 常见对象(String类的构造方法) 常见对象(String类的 ...
- PHP数组运算符
PHP数组预算符有==(等于),===(恒等于),!=(不等于),<>(不等于),+(联合): 注意:没有-(减号)运算符: $a=array("a"=>&quo ...
- css3换行的三方式的对比(整理)
CSS3 文本换行 (转载..) 作者 张歆琳 关注 2016.06.20 10:49* 字数 1101 阅读 676评论 1喜欢 6 文本换行其实是个非常常用但并不起眼的特性.你什么都不用设,浏览器 ...
- 每周分享之 二 http协议(3)
本次分享http协议,共分为三部分,这是第三部分,主要讲解一个完整的http请求都经过哪些步骤,当我们在地址栏中输入网址,到返回页面都经历了什么 1.输入网址 当我们在浏览器中输入网址的时候,浏览器就 ...
- The Nerd Factor SPOJ - MYQ5
The Nerd Factor Time Limit: 1000MS Memory Limit: Unknown 64bit IO Format: %lld & %llu [Submi ...
- 【原创】流程引擎的网关(遵循BPMN2.0)设计总结
概述 BPMN 2.0是什么呢?业务流程模型注解(Business Process Modeling Notation - BPMN)是 业务流程模型的一种标准图形注解.这个标准 是由对象管理组(Ob ...
