kubeadm安装K8S单master双节点集群
宿主机:
master:172.16.40.97
node1:172.16.40.98
node2:172.16.40.99
# 一、k8s初始化环境:(三台宿主机)
关闭防火墙和selinux
systemctl stop firewalld && systemctl disable firewalld
sed -ri '/^[^#]*SELINUX=/s#=.+$#=disabled#' /etc/selinux/config
setenforce 0
设置时间同步客户端
yum install chrony -y
cat <<EOF > /etc/chrony.conf
server ntp.aliyun.com iburst
stratumweight 0
driftfile /var/lib/chrony/drift
rtcsync
makestep 10 3
bindcmdaddress 127.0.0.1
bindcmdaddress ::1
keyfile /etc/chrony.keys
commandkey 1
generatecommandkey
logchange 0.5
logdir /var/log/chrony
EOF
systemctl restart chronyd && systemctl enable chronyd
各主机之间相互DNS解析和ssh登录
略
升级内核
wget -O /etc/yum.repos.d/epel.repo http://mirrors.aliyun.com/repo/epel-7.repo
yum install wget git  jq psmisc -y
wget -O /etc/yum.repos.d/epel.repo http://mirrors.aliyun.com/repo/epel-7.repo
yum install https://mirrors.aliyun.com/saltstack/yum/redhat/salt-repo-latest-2.el7.noarch.rpm
sed -i "s/repo.saltstack.com/mirrors.aliyun.com\/saltstack/g" /etc/yum.repos.d/salt-latest.repo
yum update -y
更新重启
自选版本
export Kernel_Vsersion=4.18.9-1
wget  http://mirror.rc.usf.edu/compute_lock/elrepo/kernel/el7/x86_64/RPMS/kernel-ml{,-devel}-${Kernel_Vsersion}.el7.elrepo.x86_64.rpm
yum localinstall -y kernel-ml*
查看这个内核里是否有这个内核模块
find /lib/modules -name '*nf_conntrack_ipv4*' -type f
修改内核启动顺序,默认启动的顺序应该为1,升级以后内核是往前面插入,为0(如果每次启动时需要手动选择哪个内核,该步骤可以省略)
grub2-set-default 0 && grub2-mkconfig -o /etc/grub2.cfg
使用下面命令看看确认下是否启动默认内核指向上面安装的内核
grubby --default-kernel
docker官方的内核检查脚本建议(RHEL7/CentOS7: User namespaces disabled; add ‘user_namespace.enable=1’ to boot command line),使用下面命令开启
grubby --args="user_namespace.enable=1" --update-kernel="$(grubby --default-kernel)"
重新加载内核
reboot
需要设定/etc/sysctl.d/k8s.conf的系统参数
cat <<EOF > /etc/sysctl.d/k8s.conf
net.ipv4.ip_forward = 1
net.bridge.bridge-nf-call-ip6tables = 1
net.bridge.bridge-nf-call-iptables = 1
fs.may_detach_mounts = 1
vm.overcommit_memory=1
vm.panic_on_oom=0
fs.inotify.max_user_watches=89100
fs.file-max=52706963
fs.nr_open=52706963
net.netfilter.nf_conntrack_max=2310720
EOF
sysctl --system
检查系统内核和模块是否适合运行 docker (仅适用于 linux 系统)
curl https://raw.githubusercontent.com/docker/docker/master/contrib/check-config.sh > check-config.sh
bash ./check-config.sh
安装docker-ce
yum install -y yum-utils device-mapper-persistent-data lvm2
yum-config-manager --add-repo http://mirrors.aliyun.com/docker-ce/linux/centos/docker-ce.repo
yum makecache fast
yum install docker-ce-17.06.2.ce -y
sed -i "13i ExecStartPost=/usr/sbin/iptables -P FORWARD ACCEPT" /usr/lib/systemd/system/docker.service
systemctl daemon-reload && systemctl enable docker && systemctl start docker
设置docker开机启动,CentOS安装完成后docker需要手动设置docker命令补全
yum install -y epel-release bash-completion && cp /usr/share/bash-completion/completions/docker /etc/bash_completion.d/
systemctl enable --now docker
在各节点上下载k8s1.13.2版本的对应官方镜像包,网盘地址: https://pan.baidu.com/s/1NETu4uZrd5ijjXICARNe5A 密码:4oco
#二、安装k8s集群**
三台宿主机进行kubectl kubelet kubeadm安装:
cat <<EOF > /etc/yum.repos.d/kubernetes.repo
[kubernetes]
name=Kubernetes
baseurl=https://mirrors.aliyun.com/kubernetes/yum/repos/kubernetes-el7-x86_64/
enabled=1
gpgcheck=1
repo_gpgcheck=1
gpgkey=https://mirrors.aliyun.com/kubernetes/yum/doc/yum-key.gpg https://mirrors.aliyun.com/kubernetes/yum/doc/rpm-package-key.gpg
EOF
yum install -y kubelet kubeadm kubectl
systemctl enable kubelet
master宿主机忽略交换分区未关闭warning:
cat <<EOF > /etc/sysconfig/kubelet
KUBELET_EXTRA_ARGS="--fail-swap-on=false --cgroup-driver=cgroupfs"
EOF

systemctl daemon-reload
master节点进行kubeadm初始化
kubeadm init --kubernetes-version=v1.13.2 --pod-network-cidr=10.244.0.0/16 --service-cidr=10.96.0.0/16 --ignore-preflight-errors=Swap
*[init] Using Kubernetes version: v1.13.2
[preflight] Running pre-flight checks
[preflight] Pulling images required for setting up a Kubernetes cluster
[preflight] This might take a minute or two, depending on the speed of your internet connection
[preflight] You can also perform this action in beforehand using ‘kubeadm config images pull’
[kubelet-start] Writing kubelet environment file with flags to file “/var/lib/kubelet/kubeadm-flags.env”
[kubelet-start] Writing kubelet configuration to file “/var/lib/kubelet/config.yaml”
[kubelet-start] Activating the kubelet service
[certs] Using certificateDir folder “/etc/kubernetes/pki”
[certs] Generating “ca” certificate and key
[certs] Generating “apiserver-kubelet-client” certificate and key
[certs] Generating “apiserver” certificate and key
[certs] apiserver serving cert is signed for DNS names [master kubernetes kubernetes.default kubernetes.default.svc kubernetes.default.svc.cluster.local] and IPs [10.96.0.1 172.16.40.97]
[certs] Generating “front-proxy-ca” certificate and key
[certs] Generating “front-proxy-client” certificate and key
[certs] Generating “etcd/ca” certificate and key
[certs] Generating “etcd/server” certificate and key
[certs] etcd/server serving cert is signed for DNS names [master localhost] and IPs [172.16.40.97 127.0.0.1 ::1]
[certs] Generating “etcd/peer” certificate and key
[certs] etcd/peer serving cert is signed for DNS names [master localhost] and IPs [172.16.40.97 127.0.0.1 ::1]
[certs] Generating “etcd/healthcheck-client” certificate and key
[certs] Generating “apiserver-etcd-client” certificate and key
[certs] Generating “sa” key and public key
[kubeconfig] Using kubeconfig folder “/etc/kubernetes”
[kubeconfig] Writing “admin.conf” kubeconfig file
[kubeconfig] Writing “kubelet.conf” kubeconfig file
[kubeconfig] Writing “controller-manager.conf” kubeconfig file
[kubeconfig] Writing “scheduler.conf” kubeconfig file
[control-plane] Using manifest folder “/etc/kubernetes/manifests”
[control-plane] Creating static Pod manifest for “kube-apiserver”
[control-plane] Creating static Pod manifest for “kube-controller-manager”
[control-plane] Creating static Pod manifest for “kube-scheduler”
[etcd] Creating static Pod manifest for local etcd in “/etc/kubernetes/manifests”
[wait-control-plane] Waiting for the kubelet to boot up the control plane as static Pods from directory “/etc/kubernetes/manifests”. This can take up to 4m0s
[apiclient] All control plane components are healthy after 20.003620 seconds
[uploadconfig] storing the configuration used in ConfigMap “kubeadm-config” in the “kube-system” Namespace
[kubelet] Creating a ConfigMap “kubelet-config-1.13” in namespace kube-system with the configuration for the kubelets in the cluster
[patchnode] Uploading the CRI Socket information “/var/run/dockershim.sock” to the Node API object “master” as an annotation
[mark-control-plane] Marking the node master as control-plane by adding the label “node-role.kubernetes.io/master=’’”
[mark-control-plane] Marking the node master as control-plane by adding the taints [node-role.kubernetes.io/master:NoSchedule]
[bootstrap-token] Using token: 2s9xxt.8lgyw6yzt21qq8xf
[bootstrap-token] Configuring bootstrap tokens, cluster-info ConfigMap, RBAC Roles
[bootstraptoken] configured RBAC rules to allow Node Bootstrap tokens to post CSRs in order for nodes to get long term certificate credentials
[bootstraptoken] configured RBAC rules to allow the csrapprover controller automatically approve CSRs from a Node Bootstrap Token
[bootstraptoken] configured RBAC rules to allow certificate rotation for all node client certificates in the cluster
[bootstraptoken] creating the “cluster-info” ConfigMap in the “kube-public” namespace
[addons] Applied essential addon: CoreDNS
[addons] Applied essential addon: kube-proxy

Your Kubernetes master has initialized successfully!

To start using your cluster, you need to run the following as a regular user:

mkdir -p $HOME/.kube
sudo cp -i /etc/kubernetes/admin.conf $HOME/.kube/config
sudo chown $(id -u):$(id -g) $HOME/.kube/config

You should now deploy a pod network to the cluster.
Run “kubectl apply -f [podnetwork].yaml” with one of the options listed at:
https://kubernetes.io/docs/concepts/cluster-administration/addons/

You can now join any number of machines by running the following on each node
as root:

kubeadm join 172.16.40.97:6443 –token 2s9xxt.8lgyw6yzt21qq8xf –discovery-token-ca-cert-hash sha256:c141fb0608b4b83136272598d2623589d73546762abc987391479e8e049b0d76*
master节点用kubectl访问集群
mkdir -p $HOME/.kube
cp -i /etc/kubernetes/admin.conf $HOME/.kube/config
chown $(id -u):$(id -g) $HOME/.kube/config
master节点拉取github配置文件
git clone https://github.com/sky-daiji/k8s-install.git
接下来我们来安装flannel网络插件
cd /root/k8s-install
kubectl apply -f kube-flannel/
master节点查看集群状态
[root@master ~]# kubectl get cs
NAME                 STATUS    MESSAGE              ERROR
controller-manager   Healthy   ok
scheduler            Healthy   ok
etcd-0               Healthy   {"health": "true"}
添加各节点进去集群
kubeadm join 172.16.40.97:6443 --token 2s9xxt.8lgyw6yzt21qq8xf --discovery-token-ca-cert-hash sha256:c141fb0608b4b83136272598d2623589d73546762abc987391479e8e049b0d76
查看节点是否都添加到集群里
[root@master ~]# kubectl get node
NAME     STATUS   ROLES    AGE   VERSION
master   Ready    master   15m   v1.13.2
node1    Ready    <none>   13m   v1.13.2
node2    Ready    <none>   13m   v1.13.2
查看k8s各自组件运行情况
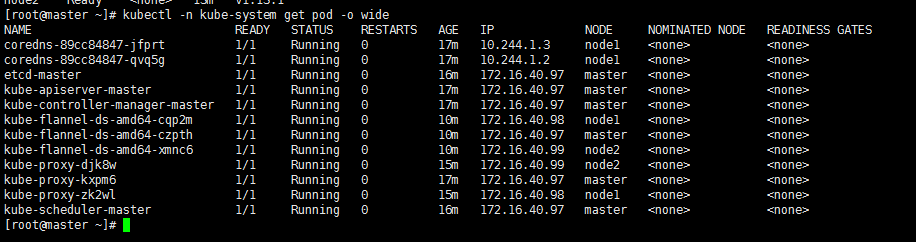
在所有节点启用ipvs模块
yum install -y ipvsadm
vim /etc/sysconfig/modules/ipvs.modules
#!/bin/bash
modprobe -- ip_vs
modprobe -- ip_vs_rr
modprobe -- ip_vs_wrr
modprobe -- ip_vs_sh
modprobe -- nf_conntrack_ipv4

chmod +x /etc/sysconfig/modules/ipvs.modules

source /etc/sysconfig/modules/ipvs.modules

lsmod | grep -e ip_vs -enf_conntrack_ipv4

kubectl edit cm kube-proxy -n kube-system  将mode修改为ipvs

kubectl get pod -n kube-system | grep kube-proxy | awk '{system("kubectl delete pod"$1" -n kube-system")}'  批量删除并重建kube-proxy
安装kuber-dashboard插件
cd /root/k8s-install
kubectl apply -f  kubernetes-dashboard/
查看kubernetes-dashboard插件安装是否成功
kubectl get pod -n kube-system |grep kubernetes-dashboard
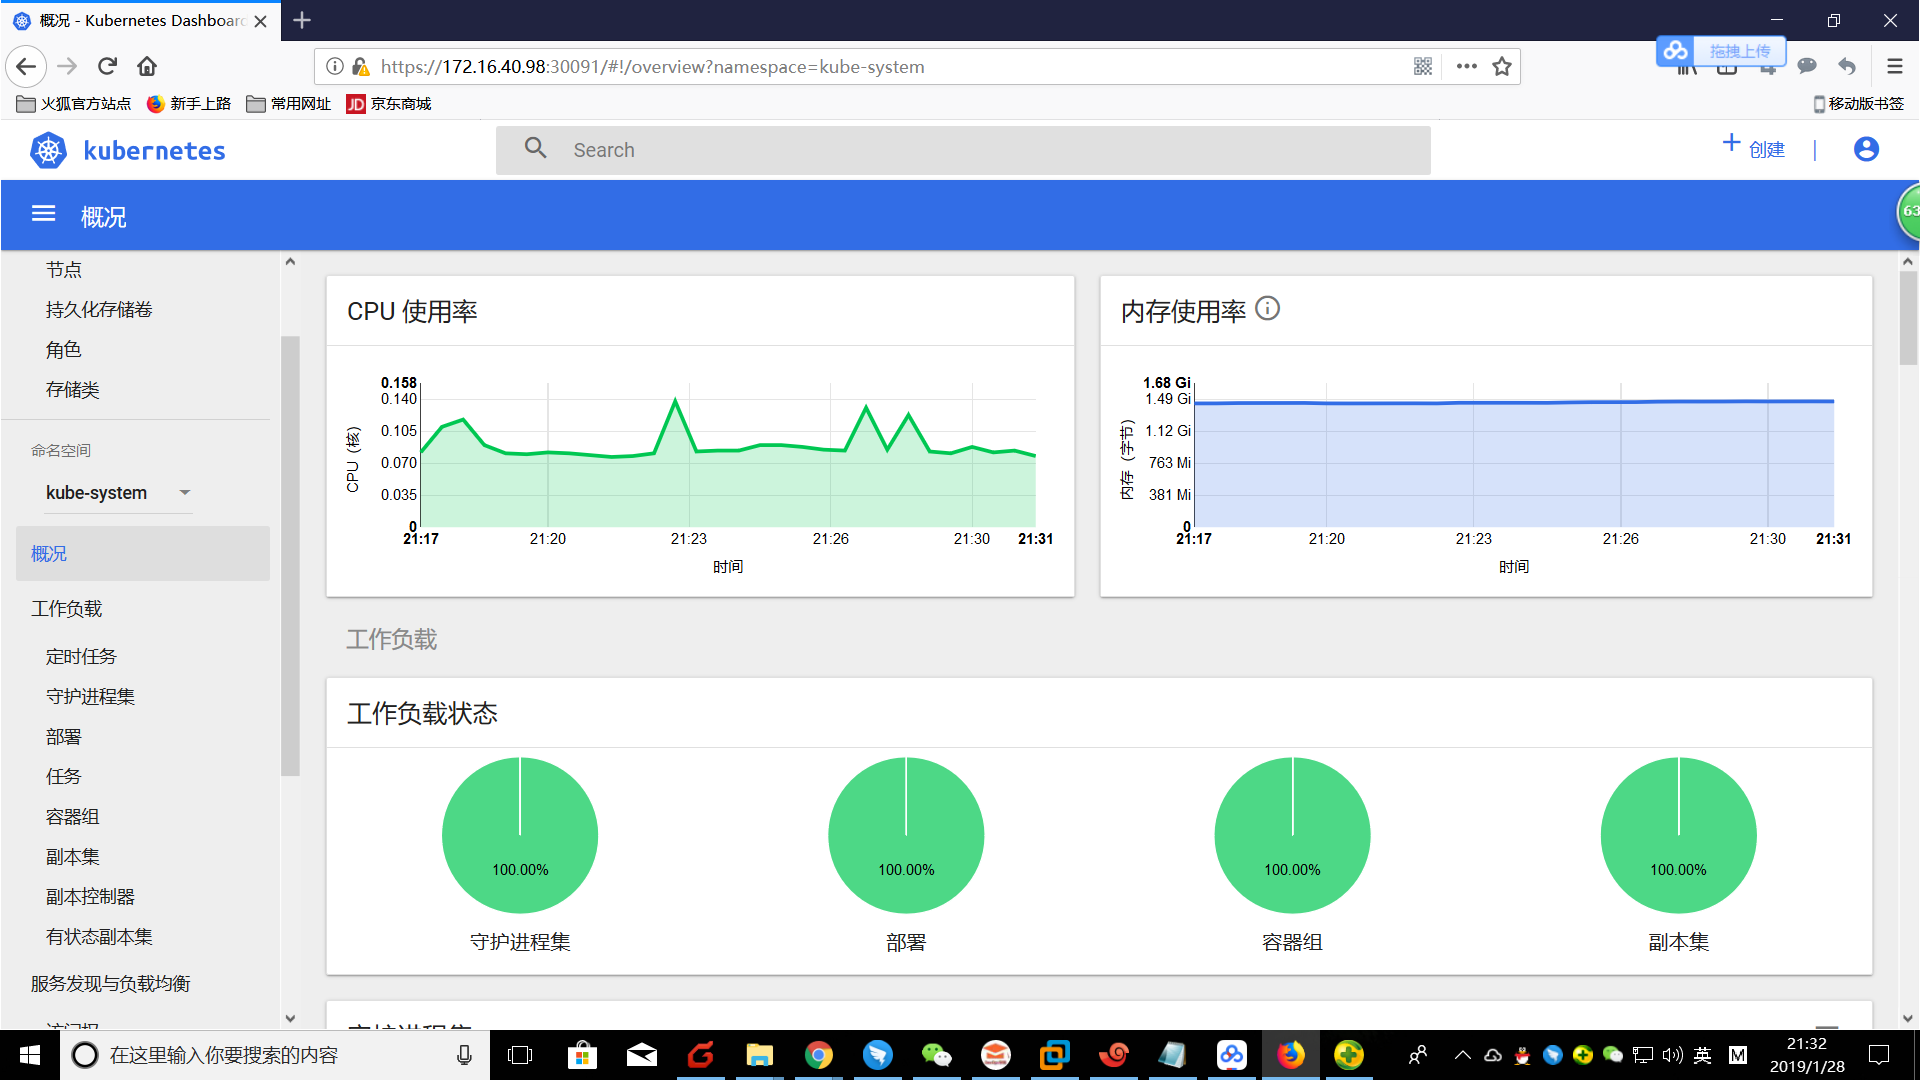
访问Dashboard
https://172.16.40.97:30091
选择Token令牌模式登录。
kubectl describe secret/$(kubectl get secret -n kube-system |grep admin|awk '{print $1}') -n kube-system
在master节点上安装heapster,从v1.11.0开始,性能采集不再采用heapster采集pod性能数据,而是使用metrics-server,但是dashboard依然使用heapster呈现性能数据
cd /root/k8s-install
kubectl apply -f heapster/
安装metrics-server
cd /root/k8s-install
kubectl apply -f metrics-server/

# 等待5分钟,查看性能数据是否正常收集
[root@master01 ~]# kubectl top pods -n kube-system
NAME                                                                CPU(cores)                                           MEMORY(bytes)
coredns-86c58d9df4-n5brl                                            2m                                                      15Mi
coredns-86c58d9df4-rhl5d                                            2m                                                      20Mi
etcd-master01                                                       14m                                                     97Mi
heapster-c8847db7d-rw845                                            1m                                                      40Mi
kube-apiserver-master01                                             21m                                                     553Mi
kube-controller-manager-master01                                    23m                                                     95Mi
kube-flannel-ds-amd64-bh5dm                                         2m                                                      11Mi
kube-flannel-ds-amd64-bzfnm                                         2m                                                      17Mi
kube-flannel-ds-amd64-clrmd                                         2m                                                      14Mi
kube-proxy-cgcqj                                                    3m                                                      21Mi
kube-proxy-lrzh7                                                    3m                                                      24Mi
kube-proxy-wkgjq                                                    3m                                                      18Mi
kube-scheduler-master01                                             6m                                                      20Mi
kubernetes-dashboard-57df4db6b-tzvcc                                1m                                                      22Mi
metrics-server-9d78d4d64-zjv4z                                      1m                                                      28Mi
monitoring-grafana-b4c79dbd4-bzk9r                                  1m                                                      29Mi
monitoring-influxdb-576db68c87-57sg7                                1m                                                      74Mi
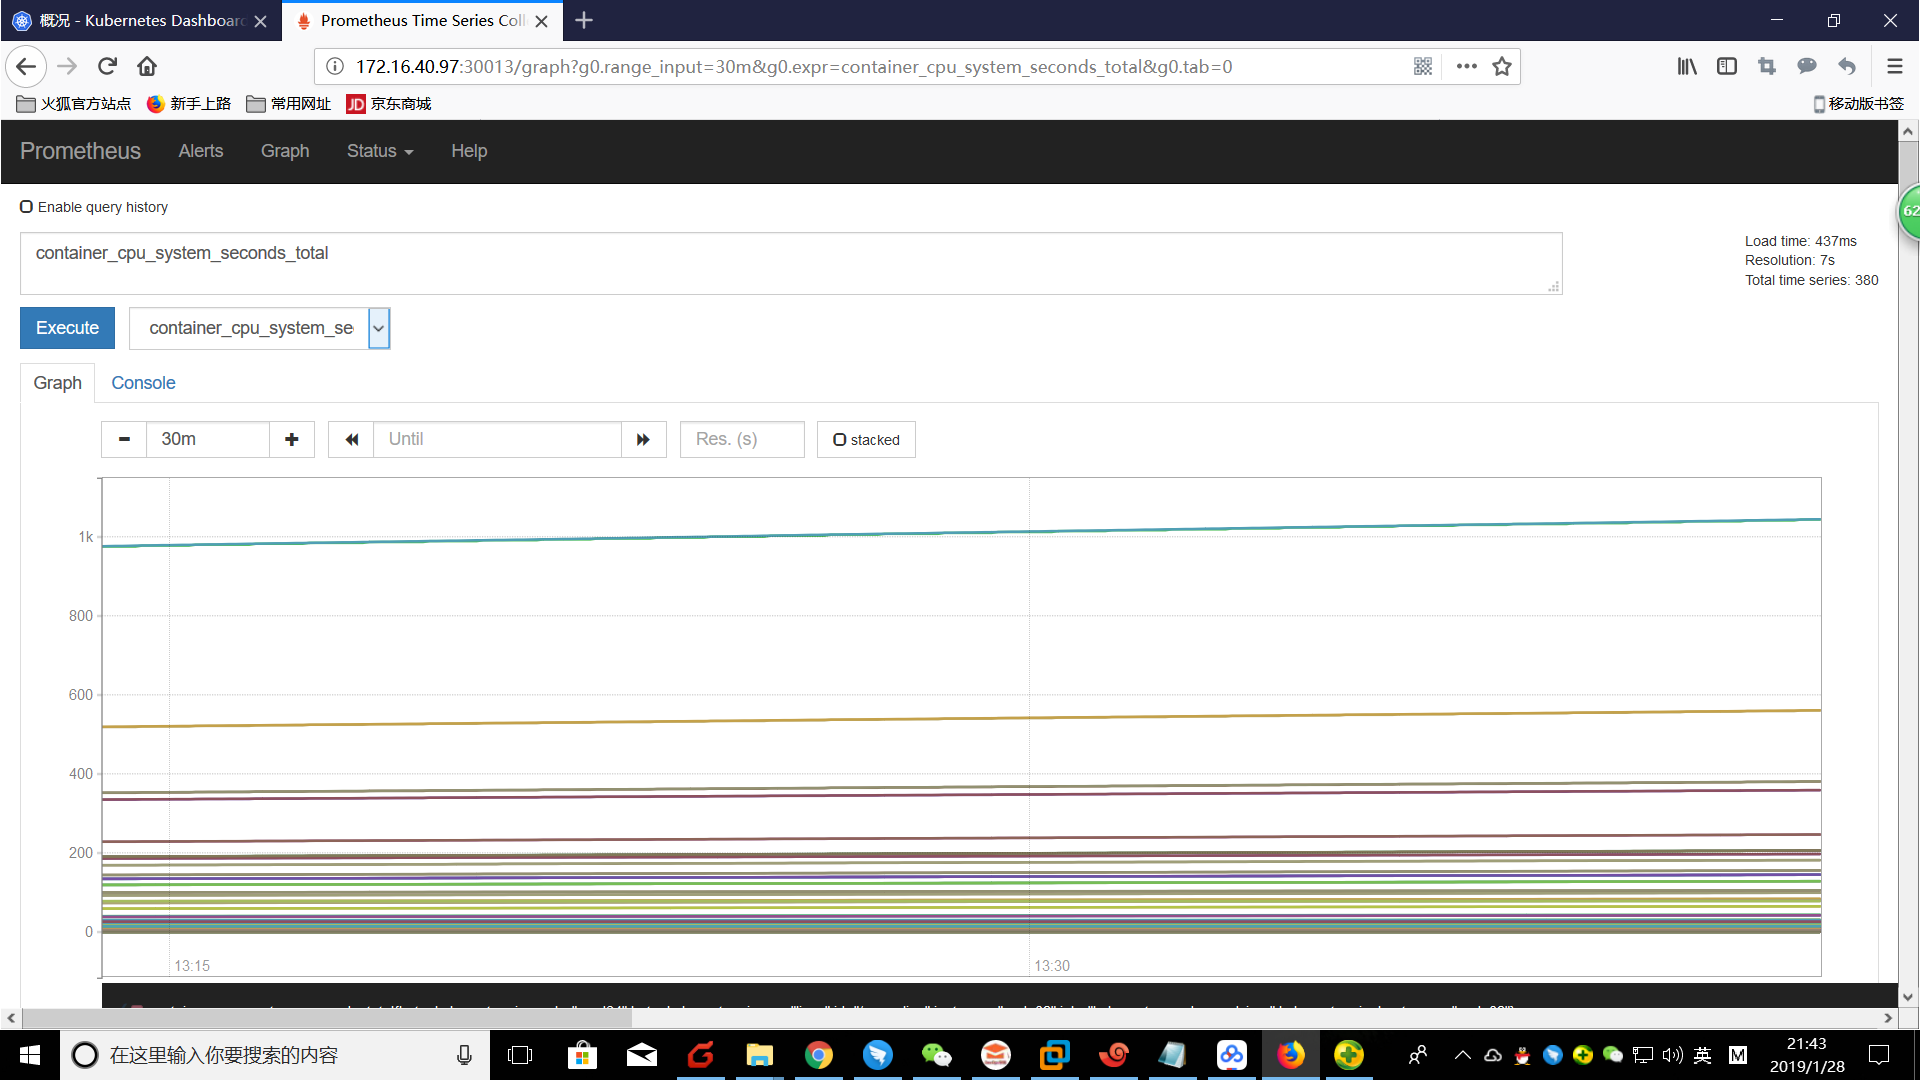
安装prometheus
cd /root/k8s-install
kubectl apply -f prometheus/
成功安装后访问以下网址打开prometheus管理界面,查看相关性能采集数据: http://172.16.40.97:30013/
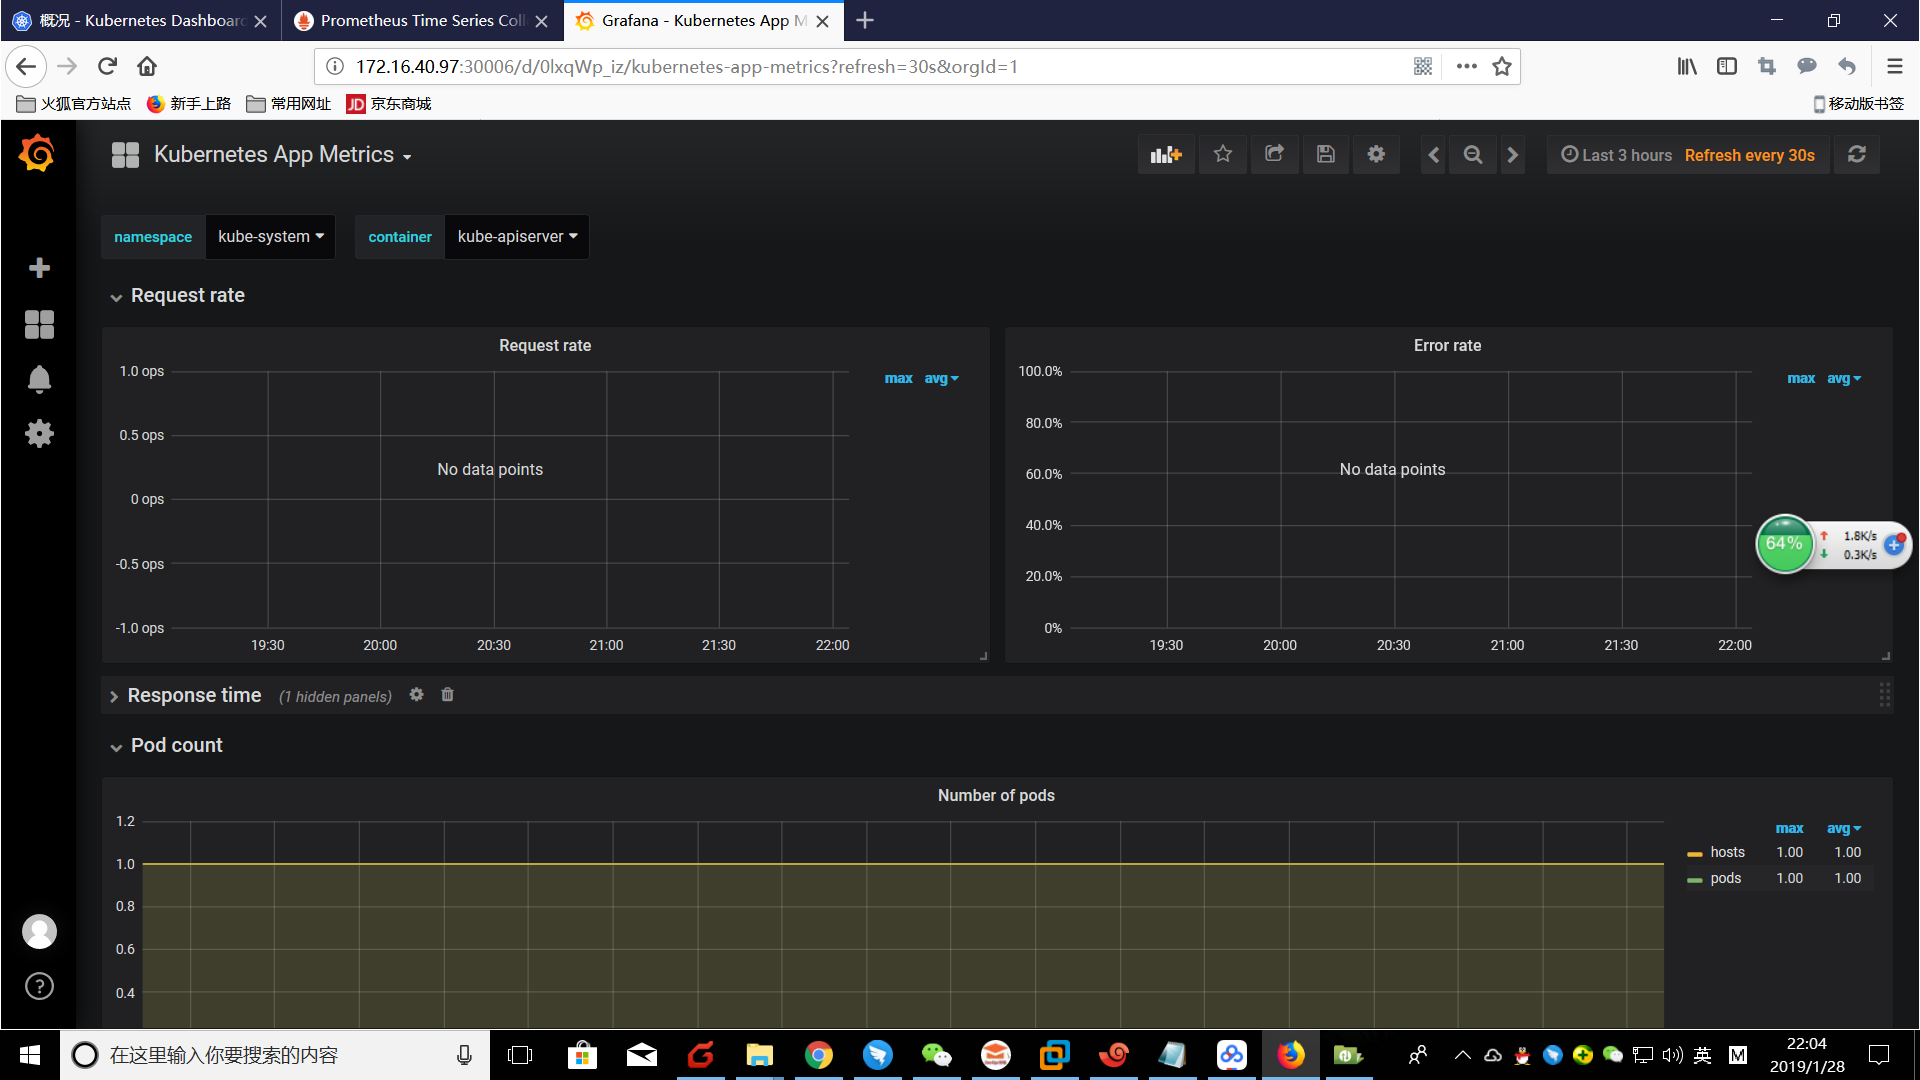
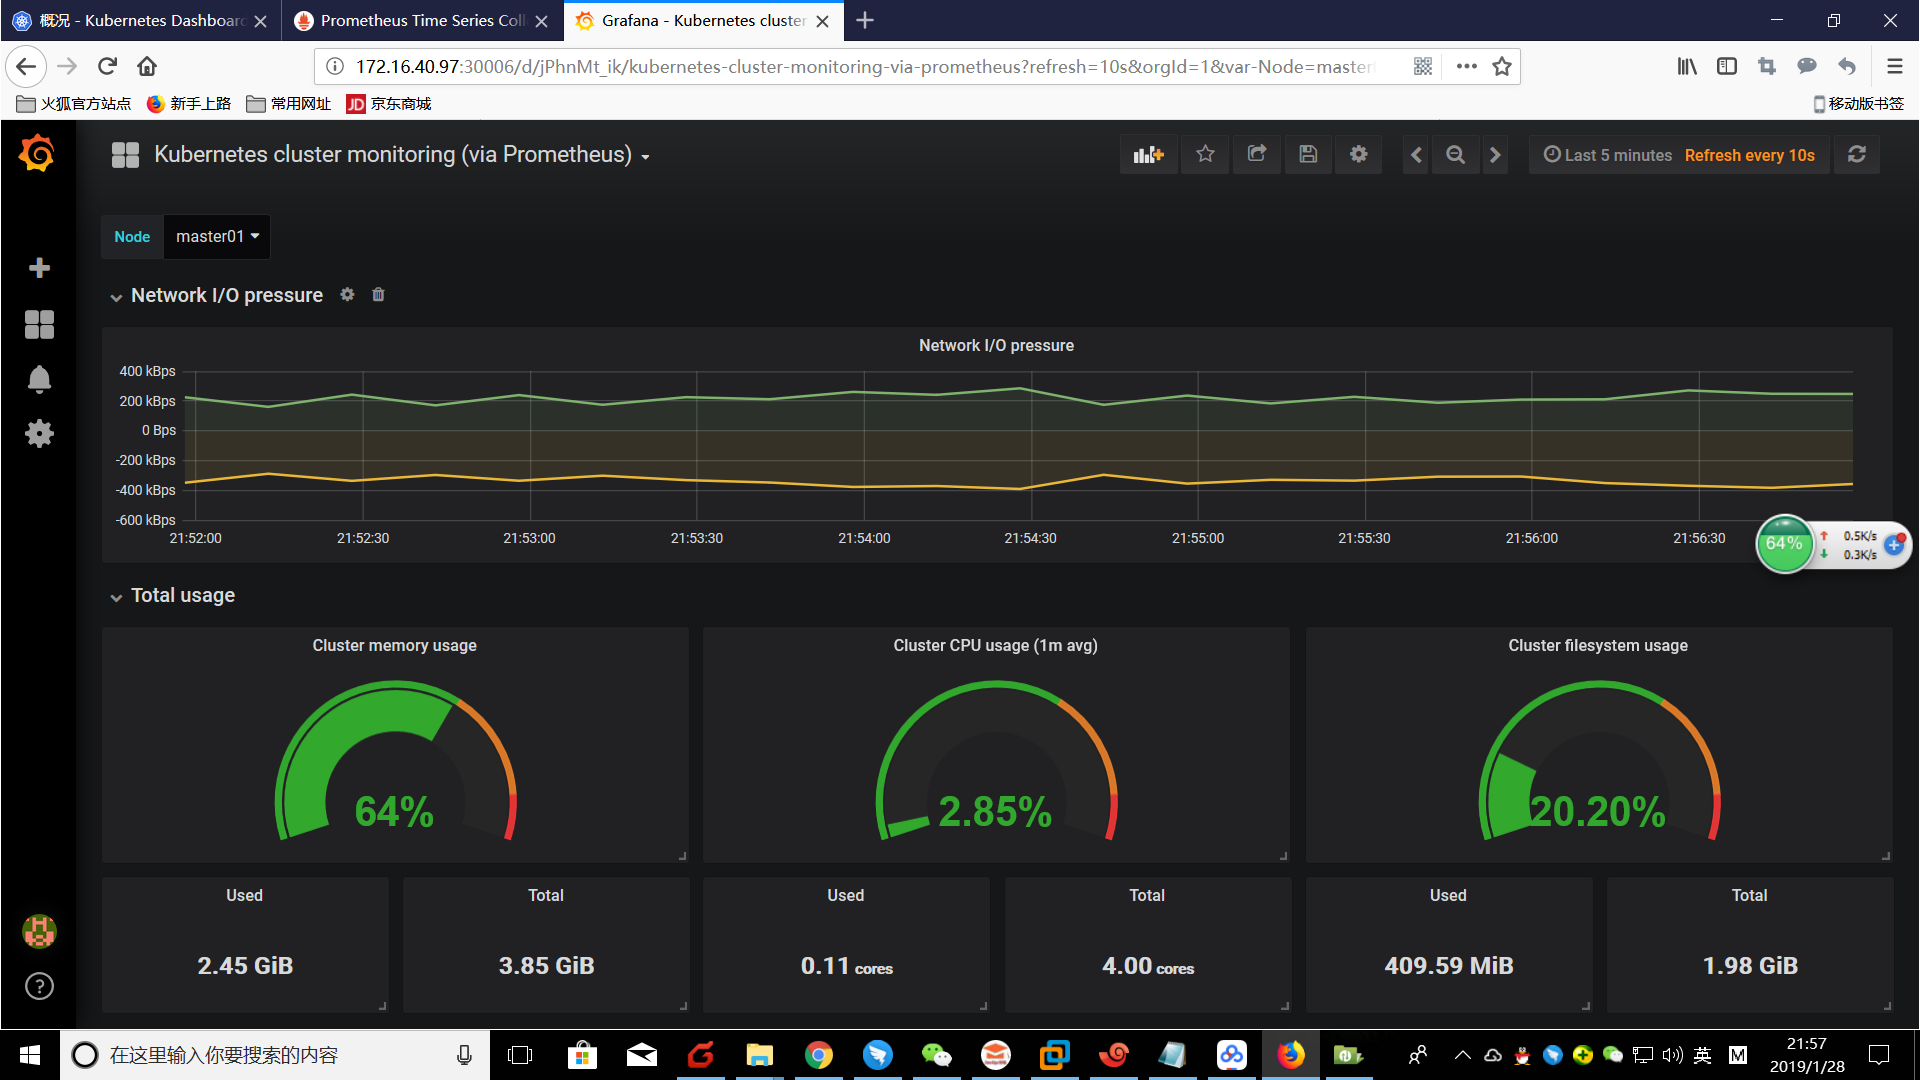
成功安装后访问以下网址打开grafana管理界面(账号密码都是admin),查看相关性能采集数据: http://172.16.40.97:30006登录后,进入datasource设置界面,增加prometheus数据源,
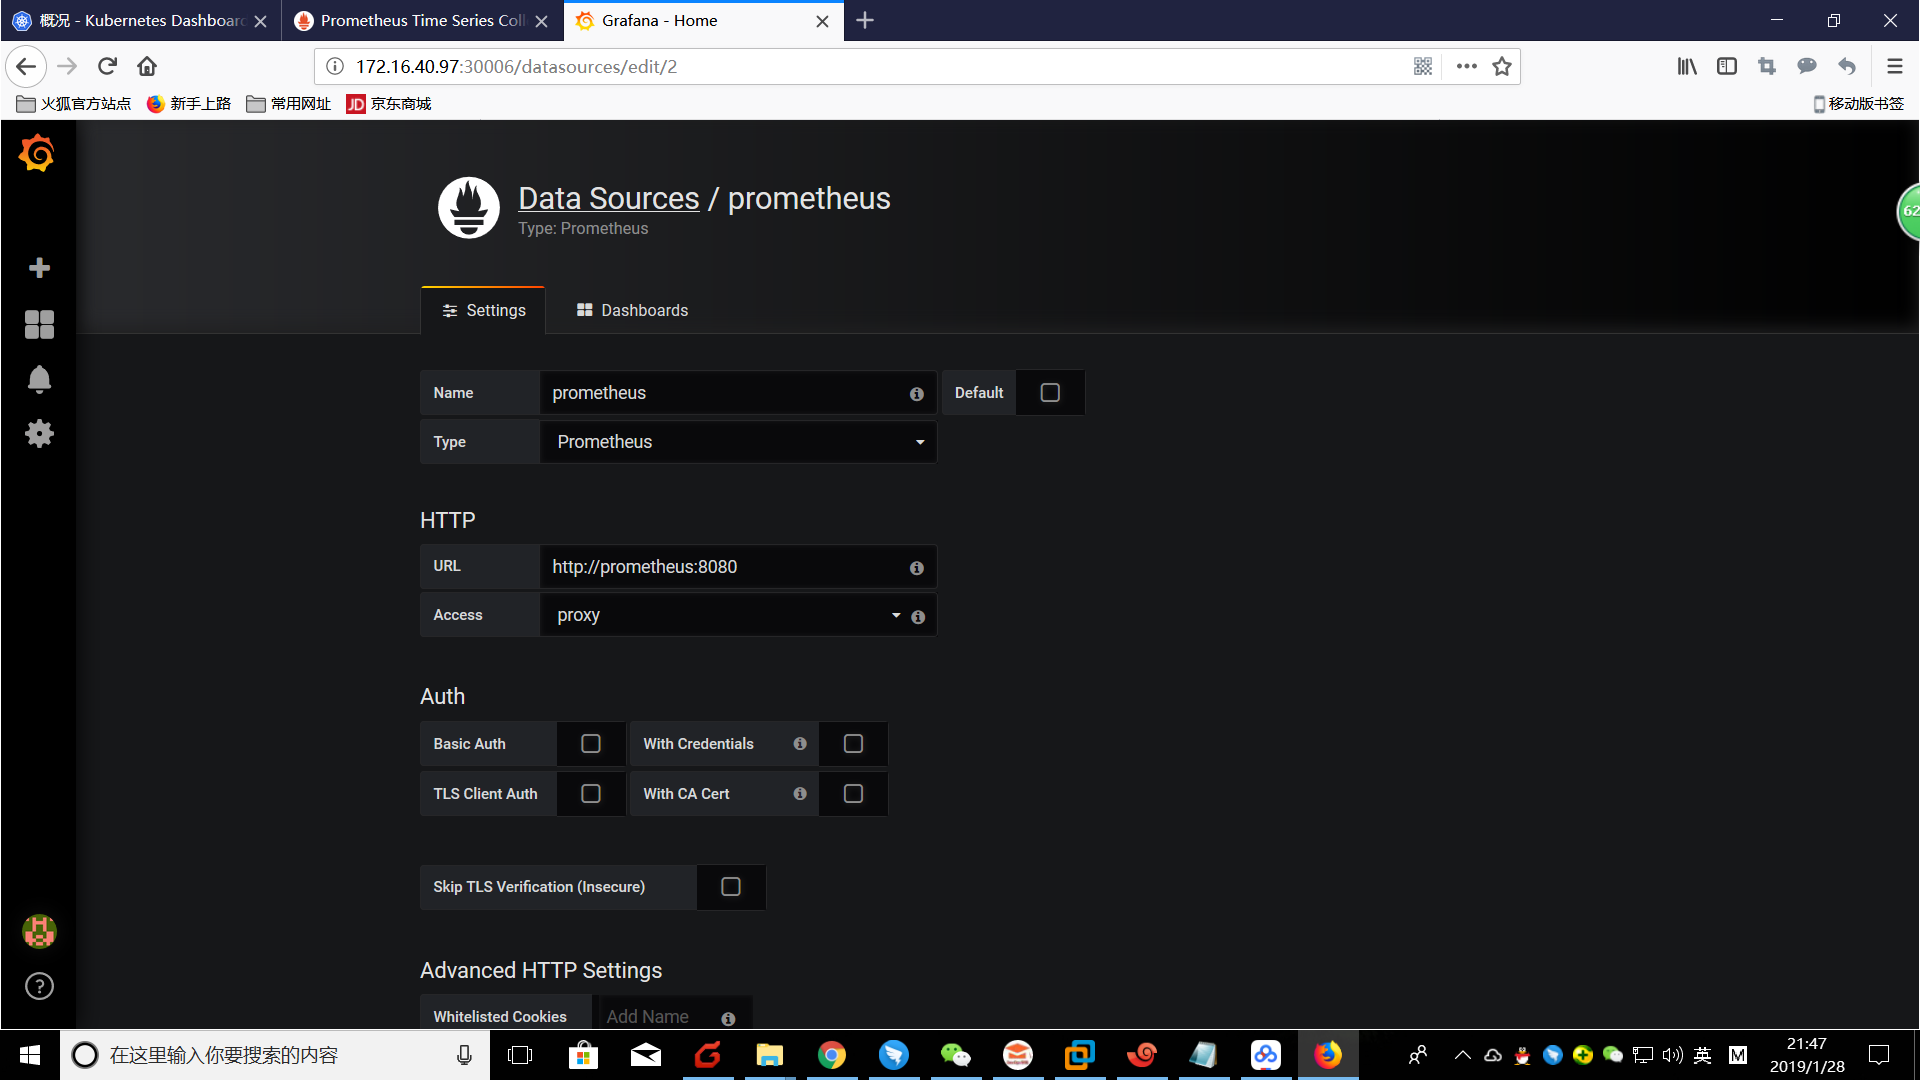
进入导入dashboard界面: http://172.16.40.97:30006/dashboard/import 导入heapster/grafana-dashboard目录下的dashboard Kubernetes App Metrics和Kubernetes cluster monitoring (via Prometheus)
如果你觉得这份文档对你有帮助,请支付宝扫描下方的二维码进行捐赠,谢谢!

kubeadm安装K8S单master双节点集群的更多相关文章
- ELK日志框架(1):安装Elasticsearch组建单服务器多节点集群
ELK简介 最近有个需求搭建一套日志系统用于集成几个业务系统的日志提供快速的检索功能,目前是用Log4net存数据库+Error级别发邮件方式,也算简单暴力好用,但历史日志的模糊查询确实很慢,所以使用 ...
- CentOS7搭建hadoop2.6.4双节点集群
环境: CentOS7+SunJDK1.8@VMware12. NameNode虚拟机节点主机名:master,IP规划:192.168.23.101,职责:Name node,Secondary n ...
- kubernetes系列:(一)、kubeadm搭建kubernetes(v1.13.1)单节点集群
kubeadm是Kubernetes官方提供的用于快速部署Kubernetes集群的工具,本篇文章使用kubeadm搭建一个单master节点的k8s集群. 节点部署信息 节点主机名 节点IP 节点角 ...
- kubeadm安装k8s测试环境
目标是搭建一个可测试的k8s环境,使用的工具 kubeadm, 最终一个master节点(非高可用),2个node节点. 环境以及版本 Centos7.3 kubeadm 1.11.1 kubelet ...
- 使用 --image-repository 解决kubeadm 安装k8s 集群 谷歌镜像墙的问题
从网上我们看到的好多kubeadm 安装k8s 的时候都说需要下拉取镜像,然后修改,实际上 我们可以使用配置参数,快速的跳过墙的问题 说明: 基础镜像,我们仍然存在,拉取的问题,但是dockerhub ...
- 通过 Kubeadm 安装 K8S 与高可用,版本1.13.4
环境介绍: CentOS: 7.6 Docker: 18.06.1-ce Kubernetes: 1.13.4 Kuberadm: 1.13.4 Kuberlet: 1.13.4 Kuberctl: ...
- Kubeadm部署k8s单点master
Kubeadm部署k8s单点master 1.环境准备: 主机名 IP 说明 宿主机系统 master 10.0.0.17 Kubernetes集群的master节点 CentOS 7.9 node1 ...
- k8s学习笔记之二:使用kubeadm安装k8s集群
一.集群环境信息及安装前准备 部署前操作(集群内所有主机): .关闭防火墙,关闭selinux(生产环境按需关闭或打开) .同步服务器时间,选择公网ntpd服务器或者自建ntpd服务器 .关闭swap ...
- ubuntu18.04使用kubeadm部署k8s单节点
实验目的: 体验kubeadm部署k8s服务,全流程体验! 实验环境: ubuntu18.04 联网在线部署 kubeadm 01.系统检查 节点主机名唯一,建议写入/etc/hosts 禁止swap ...
随机推荐
- Python学习(七)面向对象 ——继承和多态
Python 类的继承和多态 Python 类的继承 在OOP(Object Oriented Programming)程序设计中,当我们定义一个class的时候,可以从某个现有的class 继承,新 ...
- Beta阶段第四次冲刺
Beta阶段第四次冲刺 严格按照Git标准来,组员有上传Git的才有贡献分没有的为0 代码签入图 1.part1 -站立式会议照片 2.part2 -项目燃尽图 3.part3 -项目进展 1.正在进 ...
- 【Android自动化】在使用uiautomator框架自动化时,往往有时再运行脚本时发现xxx实例属性不被允许
例如: # -*- coding:utf-8 -*- from uiautomator import device as d d(classname="android.widget.List ...
- 7、Django的模型层(1)
第1节:ORM简介 ORM简介 MVC或者MVC框架中包括一个重要的部分,就是ORM,它实现了数据模型与数据库的解耦,即数据模型的设计不需要依赖于特定的数据库,通过简单的配置就可以轻松更换数据库,这极 ...
- 13.1SolrCloud集群使用手册之Collections API
转载请出自出处:http://www.cnblogs.com/hd3013779515/ 1.创建collection name:指明collection名字 router.name:指定路由策略,默 ...
- 乐视4.14硬件免费日de用户体验
此贴用于记录2016年4月14日乐视硬件免费日购买X65超级电视的用户体验.后续将动态更新 我是乐视电视的第一批用户,从乐视上市第一批超级电视,我先后帮助家人.同事.朋友买了6台乐视超级电视,也算是乐 ...
- 软件测试QA、QC、QM的关系与区别
01概念上 QA:Quality Assurance (质量保证) QC:Quality Control (质量控制) QM:Quality Manage (质量管理) 02定义上 QA:为达到质量要 ...
- metamask-iframe-stream,没成功
https://github.com/kumavis/iframe-stream/blob/master/test/rebundle.js iframe-stream-其实就是将iframe打包成流 ...
- centos7上svn安装
svn安装 yum install subversion 查看svn安装的版本 svnserve --version新建svn目录 mkdir /opt/svn 建立版本库目录 mkdir ...
- ssh访问服务器端visdom
在服务器端启动visdompython -m visdom.server在windows端,将服务器的8097端口重定向到windows端(做了映射绑定):ssh -L 8097:127.0.0.1: ...