最新最简洁Spring Cloud Oauth2.0 Jwt 的Security方式
因为Spring Cloud 2020.0.0和Spring Boot2.4.1版本升级比较大,所以把我接入过程中的一些需要注意的地方告诉大家
我使用的版本是Spring boot 2.4.1+Spring Cloud 2020.0.0
我的架构是Gateway做Resource Server,然后服务内部不暴露到外网,微服务之间调用不需要再做验证。
而且为了减少请求Auth Server采用JWT方式
完全使用Spring Security的机制
最新的版本里面取消了org.springframework.cloud:spring-cloud-starter-oauth2
我使用了官方最新推荐集成Oauth2.0
AuthServer:

implementation 'org.springframework.security.oauth.boot:spring-security-oauth2-autoconfigure'

implementation 'org.springframework.security:spring-security-oauth2-jose'

Gateway:

implementation 'org.springframework.security:spring-security-config'

implementation 'org.springframework.security:spring-security-oauth2-resource-server'

implementation 'org.springframework.security:spring-security-oauth2-jose'
取消Ribbon之后使用
implementation 'org.springframework.cloud:spring-cloud-starter-loadbalancer'
下面把关键文件的源码粘贴出来
网关服务器
Gateway:
/**

 * 资源服务器配置

 * @author Mikey Huang

 * @date 2020/12/28

 */

@Configuration

@EnableWebFluxSecurity

@EnableReactiveMethodSecurity

public class ResourceServerConfig {

    /**

     * 注册安全验证规则

     * 配置方式与HttpSecurity基本一致

     */

    @Bean

    public SecurityWebFilterChain securityWebFilterChain(ServerHttpSecurity http) { //定义SecurityWebFilterChain对安全进行控制,使用ServerHttpSecurity构造过滤器链;

        http.authorizeExchange()

                //注意! hasrole里面的值必须和jwt负载的值一致

                .pathMatchers("/user/user/login").hasRole("ROLE_ADMIN")

                .pathMatchers("/user/user/hello").hasRole("ROLE_USER")

                .pathMatchers("/auth/oauth/token", "/auth/oauth/check_token").permitAll()

                .anyExchange().authenticated()

                .and().csrf().disable();

        http.oauth2ResourceServer().jwt().jwtAuthenticationConverter(jwtAuthenticationConverter());

        return http.build();

    }

    /**

     * 使用ROLE来做权限验证,默认是SCOPE

     * @return

     */

    @Bean

    public Converter<Jwt, ? extends Mono<? extends AbstractAuthenticationToken>> jwtAuthenticationConverter() {

        JwtGrantedAuthoritiesConverter jwtGrantedAuthoritiesConverter = new JwtGrantedAuthoritiesConverter();

        jwtGrantedAuthoritiesConverter.setAuthorityPrefix("ROLE_");

        jwtGrantedAuthoritiesConverter.setAuthoritiesClaimName("authorities");

        JwtAuthenticationConverter jwtAuthenticationConverter = new JwtAuthenticationConverter();

        jwtAuthenticationConverter.setJwtGrantedAuthoritiesConverter(jwtGrantedAuthoritiesConverter);

        return new ReactiveJwtAuthenticationConverterAdapter(jwtAuthenticationConverter);

    }

}
server:

  port: 8080

spring:

  application:

    name: gateway

  security:

    oauth2:

      resourceserver:

        jwt:

          #配置RSA的公钥访问地址

          jwk-set-uri: 'http://localhost:8081/.well-known/jwks.json'

  cloud:

    nacos:

      discovery:

        server-addr: localhost:8848

    gateway:

      discovery:

        locator:

          enabled: true

      routes:

        - id: auth

          uri: lb://auth

          predicates:

            - Path=/auth/**

          filters:

            - StripPrefix=1

        - id: user

          uri: lb://user

          predicates:

            - Path=/user/**

          filters:

            - StripPrefix=1
授权服务器
AuthServer:
/**

 * 认证服务器配置

 * @author Mikey Huang

 * @date 2020/12/28

 */

@Configuration

@EnableAuthorizationServer

public class AuthorizationServerConfig extends AuthorizationServerConfigurerAdapter {

    private final AuthenticationManager authenticationManager;

    private final JwtTokenEnhancer jwtTokenEnhancer;

    private final ApplicationContext context;

    public AuthorizationServerConfig(AuthenticationManager authenticationManager, JwtTokenEnhancer jwtTokenEnhancer,

                                     ApplicationContext context) {

        this.authenticationManager = authenticationManager;

        this.jwtTokenEnhancer = jwtTokenEnhancer;

        this.context = context;

    }

    @Override

    public void configure(ClientDetailsServiceConfigurer clients) throws Exception {

        // 内存中创建一个客户端

        clients.inMemory()

                .withClient("client-app")

                .secret("123456")

                .authorizedGrantTypes("password", "refresh_token")

                .scopes("all");

    }

    @Override

    public void configure(AuthorizationServerEndpointsConfigurer endpoints) throws Exception {

        TokenEnhancerChain enhancerChain = new TokenEnhancerChain();

        List<TokenEnhancer> delegates = new ArrayList<>();

        delegates.add(jwtTokenEnhancer);

        delegates.add(accessTokenConverter());

        // 配置JWT的内容增强器

        enhancerChain.setTokenEnhancers(delegates);

        endpoints.authenticationManager(authenticationManager)

                .accessTokenConverter(accessTokenConverter())

                .tokenEnhancer(enhancerChain);

    }

    @Override

    public void configure(AuthorizationServerSecurityConfigurer security) throws Exception {

        security.allowFormAuthenticationForClients()

                .checkTokenAccess("isAuthenticated()");

    }

    @Bean

    public JwtAccessTokenConverter accessTokenConverter() {

        JwtAccessTokenConverter jwtAccessTokenConverter = new JwtAccessTokenConverter();

        jwtAccessTokenConverter.setKeyPair(keyPair());

        return jwtAccessTokenConverter;

    }

    /**

     * 通过读取key store的配置构造

     * @return

     */

    @Bean

    public KeyPair keyPair(){

        AuthorizationServerProperties properties = authorizationServerProperties();

        Resource keyStore = context

                .getResource(properties.getJwt().getKeyStore());

        char[] keyStorePassword = properties.getJwt().getKeyStorePassword()

                .toCharArray();

        KeyStoreKeyFactory keyStoreKeyFactory = new KeyStoreKeyFactory(keyStore,

                keyStorePassword);

        String keyAlias = properties.getJwt().getKeyAlias();

        char[] keyPassword = Optional

                .ofNullable(properties.getJwt().getKeyPassword())

                .map(String::toCharArray).orElse(keyStorePassword);

        return keyStoreKeyFactory.getKeyPair(keyAlias, keyPassword);

    }

    @Bean

    public AuthorizationServerProperties authorizationServerProperties() {

        return new AuthorizationServerProperties();

    }

}
/**

 * Spring Security配置

 * @author Mikey Huang

 * @date 2020/12/28

 */

@Configuration

@EnableWebSecurity

public class WebSecurityConfig extends WebSecurityConfigurerAdapter {

    @Override

    protected void configure(HttpSecurity http) throws Exception {

        http.authorizeRequests()

                .antMatchers("/oauth/**", "/.well-known/jwks.json").permitAll()

                .anyRequest().authenticated().and().csrf().disable();

    }

    @Override

    protected void configure(AuthenticationManagerBuilder auth) throws Exception {

        //内存中创建两个用户,两个不同的role用来测试权限

        auth.inMemoryAuthentication()

                .passwordEncoder(passwordEncoder())

                .withUser("mikey").password("123456").roles("ADMIN")

                .and()

                .withUser("sirius").password("654321").roles("USER");

    }

    @Bean

    @Override

    public AuthenticationManager authenticationManagerBean() throws Exception {

        return super.authenticationManagerBean();

    }

    @Bean

    public PasswordEncoder passwordEncoder() {

//        return new BCryptPasswordEncoder();

        // 方便测试,暂时不加密

        return NoOpPasswordEncoder.getInstance();

    }

}
/**

 * @author Mikey Huang

 * @date 2020/12/28

 */

@FrameworkEndpoint

public class JwkSetEndpoint {

    private final KeyPair keyPair;

    @Autowired

    public JwkSetEndpoint(KeyPair keyPair) {

        this.keyPair = keyPair;

    }

    @GetMapping("/.well-known/jwks.json")

    @ResponseBody

    public Map<String, Object> getKey() {

        RSAPublicKey publicKey = (RSAPublicKey) this.keyPair.getPublic();

        RSAKey key = new RSAKey.Builder(publicKey).build();

        return new JWKSet(key).toJSONObject();

    }

}
/**

 * jwt token增强

 * @author Mikey Huang

 * @date 2020/12/28

 */

@Component

public class JwtTokenEnhancer implements TokenEnhancer {

    @Override

    public OAuth2AccessToken enhance(OAuth2AccessToken accessToken, OAuth2Authentication authentication) {

        User user = (User) authentication.getPrincipal();

        Map<String, Object> info = new HashMap<>();

        //存入需要的信息,例如把密码设置到JWT中

        info.put("password", user.getPassword());

        ((DefaultOAuth2AccessToken) accessToken).setAdditionalInformation(info);

        return accessToken;

    }

}
server:

  port: 8081

spring:

  application:

    name: auth

  cloud:

    nacos:

      discovery:

        server-addr: localhost:8848

security:

  oauth2:

    authorization:

      jwt:

        key-store: classpath:mikey.jks

        key-store-password: 123456

        key-alias: mikey

        key-password: 123456
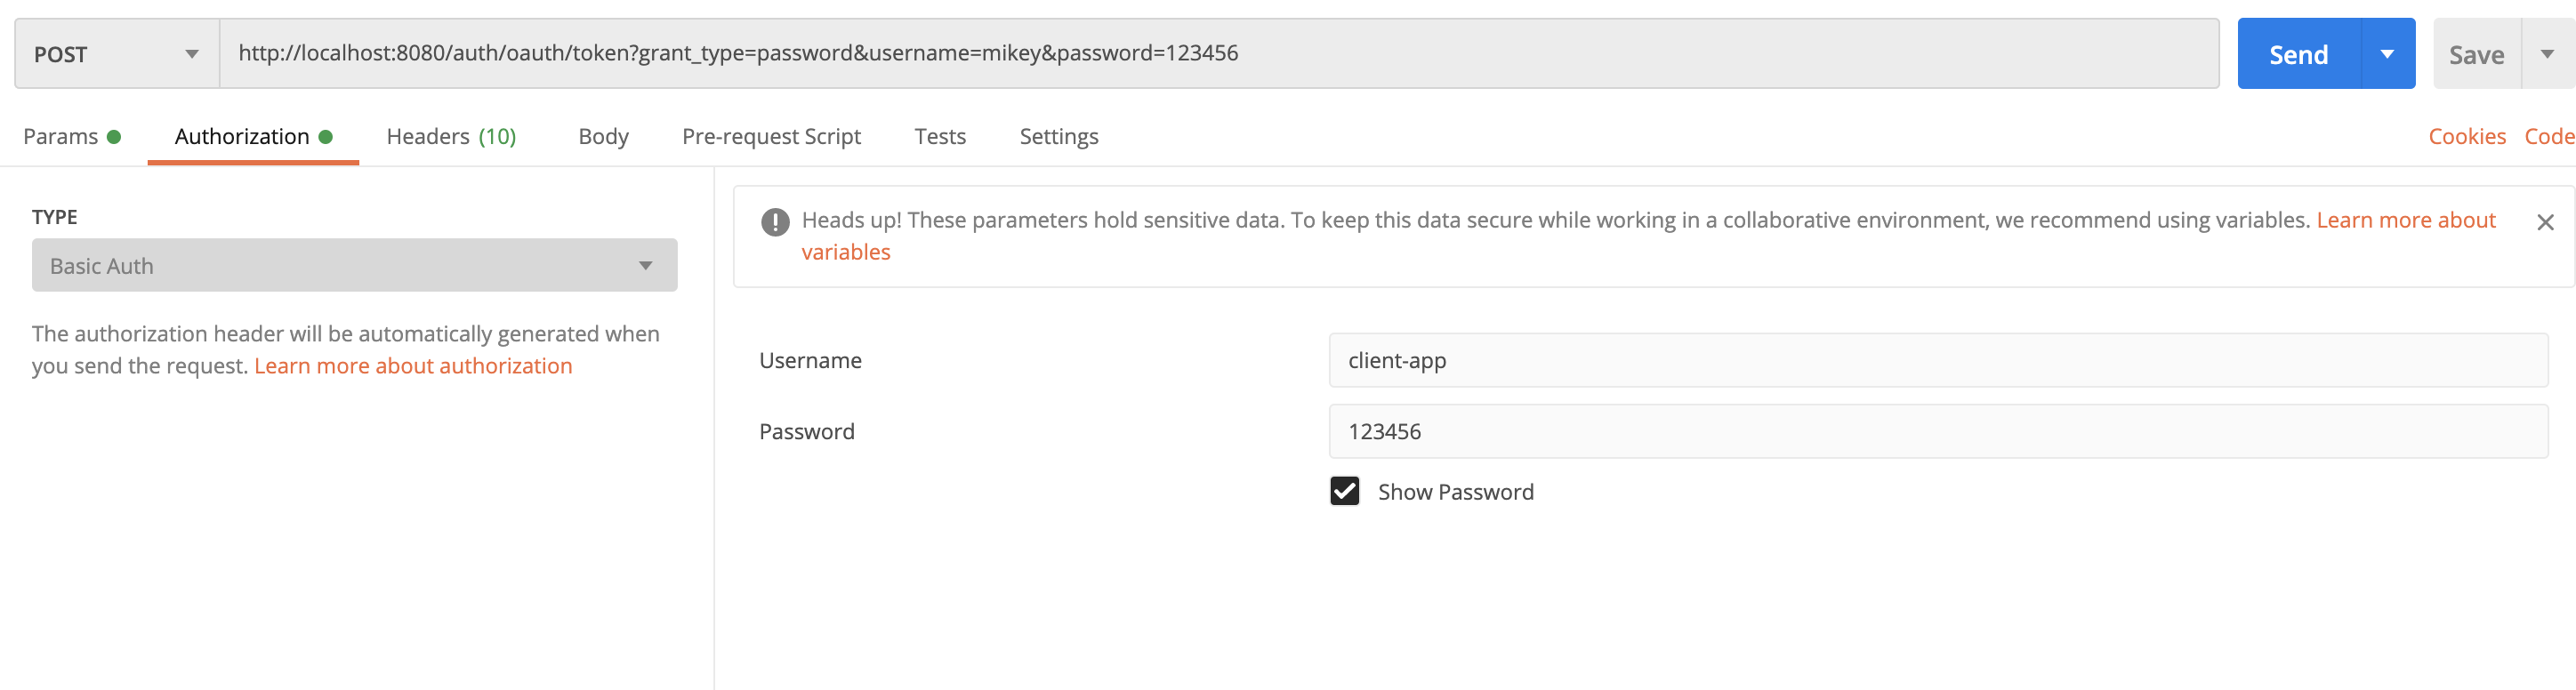
测试截图
如果需要测试权限可以用创建的两个账号来分别调用User的两个接口,可以看到ROLE的效果


最新最简洁Spring Cloud Oauth2.0 Jwt 的Security方式的更多相关文章
- Spring Cloud OAuth2.0 微服务中配置 Jwt Token 签名/验证
关于 Jwt Token 的签名与安全性前面已经做了几篇介绍,在 IdentityServer4 中定义了 Jwt Token 与 Reference Token 两种验证方式(https://www ...
- SpringCloud(10)使用Spring Cloud OAuth2和JWT保护微服务
采用Spring Security AOuth2 和 JWT 的方式,避免每次请求都需要远程调度 Uaa 服务.采用Spring Security OAuth2 和 JWT 的方式,Uaa 服务只验证 ...
- 使用Spring Cloud OAuth2和JWT保护微服务
采用Spring Security AOuth2 和 JWT 的方式,避免每次请求都需要远程调度 Uaa 服务.采用Spring Security OAuth2 和 JWT 的方式,Uaa 服务只验证 ...
- Spring cloud oauth2.0 access_token 永不失效设置方法
在AuthorizationServerConfigurerAdapter,重写一个TokenServices,注意这里的@Primary 非常重要,否则会有3个同类型的Bean,无法注入,会抛出以下 ...
- 基于spring boot2.0+spring security +oauth2.0+ jwt微服务架构
github地址:https://github.com/hankuikuide/microservice-spring-security-oauth2 项目介绍 该项目是一个演示项目,主要演示了,基于 ...
- 微信授权就是这个原理,Spring Cloud OAuth2 授权码模式
上一篇文章Spring Cloud OAuth2 实现单点登录介绍了使用 password 模式进行身份认证和单点登录.本篇介绍 Spring Cloud OAuth2 的另外一种授权模式-授权码模式 ...
- vue+uni-app商城实战 | 第一篇:【有来小店】微信小程序快速开发接入Spring Cloud OAuth2认证中心完成授权登录
一. 前言 本篇通过实战来讲述如何使用uni-app快速进行商城微信小程序的开发以及小程序如何接入后台Spring Cloud微服务. 有来商城 youlai-mall 项目是一套全栈商城系统,技术栈 ...
- Spring Cloud 2020.0.0正式发布,再见了Netflix
目录 ✍前言 版本约定 ✍正文 Spring Cloud版本管理 与Spring Boot版本对应关系 当前支持的版本 阻断式升级(不向下兼容) 1.再见了,Netflix Netflix组件替代方案 ...
- Spring Cloud 2020.0.0 正式发布,全新颠覆性版本!
Spring Cloud 2020.0.0 没错,Spring Cloud 2020.0.0 正式发布了: 感谢Java技术栈群友通知,想入群的在公众号Java技术栈后台回复:wx,正在使用 Spri ...
随机推荐
- 题解-SHOI2005 树的双中心
SHOI2005 树的双中心 给树 \(T=(V,E)(|V|=n)\),树高为 \(h\),\(w_u(u\in V)\).求 \(x\in V,y\in V:\left(\sum_{u\in V} ...
- SnowFlakeldWorker
SnowFlakeldWorker java /** * Twitter_Snowflake * SnowFlake的结构如下(每部分用-分开): * 0 - 0000000000 000000000 ...
- QQ电话能定位
QQ电话是网络电话,可以定位吗??? 下面介绍利用wireshark获取QQ好友IP实施精准定位 超详!! Wireshark Wireshark是一个使用WinPcap作为接口,直接与网卡进行数据报 ...
- 基于excel实现接口自动化测试
本文档介绍如何使用excel管理接口测试用例并一键执行的实现方式,其中包括 python 读写excel, request库的基本操作,接口用例的设计 接口用例设计 用例字段描述 被依赖表达式: 示例 ...
- 2020软件测试工程师面试题汇总(内含答案)-看完BATJ面试官对你竖起大拇指!
测试技术面试题 1.什么是兼容性测试?兼容性测试侧重哪些方面? 参考答案: 兼容测试主要是检查软件在不同的硬件平台.软件平台上是否可以正常的运行,即是通常说的软件的可移植性. 兼容的类型,如果细分的话 ...
- mysql锁机制 读书笔记
目录 MySQL锁机制 1.什么是锁 2.lock与latch 3.InnoDB存储引擎中的锁 3.1锁的类型 3.2 一致性非锁定读 3.3 一致性锁定读 4 锁的算法 4.1行锁的3中算法 4.2 ...
- Python之word文档替换字符串(也可以用于短模板套用)
Python之word文档替换字符串(也可以用于短模板套用),代码如下: 1 ''' 2 #word模板套用1:创建模板,适合比较短的文档 3 ''' 4 5 #导入所需库 6 from docx i ...
- swift笔记简录
一,变量和常量 /***************************基本数据类型*************************/ /****************************** ...
- CCNP之二层技术
二层技术 ---数据链路层 核心功能:介质访问控制功能,控制物理层 网络类型: 1)MA:multiple access 多路访问(指在一条链路上有多个访问点,区别于点到点或点到多点的网络) BMA: ...
- CentOS8/Windows 安装RabbitMQ
Centos8安装rabbitmq 1.安装erlang(rabbitmq是用erlang语言开发的,erlang版本需要22.x以上) yum install erlang 2.下载rabbitmq ...