spring源码-事件&监听3.6
一、spring中的发布与监听模式,是我们最常用的一种观察者模式。spring在其中做了很多优化,目的就是让用户更好的使用事件与监听的过程。
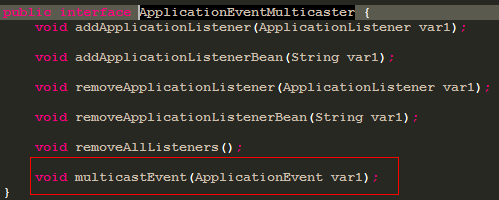
二、常用的事件与监听中涉及到的接口和类为:ApplicationEvent、ApplicationListener、ApplicationEventPublisher或者ApplicationContext。ApplicationEventPublisher或者ApplicationContext其实使用的是同一个方法进行发布事件。

三、实现方式
参考:spring源码-Aware-3.4的第二类b点的实现方式,这里不详细解释。
四、源码部分
1)方法实现在:refresh()方法中的
this.initApplicationEventMulticaster();
this.registerListeners();
2)initApplicationEventMulticaster
  protected void initApplicationEventMulticaster() {

        //获取本地的beanFactory

        ConfigurableListableBeanFactory beanFactory = this.getBeanFactory();

        //判断是否自己加入applicationEventMulticaster的bean

        if (beanFactory.containsLocalBean("applicationEventMulticaster")) {

            //如果存在则赋值待用

            this.applicationEventMulticaster = (ApplicationEventMulticaster)beanFactory.getBean("applicationEventMulticaster", ApplicationEventMulticaster.class);

            if (this.logger.isDebugEnabled()) {

                this.logger.debug("Using ApplicationEventMulticaster [" + this.applicationEventMulticaster + "]");

            }

        } else {

            //如果没用,就直接使用默认的方式加入

            this.applicationEventMulticaster = new SimpleApplicationEventMulticaster(beanFactory);

            //加入容器,单例方式

            beanFactory.registerSingleton("applicationEventMulticaster", this.applicationEventMulticaster);

            if (this.logger.isDebugEnabled()) {

                this.logger.debug("Unable to locate ApplicationEventMulticaster with name 'applicationEventMulticaster': using default [" + this.applicationEventMulticaster + "]");

            }

        }

    }
可能有点奇怪,这个和事件以及监听有啥关系。后面为具体讲执行过程,留个悬念
3)registerListeners
protected void registerListeners() {

        //获取已有监听

        Iterator var2 = this.getApplicationListeners().iterator();

        //如果存在着添加到缓存中灯带执行

        while(var2.hasNext()) {

            ApplicationListener listener = (ApplicationListener)var2.next();

            this.getApplicationEventMulticaster().addApplicationListener(listener);

        }

        //获取ApplicationListener类型的beanNames

        String[] listenerBeanNames = this.getBeanNamesForType(ApplicationListener.class, true, false);

        String[] var5 = listenerBeanNames;

        int var4 = listenerBeanNames.length;

        //同样添加到具体的缓存中

        for(int var3 = 0; var3 < var4; ++var3) {

            String lisName = var5[var3];

            this.getApplicationEventMulticaster().addApplicationListenerBean(lisName);

        }

    }

    //添加到缓存中

    //ListenerRetriever

    public void addApplicationListener(ApplicationListener listener) {

        //这里不详解释,有兴趣可以自己看一下源码,这里就是默认加入缓存的一个过程

        AbstractApplicationEventMulticaster.ListenerRetriever var2 = this.defaultRetriever;

        synchronized(this.defaultRetriever) {

            this.defaultRetriever.applicationListeners.add(listener);

            this.retrieverCache.clear();

        }

    }

    //添加到缓存中

    public void addApplicationListenerBean(String listenerBeanName) {

        AbstractApplicationEventMulticaster.ListenerRetriever var2 = this.defaultRetriever;

        synchronized(this.defaultRetriever) {

            this.defaultRetriever.applicationListenerBeans.add(listenerBeanName);

            this.retrieverCache.clear();

        }

    }

    //set数据,不详解释

    private class ListenerRetriever {

        public final Set<ApplicationListener> applicationListeners = new LinkedHashSet();

        public final Set<String> applicationListenerBeans = new LinkedHashSet();

        private final boolean preFiltered;

        public ListenerRetriever(boolean preFiltered) {

            this.preFiltered = preFiltered;

        }

        //具体的获取监听的过程

        public Collection<ApplicationListener> getApplicationListeners() {

            LinkedList<ApplicationListener> allListeners = new LinkedList();

            Iterator var3 = this.applicationListeners.iterator();

            while(var3.hasNext()) {

                ApplicationListener listener = (ApplicationListener)var3.next();

                allListeners.add(listener);

            }

            if (!this.applicationListenerBeans.isEmpty()) {

                BeanFactory beanFactory = AbstractApplicationEventMulticaster.this.getBeanFactory();

                Iterator var4 = this.applicationListenerBeans.iterator();

                label23:

                while(true) {

                    ApplicationListener listenerx;

                    do {

                        if (!var4.hasNext()) {

                            break label23;

                        }

                        String listenerBeanName = (String)var4.next();

                        //获取实例

                        listenerx = (ApplicationListener)beanFactory.getBean(listenerBeanName, ApplicationListener.class);

                    } while(!this.preFiltered && allListeners.contains(listenerx));

                    allListeners.add(listenerx);

                }

            }

            OrderComparator.sort(allListeners);

            return allListeners;

        }

    }
4)这就是spring中的准备过程,下面就是执行过程了。(publisher为ApplicationEventPublisher,可以参考实现方式)
  public void test() {

        publisher.publishEvent(new TestEvent(this, "test"));

    }
public void publishEvent(ApplicationEvent event) {

        Assert.notNull(event, "Event must not be null");

        if (this.logger.isTraceEnabled()) {

            this.logger.trace("Publishing event in " + this.getDisplayName() + ": " + event);

        }

        //这也就是前面留下悬念的过程

        this.getApplicationEventMulticaster().multicastEvent(event);

        if (this.parent != null) {

            this.parent.publishEvent(event);

        }

    }
看一下注册的ApplicationEventMulticaster
  public void multicastEvent(final ApplicationEvent event) {

        //这里获取具体的事件所有关注的监听者

        Iterator var3 = this.getApplicationListeners(event).iterator();

        while(var3.hasNext()) {

            final ApplicationListener listener = (ApplicationListener)var3.next();

            //这里如果过存在线程池。则通过线程池执行

            Executor executor = this.getTaskExecutor();

            if (executor != null) {

                executor.execute(new Runnable() {

                    public void run() {

                        listener.onApplicationEvent(event);

                    }

                });

            } else {

                //或者同步执行

                listener.onApplicationEvent(event);

            }

        }

    }
这里就是具体执行过程了!
5)当然获取具体监听的实现过程还是可以学习一下的,主要是泛型的应用:getApplicationListeners
   protected Collection<ApplicationListener> getApplicationListeners(ApplicationEvent event) {

        //获取实际的事件classType

        Class<? extends ApplicationEvent> eventType = event.getClass();

        //发生地new TestEvent(this, "test")中的this

        Class sourceType = event.getSource().getClass();

        //查看缓存key

        AbstractApplicationEventMulticaster.ListenerCacheKey cacheKey = new AbstractApplicationEventMulticaster.ListenerCacheKey(eventType, sourceType);

        AbstractApplicationEventMulticaster.ListenerRetriever retriever = (AbstractApplicationEventMulticaster.ListenerRetriever)this.retrieverCache.get(cacheKey);

        //如果存在则直接返回

        if (retriever != null) {

            return retriever.getApplicationListeners();

        } else {

            //没有则重新声明保存

            retriever = new AbstractApplicationEventMulticaster.ListenerRetriever(true);

            LinkedList<ApplicationListener> allListeners = new LinkedList();

            AbstractApplicationEventMulticaster.ListenerRetriever var7 = this.defaultRetriever;

            synchronized(this.defaultRetriever) {

                //查看已有的监听

                Iterator var9 = this.defaultRetriever.applicationListeners.iterator();

                //判断是否支持

                while(var9.hasNext()) {

                    ApplicationListener listener = (ApplicationListener)var9.next();

                    if (this.supportsEvent(listener, eventType, sourceType)) {

                        retriever.applicationListeners.add(listener);

                        allListeners.add(listener);

                    }

                }

                //如果没有

                if (!this.defaultRetriever.applicationListenerBeans.isEmpty()) {

                    BeanFactory beanFactory = this.getBeanFactory();

                    //遍历默认的

                    Iterator var10 = this.defaultRetriever.applicationListenerBeans.iterator();

                    while(var10.hasNext()) {

                        String listenerBeanName = (String)var10.next();

                        //获取加入容器的监听

                        ApplicationListener listener = (ApplicationListener)beanFactory.getBean(listenerBeanName, ApplicationListener.class);

                        //判断是否支持

                        if (!allListeners.contains(listener) && this.supportsEvent(listener, eventType, sourceType)) {

                            retriever.applicationListenerBeans.add(listenerBeanName);

                            allListeners.add(listener);

                        }

                    }

                }

                //排序

                OrderComparator.sort(allListeners);

                //加入缓存方便下次执行

                this.retrieverCache.put(cacheKey, retriever);

                return allListeners;

            }

        }

    }

    //判断方式

    protected boolean supportsEvent(ApplicationListener listener, Class<? extends ApplicationEvent> eventType, Class sourceType) {

        SmartApplicationListener smartListener = listener instanceof SmartApplicationListener ? (SmartApplicationListener)listener : new GenericApplicationListenerAdapter(listener);

        return ((SmartApplicationListener)smartListener).supportsEventType(eventType) && ((SmartApplicationListener)smartListener).supportsSourceType(sourceType);

    }

    //判断过程

    public boolean supportsEventType(Class<? extends ApplicationEvent> eventType) {

        Class typeArg = GenericTypeResolver.resolveTypeArgument(this.delegate.getClass(), ApplicationListener.class);

        if (typeArg == null || typeArg.equals(ApplicationEvent.class)) {

            Class targetClass = AopUtils.getTargetClass(this.delegate);

            if (targetClass != this.delegate.getClass()) {

                typeArg = GenericTypeResolver.resolveTypeArgument(targetClass, ApplicationListener.class);

            }

        }

        return typeArg == null || typeArg.isAssignableFrom(eventType);

    }

    public static Class<?> resolveTypeArgument(Class clazz, Class genericIfc) {

        Class[] typeArgs = resolveTypeArguments(clazz, genericIfc);

        if (typeArgs == null) {

            return null;

        } else if (typeArgs.length != 1) {

            throw new IllegalArgumentException("Expected 1 type argument on generic interface [" + genericIfc.getName() + "] but found " + typeArgs.length);

        } else {

            return typeArgs[0];

        }

    }

    public static Class[] resolveTypeArguments(Class clazz, Class genericIfc) {

        return doResolveTypeArguments(clazz, clazz, genericIfc);

    }

    private static Class[] doResolveTypeArguments(Class ownerClass, Class classToIntrospect, Class genericIfc) {

        for(; classToIntrospect != null; classToIntrospect = classToIntrospect.getSuperclass()) {

            if (genericIfc.isInterface()) {

                Type[] ifcs = classToIntrospect.getGenericInterfaces();

                Type[] var7 = ifcs;

                int var6 = ifcs.length;

                for(int var5 = 0; var5 < var6; ++var5) {

                    Type ifc = var7[var5];

                    Class[] result = doResolveTypeArguments(ownerClass, ifc, genericIfc);

                    if (result != null) {

                        return result;

                    }

                }

            } else {

                Class[] result = doResolveTypeArguments(ownerClass, classToIntrospect.getGenericSuperclass(), genericIfc);

                if (result != null) {

                    return result;

                }

            }

        }

        return null;

    }

    private static Class[] doResolveTypeArguments(Class ownerClass, Type ifc, Class genericIfc) {

        if (ifc instanceof ParameterizedType) {

            ParameterizedType paramIfc = (ParameterizedType)ifc;

            Type rawType = paramIfc.getRawType();

            if (genericIfc.equals(rawType)) {

                Type[] typeArgs = paramIfc.getActualTypeArguments();

                Class[] result = new Class[typeArgs.length];

                for(int i = 0; i < typeArgs.length; ++i) {

                    Type arg = typeArgs[i];

                    result[i] = extractClass(ownerClass, arg);

                }

                return result;

            }

            if (genericIfc.isAssignableFrom((Class)rawType)) {

                return doResolveTypeArguments(ownerClass, (Class)rawType, genericIfc);

            }

        } else if (ifc != null && genericIfc.isAssignableFrom((Class)ifc)) {

            return doResolveTypeArguments(ownerClass, (Class)ifc, genericIfc);

        }

        return null;

    }
过程有点复杂,具体可以自己了解一下。大体方向就是通过获取接口的类型,然后具体的泛型类型,然后比对。
6)最后提一点,上面如果我们没有配置applicationEventMulticaster会导致一个问题就是同步问题。在initApplicationEventMulticaster中默认使用的是SimpleApplicationEventMulticaster的实例来实现具体过程。但是默认情况下是不会有线程池的方式加入的,所以这里需要重新注册名为applicationEventMulticaster的bean。具体实现方式为:
@Configuration

public class PublisherConfiguration {

    @Bean

    public ThreadPoolTaskExecutor threadPoolTaskExecutor() {

        ThreadPoolTaskExecutor executor = new ThreadPoolTaskExecutor();

        executor.setCorePoolSize(5);

        executor.setMaxPoolSize(60);

        executor.setKeepAliveSeconds(60);

        executor.setQueueCapacity(3000);

        return executor;

    }

    /**

     * 事件监听会默认使用改监听器使用线程池执行

     * @param executor

     * @return

     */

    @Bean(name = "applicationEventMulticaster")

    public SimpleApplicationEventMulticaster simpleApplicationEventMulticaster(ThreadPoolTaskExecutor executor) {

        SimpleApplicationEventMulticaster applicationEventMulticaster = new SimpleApplicationEventMulticaster();

        applicationEventMulticaster.setTaskExecutor(executor);

        return applicationEventMulticaster;

    }

}
这里的名字必须为applicationEventMulticaster,至于为什么不用解释了吧!
spring源码-事件&监听3.6的更多相关文章
- Spring Boot实践——事件监听
借鉴:https://blog.csdn.net/Harry_ZH_Wang/article/details/79691994 https://blog.csdn.net/ignorewho/arti ...
- asp.net core启动源码以及监听,到处理请求响应的过程
摘要 asp.net core发布至今已经将近6年了,很多人对于这一块还是有些陌生,或者说没接触过:接触过的,对于asp.net core整个启动过程,监听过程,以及请求过程,响应过程也是一知半解,可 ...
- Spring中的事件监听实现
在spring中我们可以自定义事件,并且可以使用ApplicationContext类型对象(就是spring容器container)来发布这个事件 事件发布之后,所有的ApplicaitonList ...
- spring源码-bean之增强初始化-3
一.ApplicationContext的中文意思是“应用上下文”,它继承自BeanFactory接口,除了包含BeanFactory的所有功能之外,在国际化支持.资源访问(如URL和文件).事件传播 ...
- Spring之事件监听(观察者模型)
目录 Spring事件监听 一.事件监听案例 1.事件类 2.事件监听类 3.事件发布者 4.配置文件中注册 5.测试 二.Spring中事件监听分析 1. Spring中事件监听的结构 2. 核心角 ...
- (转)spring boot实战(第三篇)事件监听源码分析
原文:http://blog.csdn.net/liaokailin/article/details/48194777 监听源码分析 首先是我们自定义的main方法: package com.lkl. ...
- spring boot 源码赏析之事件监听
使用spring Boot已经快1年多了,期间一直想点开springboot源码查看,但由于种种原因一直未能如愿(主要是人类的惰性...),今天就拿springboot 的监听事件祭刀. spring ...
- Spring事件监听机制源码解析
Spring事件监听器使用 1.Spring事件监听体系包括三个组件:事件.事件监听器,事件广播器. 事件:定义事件类型和事件源,需要继承ApplicationEvent. package com.y ...
- 【spring源码学习】spring的事件发布监听机制源码解析
[一]相关源代码类 (1)spring的事件发布监听机制的核心管理类:org.springframework.context.event.SimpleApplicationEventMulticast ...
随机推荐
- 有趣的IntegerCache
一个很有趣的现象,下面这两个结果输出的结果是false true,这是为什么? 翻看Integer的源码可以看到,当new Integer(12);时,没有什么特别的,就是通过构造方法创建了一个I ...
- 圆环,扇形控件基本算法一种实现 - 代码库 - CocoaChina_让移动开发更简单
圆环,扇形控件基本算法一种实现 - 代码库 - CocoaChina_让移动开发更简单 //// CircleCore.h// Quartz//// Created by 仙人掌 on 12 ...
- JAVA Collections常用方法
/* 集合框架的工具类 Collections: */ import java.util.*; class Test { public static void main(String [] args) ...
- Vue教程:Class 与 Style 绑定(四)
绑定 HTML Class 对象语法 ①.添加单个class: <div v-bind:class="{ active: isActive }"></div> ...
- Office365学习笔记—列表查询,删除条目,更新条目。
1,基于Query语句的列表查询. function retrieveListItems(itemId) { var siteUrl=_spPageContextInfo.webServerRelat ...
- Linux - CentOS 7 yum方式快速安装MongoDB
一.安装环境及配置yum # more /etc/redhat-release CentOS Linux release 7.2.1511 (Core) # vi /etc/yum.repos.d/m ...
- OpenGL 3 and OpenGL 4 with GLSL
Here are some OpenGL samples with advance features. NeHe OpenGL tutorial focus on the OpenGL fixed p ...
- OC - ARC(自动引用计数)
1.什么是自动引用计数? 顾明思义,自动引用计数(ARC,Automatic Reference Counting)是指内存管理中对引用采取自动计数的技术. 在OC中采用ARC机制,让编译器来进行内存 ...
- MySQL索引的使用及注意事项
索引是存储引擎用于快速找到记录的一种数据结构.索引优化应该是对查询性能优化最有效的手段了.索引能够轻易将查询性能提高几个数量级,"最优"的索引有时比一个"好的" ...
- Sass变量及嵌套
1. 变量:SASS允许使用变量,所有变量以$开头. 变量声明:$highlight-color: #000; 注意:变量可以在css规则块定义之外存在.如下例子: $nav-color: #F90; ...