Arduino IDE for ESP8266 项目(3)创建AP+STA

官网API:http://arduino-esp8266.readthedocs.io/en/latest/esp8266wifi/readme.html
STA (客户端)手机连接路由器

S1 *简单的连接WIFI
自己当手机,连接wifi
#include <ESP8266WiFi.h>


void setup()

{

  Serial.begin(115200);

  Serial.println();


  WiFi.begin("network-name", "pass-to-network");


  Serial.print("Connecting");

  while (WiFi.status() != WL_CONNECTED)

  {

    delay(500);

    Serial.print(".");

  }

  Serial.println();


  Serial.print("Connected, IP address: ");

  Serial.println(WiFi.localIP());

}


void loop() {}
S2 *添加WIFI备用,自动连接
/*

 *  This sketch trys to Connect to the best AP based on a given list

 *

 */


#include <ESP8266WiFi.h>

#include <ESP8266WiFiMulti.h>


ESP8266WiFiMulti wifiMulti;


void setup() {

    Serial.begin(115200);

    Serial.setDebugOutput(true);

    Serial.println();

    delay(10);


    wifiMulti.addAP("dongdong", "dongdong");

    wifiMulti.addAP("ssid_from_AP_2", "your_password_for_AP_2");

    wifiMulti.addAP("ssid_from_AP_3", "your_password_for_AP_3");


    Serial.println("Connecting Wifi...");

    if(wifiMulti.run() == WL_CONNECTED) {

        Serial.println("");

        Serial.println("WiFi connected");

        Serial.println("IP address: ");

        Serial.println(WiFi.localIP());

    }

}


void loop() {

    if(wifiMulti.run() != WL_CONNECTED) {

        Serial.println("WiFi not connected!");

        delay(1000);

    }

}
S3 连接WIFI,主动设置静态地址
#include <ESP8266WiFi.h>

const char* ssid = "dongdong";

const char* password = "dongdong";

String name="DD_Station_01";

IPAddress staticIP(192,168,1,22);

IPAddress gateway(192,168,1,9);

IPAddress subnet(255,255,255,0);

void setup(void)

{

  Serial.begin(115200);

  Serial.println();

  Serial.printf("Connecting to %s\n", ssid);

  WiFi.begin(ssid, password);

  WiFi.config(staticIP, gateway, subnet);

  // 修改主机名

  WiFi.hostname(name);

  Serial.printf("New hostname: %s\n", WiFi.hostname().c_str());

  while (WiFi.status() != WL_CONNECTED)

  {

    delay(500);

    Serial.print(".");

  }

  Serial.println();

  Serial.print("Connected, IP address: ");

  Serial.println(WiFi.localIP());   // 分配的动态地址&自己设置的静态地址

  Serial.printf("SSID: %s\n", WiFi.SSID().c_str());// 连接的WIFI名

}

void loop() {}
S4 http连接网络,访问网页
/*

 *  This sketch sends data via HTTP GET requests to data.sparkfun.com service.

 *

 *  You need to get streamId and privateKey at data.sparkfun.com and paste them

 *  below. Or just customize this script to talk to other HTTP servers.

 *

 */

#include <ESP8266WiFi.h>


const char* ssid     = "Doit";

const char* password = "doit3305";

const char* host = "data.sparkfun.com";

const char* streamId   = "ESPDUINO_STA";

const char* privateKey = "pzRb9dawqocbP9n0K0M9";


void setup() {

  Serial.begin(115200);

  delay(10);

  // We start by connecting to a WiFi network

  Serial.println();

  Serial.println();

  Serial.print("Connecting to ");

  Serial.println(ssid);

  WiFi.begin(ssid, password);

  while (WiFi.status() != WL_CONNECTED) {

  delay(500);

  Serial.print(".");

  }

  Serial.println("");

  Serial.println("WiFi connected");

  Serial.println("IP address: ");

  Serial.println(WiFi.localIP());

}


int value = 0;


void loop() {

  delay(5000);

  ++value;

  Serial.print("connecting to ");

  Serial.println(host);

  // Use WiFiClient class to create TCP connections

  WiFiClient client;

  const int httpPort = 80;

  if (!client.connect(host, httpPort)) {

    Serial.println("connection failed");

    return;

  }

  // We now create a URI for the request

  String url = "/input/";

  url += streamId;

  url += "?private_key=";

  url += privateKey;

  url += "&value=";

  url += value;

  Serial.print("Requesting URL: ");

  Serial.println(url);

  // This will send the request to the server

  client.print(String("GET ") + url + " HTTP/1.1\r\n" +"Host: " + host + "\r\n" + "Connection: close\r\n\r\n");

  delay(10);

  // Read all the lines of the reply from server and print them to Serial

  while(client.available()){

    String line = client.readStringUntil('\r');

    Serial.print(line);

  }


  Serial.println();

  Serial.println("closing connection");


}
AP(服务器) 自己当WIFI
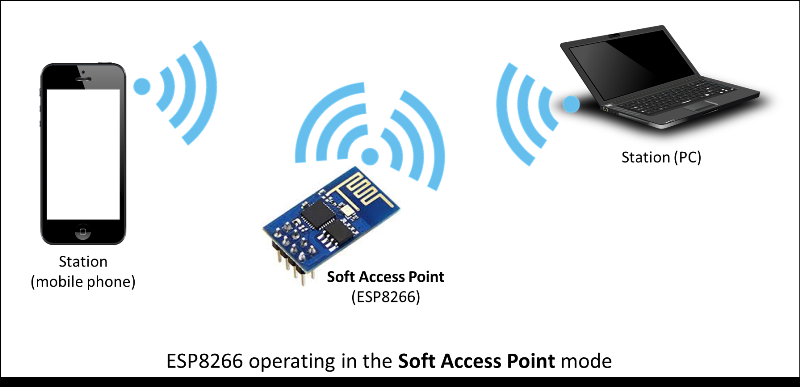
A1 自己当WIFI wifi名称+密码+ IP 不提供服务
#include <ESP8266WiFi.h>

const char *ssid = "Charlie Testing AP";

const char *password = "12345678";

void setup()

{

  Serial.begin(115200);

  Serial.println();

  Serial.print("Setting soft-AP ... ");


IPAddress softLocal(192,168,128,1);

IPAddress softGateway(192,168,128,1);

IPAddress softSubnet(255,255,255,0);

WiFi.softAPConfig(softLocal, softGateway, softSubnet);

    WiFi.softAP(ssid, password);


   IPAddress myIP = WiFi.softAPIP();

  Serial.print("AP IP address: ");

  Serial.println(myIP);

}

void loop()

{

  delay(3000);

}
A2 1主动设置自己的WIFI wifi名称+密码+ IP 2建立一个服务接收手机的请求和信息 3网页返回给手机
#include <ESP8266WiFi.h>

const char *ssid = "Charlie Testing AP";

const char *password = "12345678";

WiFiServer server(80);

void setup()

{

  Serial.begin(115200);

  Serial.println();

  Serial.print("Setting soft-AP ... ");

IPAddress softLocal(192,168,128,1);

IPAddress softGateway(192,168,128,1);

IPAddress softSubnet(255,255,255,0);

WiFi.softAPConfig(softLocal, softGateway, softSubnet);

    WiFi.softAP(ssid, password);

   IPAddress myIP = WiFi.softAPIP();

  Serial.print("AP IP address: ");

  Serial.println(myIP);

 server.begin();

 Serial.printf("Web server started, open %s in a web browser\n", WiFi.localIP().toString().c_str());

}

void loop()

{

 WiFiClient client = server.available();

 if (client)

  {

    Serial.println("\n[Client connected]");

    while (client.connected())

    {

      // read line by line what the client (web browser) is requesting

      if (client.available())

      {

        String line = client.readStringUntil('\r');

        Serial.print(line);

        // wait for end of client's request, that is marked with an empty line

        if (line.length() == 1 && line[0] == '\n')

        {

          client.println(prepareHtmlPage());

          break;

        }

      }

    }

    delay(1); // give the web browser time to receive the data

    // close the connection:

    client.stop();

    Serial.println("[Client disonnected]");

  }

}

// prepare a web page to be send to a client (web browser)

String prepareHtmlPage()

{

  String htmlPage =

     String("HTTP/1.1 200 OK\r\n") +

            "Content-Type: text/html\r\n" +

            "Connection: close\r\n" +  // the connection will be closed after completion of the response

            "Refresh: 5\r\n" +  // refresh the page automatically every 5 sec

            "\r\n" +

            "<!DOCTYPE HTML>" +

            "<html>" +

            "Analog input:  " + String(analogRead(A0)) +

            "</html>" +

            "\r\n";

  return htmlPage;

}
STA (客户端)+ AP(服务器)
#include <ESP8266WiFi.h>

#include <WiFiUdp.h>

/******************* STA 当手机 *****************************/

//设置STA网络参数

IPAddress sip(192, 168, 1, 29);//本地IP

IPAddress sip1(192, 168, 1, 1);//本地网关

IPAddress sip2(255, 255, 255, 0);//本地子网掩码

//设置STA

const char *ssid = "Netcore_wsn";

const char *password = "99325408322";

/**********************************************************/

/******************* AP 当wifi *****************************/

IPAddress xip(192, 168,2, 2);//下位远程IP

//设置AP网络参数

IPAddress lxip(192, 168,2, 1);//AP端IP

IPAddress lxip1(192, 168,2, 1);//AP端网关

IPAddress lxip2(255, 255,255, 0);//AP端子网掩码

//设置AP账号密码

const char *ssid1 = "Netcore_wsn1";//AP  wifi名

const char *password1 = "99325408322";//AP  wifi密码

/**********************************************************/

IPAddress Serverip(192, 168, 1, 4);//上位机远程IP

unsigned int localPort = 9999;//本地端口

unsigned int remoteport = 9999;//远程端口

WiFiUDP udp;

char packetBuffer[255];//收发缓冲区

void setup() {

Serial.begin(115200);//初始化串口波特率

delay(5000);//延时5S

WiFi.mode(WIFI_AP_STA);//设置模式为AP+STA

/******************* AP 当WIFI  *****************************/

WiFi.softAPConfig(lxip,lxip1,lxip2);//设置AP网络参数

WiFi.softAP(ssid1,password1,1);//设置AP账号密码

/******************************************************************/

Serial.print("apip:");

Serial.println(WiFi.softAPIP());// AP 自己当WIFI 自己设置的内网地址

/******************* STA 当手机连接WIFI *****************************/

WiFi.begin(ssid,password);//连接指定路由

WiFi.config(sip,sip1,sip2);//设置本地网络参数

Serial.print("Is connection routing, please wait");

while(WiFi.status()!=WL_CONNECTED)//等待路由连接

{

delay(500);

Serial.print(".");

}

/******************************************************************/

Serial.println(" ");

udp.begin(localPort);//监听指定端口

Serial.print("ip:");

Serial.println(WiFi.localIP());// STA 当手机连接WIFI 自己设置的静态地址

}

void loop()

{

if(udp.parsePacket())

{

udp.read(packetBuffer,255);//读取数据

udp.beginPacket(Serverip,remoteport);

udp.write(packetBuffer,255);

udp.endPacket();

Serial.println(packetBuffer);

udp.beginPacket(xip,remoteport);

udp.write(packetBuffer,255);

udp.endPacket();

memset(packetBuffer, 0, 255);//清除缓冲器数值

}

}
Arduino IDE for ESP8266 项目(3)创建AP+STA的更多相关文章
- Arduino IDE for ESP8266教程(二) 创建WIFI AP模式
创建WIFI热点 #include <ESP8266WiFi.h> void setup() { Serial.begin ( 115200 ); Serial.println(" ...
- Arduino IDE for ESP8266 项目云盒子 (1)AP直接模式
手机直接连接esp8266辐射的WIFI,通信. https://item.taobao.com/item.htm?spm=a230r.1.14.20.eYblO3&id=5219451024 ...
- Arduino IDE for ESP8266 项目云盒子(2)一键自配置+网页服务器
https://item.taobao.com/item.htm?spm=a230r.1.14.20.eYblO3&id=521945102409&ns=1&abbucket= ...
- Arduino IDE for ESP8266 项目(4)HTTP客户端+服务端
Arduio for esp8266 官网API:http://arduino-esp8266.readthedocs.io/en/latest/esp8266wifi/readme.html 很有 ...
- Arduino IDE for ESP8266 项目(1) 点亮灯+按键LED+pwm
官方文档 http://esp8266.github.io/Arduino/versions/2.1.0/doc/libraries.html 引脚口说明 http://yfrobot.com/thr ...
- Arduino IDE for ESP8266 项目云盒子(3)外网访问
互联网访问esp8266 https://item.taobao.com/item.htm?spm=a230r.1.14.20.eYblO3&id=521945102409&ns=1& ...
- Arduino IDE for ESP8266 项目(2)wifi扫描
#include "ESP8266WiFi.h" void setup() { Serial.begin(115200); //设定WiFi为STA模式,如果先前已连接上AP,则与 ...
- Arduino IDE for ESP8266 项目云盒子(4)组网
- ESP8266开发之旅 进阶篇② 闲聊Arduino IDE For ESP8266烧录配置
授人以鱼不如授人以渔,目的不是为了教会你具体项目开发,而是学会学习的能力.希望大家分享给你周边需要的朋友或者同学,说不定大神成长之路有博哥的奠基石... QQ技术互动交流群:ESP8266&3 ...
随机推荐
- 使用Nexus2.x为Maven3.x搭建私服构件仓库
前言 在笔者的前一篇博文<Use Maven3.x>中,笔者详细的讲解了如何通过使用Maven3.x来构建及管理你的项目.其中笔者提到过些关于私服的概念,但却没有明确的对私服做出详细的阐述 ...
- jsp使用servlet实现文件上传
1.在index.jsp中写入以下代码 <form method="post" action="demo3" enctype="multipar ...
- JavaScript 把字符串类型转换成日期类型
今天在写习题时,遇到些小问题,在这里把答案分享给大家,希望能帮助到大家! 一.把字符串转换成日期类型 var str = "1997-3-12"; var d = new Date ...
- Python sys 模块
import sys # 把命令行参数返回一个 List,第一个元素是程序本身的路径 print(sys.argv) # 命令行运行 python3 sys_model.py klvchen hell ...
- webpack2利用插件clean-webpack-plugin来清除dist文件夹中重复的文件
配置文件如下 /** * Created by oufeng on 2017/5/6. */ const webpack = require('webpack'); const path = requ ...
- [ng:areq] Argument 'XXXXCtrl' is not a function, got undefined
angular.module('MyApp', []) 这里的[]重复了,以后引入新的controller.js文件会覆盖前面那个,所以此处的[]去掉 .controller('MyCtrl', fu ...
- ImageButton和ImageView设置点击透明区域不响应
思路 ImageView和ImageButton都可以设置background和设置src,两者的区别自行度娘.由于两者的不同,获取它们的图片资源的方法也不同.倘若设置的是background,那么需 ...
- NoHttp封装--02 自定义请求
bean实体类请求: 1.bean import java.io.Serializable; import com.alibaba.fastjson.annotation.JSONField; pub ...
- 51Testing专访史亮:测试人员在国外
不久前,我接受了51Testing的访问,讨论了软件测试的一些问题.以下是全文. 1.史亮老师,作为我们51Testing的老朋友,能和我们说说您最近在忙些什么吗? 自2011年起,我加入Micros ...
- BigDecimal遇到的问题,大伙也说说
一:相除精度丢失的问题 BigDecimal的api除法相对加减乘要实现的复杂多了,只介绍常用的我遇到的问题: 问题:两数相除,如果9/3=3整除没问题,但是10/3=0.33333333...... ...