201771010128王玉兰《面向对象程序设计(Java)》第十六周学习总结
第一部分:理论基础
1.线程的概念
进程:进程是程序的一次动态执行,它对应了从代码加 载、执行至执行完毕的一个完整过程。
多线程:多线程是进程执行过程中产生的多条执行线索。
线程:线程是比进程执行更小的单位
a:线程不能独立存在,必须存在于进程中,同一进 程的各线程间共享进程空间的数据
b:每个线程有它自身的产生、存在和消亡的过程, 是一个动态的概念。
c:每个线程有它自身的产生、存在和消亡的过程, 是一个动态的概念。
2.Java实现多线程的两个方法
‐创建Thread类的子类
‐在程序中定义实现Runnable接口的类
用Thread类的子类创建线程
a:首先需从Thread类派生出一个子类,在该子类中 重写run()方法。
b:然后用创建该子类的对象
c:最后用start()方法启动线程 left.start(); right.start();
用Thread类的子类创建多线程的关键性操作
a:定义Thread类的子类并实现用户线程操作,即 run()方法的实现。 –在适当的时候启动线程。
b:由于Java只支持单重继承,用这种方法定义的类不 可再继承其他父类。
3.用Runnable接口实现多线程
a:首先设计一个实现Runnable接口的类;
b:然后在类中根据需要重写run方法;
c:再创建该类对象,以此对象为参数建立Thread 类的对象;
d调用Thread类对象的start方法启动线程,将 CPU执行权转交到run方法。
1、实验目的与要求
(1) 掌握线程概念;
(2) 掌握线程创建的两种技术;
(3) 理解和掌握线程的优先级属性及调度方法;
(4) 掌握线程同步的概念及实现技术;
2、实验内容和步骤
实验1:测试程序并进行代码注释。
测试程序1:
l 在elipse IDE中调试运行ThreadTest,结合程序运行结果理解程序;
l 掌握线程概念;
l 掌握用Thread的扩展类实现线程的方法;
l 利用Runnable接口改造程序,掌握用Runnable接口创建线程的方法。
|
class Lefthand extends Thread { public void run() { for(int i=0;i<=5;i++) { System.out.println("You are Students!"); try{ sleep(500); } catch(InterruptedException e) { System.out.println("Lefthand error.");} } } } class Righthand extends Thread { public void run() { for(int i=0;i<=5;i++) { System.out.println("I am a Teacher!"); try{ sleep(300); } catch(InterruptedException e) { System.out.println("Righthand error.");} } } } public class ThreadTest { static Lefthand left; static Righthand right; public static void main(String[] args) { left=new Lefthand(); right=new Righthand(); left.start(); right.start(); } } |
用Runnable接口实现
class Lefthand implements Runnable {

    public void run() {

        for (int i = 0; i <= 5; i++) {

            System.out.println("You are Students!");

            try {

                Thread.sleep(500);

            } catch (InterruptedException e) {

                System.out.println("Lefthand error.");

            }

        }

    }

}

class Righthand implements Runnable {

    public void run() {

        for (int i = 0; i <= 5; i++) {

            System.out.println("I am a Teacher!");

            try {

                Thread.sleep(300);

            } catch (InterruptedException e) {

                System.out.println("Righthand error.");

            }

        }

    }

}

public class ThreadTest {

    static Thread left;

    static Thread right;

    public static void main(String[] args) {

        Runnable a = new Lefthand();

        Runnable b = new Righthand();

        left = new Thread(a);

        right = new Thread(b);

        left.start();

        right.start();

    }

}
运行结果如下:

测试程序2:
l 在Elipse环境下调试教材625页程序14-1、14-2 、14-3,结合程序运行结果理解程序;
package bounceThread;

import java.awt.geom.*;

/**

   A ball that moves and bounces off the edges of a

   rectangle

 * @version 1.33 2007-05-17

 * @author Cay Horstmann

*/

public class Ball

{

   private static final int XSIZE = 15;

   private static final int YSIZE = 15;

   private double x = 0;

   private double y = 0;

   private double dx = 1;

   private double dy = 1;

   /**

      Moves the ball to the next position, reversing direction

      if it hits one of the edges

   */

   //判断球的边界所处状态的四个条件

   public void move(Rectangle2D bounds)

   {

      x += dx;

      y += dy;

      if (x < bounds.getMinX())

      {

         x = bounds.getMinX();

         dx = -dx;

      }

      if (x + XSIZE >= bounds.getMaxX())

      {

         x = bounds.getMaxX() - XSIZE;

         dx = -dx;

      }

      if (y < bounds.getMinY())

      {

         y = bounds.getMinY();

         dy = -dy;

      }

      if (y + YSIZE >= bounds.getMaxY())

      {

         y = bounds.getMaxY() - YSIZE;

         dy = -dy;

      }

   }

   /**

      Gets the shape of the ball at its current position.

   */

   public Ellipse2D getShape()

   {

      return new Ellipse2D.Double(x, y, XSIZE, YSIZE);

   }

}
package bounceThread;

import java.awt.*;

import java.util.*;

import javax.swing.*;

/**

 * The component that draws the balls.

 * @version 1.34 2012-01-26

 * @author Cay Horstmann

 */

public class BallComponent extends JComponent

{

   private static final int DEFAULT_WIDTH = 450;

   private static final int DEFAULT_HEIGHT = 350;

   private java.util.List<Ball> balls = new ArrayList<>();

   /**

    * Add a ball to the panel.

    * @param b the ball to add

    */

   public void add(Ball b)

   {

      balls.add(b);

   }

   public void paintComponent(Graphics g)

   {

      Graphics2D g2 = (Graphics2D) g;

      for (Ball b : balls)

      {

         g2.fill(b.getShape());

      }

   }

   public Dimension getPreferredSize() { return new Dimension(DEFAULT_WIDTH, DEFAULT_HEIGHT); }

}
package bounce;

import java.awt.*;

import java.awt.event.*;

import javax.swing.*;

/**

 * Shows an animated bouncing ball.

 * @version 1.34 2015-06-21

 * @author Cay Horstmann

 */

public class Bounce

{

   public static void main(String[] args)

   {

      EventQueue.invokeLater(() -> {

         JFrame frame = new BounceFrame();

         frame.setDefaultCloseOperation(JFrame.EXIT_ON_CLOSE);

         frame.setVisible(true);

      });

   }

}

/**

 * The frame with ball component and buttons.

 */

class BounceFrame extends JFrame

{

   private BallComponent comp;

   public static final int STEPS = 1000;

   public static final int DELAY = 3;

   /**

    * Constructs the frame with the component for showing the bouncing ball and

    * Start and Close buttons

    */

   public BounceFrame()

   {

      setTitle("Bounce");

      comp = new BallComponent();

      add(comp, BorderLayout.CENTER);

      JPanel buttonPanel = new JPanel();

      addButton(buttonPanel, "Start", event -> addBall());

      addButton(buttonPanel, "Close", event -> System.exit(0));

      add(buttonPanel, BorderLayout.SOUTH);//将buttonPanel组件整体放在南端

      pack();

   }

   /**

    * Adds a button to a container.

    * @param c the container

    * @param title the button title

    * @param listener the action listener for the button

    */

   public void addButton(Container c, String title, ActionListener listener)

   {

      JButton button = new JButton(title);

      c.add(button);

      button.addActionListener(listener);

   }

   /**

    * Adds a bouncing ball to the panel and makes it bounce 1,000 times.

    */

   public void addBall()

   {

      try

      {

         Ball ball = new Ball();

         comp.add(ball);

         for (int i = 1; i <= STEPS; i++)

         {

            ball.move(comp.getBounds());//调用move方法

            comp.paint(comp.getGraphics());

            Thread.sleep(DELAY);//调用线程的sleep方法

         }

      }

      catch (InterruptedException e)

      {

      }

   }

}
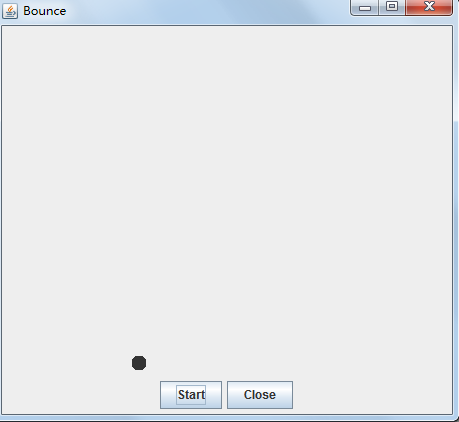
运行结果如下:

l 在Elipse环境下调试教材631页程序14-4,结合程序运行结果理解程序;
l 对比两个程序,理解线程的概念和用途;
l 掌握线程创建的两种技术。
package bounceThread;

import java.awt.*;

import java.awt.event.*;

import javax.swing.*;

/**

 * Shows animated bouncing balls.

 * @version 1.34 2015-06-21

 * @author Cay Horstmann

 */

public class BounceThread

{

   public static void main(String[] args)

   {

      EventQueue.invokeLater(() -> {

         JFrame frame = new BounceFrame();

         frame.setTitle("BounceThread");

         frame.setDefaultCloseOperation(JFrame.EXIT_ON_CLOSE);

         frame.setVisible(true);

      });

   }

}

/**

 * The frame with panel and buttons.

 */

class BounceFrame extends JFrame

{

   private BallComponent comp;

   public static final int STEPS = 1000;

   public static final int DELAY = 5;

   /**

    * Constructs the frame with the component for showing the bouncing ball and

    * Start and Close buttons

    */

   public BounceFrame()

   {

      comp = new BallComponent();

      add(comp, BorderLayout.CENTER);

      JPanel buttonPanel = new JPanel();

      addButton(buttonPanel, "Start", event -> addBall());

      addButton(buttonPanel, "Close", event -> System.exit(0));

      add(buttonPanel, BorderLayout.SOUTH);

      pack();

   }

   /**

    * Adds a button to a container.

    * @param c the container

    * @param title the button title

    * @param listener the action listener for the button

    */

   public void addButton(Container c, String title, ActionListener listener)

   {

      JButton button = new JButton(title);

      c.add(button);

      button.addActionListener(listener);

   }

   /**

    * Adds a bouncing ball to the canvas and starts a thread to make it bounce

    */

   public void addBall()

   {

      Ball ball = new Ball();

      comp.add(ball);

      //引用实现了Runnable的方法

      Runnable r = () -> {

         try

         {

            for (int i = 1; i <= STEPS; i++)

            {

               ball.move(comp.getBounds());

               comp.repaint();

               Thread.sleep(DELAY);

            }

         }

         catch (InterruptedException e)

         {

         }

      };

      Thread t = new Thread(r);//用Runnable创建一个Thread对象

      t.start();//启动线程

   }

}
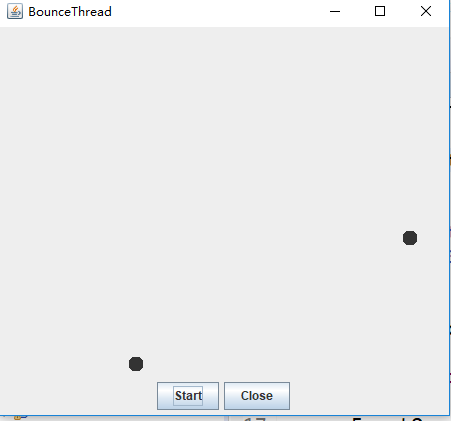
运行结果如下:

测试程序3:分析以下程序运行结果并理解程序。
|
class Race extends Thread { public static void main(String args[]) { Race[] runner=new Race[4]; for(int i=0;i<4;i++) runner[i]=new Race( ); for(int i=0;i<4;i++) runner[i].start( ); runner[1].setPriority(MIN_PRIORITY); runner[3].setPriority(MAX_PRIORITY);} public void run( ) { for(int i=0; i<1000000; i++); System.out.println(getName()+"线程的优先级是"+getPriority()+"已计算完毕!"); } } |
class Race extends Thread {

  public static void main(String args[]) {

        Race[] runner = new Race[4];

         for (int i = 0; i < 4; i++)

            runner[i] = new Race();

         for (int i = 0; i < 4; i++)

             runner[i].start();

         runner[1].setPriority(MIN_PRIORITY);

        runner[3].setPriority(MAX_PRIORITY);

     }

     public void run() {

        for (int i = 0; i < 1000000; i++);//用来延时,相当于Sleep,但不会释放CPU

         System.out.println(getName() + "线程的优先级是" + getPriority() + "已计算完毕!");

    }

 }
运行结果如下:

测试程序4
l 教材642页程序模拟一个有若干账户的银行,随机地生成在这些账户之间转移钱款的交易。每一个账户有一个线程。在每一笔交易中,会从线程所服务的账户中随机转移一定数目的钱款到另一个随机账户。
l 在Elipse环境下调试教材642页程序14-5、14-6,结合程序运行结果理解程序;
package unsynch;

/**

 * 当多个线程访问一个数据结构时,这个程序显示数据损坏。

 */

public class UnsynchBankTest

{

   public static final int NACCOUNTS = 100;

   public static final double INITIAL_BALANCE = 1000;

   public static final double MAX_AMOUNT = 1000;

   public static final int DELAY = 10;

   public static void main(String[] args)

   {

      Bank bank = new Bank(NACCOUNTS, INITIAL_BALANCE);

      for (int i = 0; i < NACCOUNTS; i++)

      {

         int fromAccount = i;

         Runnable r = () -> {

            try

            {

               while (true)

               {

                  int toAccount = (int) (bank.size() * Math.random());

                  double amount = MAX_AMOUNT * Math.random();

                  bank.transfer(fromAccount, toAccount, amount);

                  Thread.sleep((int) (DELAY * Math.random()));

               }

            }

            catch (InterruptedException e)

            {

            }

         };

         Thread t = new Thread(r);

         t.start();

      }

   }

}
package unsynch;

import java.util.*;

public class Bank

{

   private final double[] accounts;

   /**

    * @参数n表示账户数量

    * @每个帐户的初始余额

    */

   public Bank(int n, double initialBalance)

   {

      accounts = new double[n];

      Arrays.fill(accounts, initialBalance);

   }

   /**

       *  把钱从一个账户转到另一个账户。

    * @从帐户中调出参数

    * @向要转账的账户输入参数

    * @要转帐的金额

    */

   public void transfer(int from, int to, double amount)

   {

      if (accounts[from] < amount) return;

      System.out.print(Thread.currentThread());

      accounts[from] -= amount;

      System.out.printf(" %10.2f from %d to %d", amount, from, to);

      accounts[to] += amount;

      System.out.printf(" Total Balance: %10.2f%n", getTotalBalance());

   }

   /**

           * 获取所有帐户余额的总和。

           * 返回总余额

    */

   public double getTotalBalance()

   {

      double sum = 0;

      for (double a : accounts)

         sum += a;

      return sum;

   }

   /**

           *获取银行中的帐户编号.

          *  返回账号

    */

   public int size()

   {

      return accounts.length;

   }

}
运行结果:

综合编程练习
编程练习1
- 1. 设计一个用户信息采集程序,要求如下:
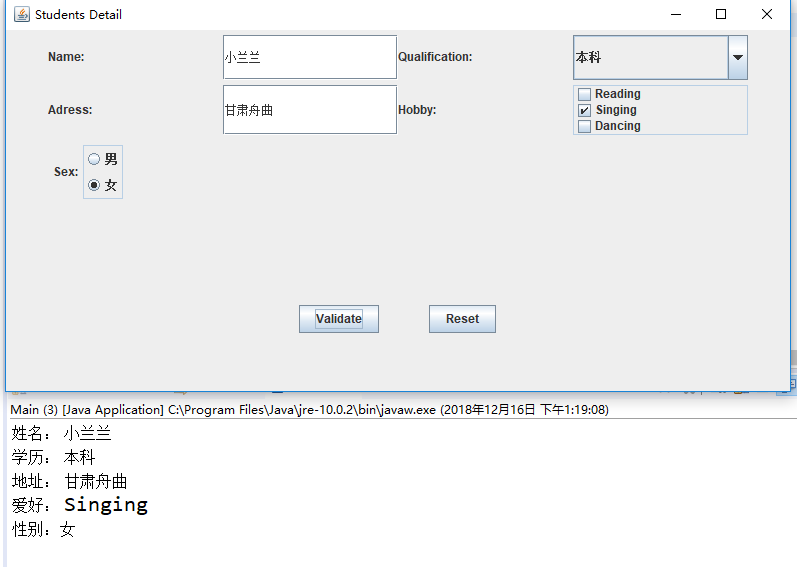
(1) 用户信息输入界面如下图所示:
(2) 用户点击提交按钮时,用户输入信息显示控制台界面;
(3) 用户点击重置按钮后,清空用户已输入信息;
(4) 点击窗口关闭,程序退出。
import java.awt.EventQueue;

import javax.swing.JFrame;

public class Main {

    public static void main(String[] args) {

        EventQueue.invokeLater(() -> {

            DemoJFrame page = new DemoJFrame();

        });

    }

}
import java.awt.Dimension;

import java.awt.Toolkit;

import java.awt.Window;

public class WinCenter {

    public static void center(Window win) {

        Toolkit tkit = Toolkit.getDefaultToolkit();

        Dimension sSize = tkit.getScreenSize();

        Dimension wSize = win.getSize();

        if (wSize.height > sSize.height) {

            wSize.height = sSize.height;

        }

        if (wSize.width > sSize.width) {

            wSize.width = sSize.width;

        }

        win.setLocation((sSize.width - wSize.width) / 2, (sSize.height - wSize.height) / 2);

    }

}
import java.awt.*;

import javax.swing.*;

public class DemoJFrame extends JFrame {

    private JPanel jPanel1;

    private JPanel jPanel2;

    private JPanel jPanel3;

    private JPanel jPanel4;

    private JTextField fieldname;

    private JComboBox comboBox;

    private JTextField fieldadress;

    private ButtonGroup bg;

    private JRadioButton nan;

    private JRadioButton nv;

    private JCheckBox sing;

    private JCheckBox dance;

    private JCheckBox read;

    public DemoJFrame() {

        // 设置窗口大小

        this.setSize(800, 400);

        // 设置可见性

        this.setVisible(true);

        // 设置标题

        this.setTitle("Students Detail");

        // 设置关闭操作

        this.setDefaultCloseOperation(EXIT_ON_CLOSE);

        // 设置窗口居中

        WinCenter.center(this);

        this.setLayout(new FlowLayout(FlowLayout.LEFT));

        // 创建四个面板对象

        jPanel1 = new JPanel();

        setJPanel1(jPanel1);

        jPanel2 = new JPanel();

        setJPanel2(jPanel2);

        jPanel3 = new JPanel();

        setJPanel3(jPanel3);

        jPanel4 = new JPanel();

        setJPanel4(jPanel4);

        // 设置容器的为流布局

        FlowLayout flowLayout = new FlowLayout();

        this.setLayout(flowLayout);

        // 将四个面板添加到容器中

        this.add(jPanel1);

        this.add(jPanel2);

        this.add(jPanel3);

        this.add(jPanel4);

    }

    /*

     * 设置面一

     */

    private void setJPanel1(JPanel jPanel) {

        // TODO 自动生成的方法存根

        jPanel.setPreferredSize(new Dimension(700, 45));

        // 给面板的布局设置为网格布局 一行4列

        jPanel.setLayout(new GridLayout(1, 4));

        JLabel name = new JLabel("Name:");

        fieldname = new JTextField("");

        JLabel study = new JLabel("Qualification:");

        comboBox = new JComboBox();

        comboBox.addItem("小学");

        comboBox.addItem("初中");

        comboBox.addItem("高中");

        comboBox.addItem("本科");

        jPanel.add(name);

        jPanel.add(fieldname);

        jPanel.add(study);

        jPanel.add(comboBox);

        this.add(jPanel);

    }

    /*

     * 设置面板二

     */

    private void setJPanel2(JPanel jPanel) {

        // TODO 自动生成的方法存根

        jPanel.setPreferredSize(new Dimension(700, 50));

        // 给面板的布局设置为网格布局 一行4列

        jPanel.setLayout(new GridLayout(1, 4));

        JLabel name = new JLabel("Adress:");

        fieldadress = new JTextField();

        fieldadress.setPreferredSize(new Dimension(150, 50));

        JLabel study = new JLabel("Hobby:");

        JPanel selectBox = new JPanel();

        selectBox.setBorder(BorderFactory.createTitledBorder(""));

        selectBox.setLayout(new GridLayout(3, 1));

        read = new JCheckBox("Reading");

        sing = new JCheckBox("Singing");

        dance = new JCheckBox("Dancing");

        selectBox.add(read);

        selectBox.add(sing);

        selectBox.add(dance);

        jPanel.add(name);

        jPanel.add(fieldadress);

        jPanel.add(study);

        jPanel.add(selectBox);

    }

    /*

     * 设置面板三

     */

    private void setJPanel3(JPanel jPanel) {

        // TODO 自动生成的方法存根

        jPanel.setPreferredSize(new Dimension(700, 150));

        FlowLayout flowLayout = new FlowLayout(FlowLayout.LEFT);

        jPanel.setLayout(flowLayout);

        JLabel sex = new JLabel("Sex:");

        JPanel selectBox = new JPanel();

        selectBox.setBorder(BorderFactory.createTitledBorder(""));

        selectBox.setLayout(new GridLayout(2, 1));

        bg = new ButtonGroup();

        nan = new JRadioButton("男");

        nv = new JRadioButton("女");

        bg.add(nan);

        bg.add(nv);

        selectBox.add(nan);

        selectBox.add(nv);

        jPanel.add(sex);

        jPanel.add(selectBox);

    }

    /*

     * 设置面板四

     */

    private void setJPanel4(JPanel jPanel) {

        // TODO 自动生成的方法存根

        jPanel.setPreferredSize(new Dimension(700, 150));

        FlowLayout flowLayout = new FlowLayout(FlowLayout.CENTER, 50, 10);

        jPanel.setLayout(flowLayout);

        jPanel.setLayout(flowLayout);

        JButton sublite = new JButton("Validate");

        JButton reset = new JButton("Reset");

        sublite.addActionListener((e) -> valiData());

        reset.addActionListener((e) -> Reset());

        jPanel.add(sublite);

        jPanel.add(reset);

    }

    /*

     * 提交数据

     */

    private void valiData() {

        // TODO 自动生成的方法存根

        // 拿到数据

        String name = fieldname.getText().toString().trim();

        String qualification = comboBox.getSelectedItem().toString().trim();

        String address = fieldadress.getText().toString().trim();

        System.out.println("姓名: " + name);

        System.out.println("学历: " + qualification);

        System.out.println("地址: " + address);

        String hobbystring = "";

        if (read.isSelected()) {

            hobbystring += "Reading  ";

        }

        if (sing.isSelected()) {

            hobbystring += "Singing   ";

        }

        if (dance.isSelected()) {

            hobbystring += "Dancing  ";

        }

        System.out.println("爱好: " + hobbystring);

        if (nan.isSelected()) {

            System.out.println("性别:男");

        }

        if (nv.isSelected()) {

            System.out.println("性别:女");

        }

    }

    /*

     * 重置

     */

    private void Reset() {

        // TODO 自动生成的方法存根

        fieldadress.setText(null);

        fieldname.setText(null);

        comboBox.setSelectedIndex(0);

        sing.setSelected(false);

        dance.setSelected(false);

        read.setSelected(false);

        bg.clearSelection();

    }

}
运行结果:

2.创建两个线程,每个线程按顺序输出5次“你好”,每个“你好”要标明来自哪个线程及其顺序号。
class Lefthand implements Runnable {

    public void run() {

        for (int i = 1; i <= 5; i++) {

            System.out.println(i+"a.您好");

            try {

                Thread.sleep(500);

            } catch (InterruptedException e) {

                System.out.println("Lefthand error.");

            }

        }

    }

}

class Righthand implements Runnable {

    public void run() {

        for (int i = 1; i <= 5; i++) {

            System.out.println(i+"b.您好");

            try {

                Thread.sleep(300);

            } catch (InterruptedException e) {

                System.out.println("Righthand error.");

            }

        }

    }

}

public class ThreadTest {

    static Thread left;

    static Thread right;

    public static void main(String[] args) {

        Runnable a = new Lefthand();

        Runnable b = new Righthand();

        left = new Thread(a);

        right = new Thread(b);

        left.start();

        right.start();

    }

}
运行结果如下:

3. 完善实验十五 GUI综合编程练习程序。
实验总结:本周学习了有关线程的知识,线程创建有两种方式,第一种是实现runnable接口,第二种是采用Thread类方法,在实验课上进行了实现Runnable接口。我对Java的线程调度采用优先级策略比较深刻,像线程的中断以及线程阻塞等知识,老师上课也详细讲解了。总而言之,本章知识是Java的重点同时也为以后操作系统的学习做了一个铺垫,因此我需要重视。
201771010128王玉兰《面向对象程序设计(Java)》第十六周学习总结的更多相关文章
- 201571030332 扎西平措 《面向对象程序设计Java》第八周学习总结
<面向对象程序设计Java>第八周学习总结 项目 内容 这个作业属于哪个课程 https://www.cnblogs.com/nwnu-daizh/ 这个作业的要求在哪里 https: ...
- 201771010118马昕璐《面向对象程序设计java》第八周学习总结
第一部分:理论知识学习部分 1.接口 在Java程序设计语言中,接口不是类,而是对类的一组需求描述,由常量和一组抽象方法组成.Java为了克服单继承的缺点,Java使用了接口,一个类可以实现一个或多个 ...
- 201771010134杨其菊《面向对象程序设计java》第八周学习总结
第八周学习总结 第一部分:理论知识 一.接口.lambda和内部类: Comparator与comparable接口: 1.comparable接口的方法是compareTo,只有一个参数:comp ...
- 201771010128 王玉兰《面象对象程序设计 (Java) 》第六周学习总结
---恢复内容开始--- 第一部分:基础知识总结: 1.继承 A:用已有类来构建新类的一种机制,当定义了一个新类继承一个类时,这个新类就继承了这个类的方法和域以适应新的情况: B:特点:具有层次结构. ...
- 201771010134杨其菊《面向对象程序设计java》第七周学习总结
第七周学习总结 第一部分:理论知识 1.继承是面向对象程序设计(Object Oriented Programming-OOP)中软件重用的关键技术.继承机制使用已经定义的类作为基础建立新的类定义,新 ...
- 201871010126 王亚涛《面向对象程序设计 JAVA》 第十三周学习总结
内容 这个作业属于哪个课程 https://www.cnblogs.com/nwnu-daizh/ 这个作业的要求在哪里 https://www.cnblogs.com/nwnu-daizh/p/ ...
- 201871010126 王亚涛 《面向对象程序设计 (Java)》第十七周学习总结
内容 这个作业属于哪个课程 https://www.cnblogs.com/nwnu-daizh/ 这个作业的要求在哪里 https://www.cnblogs.com/nwnu-daizh/p/12 ...
- 201777010217-金云馨《面向对象程序设计Java》第八周学习总结
项目 内容 这个作业属于哪个课程 https://www.cnblogs.com/nwnu-daizh/ 这个作业的要求在哪里 https://www.cnblogs.com/nwnu-daizh/p ...
- 马凯军201771010116《面向对象程序设计Java》第八周学习总结
一,理论知识学习部分 6.1.1 接口概念 两种含义:一,Java接口,Java语言中存在的结构,有特定的语法和结构:二,一个类所具有的方法的特征集合,是一种逻辑上的抽象.前者叫做“Java接口”,后 ...
- 周强201771010141《面向对象程序设计Java》第八周学习总结
一.理论知识学习部分 Java为了克服单继承的缺点,Java使用了接口,一个类可以实现一个或多个接口. 接口体中包含常量定义和方法定义,接口中只进行方法的声明,不提供方法的实现. 类似建立类的继承关系 ...
随机推荐
- 理解分布式一致性:Paxos协议之Multi-Paxos
理解分布式一致性:Paxos协议之Multi-Paxos Multi-Paxos without failures Multi-Paxos when phase 1 can be skipped Mu ...
- c语言实现乘法口诀表
利用c语言实现乘法口诀表的两种输出: #include <stdio.h> int main(int argc, char *argv[]) { ; ;a<;a++){//输出1-9 ...
- mac OS 安装淘宝npm镜像
淘宝npm镜像官网 https://npm.taobao.org/ 在终端输入 npm install -g cnpm --registry=https://registry.npm.taobao.o ...
- SVN 应用
1.从服务器上down 资料 在电脑上安装SVN客户端 在电脑本地创建个文件夹作为版本库 进入 xfssvn 文件夹右击鼠标选择 SVN Checkout 或 SVN Update 输入服务器中配置好 ...
- Hello World的五十种不同实现方法!!!!!
我们作为一名程序员,职业生涯中至少完成了一个“Hello, World!“程序.当我们学习一门新的语言时,“Hello, World!“通常是我们所写的第一个程序.程序员一般也都会使用多门语言,甚至有 ...
- STL之traits编程技法
traits编程技法利用了“内嵌型别”的编程技巧与编译器的template参数推导功能. 下面主要看看利用traits编程技法实现的迭代器萃取机制. 5种迭代器类型定义: struct input_i ...
- 深度学习环境搭建:window10+CUDA10.0+CUDNN+pytorch1.2.0
去年底入手一台联想Y7000P,配置了Nvidia GeForce GTX 1660 Ti GPU,GPU内存6G,但是因为有GPU服务器,所以一直没有在这台笔记本上跑过模型,如今经过一番折腾,终于在 ...
- Spring Cloud Alibaba系列(一)nacos作为服务注册中心
Spring Cloud Alibaba各组件版本关系 Spring Cloud Alibaba Version Sentinel Version Nacos Version RocketMQ Ver ...
- K. Road Widening
\(考虑每个区域可行的区间\) \(x[1]=s[1]\ \ y[1]=s[1]+g[1]\) \(x[i]=max(x[i-1]-1,s[i]),y[i]=min(y[i-1]+1,s[i]+g[i ...
- 201771010113 李婷华 《面向对象程序设计(Java)》第八周总结
一.理论知识部分 1.Java为了克服单继承的缺点,Java使用了接口,一个类可以实现一个或多个接口. 2.在Java程序设计语言中,接口不是类,而是对类的一组需求描述,由常量和一组抽象方法组成.接口 ...
