六.Spring与RabbitMQ集成--HelloWorld
spring对RabbitMQ做了很好的集成,我们称之为spring AMQP,其官方文档写得十分详尽,文档地址:https://docs.spring.io/spring-amqp/reference/htmlsingle/。
由于英文水平一般,看得是十分吃力,最后拉到了Sample Applications这一章,这一章主要是通过例子来讲解spring-AMQP的使用方法。通过例子我们可以更加快速的了解spring对RabbitMQ的封装。
1.Hello World同步接收消息例子
helloworld的例子展示了同步和异步的消息接收方式,可以从https://github.com/spring-projects/spring-amqp-samples这边去下载例子。
首先,新建一个配置文件类,该类以@Configuration标注,说明它是一个配置文件类,相当于替代.xml文件以annotation的形式管理bean.如下所示。
package org.springframework.amqp.helloworld;

import org.springframework.amqp.core.AmqpAdmin;

import org.springframework.amqp.core.Queue;

import org.springframework.amqp.rabbit.connection.CachingConnectionFactory;

import org.springframework.amqp.rabbit.connection.ConnectionFactory;

import org.springframework.amqp.rabbit.core.RabbitAdmin;

import org.springframework.amqp.rabbit.core.RabbitTemplate;

import org.springframework.context.annotation.Bean;

import org.springframework.context.annotation.Configuration;

@Configuration

public class HelloWorldConfiguration {

    protected final String helloWorldQueueName = "hello.world.queue";

    @Bean

    public ConnectionFactory connectionFactory() {

        CachingConnectionFactory connectionFactory = new CachingConnectionFactory("192.168.1.195");

        connectionFactory.setPort(5672);

        connectionFactory.setUsername("xdx");

        connectionFactory.setPassword("xxxxx");

        return connectionFactory;

    }

    @Bean

    public AmqpAdmin amqpAdmin() {

        return new RabbitAdmin(connectionFactory());

    }

    @Bean

    public RabbitTemplate rabbitTemplate() {

        RabbitTemplate template = new RabbitTemplate(connectionFactory());

        //The routing key is set to the name of the queue by the broker for the default exchange.

        template.setRoutingKey(this.helloWorldQueueName);

        //Where we will synchronously receive messages from

        template.setQueue(this.helloWorldQueueName);

        return template;

    }

    @Bean

    // Every queue is bound to the default direct exchange

    public Queue helloWorldQueue() {

        return new Queue(this.helloWorldQueueName);

    }

    /*

    @Bean

    public Binding binding() {

        return declare(new Binding(helloWorldQueue(), defaultDirectExchange()));

    }*/

    /*

    @Bean

    public TopicExchange helloExchange() {

        return declare(new TopicExchange("hello.world.exchange"));

    }*/

    /*

    public Queue declareUniqueQueue(String namePrefix) {

        Queue queue = new Queue(namePrefix + "-" + UUID.randomUUID());

        rabbitAdminTemplate().declareQueue(queue);

        return queue;

    }

    // if the default exchange isn't configured to your liking....

    @Bean Binding declareP2PBinding(Queue queue, DirectExchange exchange) {

        return declare(new Binding(queue, exchange, queue.getName()));

    }

    @Bean Binding declarePubSubBinding(String queuePrefix, FanoutExchange exchange) {

        return declare(new Binding(declareUniqueQueue(queuePrefix), exchange));

    }

    @Bean Binding declarePubSubBinding(UniqueQueue uniqueQueue, TopicExchange exchange) {

        return declare(new Binding(uniqueQueue, exchange));

    }

    @Bean Binding declarePubSubBinding(String queuePrefix, TopicExchange exchange, String routingKey) {

        return declare(new Binding(declareUniqueQueue(queuePrefix), exchange, routingKey));

    }*/

}
该配置类会管理几个主要的bean,分别是ConnectionFactory,AmqpAdmin,RabbitTemplate,Queue,Binding,TopicExchange。这些类都是spring对rabbitMQ中的类的抽象和封装,以便用spring的方式来进行管理和操作这些组件。
RabbitTemplate:跟spring对许多其他工具的封装类似,Spring AMQP也提供了一个模板了,就是AmqpTemplate。这个模板在整个Spring AMQP中扮演了发送和接收消息等最主要的角色。并且,它的抽象层级比较高,可以把它理解成接口层的,即它不仅仅只是为RabbitMQ这种中间件提供的一个模板,还可以为其他类似的中间件所用。但是,目前而言,它还只有一个实现,那就是RabbitTemplate.
AmqpAdmin:用于管理Exchange,Queue,Binding这些对象。它的实现类是RabbitAdmin。
在上述配置文件中,我们实例化一个RabbitTemplate,并且使用template.setRoutingKey(this.helloWorldQueueName);规定了生产者的消息会到达的地方,此时Exchange为默认的,routekey为hello.world.queue。然后使用template.setQueue(this.helloWorldQueueName);规定了消费者从哪里(哪些queue)去取消息。
其实这个设定跟我们之前介绍的原生的RabbitMQ十分类似,只不过spring安排RabbitTemplate这个模板类对象替我们做了这些事情。
接下来,我们编写生产者的程序。
package org.springframework.amqp.helloworld;

import org.springframework.amqp.core.AmqpTemplate;

import org.springframework.context.ApplicationContext;

import org.springframework.context.annotation.AnnotationConfigApplicationContext;

public class Producer {

    public static void main(String[] args) {

        ApplicationContext context = new AnnotationConfigApplicationContext(HelloWorldConfiguration.class);

        AmqpTemplate amqpTemplate = context.getBean(AmqpTemplate.class);

        System.out.println("send"+amqpTemplate);

        amqpTemplate.convertAndSend("Hello World");

        System.out.println("Sent: Hello World");

    }

}
首先使用AnnotationConfigApplicationContext拿到HelloWorldConfiguration.class配置文件所代表的spring容器,然后通过context.getBean(AmqpTemplate.class)来获取RabbitTemplate对象,注意此处传入的参数是Bean的Type,根据面向接口编程的思想,取得的是AmqpTemplate对象而不是RabbitTemplate。然后调用amqpTemplate的convertAndSend方法,顾名思义,该方法先将传递进来的参数进行转换,将其他类型转换为Spring-AMQP中的Message类型,然后发送到template所默认的Exchange和Routekey(即上述配置的)。
最后,我们编写消费者实现类。
package org.springframework.amqp.helloworld;

import org.springframework.amqp.core.AmqpTemplate;

import org.springframework.context.ApplicationContext;

import org.springframework.context.annotation.AnnotationConfigApplicationContext;

public class Consumer {

    public static void main(String[] args) {

        ApplicationContext context = new AnnotationConfigApplicationContext(HelloWorldConfiguration.class);

        AmqpTemplate amqpTemplate = context.getBean(AmqpTemplate.class);

        System.out.println("consumer"+amqpTemplate);

        System.out.println("Received: " + amqpTemplate.receiveAndConvert());

    }

}
消费者与生产者共用一个AmqpTemplate,所以我们在AmqpTemplate的配置文件中指定了routeKey和queue。然后我们调用了与生产者对应的镜像方法receiveAndConvert,先接收到消息,再将消息转换成普通的类型。
以上便是一个简单的spring-amqp的同步的helloworld例子。分别运行生产者和消费者,可得到与原生RabbitMQ一样的结果。
2.Hello World异步接收消息例子
上述例子为同步接收消息的例子,同步接收消息是一种轮询的机制,消息接收器必须一直轮询看消息池子即队列中(queue)看有无消息,而异步接收消息则更为智能,消息接收器用一个监听器,监听器监听到消息,再通知给消费者,让他去处理。关于同步与异步的对比,可以查看这篇文章。(转)同步与异步,阻塞与非阻塞
在开始介绍这个例子之前,需要先了解以下几个组件。
Message Listener:在异步消息接收机制中,一个很重要的组件被引入了,它就是message Listener,它是一个消息消费回调的容器,什么是回调。请看这篇文章。(转)理解回调函数,简答来说,回调就是给被调用者一个让它再调用的入口,这样当事件触发的时候,被调用者调用这个入口就可以了。这在异步通信中很常使用。Message Listener是所有消息监听器的接口类,他只有一个方法,void onMessage(Message message);
MessageListenerAdapter:如果你想让消息传递API和程序业务逻辑之间更好的分离,可以使用MessageListenerAdapter这个类,它被广泛的应用在Message-driven POJO(消息驱动pojo)。要实例化一个MessageListenerAdapter,你只需要传入一个被该MessageListenerAdapter实例调用的委托对象(delegate)。然后该监听器就可以调用该委托对象的方法了(这就是一个回调函数)。默认被调用的方法名是handleMessage。当然你可以指定特定的方法。如下所示。
MessageListenerAdapter listener = new MessageListenerAdapter(somePojo);

listener.setDefaultListenerMethod("myMethod");
这样,当有消息到来的时候,监听器监听到消息到来,就可以回调委托对象中的函数了。
在这里,我们将主应用程序理解为调用者,而监听器理解为被调用者,somePojo理解为回调对象,myMethod理解为回调函数。主应用程序先生成了一个监听器对象,用于监听消息,在调用监听器的时候,在它内部放了一个回调函数,这样当监听器监听到有消息的时候,就会去调用这个回调函数替主应用程序做它想做的事情。
Container:Container可以视作为Queue和Listener之间的桥梁,主要用它来管理监听器的生命周期,并且定义监听器去监听哪些Queue中的消息。它的一个实现类是SimpleMessageListenerContainer。
铺垫许久,现在来看异步监听消息的例子吧。
1.首先,写委托类的代码,也就是回调函数的代码。这是一个pojo,唯一需要注意的是,它的方法名称为handleMessage。
package org.springframework.amqp.helloworld.async;

public class HelloWorldHandler {

    //注意,默认监听器调用的回调函数名字就是handleMessage

    public void handleMessage(String text) {

        System.out.println("Received: " + text);

    }

}
2.生产者配置程序
package org.springframework.amqp.helloworld.async;

import java.util.concurrent.atomic.AtomicInteger;

import org.springframework.amqp.rabbit.connection.CachingConnectionFactory;

import org.springframework.amqp.rabbit.connection.ConnectionFactory;

import org.springframework.amqp.rabbit.core.RabbitTemplate;

import org.springframework.beans.factory.annotation.Autowired;

import org.springframework.beans.factory.config.BeanPostProcessor;

import org.springframework.context.annotation.Bean;

import org.springframework.context.annotation.Configuration;

import org.springframework.scheduling.annotation.Scheduled;

import org.springframework.scheduling.annotation.ScheduledAnnotationBeanPostProcessor;

@Configuration

public class ProducerConfiguration {

    protected final String helloWorldQueueName = "hello.world.queue";

    @Bean

    public RabbitTemplate rabbitTemplate() {

        RabbitTemplate template = new RabbitTemplate(connectionFactory());

        template.setRoutingKey(this.helloWorldQueueName);

        System.out.println("sender:"+template);

        return template;

    }

    @Bean

    public ConnectionFactory connectionFactory() {

        CachingConnectionFactory connectionFactory = new CachingConnectionFactory("192.168.1.195");

        connectionFactory.setPort(5672);

        connectionFactory.setUsername("xdx");

        connectionFactory.setPassword("xxxxx");

        return connectionFactory;

    }

    @Bean

    public ScheduledProducer scheduledProducer() {

        return new ScheduledProducer();

    }

    @Bean

    public BeanPostProcessor postProcessor() {

        return new ScheduledAnnotationBeanPostProcessor();

    }

    static class ScheduledProducer {

        @Autowired

        private volatile RabbitTemplate rabbitTemplate;

        private final AtomicInteger counter = new AtomicInteger();

        @Scheduled(fixedRate = 3000)

        public void sendMessage() {

            rabbitTemplate.convertAndSend("Hello World " + counter.incrementAndGet());

        }

    }

}
值得注意的是,这边使用spring的任务管理器实现一个功能,就是每隔3秒钟发一条消息,具体如何实现我们无需关心,因为这不是重点。连续发消息只是为了更加明显的验证这边的消费者是一个消息驱动的消费者(message-driven consumer)。
3.消费者配置程序
package org.springframework.amqp.helloworld.async;

import org.springframework.amqp.helloworld.HelloWorldConfiguration;

import org.springframework.amqp.rabbit.listener.SimpleMessageListenerContainer;

import org.springframework.amqp.rabbit.listener.adapter.MessageListenerAdapter;

import org.springframework.context.annotation.Bean;

import org.springframework.context.annotation.Configuration;

@Configuration

public class ConsumerConfiguration extends HelloWorldConfiguration {

    @Bean

    public SimpleMessageListenerContainer listenerContainer() {

        SimpleMessageListenerContainer container = new SimpleMessageListenerContainer();

        container.setConnectionFactory(connectionFactory());

        container.setQueueNames(this.helloWorldQueueName);

        container.setMessageListener(new MessageListenerAdapter(new HelloWorldHandler()));

        return container;

    }

}
消费者配置程序首先继承自HelloWorldConfiguration,所以他拥有RabbitTemplate、connectionFactory等bean,接着,它定义一个SimpleMessageListenerContainer对象,并且注入connectionFactory和Queue,然后注入一个监听器,这个监听器的委托对象就是我们刚才建立的HelloWorldHandler对象,回调函数即为HelloWorldHandler。
接下来看看生产者程序和消费者程序。
package org.springframework.amqp.helloworld.async;

import org.springframework.context.annotation.AnnotationConfigApplicationContext;

public class Producer {

    public static void main(String[] args) throws Exception {

        new AnnotationConfigApplicationContext(ProducerConfiguration.class);

    }

}
package org.springframework.amqp.helloworld.async;

import org.springframework.context.annotation.AnnotationConfigApplicationContext;

public class Consumer {

    public static void main(String[] args) {

        new AnnotationConfigApplicationContext(ConsumerConfiguration.class);

    }

}
可以看到除了载入配置文件生成spring容器之外,并未做其他事情,这是因为生产者的@Scheduled标注的方法会自动执行,而消费者中的SimpleMessageListenerContainer也是一个跟spring容易有相同生命周期的组件,它默认也会自动执行。
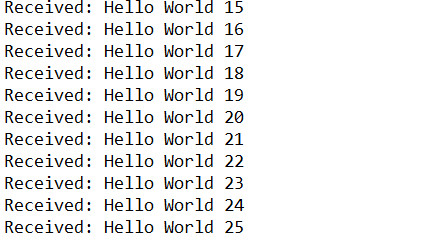
运行这两个main函数,可以看到消费者的控制台每隔3s打印一条信息。
六.Spring与RabbitMQ集成--HelloWorld的更多相关文章
- 五.Spring与RabbitMQ集成--HelloWorld
spring对RabbitMQ做了很好的集成,我们称之为spring AMQP,其官方文档写得十分详尽,文档地址:https://docs.spring.io/spring-amqp/referenc ...
- 六.Spring与RabbitMQ集成--stock trading(股票交易系统)
周末继续写博客,算起来,关于rabbitMQ这个中间件的研究已经持续至两个星期了,上一篇文章使用sring amqp实现了同步和异步的消息接收功能.这一节继续实用spring amqp实现一个股票交易 ...
- spring boot Rabbitmq集成,延时消息队列实现
本篇主要记录Spring boot 集成Rabbitmq,分为两部分, 第一部分为创建普通消息队列, 第二部分为延时消息队列实现: spring boot提供对mq消息队列支持amqp相关包,引入即可 ...
- 基于XML配置的Spring MVC 简单的HelloWorld实例应用
1.1 问题 使用Spring Web MVC构建helloworld Web应用案例. 1.2 方案 解决本案例的方案如下: 1. 创建Web工程,导入Spring Web MVC相关开发包. Sp ...
- 从头开始搭建一个Spring boot+RabbitMQ环境
*:first-child { margin-top: 0 !important; } body>*:last-child { margin-bottom: 0 !important; } /* ...
- java web项目(spring项目)中集成webservice ,实现对外开放接口
什么是WebService?webService小示例 点此了解 下面进入正题: Javaweb项目(spring项目)中集成webservice ,实现对外开放接口步骤: 准备: 采用与spring ...
- java基础(六):RabbitMQ 入门
建议先了解为什么项目要使用 MQ 消息队列,MQ 消息队列有什么优点,如果在业务逻辑上没有此种需求,建议不要使用中间件.中间件对系统的性能做优化的同时,同时增加了系统的复杂性也维护难易度:其次,需要了 ...
- RabbitMQ学习总结(7)——Spring整合RabbitMQ实例
1.RabbitMQ简介 RabbitMQ是流行的开源消息队列系统,用erlang语言开发.RabbitMQ是AMQP(高级消息队列协议)的标准实现. 官网:http://www.rabbitmq. ...
- Spring boot+RabbitMQ环境
Spring boot+RabbitMQ环境 消息队列在目前分布式系统下具备非常重要的地位,如下的场景是比较适合消息队列的: 跨系统的调用,异步性质的调用最佳. 高并发问题,利用队列串行特点. 订阅模 ...
随机推荐
- db连接驱动
1.oracle 驱动jar包-->ojdbc6.jar 驱动类-->oracle.jdbc.driver.OracleDriver 驱动连接--> 第一种:jdbc:oracle: ...
- BBS-基于forms组件和ajax实现注册功能
http://www.cnblogs.com/yuanchenqi/articles/7638956.html 1.设计注册页面 views.py from django import forms c ...
- UI5-学习篇-6-SAP创建OData服务-RFC
1.创建项目 2.Import RFC接口 3.定义实体名 目标服务器:若连接外部服务器则需SM59配置Destination 选择RFC函数名 4.选择数据源参数 5.设置主键值 6.保存成功 7. ...
- es6初级之箭头函数实现隔行变色
无论是使用哪种方式实现隔行变色的效果,它的思路都是一样的: 1.定义很多个div 2.给div 加背景 3.鼠标移动到div上时,当前div 背景变色 4.鼠标移出div时,当前div背景恢复 以上4 ...
- c中计时函数 clock()
#include<time.h> int main() { // ... .. // .... printf("Time used = %.2lf\n",(double ...
- ACM__搜素之BFS与DFS
BFS(Breadth_First_Search) DFS(Depth_First_Search) 拿图来说 BFS过程,以1为根节点,1与2,3相连,找到了2,3,继续搜2,2与4,相连,找到了4, ...
- Raft 为什么是更易理解的分布式一致性算法(转)
一致性问题可以算是分布式领域的一个圣殿级问题了,关于它的研究可以回溯到几十年前. 拜占庭将军问题 Leslie Lamport 在三十多年前发表的论文<拜占庭将军问题>(参考[1]). 拜 ...
- Linux命令:chown
Linux命令:chmod https://baijiahao.baidu.com/s?id=1616750933810368135&wfr=spider&for=pc chmod - ...
- python技巧 显示对象的所有属性
python技巧 显示对象的所有属性for attr in dir(ad):... print attr+":"+str(getattr(ad,attr))
- 联想电脑 Wifi开关开不了
"VirtualBox Host-Only Network" 没有有效的IP配置 未修复 自己电脑显示 控制面板>网络和Internet>网络连接 VirtualBo ...