PullToRefresh下拉刷新 加载更多 详解 +示例
常用设置
项目地址:https://github.com/chrisbanes/Android-PullToRefresh
a. 设置刷新模式
- 如果Mode设置成Mode.PULL_FROM_START或Mode.PULL_FROM_END,可以设置Listener为OnRefreshListener,并实现onRefresh()方法;当然此时也可以设置Listener为OnRefreshListener2,但是Mode设置成Mode.PULL_FROM_START的时候只调用onPullDownToRefresh()方法,Mode设置成Mode.PULL_FROM_END的时候只调用onPullUpToRefresh()方法,另一个方法是不会调用的。
- 如果Mode设置成Mode.BOTH,需要设置Listener为OnRefreshListener2,并同时实现onPullDownToRefresh()、onPullUpToRefresh()两个回调方法,分别代表下拉、上拉时的操作;如果想上拉、下拉的时候做一样的操作,也可以设置Listener为OnRefreshListener,这样上拉下拉的时候都会调用onRefresh方法。
b. 设置上拉下拉中的提示文字内容ILoadingLayout startLabels = pullToRefresh.getLoadingLayoutProxy(true, false);
- startLabels.setPullLabel("下拉刷新...");// 刚开始下拉时显示的提示
- startLabels.setRefreshingLabel("正在载入...");// 正在刷新时显示的提示
- startLabels.setReleaseLabel("放开刷新...");// 下来达到一定距离时显示的提示
ILoadingLayout endLabels = pullToRefresh.getLoadingLayoutProxy( false, true);
- endLabels.setPullLabel("上拉刷新...");// 刚开始上拉时显示的提示
- endLabels.setRefreshingLabel("正在载入...");// 正在刷新时
- endLabels.setReleaseLabel("放开刷新...");// 下拉达到一定距离时
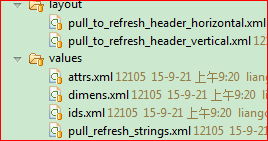
c. 设置上拉下拉中文字的样式如果想要改动图标和文字的距离和布局,在这library项目下pull_to_refresh_header_horizontal.xml和pull_to_refresh_header_vertical.xml这两个文件中更改d. 设置相关监听
- setOnRefreshListener(OnRefreshListener listener) 设置刷新监听器;
- setOnLastItemVisibleListener(OnLastItemVisibleListener listener) 设置是否到底部监听器,当用户拉到底时调用
- setOnPullEventListener(OnPullEventListener listener) 设置事件监听器;
- onRefreshComplete() 设置刷新完成监听器
- setOnScrollListener() 设置滚动监听器
- SCROLL_STATE_TOUCH_SCROLL 正在滚动
- SCROLL_STATE_FLING 手指做了抛的动作(手指离开屏幕前,用力滑了一下)
- SCROLL_STATE_IDLE 停止滚动
- 传统的setOnClickListener和setOnTouchListener
自定义的属性
<?xml version="1.0" encoding="utf-8"?>
<resources><declare-styleable name="PullToRefresh"><!-- listview的背景色,不要设置 A drawable to use as the background of the Refreshable View --><attr name="ptrRefreshableViewBackground" format="reference|color" /><!-- 刷新布局的头、尾背景颜色 A drawable to use as the background of the Header and Footer Loading Views --><attr name="ptrHeaderBackground" format="reference|color" /><!-- 头、尾文字颜色Text Color of the Header and Footer Loading Views --><attr name="ptrHeaderTextColor" format="reference|color" /><!-- 头、尾副文字如时间的颜色Text Color of the Header and Footer Loading Views Sub Header --><attr name="ptrHeaderSubTextColor" format="reference|color" /><!-- 刷新模式,manualOnly为只允许手动触发 Mode of Pull-to-Refresh that should be used --><attr name="ptrMode"><flag name="disabled" value="0x0" /><flag name="pullFromStart" value="0x1" /><flag name="pullFromEnd" value="0x2" /><flag name="both" value="0x3" /><flag name="manualOnly" value="0x4" /><!--废弃的 These last two are depreacted --><flag name="pullDownFromTop" value="0x1" /><flag name="pullUpFromBottom" value="0x2" /></attr><!-- 在listview滑动到底部或顶部时,是否显示拖动刷新提示图标 Whether the Indicator overlay(s) should be used --><attr name="ptrShowIndicator" format="reference|boolean" /><!-- 设置刷新时的图标 Drawable to use as Loading Indicator. Changes both Header and Footer. --><attr name="ptrDrawable" format="reference" /><!-- 刚开始下拉时的图片 Drawable to use as Loading Indicator in the Header View. Overrides value set in ptrDrawable. --><attr name="ptrDrawableStart" format="reference" /><!--刚开始上拉时的图片 Drawable to use as Loading Indicator in the Footer View. Overrides value set in ptrDrawable. --><attr name="ptrDrawableEnd" format="reference" /><!--是否使用安卓内部的滚动 Whether Android's built-in Over Scroll should be utilised for Pull-to-Refresh. --><attr name="ptrOverScroll" format="reference|boolean" /><!-- Base text color, typeface, size, and style for Header and Footer Loading Views --><attr name="ptrHeaderTextAppearance" format="reference" /><!-- Base text color, typeface, size, and style for Header and Footer Loading Views Sub Header --><attr name="ptrSubHeaderTextAppearance" format="reference" /><!-- 动画模式 Style of Animation should be used displayed when pulling. --><attr name="ptrAnimationStyle"><flag name="rotate" value="0x0" /><flag name="flip" value="0x1" /></attr><!-- 刷新时是否允许拖动 Whether the user can scroll while the View is Refreshing --><attr name="ptrScrollingWhileRefreshingEnabled" format="reference|boolean" /><!-- Whether PullToRefreshListView has it's extras enabled. This allows the user to beable to scroll while refreshing, and behaves better. It acheives this by addingHeader and/or Footer Views to the ListView. --><attr name="ptrListViewExtrasEnabled" format="reference|boolean" /><!--下拉时图片是否继续旋转 Whether the Drawable should be continually rotated as you pull. This onlytakes effect when using the 'Rotate' Animation Style. --><attr name="ptrRotateDrawableWhilePulling" format="reference|boolean" /><!--废弃了,不要使用 BELOW HERE ARE DEPRECEATED. DO NOT USE. --><attr name="ptrAdapterViewBackground" format="reference|color" /><attr name="ptrDrawableTop" format="reference" /><attr name="ptrDrawableBottom" format="reference" /></declare-styleable></resources>
库中的原始布局
pull_to_refresh_header_vertical.xml
<?xml version="1.0" encoding="utf-8"?>
<merge xmlns:android="http://schemas.android.com/apk/res/android" ><FrameLayoutandroid:id="@+id/fl_inner"android:layout_width="fill_parent"android:layout_height="wrap_content"android:paddingBottom="@dimen/header_footer_top_bottom_padding"android:paddingLeft="@dimen/header_footer_left_right_padding"android:paddingRight="@dimen/header_footer_left_right_padding"android:paddingTop="@dimen/header_footer_top_bottom_padding" ><FrameLayoutandroid:layout_width="wrap_content"android:layout_height="wrap_content"android:layout_gravity="left|center_vertical" ><ImageViewandroid:id="@+id/pull_to_refresh_image"android:layout_width="wrap_content"android:layout_height="wrap_content"android:layout_gravity="center" /><ProgressBarandroid:id="@+id/pull_to_refresh_progress"style="?android:attr/progressBarStyleSmall"android:layout_width="wrap_content"android:layout_height="wrap_content"android:layout_gravity="center"android:indeterminate="true"android:visibility="visible" /></FrameLayout><LinearLayoutandroid:layout_width="wrap_content"android:layout_height="wrap_content"android:layout_gravity="center"android:gravity="center_horizontal"android:orientation="vertical" ><TextViewandroid:id="@+id/pull_to_refresh_text"android:layout_width="wrap_content"android:layout_height="wrap_content"android:singleLine="true"android:text="我是描述信息"android:textAppearance="?android:attr/textAppearance"android:textStyle="bold" /><TextViewandroid:id="@+id/pull_to_refresh_sub_text"android:layout_width="wrap_content"android:layout_height="wrap_content"android:singleLine="true"android:text="我是默认隐藏的描述信息,如显示时间"android:textAppearance="?android:attr/textAppearanceSmall"android:visibility="visible" /></LinearLayout></FrameLayout></merge>
演示示例-ListView-布局
activity_main.xml
<RelativeLayout xmlns:android="http://schemas.android.com/apk/res/android"xmlns:tools="http://schemas.android.com/tools"android:layout_width="match_parent"android:layout_height="match_parent" ><com.handmark.pulltorefresh.library.PullToRefreshListViewxmlns:ptr="http://schemas.android.com/apk/res-auto"android:id="@+id/pull_refresh_list"android:layout_width="fill_parent"android:layout_height="fill_parent"android:cacheColorHint="#00000000"android:divider="#19000000"android:dividerHeight="4dp"android:fadingEdge="none"android:fastScrollEnabled="false"android:footerDividersEnabled="false"android:headerDividersEnabled="false"android:smoothScrollbar="true"ptr:ptrAnimationStyle="flip"ptr:ptrListViewExtrasEnabled="false"ptr:ptrMode="both"ptr:ptrScrollingWhileRefreshingEnabled="true" /></RelativeLayout>
演示示例-ListView-代码
public class PullToRefreshListActivity extends Activity {
private LinkedList<String> mListItems;private PullToRefreshListView mPullRefreshListView;private ArrayAdapter<String> mAdapter;private int mItemCount = 20;@Overrideprotected void onCreate(Bundle savedInstanceState) {super.onCreate(savedInstanceState);setContentView(R.layout.activity_main);mPullRefreshListView = (PullToRefreshListView) findViewById(R.id.pull_refresh_list);mPullRefreshListView.setMode(Mode.BOTH);initDatas();mAdapter = new ArrayAdapter<String>(this, android.R.layout.simple_list_item_1, mListItems);mPullRefreshListView.setAdapter(mAdapter);mPullRefreshListView.setOnRefreshListener(new OnRefreshListener2<ListView>() {@Overridepublic void onPullDownToRefresh(PullToRefreshBase<ListView> refreshView) {//这里写下拉刷新的任务new GetDataTask().execute();}@Overridepublic void onPullUpToRefresh(PullToRefreshBase<ListView> refreshView) {//这里写上拉加载更多的任务new GetDataTask().execute();}});}private void initDatas() {mListItems = new LinkedList<String>();for (int i = 0; i < mItemCount; i++) {mListItems.add("包青天 " + i);}}private class GetDataTask extends AsyncTask<Void, Void, String> {@Overrideprotected String doInBackground(Void... params) {SystemClock.sleep(1000);return "包青天-新 " + (mItemCount++);}@Overrideprotected void onPostExecute(String result) {mListItems.add(result);mAdapter.notifyDataSetChanged();mPullRefreshListView.onRefreshComplete();//要先调用mPullToRefreshListView.getRefreshableView()获取真正的listview后才能使用某些listview的APImPullRefreshListView.getRefreshableView().setSelection(mItemCount);}}}
演示示例-GridView-布局
activity_ptr_grid.xml
<?xml version="1.0" encoding="utf-8"?><LinearLayout xmlns:android="http://schemas.android.com/apk/res/android"android:layout_width="fill_parent"android:layout_height="fill_parent"android:orientation="vertical" ><!--通过horizontalSpacing设置列间距无效,实际会根据屏幕宽度和item的宽度自动得出间距宽度设置为"wrap_content"时是match_parent的效果,可以通过padding和background观察到这种效果高度必须设为"match_parent",否则增加item时高度不会自动增大android:numColumns="auto_fit" 将根据columnWidth和Spacing来自动计算,但是非常不好用columnWidth:将剩余空间分摊给列;SpacingWidth:将剩余空间分摊给间隔空隙--><com.handmark.pulltorefresh.library.PullToRefreshGridViewxmlns:ptr="http://schemas.android.com/apk/res-auto"android:id="@+id/pull_refresh_grid"android:layout_width="wrap_content"android:layout_height="match_parent"android:background="#B4EEB4"android:gravity="center_horizontal"android:horizontalSpacing="1dp"android:numColumns="4"android:padding="5dp"android:scrollbars="none"android:stretchMode="columnWidth"android:verticalSpacing="1dp"ptr:ptrAnimationStyle="flip"ptr:ptrDrawableStart="@drawable/ic_launcher"ptr:ptrHeaderBackground="#B2DFEE"ptr:ptrHeaderSubTextColor="#ff0000"ptr:ptrHeaderTextColor="#0000ff"ptr:ptrListViewExtrasEnabled="false"ptr:ptrMode="both"ptr:ptrRefreshableViewBackground="#f00"ptr:ptrScrollingWhileRefreshingEnabled="false"ptr:ptrShowIndicator="true" /></LinearLayout>
grid_item.xml<?xml version="1.0" encoding="utf-8"?><TextView xmlns:android="http://schemas.android.com/apk/res/android"android:id="@+id/id_grid_item_text"android:layout_width="80dp"android:layout_height="80dp"android:background="#FFE4E1"android:gravity="center"android:textColor="#000"android:textSize="15sp" />
演示示例-GridView-代码
public class PullToRefreshGridActivity extends Activity {
private LinkedList<String> mListItems;private PullToRefreshGridView mPullRefreshListView;private ArrayAdapter<String> mAdapter;private int mItemCount = 30;@Overrideprotected void onCreate(Bundle savedInstanceState) {super.onCreate(savedInstanceState);setContentView(R.layout.activity_ptr_grid);mPullRefreshListView = (PullToRefreshGridView) findViewById(R.id.pull_refresh_grid);initDatas();initIndicator();mAdapter = new ArrayAdapter<String>(this, R.layout.grid_item, R.id.id_grid_item_text, mListItems);mPullRefreshListView.setAdapter(mAdapter);mPullRefreshListView.setOnRefreshListener(new MyOnRefreshListener());}private void initDatas() {mListItems = new LinkedList<String>();for (int i = 0; i < mItemCount; i++) {mListItems.add(i + "");}}private void initIndicator() {ILoadingLayout startLabels = mPullRefreshListView.getLoadingLayoutProxy(true, false);startLabels.setPullLabel("你可劲拉,拉...");// 刚下拉时,显示的提示startLabels.setRefreshingLabel("好嘞,正在刷新...");// 刷新时startLabels.setReleaseLabel("你敢放,我就敢刷新...");// 下来达到一定距离时,显示的提示ILoadingLayout endLabels = mPullRefreshListView.getLoadingLayoutProxy(false, true);endLabels.setPullLabel("你可劲拉,拉2...");// 刚下拉时,显示的提示endLabels.setRefreshingLabel("好嘞,正在刷新2...");// 刷新时endLabels.setReleaseLabel("你敢放,我就敢刷新2...");// 下来达到一定距离时,显示的提示}private class MyOnRefreshListener implements OnRefreshListener2<GridView> {@Overridepublic void onPullDownToRefresh(PullToRefreshBase<GridView> refreshView) {//下拉时更新时间SimpleDateFormat mSimpleDateFormat = new SimpleDateFormat("yyyy-MM-dd E aHH:mm:ss");String label = mSimpleDateFormat.format(new Date());refreshView.getLoadingLayoutProxy().setLastUpdatedLabel(label);new GetDataTask().execute();}@Overridepublic void onPullUpToRefresh(PullToRefreshBase<GridView> refreshView) {//上拉时不更新new GetDataTask().execute();}}private class GetDataTask extends AsyncTask<Void, Void, Void> {@Overrideprotected Void doInBackground(Void... params) {SystemClock.sleep(1000);//休息1秒,伪造正在刷新的样子return null;}@Overrideprotected void onPostExecute(Void result) {mListItems.add("新增 " + mItemCount++);//添加一条数据mAdapter.notifyDataSetChanged();//更新数据mPullRefreshListView.onRefreshComplete();//刷新完毕}}}
PullToRefresh下拉刷新 加载更多 详解 +示例的更多相关文章
- Android UI--自定义ListView(实现下拉刷新+加载更多)
Android UI--自定义ListView(实现下拉刷新+加载更多) 关于实现ListView下拉刷新和加载更多的实现,我想网上一搜就一堆.不过我就没发现比较实用的,要不就是实现起来太复杂,要不就 ...
- Android Demo 下拉刷新+加载更多+滑动删除
小伙伴们在逛淘宝或者是各种app上,都可以看到这样的功能,下拉刷新和加载更多以及滑动删除,刷新,指刷洗之后使之变新,比喻突破旧的而创造出新的,比如在手机上浏览新闻的时候,使用下拉刷新的功能,我们可以第 ...
- 分页插件思想:pc加载更多功能和移动端下拉刷新加载数据
感觉一个人玩lol也没意思了,玩会手机,看到这个下拉刷新功能就写了这个demo! 这个demo写的比较随意,咱不能当做插件使用,基本思想是没问题的,要用就自己封装吧! 直接上代码分析下吧! 布局: & ...
- Android之RecyclerView轻松实现下拉刷新和加载更多
今天研究了下RecyclerView的滑动事件,特别是下拉刷新和加载更多事件,在现在几乎所有的APP显示数据列表时都用到了.自定义RecyclerView下拉刷新和加载更多听上去很复杂,实际上并不难, ...
- RecyclerView的下拉刷新和加载更多 动画
下拉刷新和加载更多 1.https://github.com/jianghejie/XRecyclerView 2.http://blog.csdn.net/jabony/article/detail ...
- XListView下拉刷新和上拉加载更多详解
转载本专栏每一篇博客请注明转载出处地址,尊重原创.博客链接地址:小杨的博客 http://blog.csdn.net/qq_32059827/article/details/53167655 市面上有 ...
- Android智能下拉刷新加载框架—看这些就够了
一些值得学习的几个下拉刷新上拉加载开源库 Android智能下拉刷新框架-SmartRefreshLayout 支持所有的 View(AbsListView.RecyclerView.WebView. ...
- iOS 下拉刷新和加载更多 (OC\Swift)
Swift语言出来之后, 可能还没有第三方的下拉刷新和上提加载, 所以自己用UIRefreshControl控件和UITableView实例的tableFooterView(底部视图)属性结合起来写了 ...
- 自己封装的工具类,使用原生SwipeRefreshLayout+RecycleView实现下拉刷新和加载更多
实现SwipeRefreshLayout+RecycleView实现刷新 在你的xml文件里写上如下代码: <android.support.v4.widget.SwipeRefreshLayo ...
随机推荐
- 【USACO 1.3.1】混合牛奶
[题目描述] 由于乳制品产业利润很低,所以降低原材料(牛奶)价格就变得十分重要.帮助梅丽乳业找到最优的牛奶采购方案. 梅丽乳业从一些奶农手中采购牛奶,并且每一位奶农为乳制品加工企业提供的价格是不同的. ...
- CSS3重要内容翻译
以上是废话 1.3 此处未完全确认,相较于css3和css3的选择器,区别包括: 基础定义改变(选择器.选择器组,简单选择器等),特别的,作为css2中简单选择器,如今被成为简单选择器序列,“简 ...
- Android学习----五大布局
1.LinearLayout 线性布局 android:orientation="horizontal" 制定线性布局的排列方式 水平 horizontal 垂直 vertical ...
- WebService cxf 接口中获得拦截器参数
1. 拦截器中put属性 Message message = PhaseInterceptorChain.getCurrentMessage(); message.put("AuthCode ...
- PHP程序异常处理实现方法
一个异常(Exception)则是在一个程序执行过程中出现一个例外或是一个事件,它中断了指令的运行,跳转到其他程序模块继续执行.所以异常处理经常被当作程序的控制流程使用.无论是错误还是异常,应用程序都 ...
- centos+nginx+uwsgi+virtualenv+flask 多站点环境搭建
环境: centos x64 6.6 nginx 1.6.2 python 2.7.9 uwsgi 2.0.9 virtualenv 12.0.5 flask 0.10.1 正文: 1.安装nginx ...
- DCI
理论: 某个data,在一个特定的场景中,以某个角色role,来与该场景中的其他角色进行交互.这个过程要以代码的方式表达出来,他要求data本身不具备交互行为, 有交互行为的是角色,当一个data没有 ...
- Caffe Python特征抽取
Caffe Python特征抽取 转载 http://www.cnblogs.com/louyihang-loves-baiyan/ Caffe大家一般用到的深度学习平台都是这个,关于Caffe的训练 ...
- Installshield更新时,新加dll未拷贝至安装目录问题完美解决【原创】
最近在发现在开发过程中新增的目录或文件(特别是dll\ocx\exe等二进制文件),在升级安装时拷贝失败. 经过一周的研究,完美解决办法: 对于新增的文件或目录,放到一个新的component中,并且 ...
- Java进阶代码
本文重在温习……不过初学以及进阶高手不可错过 1. public static void arraycopy(全小写)(object src,int srcPos,object dest,int d ...


