Centos 7.6搭建LNMP环境的web服务器
一.安装软件
1.1.MYSQL安装
下载mysql的repo源:
wget http://repo.mysql.com/mysql-community-release-el7-5.noarch.rpm
安装mysql-community-release-el7-5.noarch.rpm包
rpm -ivh mysql-community-release-el7-.noarch.rpm
安装MYSQL
sudo yum install -y mysql-server
重启服务:
systemctl restart mysql 或

systemctl restart mysql.service
登录,并修改密码:
mysql -u root

mysql > use mysql;

mysql > update user set password=password(‘‘) where user=‘root‘;
mysql > grant all on *.* to admin@'%' identified by '123456' with grant option;
mysql > flush privileges;
mysql > exit;
修改yum源
下载对应当前系统版本的nginx包
rpm -Uvh https://dl.Fedoraproject.org/pub/epel/epel-release-latest-7.noarch.rpm

rpm -Uvh https://mirror.webtatic.com/yum/el7/webtatic-release.rpm
安装 Nginx、PHP
yum -y install nginxyum -y install php70w-devel php70w.x86_64 php70w-cli.x86_64 php70w-common.x86_64 php70w-gd.x86_64 php70w-ldap.x86_64 php70w-mbstring.x86_64 php70w-mcrypt.x86_64 php70w-pdo.x86_64 php70w-mysqlnd php70w-fpm php70w-opcache
php70w-pecl-redis php70w-pecl-mongo配置默认编码为 utf8:
vim /etc/my.cnf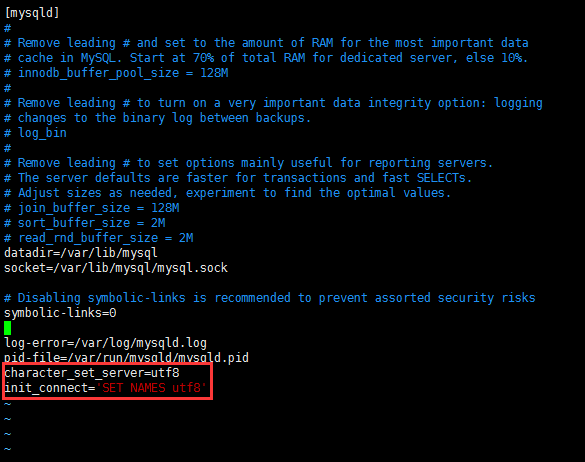
设置开机启动:
[root@localhost ~]# systemctl enable mysqld默认配置文件路径:
配置文件:/etc/my.cnf
日志文件:/var/log/mysqld.log
服务启动脚本:/usr/lib/systemd/system/mysqld.service
socket 文件:/var/run/mysqld/mysqld.pid
配置 Nginx
安装完成以后查看自己防火墙是否开启,如果已开启,我们需要修改防火墙配置,开启 Nginx 外网端口访问。
[root@localhost ~]# systemctl status firewalld
如果显示 active (running),则需要调整防火墙规则的配置。
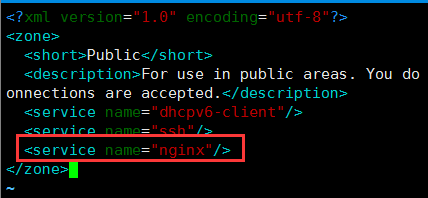
修改 /etc/firewalld/zones/public.xml文件,在zone一节中增加
保存后重新加载 firewalld 服务:
[root@localhost ~]# vim /etc/firewalld/zones/public.xml

<zone>

    ...

    <service name="nginx"/>

<zone>

[root@localhost ~]# systemctl reload firewalld
修改 Nginx 配置:
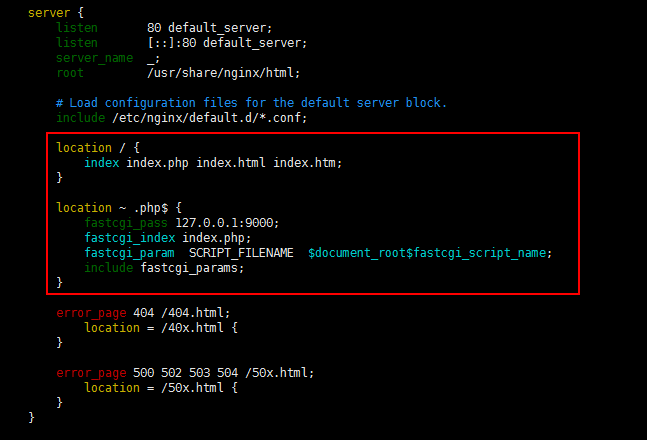
[root@localhost ~]# vim /etc/nginx/nginx.conf
location / {

    #定义首页索引文件的名称

    index index.php index.html index.htm;

}
# PHP 脚本请求全部转发到 FastCGI处理. 使用FastCGI默认配置.

location ~ .php$ {

    fastcgi_pass 127.0.0.1:9000;

    fastcgi_index index.php;

    fastcgi_param  SCRIPT_FILENAME  $document_root$fastcgi_script_name;

    include fastcgi_params;

}
配置完成重启 Nginx:
[root@localhost ~]# systemctl start nginx # 启动 Nginx
设置开机启动:
[root@localhost ~]# systemctl enable nginx
3、设置开机启动 php-fpm:
[root@localhost ~]# systemctl enable php-fpm

[root@localhost ~]# systemctl start php-fpm    # 启动 php-fpm
开启80端口:
iptables -I INPUT -p tcp -m state --state NEW -m tcp --dport 80 -j ACCEPT
四、测试
放入测试文件:
cd  /usr/share/nginx/html

echo '<?php phpinfo(); ?>' >info.php
在
/usr/share/nginx/html文件下创建php文件,输出phpinfo信息浏览器访问
http://<内网IP地址>/info.php,如果看到PHP信息,说明安装成
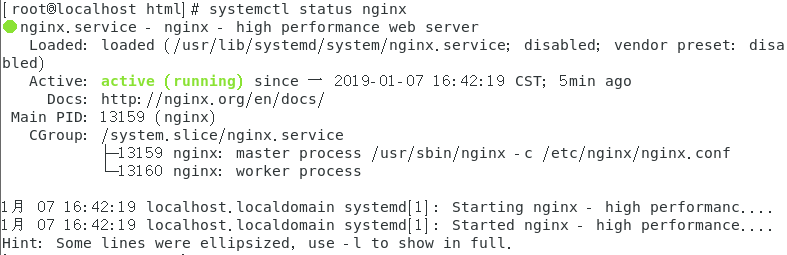
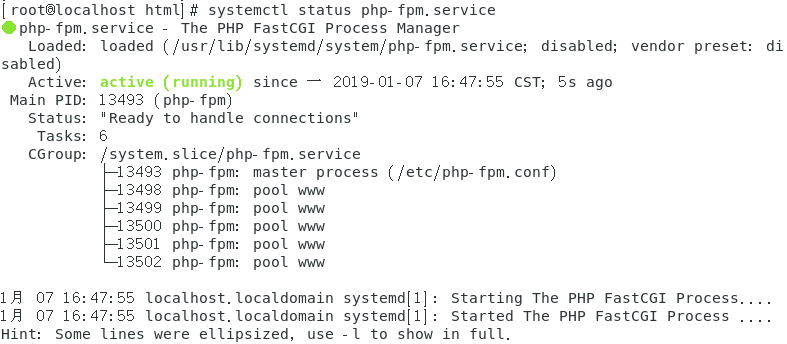
看启动状态:
systemctl status php-fpm.service
Centos 7.6搭建LNMP环境的web服务器的更多相关文章
- CentOS 7 上搭建LNMP环境
(转自美团云知识库Chris) 简介 LNMP是Linux.Nginx.MySQL(MariaDB)和PHP的缩写,这个组合是最常见的WEB服务器的运行环境之一.本文将带领大家在CentOS 7操作系 ...
- 烂泥:学习centos之快速搭建LNMP环境
本文由秀依林枫提供友情赞助,首发于烂泥行天下 以前在centos下安装软件都是喜欢源码安装,不过昨天因为一个事情需要一个centos 下的LNMP环境.反倒不会搞了,今天特意记录下,以备后续使用. 一 ...
- centos 6.5搭建LNMP环境
1:查看环境: 1 2 [root@10-4-14-168 html]# cat /etc/redhat-release CentOS release 6.5 (Final) 2:关掉防火墙 1 [r ...
- CentOS 6.6搭建LNMP环境
一.安装前 1.关闭linux的安全机制 vim /etc/selinux/config SELINUX=enforcing 改为 SELINUX=disabled 2.关闭iptables防火墙 ...
- 搭建LNMP环境(CentOS 6)
本文档介绍如何使用一台普通配置的云服务器ECS实例搭建LNMP平台的web环境. Linux:自由和开放源码的类UNIX操作系统. Nginx:轻量级网页服务器.反向代理服务器. MySQL:关系型数 ...
- Centos 7 下yum搭建lnmp环境(yum安装方式)
我们都知道linux下安装软件主要有三种方式: 1.源码编译安装,即下载软件源代码,利用gcc g++ make 等编译工具进行编译安装: 此方式的优点:可以指定软件版本,可选择性好:编译时可以手动指 ...
- CentOS 7 源码搭建LNMP环境
搭建 LNMP 环境 源码包版本 : CentOS Linux 7 nginx-1.15.1.tar.gz mysql-boost-5.7.21.tar.gz php-7.2.7.tar.gz ...
- docker搭建lnmp环境(问题,资料,命令)
入门参考 http://www.runoob.com/docker/docker-install-nginx.html 十大常用命令玩转docker 1. #从官网拉取镜像 docker pull & ...
- centos7 yum搭建lnmp环境及配置wordpress超详细教程
yum安装lnmp环境是最方便,最快捷的一种方法.源码编译安装需要花费大量的人类时间,当然源码编译可以个性化配置一些其它功能.目前来说,yum安装基本满足我们搭建web服务器的需求. 本文是我根据近期 ...
随机推荐
- window7 32位部署django
window7 32位安装环境,所有的软件都用32位的,如果你想要用64位的软件需要操作系统和下面的相关软件都换成64位,我是在虚拟机上装了win7 32版做的测试. 软件下载地址: python2. ...
- Linux时间戳转换成BCD码(转载)
#include <stdio.h> #include <stdlib.h> #include <time.h> #include <math.h> / ...
- 安装kylin的艰难历程
前言:暑假里老师布置的任务没有完成,来到学校后马不停蹄的安装kylin,结果一路艰难险阻,搞了快两个星期都没有弄好....现在止步于hive阶段卡死...仅将之前的步骤记录下来以便重新安装时更加顺利. ...
- day23_雷神_git
git 版本控制工具 下载: https://git-scm.com/ git clone: 是用来拉代码的,git pull是更新当前分支的代码,拿到最新的代码,git pull是获取已经存在的仓库 ...
- linux之配置Mongodb~
OK 让我们先下载一波mongodb~(64位ubuntu) curl -O https://fastdl.mongodb.org/linux/mongodb-linux-x86_64-3.0. ...
- 深入理解JVM(一)——基本原理
前言 JVM一直是java知识里面进阶阶段的重要部分,如果希望在java领域研究的更深入,则JVM则是如论如何也避开不了的话题,本系列试图通过简洁易读的方式,讲解JVM必要的知识点. 运行流程 我们都 ...
- react-native 项目初始化
react-native 项目初始化 搭建java,android,node环境 http://www.cnblogs.com/morang/p/react-native-java-build.htm ...
- Android JNI 学习(九):Static Fields Api & Static Methods Api
一.Accessing Static Fields(访问静态域) 1. GetStaticFieldID jfieldIDGetStaticFieldID(JNIEnv *env, jclass cl ...
- python写的压缩软件
import tkinterimport tkinter.filedialogimport osimport zipfileimport tkinter.messagebox #创建住窗口root = ...
- 前端切图神器-cutterman
之前我写过一篇关于前端切图的博客:https://www.cnblogs.com/tu-0718/p/9741058.html 但上面的方法在切图量大时依然很费时间,下面向大家推荐这款免费切图神器 c ...