虚拟机安装mysql踩坑记录
本章节主要讲解的是在虚拟机centOs7版本以上安装mysql5.6版本,亲测可以直接使用,有需要帮助的小伙伴可以加本人QQ2246451792@qq.com!!!!
卸载centOs7自带的mariadb命令:
rpm -qa | grep mariadb
rpm -e --nodeps 文件名
1.新开的云服务器,需要检测系统是否自带安装mysql
# yum list installed | grep mysql2.如果发现有系统自带mysql,果断这么干
# yum -y remove 文件名3.随便在你存放文件的目录下执行,这里解释一下,由于这个mysql的yum源服务器在国外,所以下载速度会比较慢,还好mysql5.6只有79M大,而mysql5.7就有182M了,所以这是我不想安装mysql5.7的原因
# wget http://repo.mysql.com/mysql-community-release-el6-5.noarch.rpm4.接着执行这句,解释一下,这个rpm还不是mysql的安装文件,只是两个yum源文件,执行后,在/etc/yum.repos.d/ 这个目录下多出mysql-community-source.repo和mysql-community.repo
# rpm -ivh mysql-community-release-el6-5.noarch.rpm5.这个时候,可以用yum repolist mysql这个命令查看一下是否已经有mysql可安装文件
#yum repolist all | grep mysql6.安装mysql 服务器命令(一路yes):
# yum install mysql-community-server7.安装成功后
# service mysqld start8.由于mysql刚刚安装完的时候,mysql的root用户的密码默认是空的,所以我们需要及时用mysql的root用户登录(第一次回车键,不用输入密码),并修改密码
# mysql -u root
# use mysql;
#update user set password=PASSWORD('admin123') where user='root';# flush privileges;
#exit;
9.查看mysql是否自启动,并且设置开启自启动命令
# chkconfig --list | grep mysqld # chkconfig mysqld on10.mysql安全设置(系统会一路问你几个问题,看不懂复制之后翻译,基本上一路yes):
# mysql_secure_installation
以下是讲解授权远程登录,以Navicat工具为主
授权远程访问:
登陆:
[root@localhost ~]# mysql -uroot -p
Enter password:
Welcome to the MySQL monitor. Commands end with ; or \g.
Your MySQL connection id is 7
Server version: 5.5.60 MySQL Community Server (GPL) by Remi
Copyright (c) 2000, 2018, Oracle and/or its affiliates. All rights reserved.
Oracle is a registered trademark of Oracle Corporation and/or its
affiliates. Other names may be trademarks of their respective
owners.
Type 'help;' or '\h' for help. Type '\c' to clear the current input statement.
mysql> show databases;
+--------------------+
| Database |
+--------------------+
| information_schema |
| fgf |
| mysql |
| performance_schema |
| test |
+--------------------+
5 rows in set (0.00 sec)
mysql>
使用mysql数据库(真正的数据库,而非数据库软件),将所有数据库的所有表(*.*)的所有权限(all privileges),授予通过任何ip(%)访问的root用户,密码为123456,最后刷新(flush privileges)即可。
mysql> use mysql
Reading table information for completion of table and column names
You can turn off this feature to get a quicker startup with -A
Database changed
mysql> grant all privileges on *.* to 'root'@'%' identified by 'root';
Query OK, 0 rows affected (0.00 sec)
mysql> flush privileges;
Query OK, 0 rows affected (0.00 sec)
mysql>
开放防火墙端口:
先查看防火墙是否开启了3306端口:
|
1
|
firewall-cmd --permanent --query-port=3306/tcp |
打印结果如下:
no
表示没有开放3306端口,那么添加下该端口:
|
1
|
firewall-cmd --permanent --add-port=3306/tcp |
打印结果如下:
success
重新加载防火墙策略:
|
1
|
firewall-cmd --reload |
执行成功后,查看10086端口是否被开启:
|
1
|
firewall-cmd --permanent --query-port=3306/tcp |
打印结果如下:
yes
最后一步配置虚拟机NAT设置(具体流程省略,主要是放行端口号)
在windows下,我用 navicat测试:
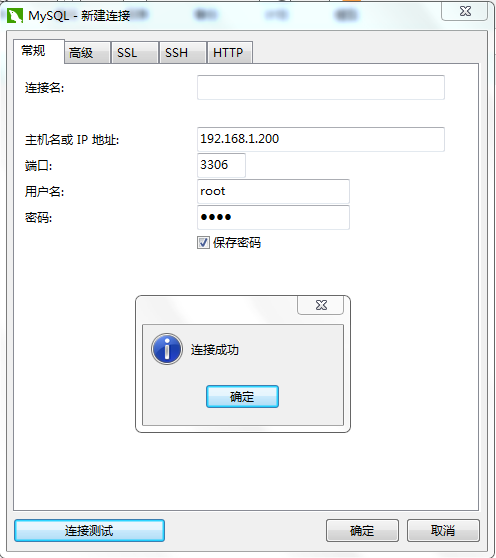
------mysql 相关命令: service mysqld restart ;service mysqld status ;service mysqld start
虚拟机安装mysql踩坑记录的更多相关文章
- CentOS7.4安装MySQL踩坑记录
CentOS7.4安装MySQL踩坑记录 time: 2018.3.19 CentOS7.4安装MySQL时网上的文档虽然多但是不靠谱的也多, 可能因为版本与时间的问题, 所以记录下自己踩坑的过程, ...
- ubuntu 下安装docker 踩坑记录
ubuntu 下安装docker 踩坑记录 # Setp : 移除旧版本Docker sudo apt-get remove docker docker-engine docker.io # Step ...
- centos7安装Mysql爬坑记录
centos7安装Mysql爬坑记录 查看是否已安装 使用下列命令查看是否已经安装过mysql/mariadb/PostgreSQL 如果未安装,不返回任何结果(ECS的centos镜像默认未安装 ...
- Asp.Net Core Identity+EFCore + Mysql踩坑记录
搭建基础框架准备试试传说中的Identity,本以为很顺利,结果一路踩了N多坑 遂就把过程记录下来.方便自己以后查看,也希望能帮到遇到同样问题的朋友. 1.首先,引入Identity需要的类库,还有M ...
- 安装mysql采坑记录
安装之前彻底卸载之前的mysql,再次安装,初始化数据库那一步失败. 再次彻底卸载mysql,把原先的安装路径的文件夹删除,文件夹路径:C:\ProgramData,再次安装,成功. 总结:重装mys ...
- Ubuntu mysql踩坑记录
安装: 1.sudo apt-get install mysql-server 2. apt-get isntall mysql-client 3. sudo apt-get install lib ...
- 在 ASP.NET Core 中使用 MySql 踩坑记录
使用 Pomelo.EntityFrameworkCore.MySql 生成 MySQL 数据库 关于如何使用请查看项目文档即可 组件地址:https://github.com/PomeloFound ...
- Android关于版本更新下载安装之踩坑记录(针对7.0以上)
最近刚刚把古老的项目targetSdk版本升级到26,升级之前是19(非常非常古老了).那么升级后一些问题开始出现. Android 8.0 (Android O)为了针对一些流氓软件引导用户安装其他 ...
- windows 安装 python 踩坑记录
官方不建议使用 64 bit python,容易出各种问题 Unable to find vcvarsall.bat 凡是安装与操作系统底层相关的 python 扩展都会遇到这个问题,如 PIL,Pi ...
随机推荐
- UNIX网络编程卷1 - >环境搭建(ubuntu16.04)
学习unp网络编程,树上的例子均存在#include“unp.h”,故需要对环境进行配置. 1.到资源页下载www.unpbook.com 2.解压并将unpv13e移动到相应的文件夹下 (因为我 ...
- 【AGC009E】Eternal Average
[AGC009E]Eternal Average 题面 洛谷 题解 神仙题.jpg 我们把操作看成一棵\(k\)叉树,其中每个节点有权值,所有叶子节点(共\(n+m\)个)就是\(0\)或\(1\). ...
- spark基础知识一
1. spark是什么 Apache Spark™ is a unified analytics engine for large-scale data processing. spark是针对于大规 ...
- Linux上安装git并在gitlab上建立对应的项目
1.CentOS上面安装git我所用的CentOS为CentOS6.5,其他版本没有测试. yum install git 安装之后查看git版本信息 git --version 2.配置git信息g ...
- Spring Boot 《一》开发一个“HelloWorld”的 web 应用
一,Spring Boot 介绍 Spring Boot不是一个新的框架,默认配置了多种框架使用方式,使用SpringBoot很容易创建一个独立运行(运行jar,内嵌Servlet).准生产级别的基于 ...
- Expect Command And How To Automate Shell Scripts Like Magic
In the previous post, we talked about writing practical shell scripts and we saw how it is easy to w ...
- Maven 教程(17)— Maven Profile 和 Filtering 简介
原文地址:https://blog.csdn.net/liupeifeng3514/article/details/79774572 每个项目都会有多套运行环境(开发,测试,正式等等),不同的环境配置 ...
- 【数据结构与算法】线性表操作(C语言)
#include <stdio.h> #include <stdlib.h> #define OK 1 #define NO 0 #define MAXSIZE 20 type ...
- c++11多线程记录0
两种并发编程模型 多进程 进程间通信常用的几种方式: 文件 管道 消息队列 多线程 一个进程中存在的多个线程,通常通过共享内存来通信,(说的非常非常粗俗,就是通过类似"全局变量"的 ...
- flask异常处理:abort、errorhandler、app_errorhandler,封装全局异常处理
目录 1. abort() 1.1 使用方式一:传递一个错误码 1.2 使用方式二:传递一个json格式字符串 1.3 使用方式三:传递一个响应体 2. errorhandler 2.1 简单使用: ...