idea下新建Spring Boot项目并配置启动
一、操作步骤
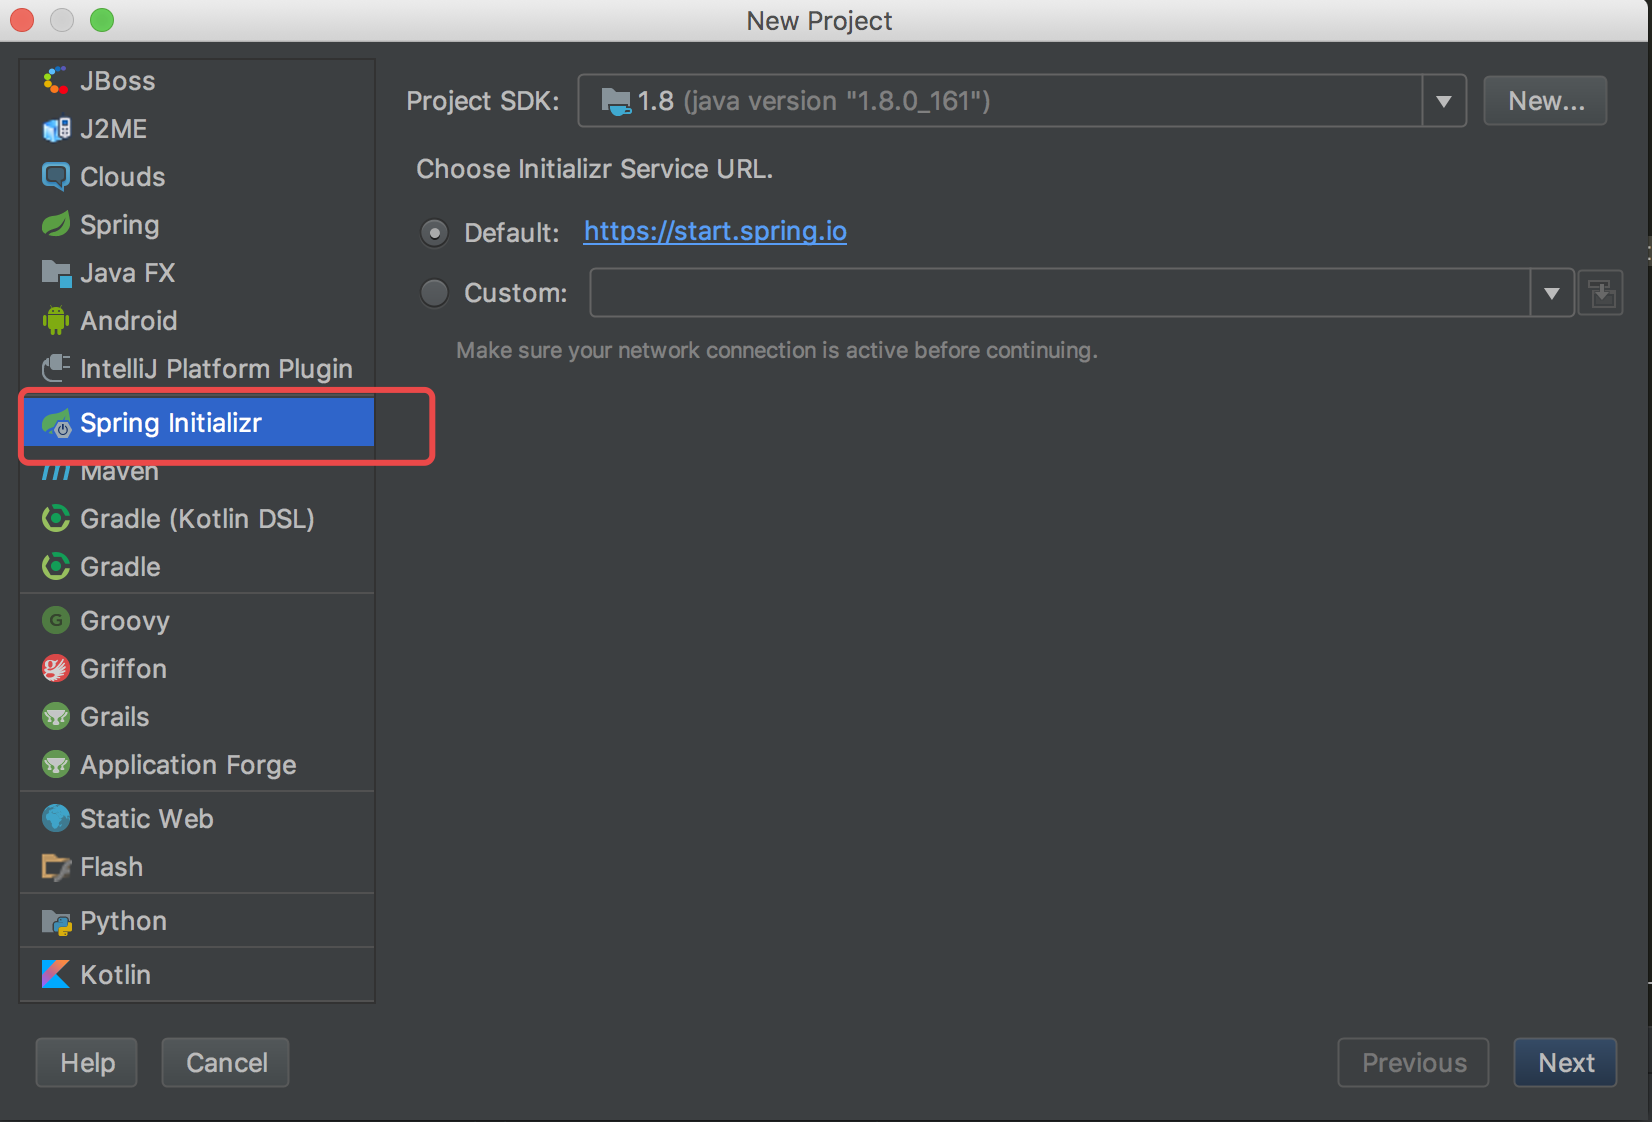
二、详细步骤

2、选择Spring Initializr 然后Next
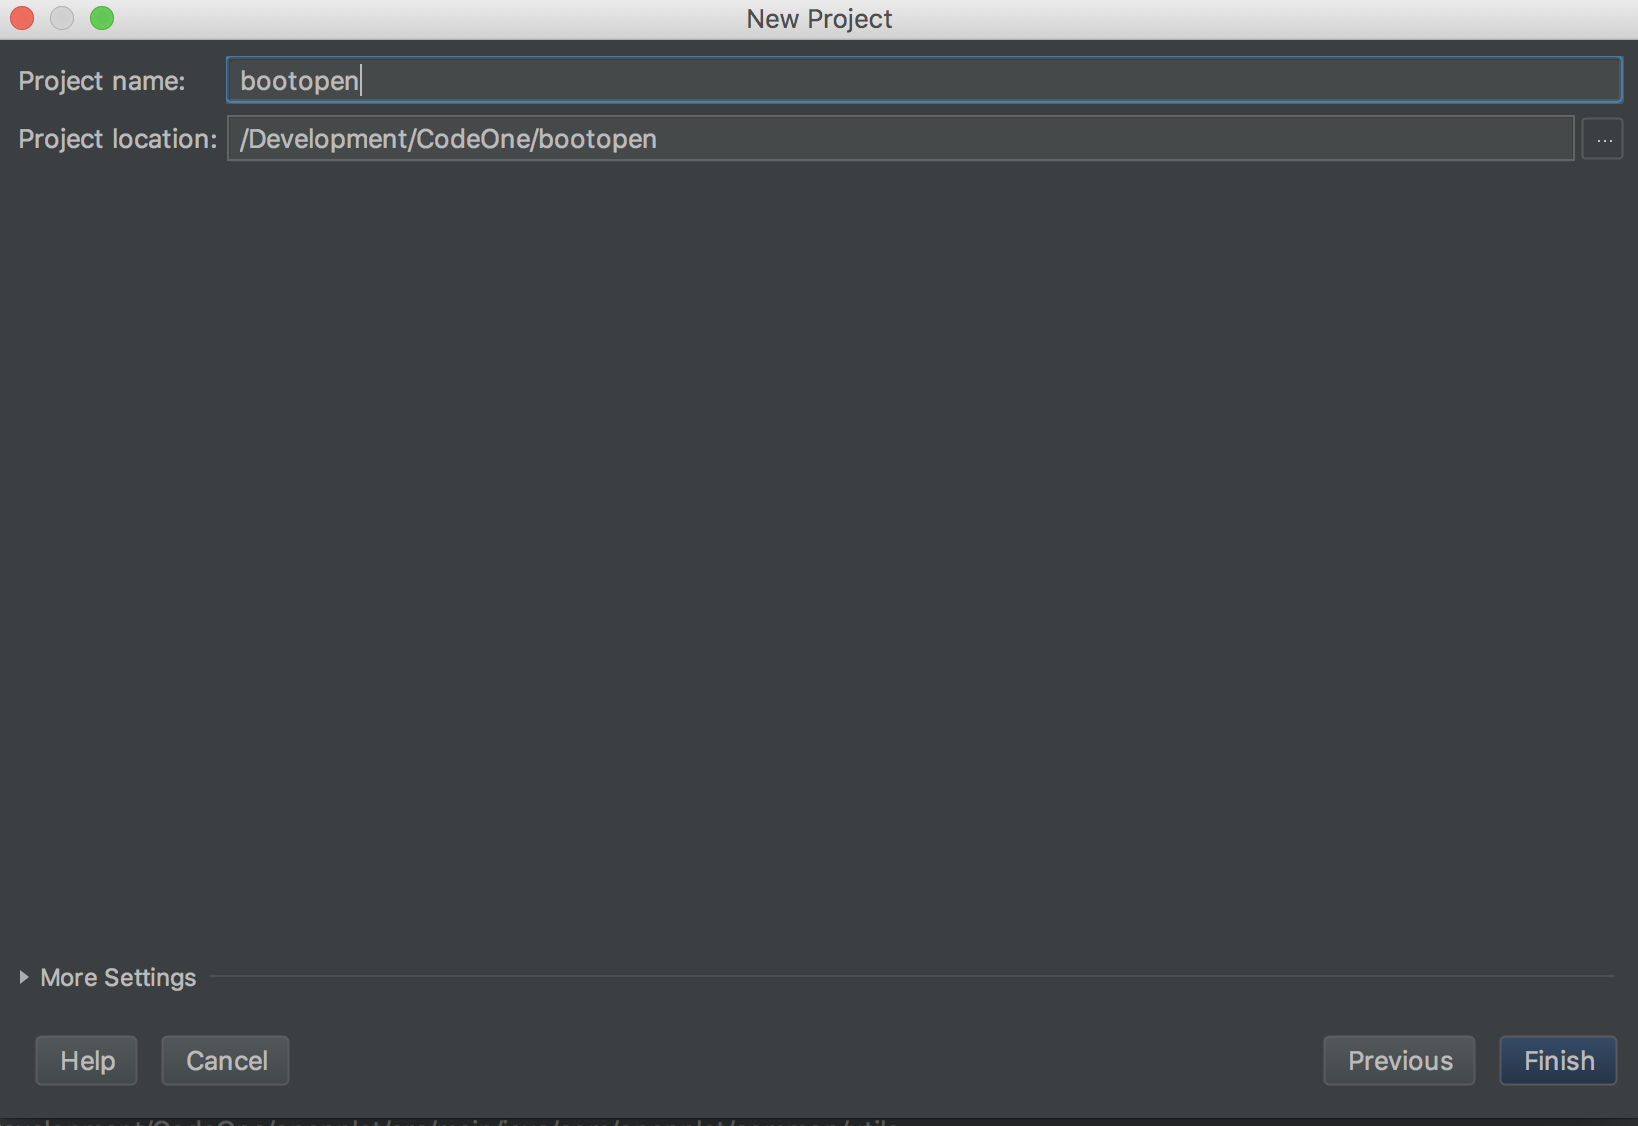
3、输入Artiface 然后Next

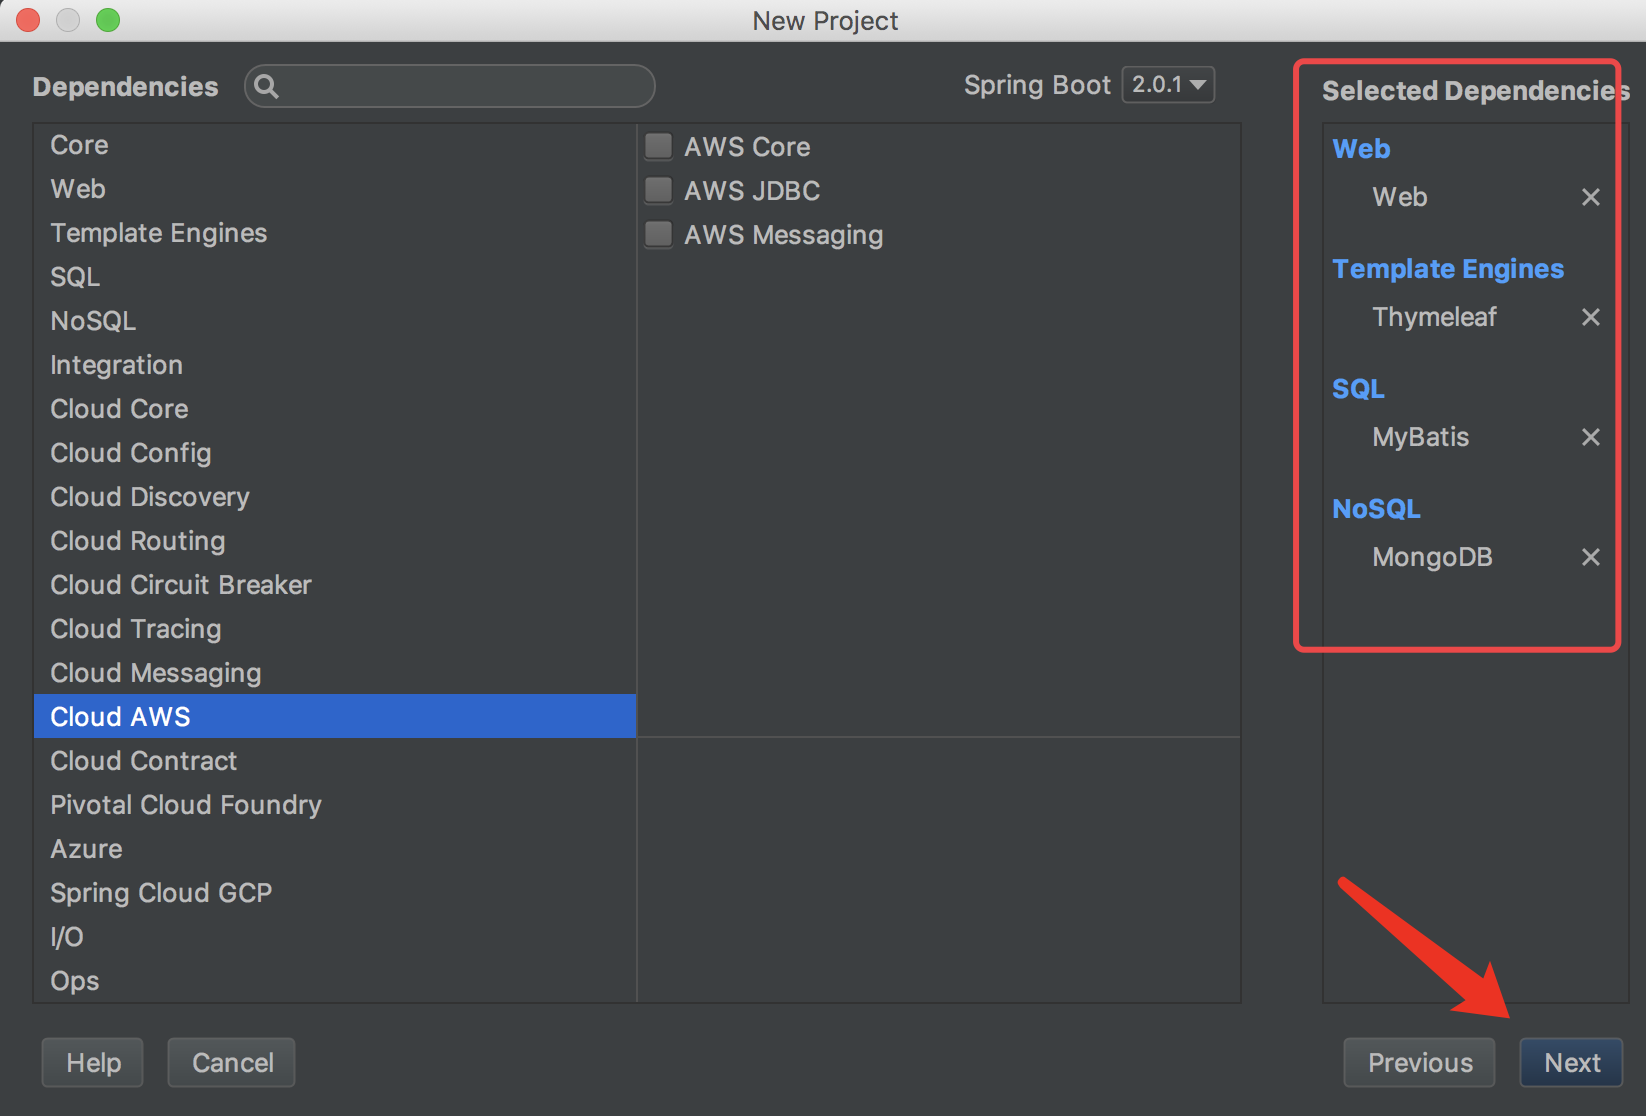
4、勾选Web 、模版我们选择官方推荐的Thymeleaf模版引擎,其他框架、中间件、数据库根据需要选择即可,而且无需我们手动去添加配置文件等,选择完成后Next
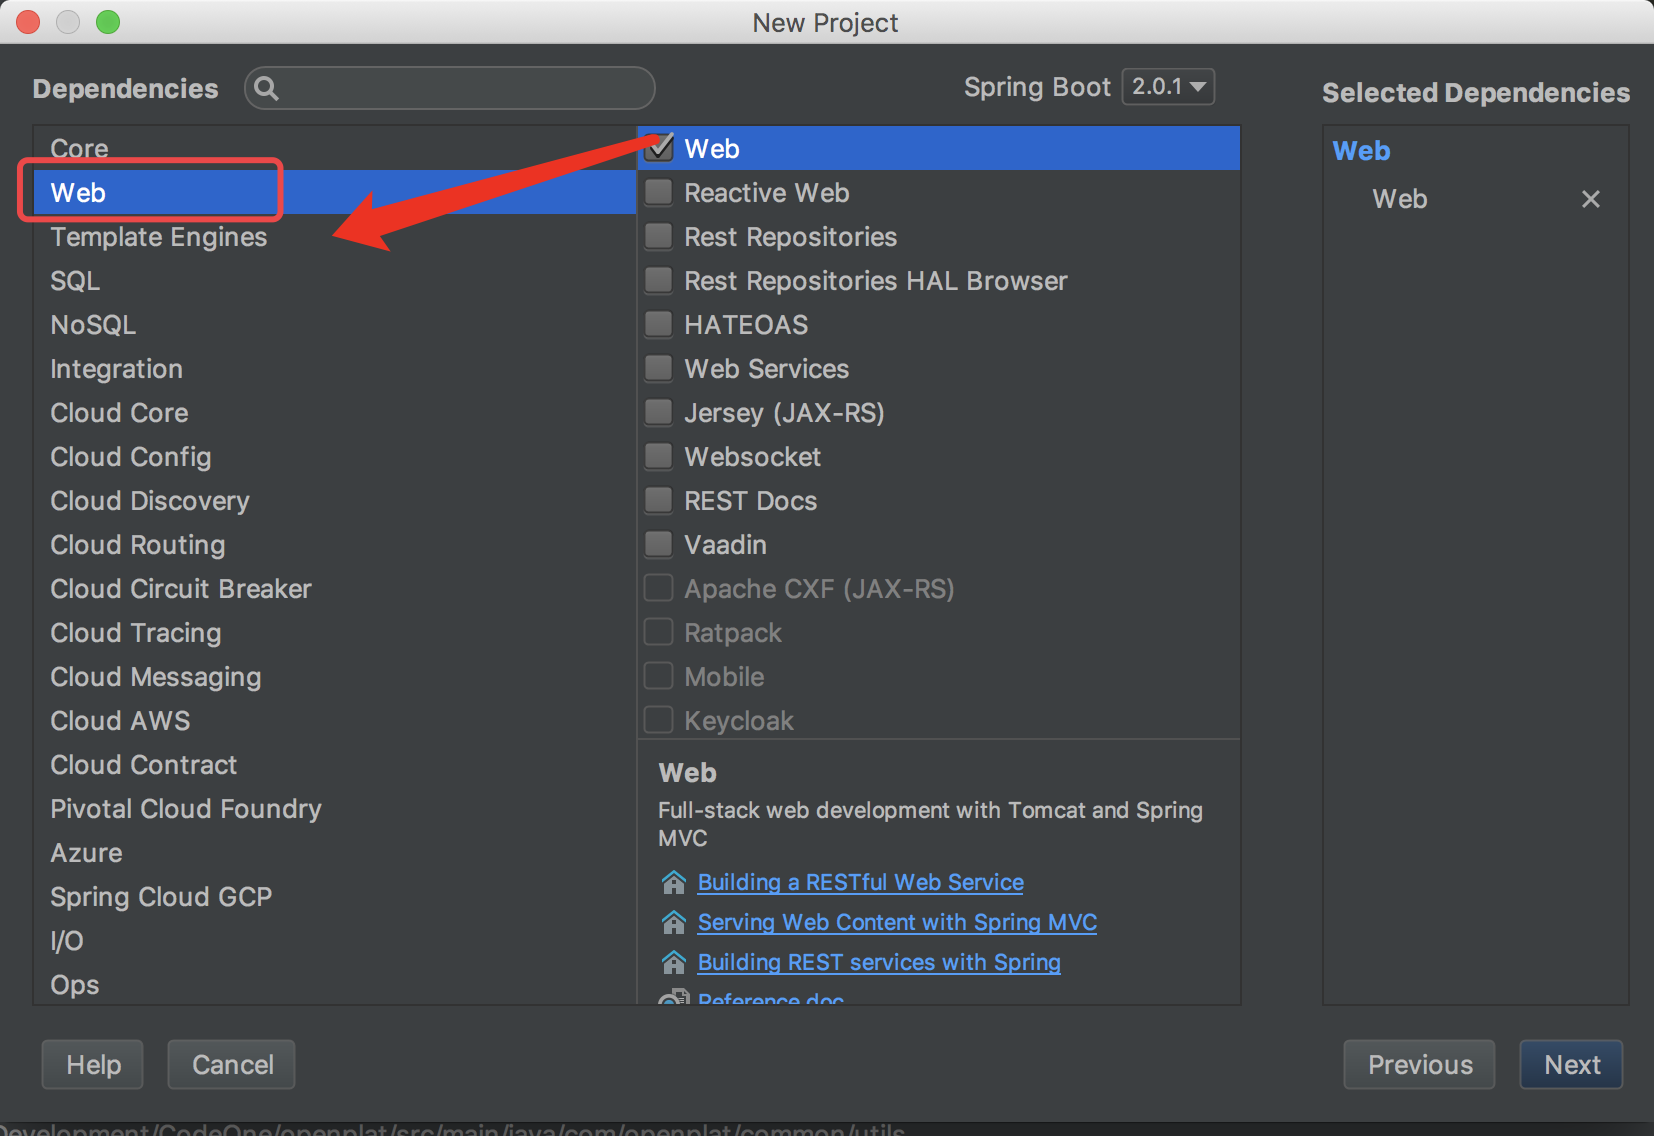
选择模版引擎

5、Finish即可
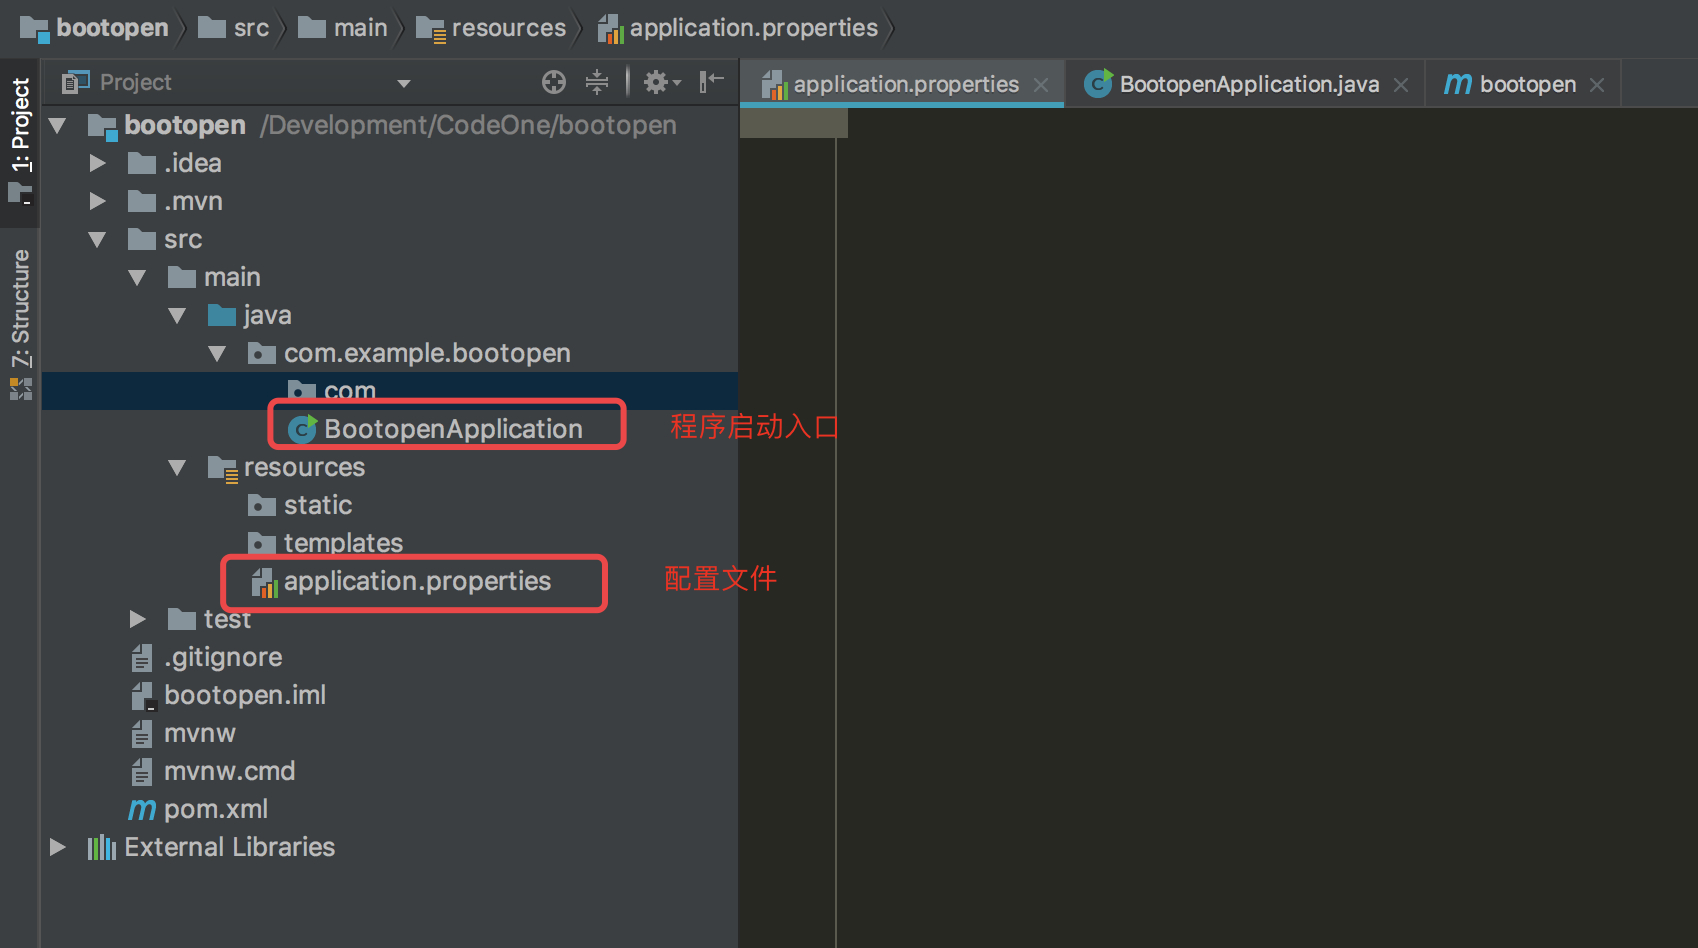
6、查看Spring Boot项目结构目录
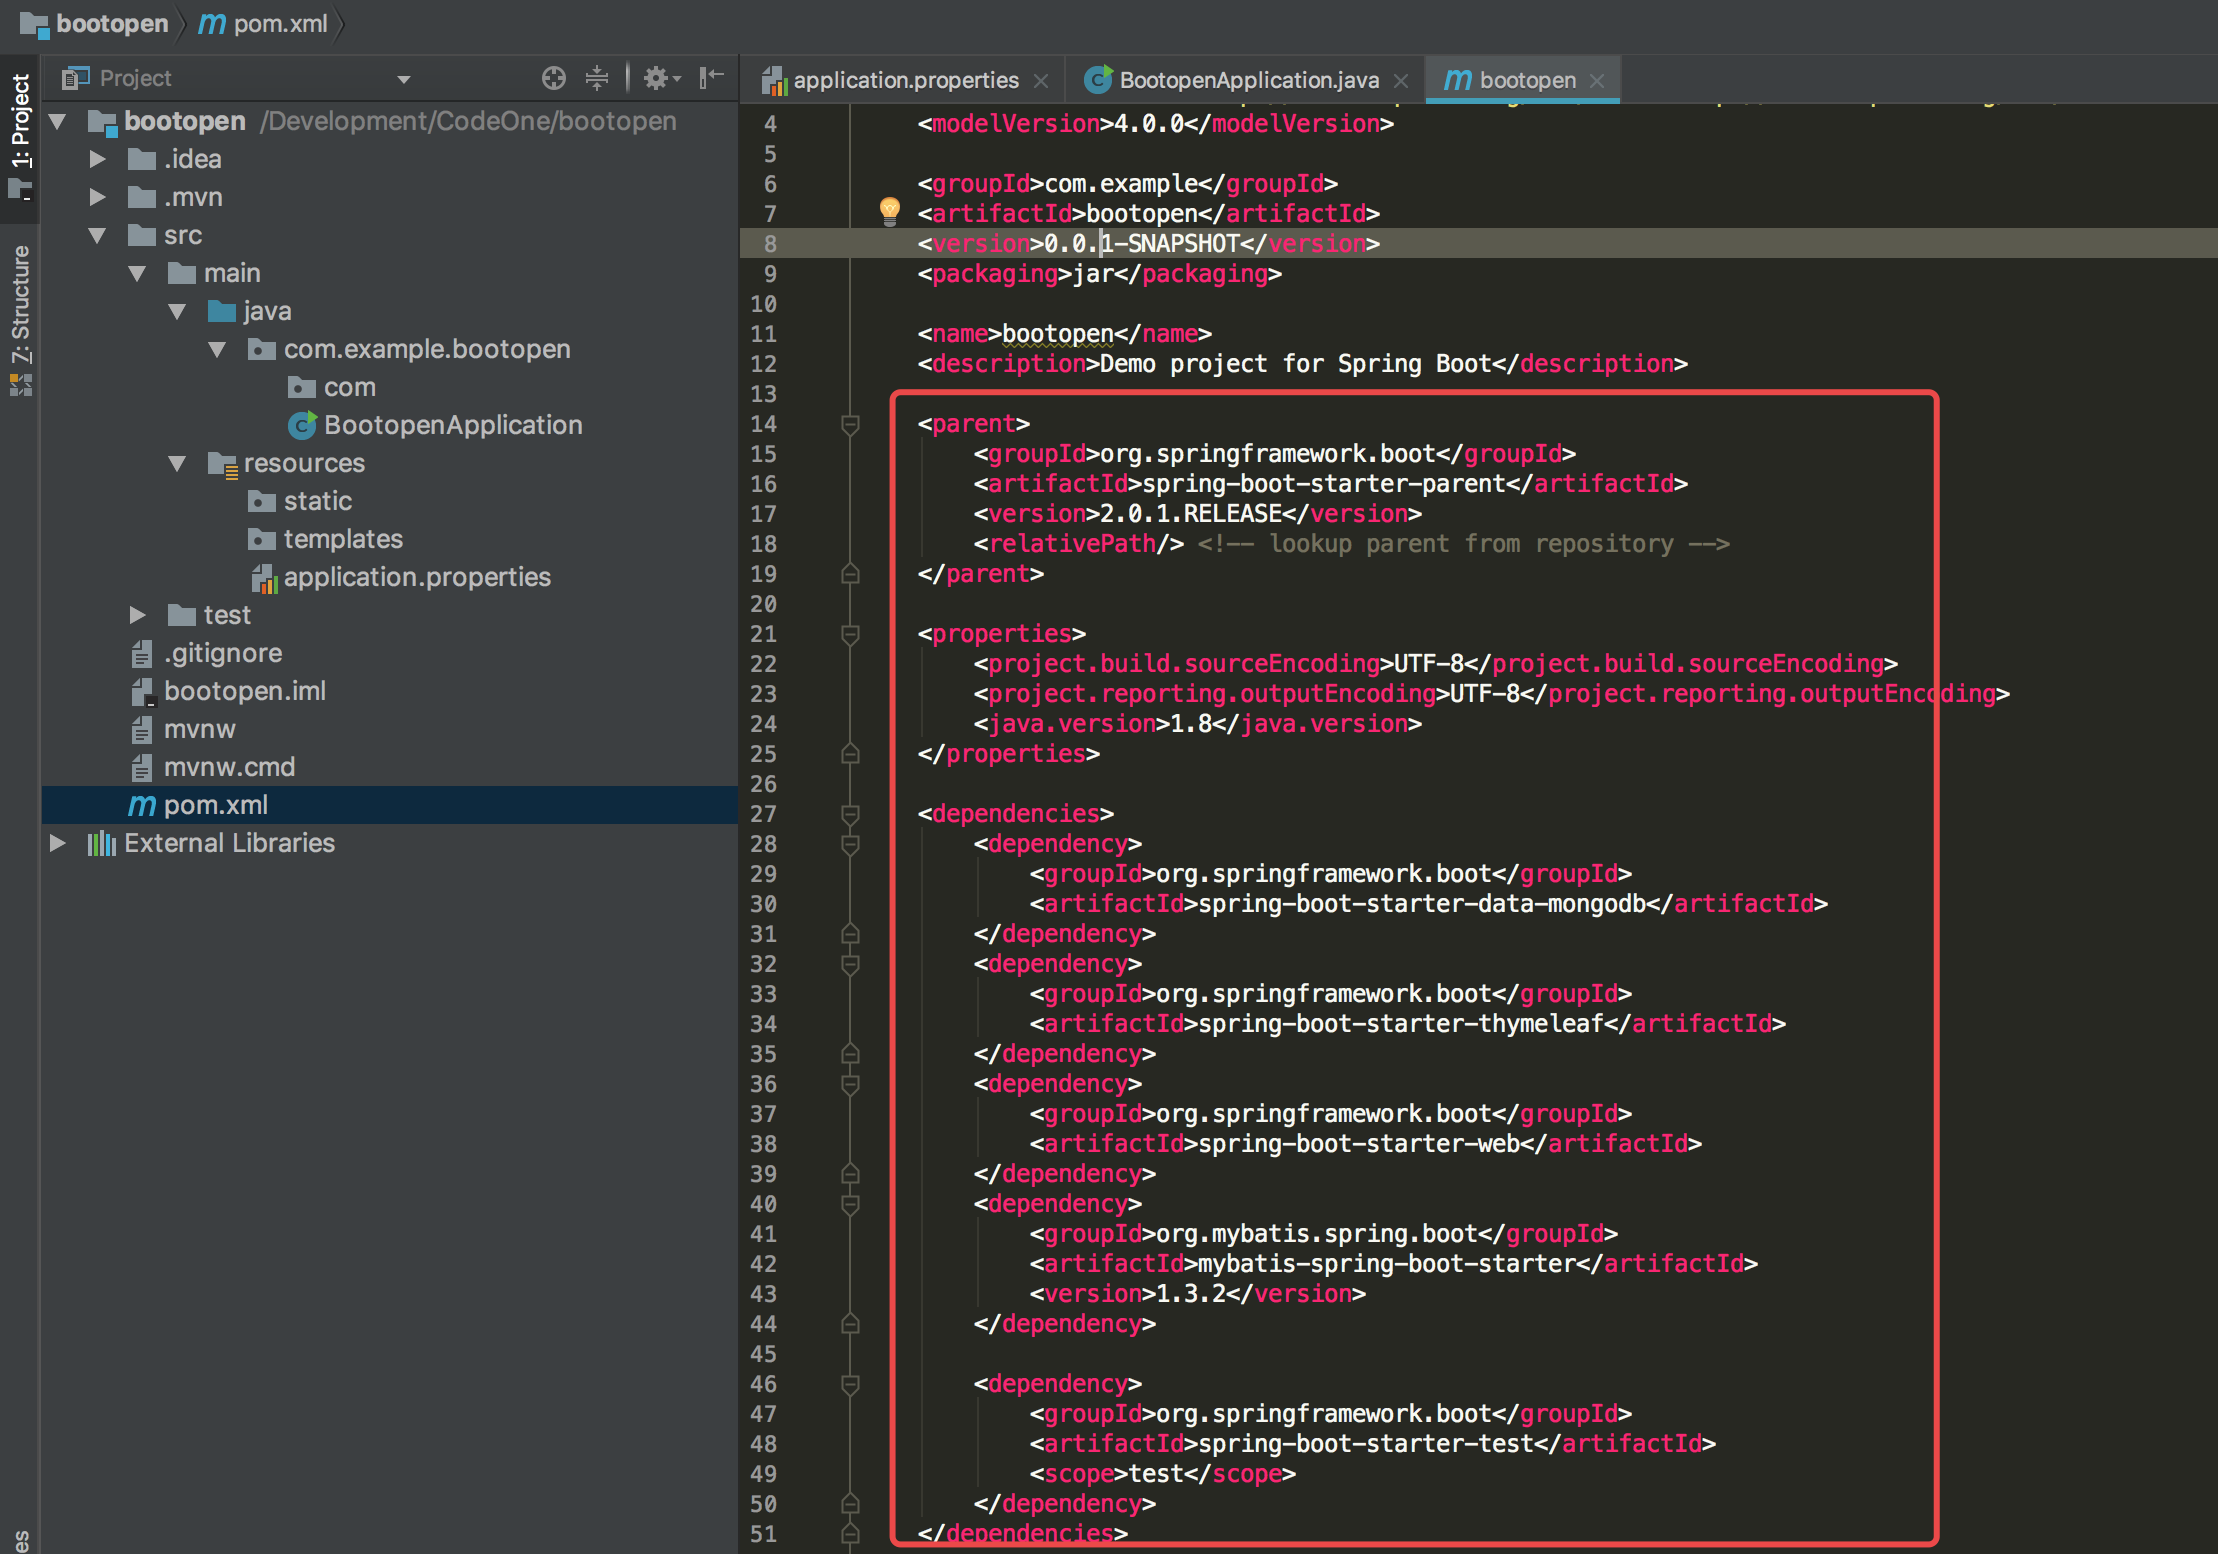
7、在pom.xml添加如下内容
注意:如果新建项目时选择了依赖的mybatis、mongodb之类的启动时候会报错,由于没配置数据源及mongodb的连接信息,此时如果只是想测试项目是否搭建成功先注释即可
<parent>

        <groupId>org.springframework.boot</groupId>

        <artifactId>spring-boot-starter-parent</artifactId>

        <version>2.0.1.RELEASE</version>

        <relativePath/> <!-- lookup parent from repository -->

    </parent>

    <properties>

        <project.build.sourceEncoding>UTF-8</project.build.sourceEncoding>

        <project.reporting.outputEncoding>UTF-8</project.reporting.outputEncoding>

        <java.version>1.8</java.version>

    </properties>

    <dependencies>

        <!--<dependency>-->

            <!--<groupId>org.springframework.boot</groupId>-->

            <!--<artifactId>spring-boot-starter-data-mongodb</artifactId>-->

        <!--</dependency>-->

        <dependency>

            <groupId>org.springframework.boot</groupId>

            <artifactId>spring-boot-starter-thymeleaf</artifactId>

        </dependency>

        <dependency>

            <groupId>org.springframework.boot</groupId>

            <artifactId>spring-boot-starter-web</artifactId>

        </dependency>

        <!--<dependency>-->

            <!--<groupId>org.mybatis.spring.boot</groupId>-->

            <!--<artifactId>mybatis-spring-boot-starter</artifactId>-->

            <!--<version>1.3.2</version>-->

        <!--</dependency>-->

        <dependency>

            <groupId>org.springframework.boot</groupId>

            <artifactId>spring-boot-starter-test</artifactId>

            <scope>test</scope>

        </dependency>

    </dependencies>
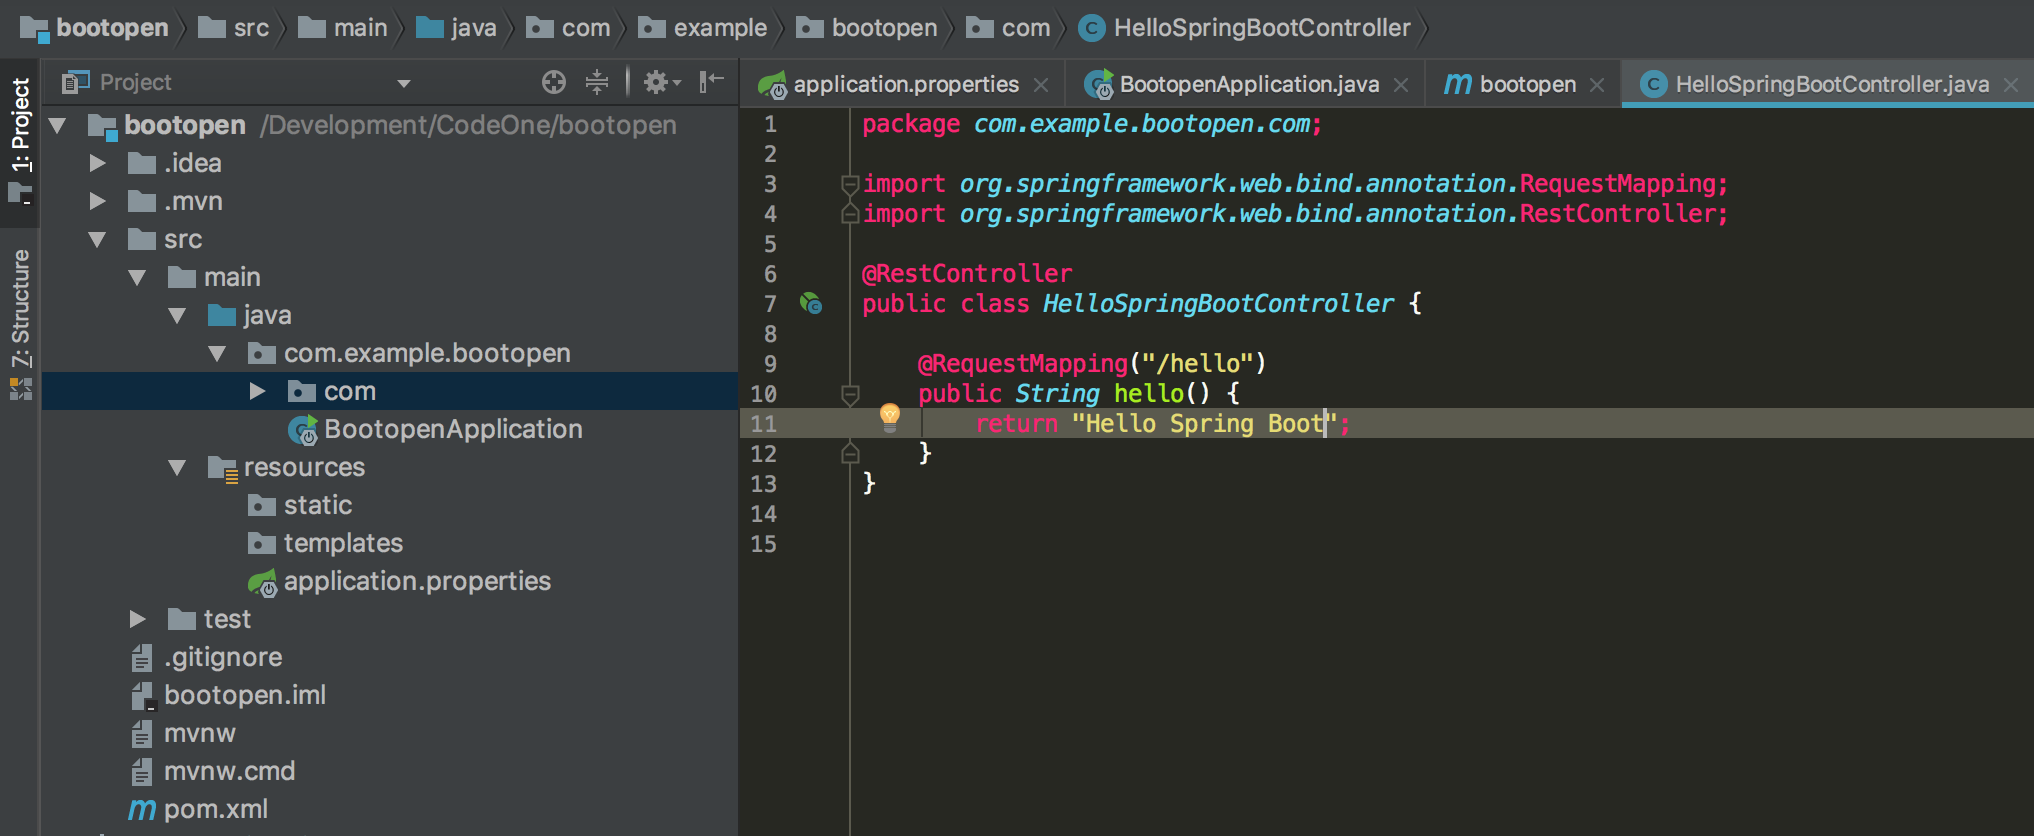
8、编写Hello Spring Boot的Controller
package com.example.bootopen.com;

import org.springframework.web.bind.annotation.RequestMapping;

import org.springframework.web.bind.annotation.RestController;

@RestController

public class HelloSpringBootController {

    @RequestMapping("/hello")

    public String hello() {

        return "Hello Spring Boot";

    }

}
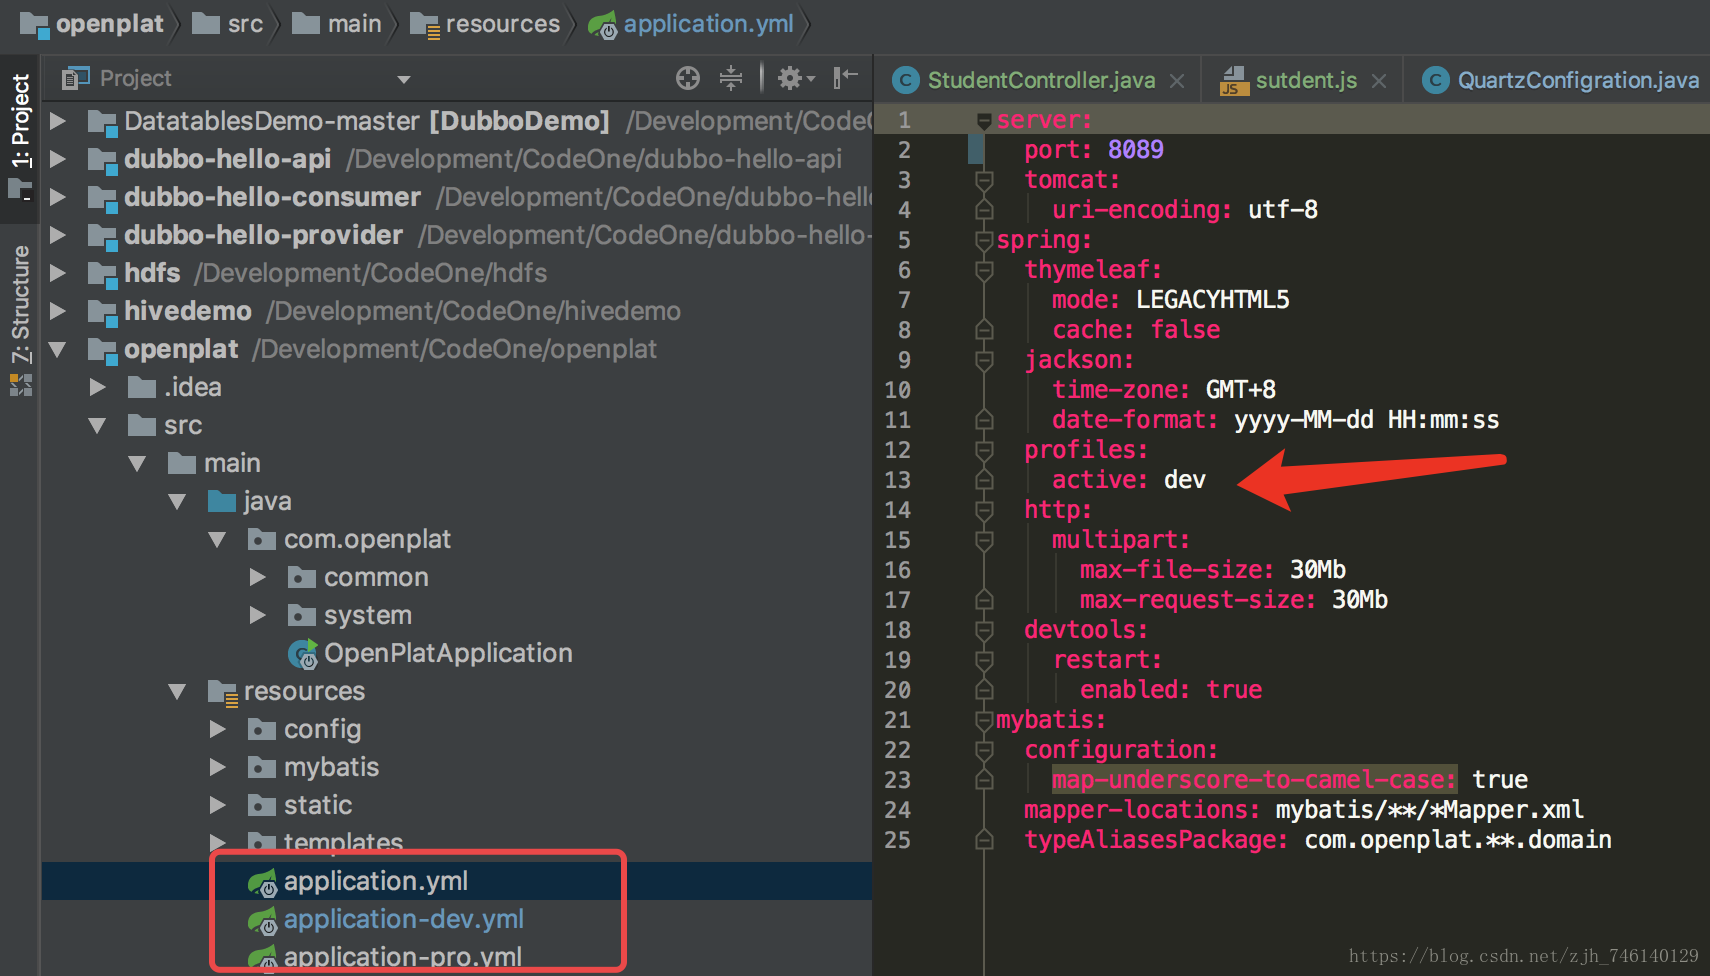
注意:如果只是简单测试项目只需要添加端口即可,其他数据源、缓存、静态资源路径也可以在此配置。

笔者推荐一种配置文件模式:另外新建2个配置文件,一个开发环境,一个线上环境,通过application.properties自由切换

10、启动项目 选择Run、Debug启动
关于@SpringBootApplication注解说明:@SpringBootApplication开启了Spring的组件扫描和springboot的自动配置功能,相当于将以下三个注解组合在了一起
(1)@Configuration:表名该类使用基于Java的配置,将此类作为配置类
(2)@ComponentScan:启用注解扫描
(3)@EnableAutoConfiguration:开启springboot的自动配置功能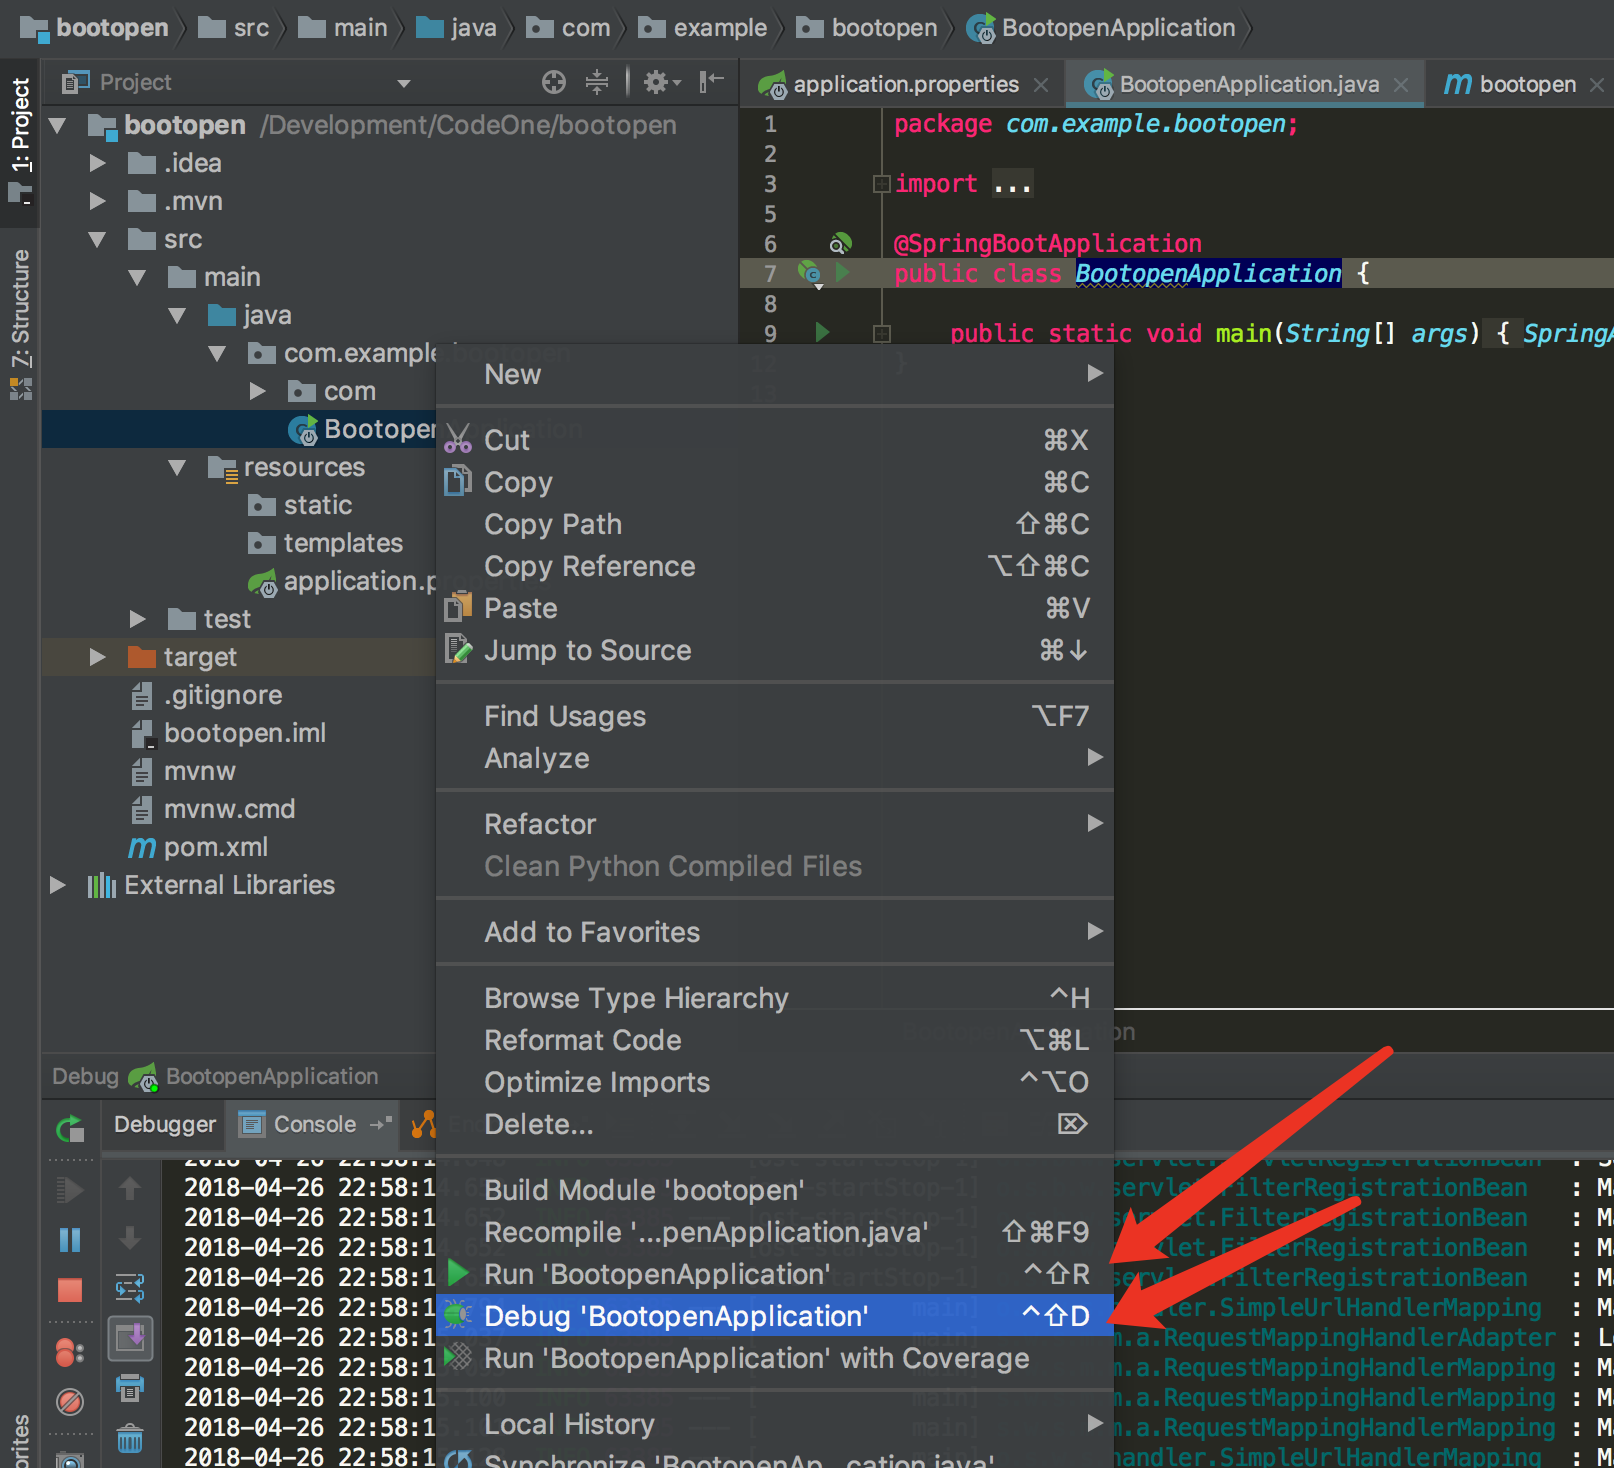

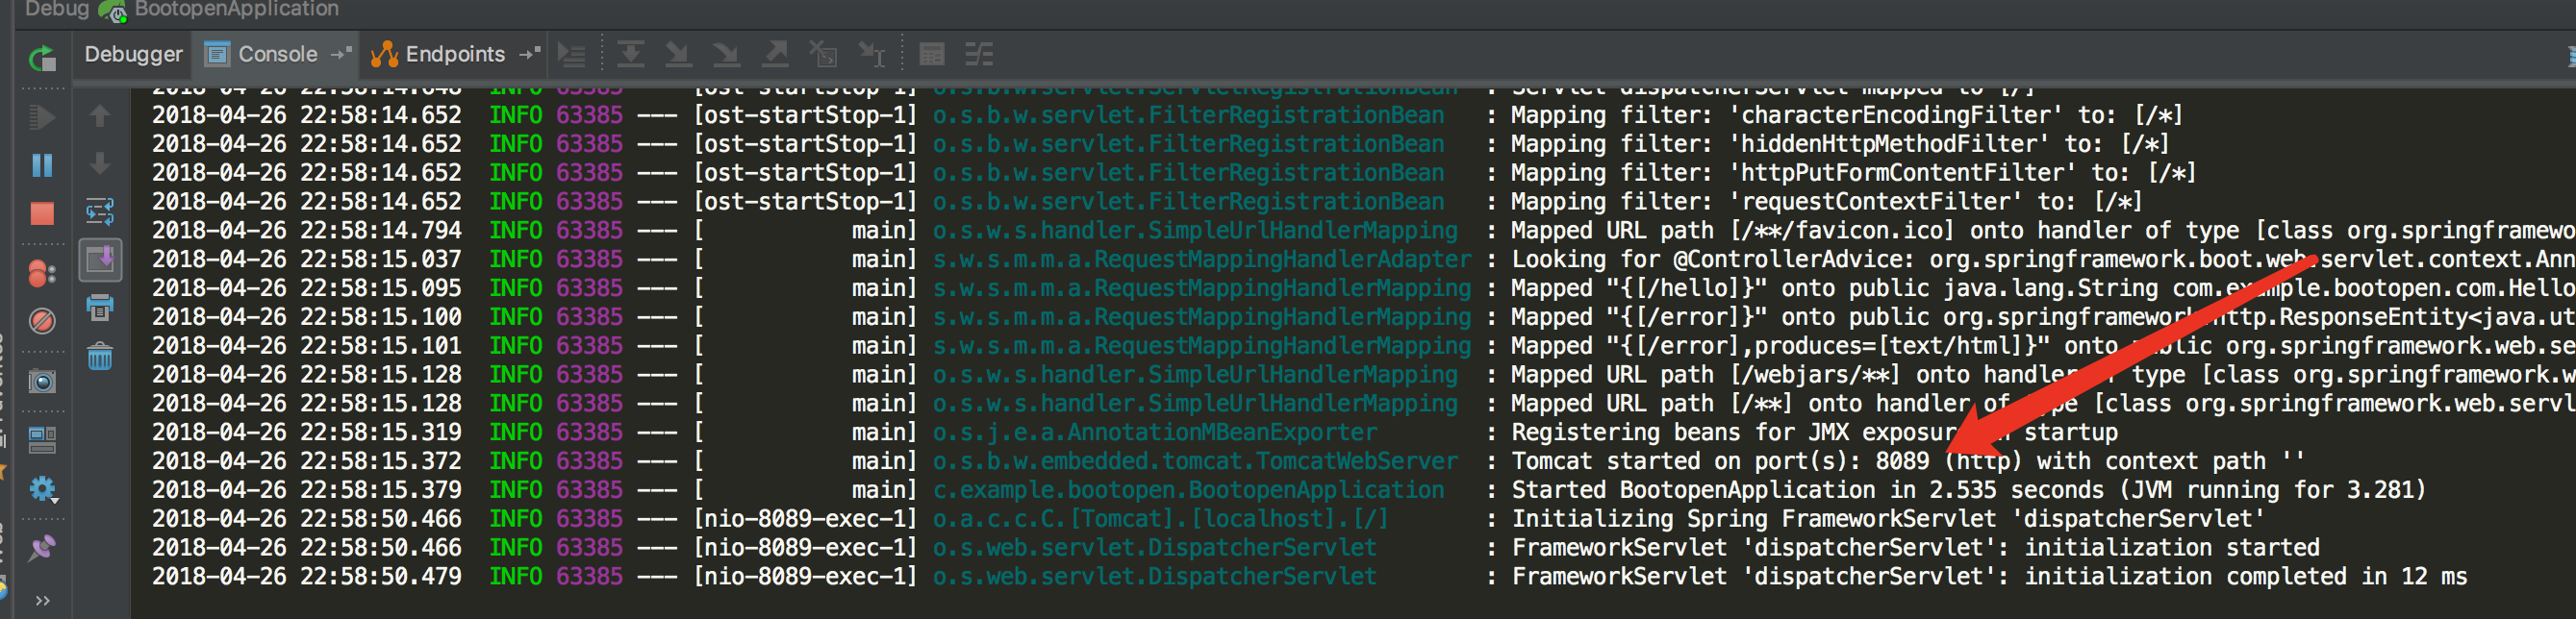
访问项目 http://localhost:8089/hello

idea下新建Spring Boot项目并配置启动的更多相关文章
- Intellij IDEA Spring Boot 项目Debug模式启动缓慢问题
问题 Intellij IDEA Spring Boot 项目Debug模式启动缓慢 环境 os: windows10 idea :2018.1 解决方法 去除所有断点就正常了,很诡异,原因未知.
- Spring Boot 项目几种启动方式
Spring Boot 项目几种启动方式 1. 使用 main 启动 jar xxxx.jar 2. 使用 mvn 启动 mvn spring-boot:run 3. 使用 Spring Boot c ...
- Spring Boot 项目 Maven 配置
在配置基于Maven的Spring Boot项目的过程中,打包运行出现了一系列错误. 比如: mvn 中没有主清单属性.java.lang.NoClassDefFoundError: org/spri ...
- Spring Boot项目属性配置
接着上面的入门教程,我们来学习下Spring Boot的项目属性配置. 1.配置项目内置属性 属性配置主要是在application.properties文件里配置的(编写时有自动提示)这里我们将se ...
- 寻找写代码感觉(二)之 Spring Boot 项目属性配置
一.前言 写代码就和恋爱一样,有反馈就要趁热打铁,搞完了项目搭建,接下来就来搞搞项目配置. 二.IDEA设置 1.编码配置 这里所说的就是代码的编码格式,你可以不设置,但是可能要面临的是,很多未知的麻 ...
- IDEA新建spring boot项目没有Spring Initializr选项
在settings -> Plugins 里面搜索spring boot,勾选上,然后再重启下idea,就可以了.如果Plugins里面没有spring boot的话,先安装下,再勾选. 参考( ...
- spring boot项目mybatis配置注解+配置文件
maven依赖 <dependency> <groupId>mysql</groupId> <artifactId>mysql-connector-ja ...
- Spring Boot项目的不同启动方式
方式一: 直接通过IntelliJ IDEA启动,直接执行Spring Boot项目的main()方法. 方法二: 将项目打包成jar包,首先需要在pom.xml文件的根节点下添加如下配置: < ...
- eclipse创建spring boot项目,tomcat启动成功,但http://localhost:8080无法访问报错404解决方案
spring boot的启动程序启动后,在访问http://localhost:8080地址的时候出现了错误,为什么出错网上我找了好久也没有得出具体的解决办法 当我指定到具体的action的时候,却可 ...
随机推荐
- 【转】Java 泛型
转载:https://www.cnblogs.com/lwbqqyumidi/p/3837629.html. 一. 泛型概念的提出(为什么需要泛型)? 首先,我们看下下面这段简短的代码: public ...
- CF1136E Nastya Hasn't Written a Legend(线段树)
还能说什么呢,简直太妙了. $$a_{i+1}<a_i+k_i$$ $$a_{i+1}-k_i-k_{i-1}-\cdots-k_1<a_i+k_i-k_i-k_{i-1}-\cdots- ...
- [LeetCode] 375. Guess Number Higher or Lower II 猜数字大小之二
We are playing the Guess Game. The game is as follows: I pick a number from 1 to n. You have to gues ...
- [LeetCode] 213. House Robber II 打家劫舍之二
You are a professional robber planning to rob houses along a street. Each house has a certain amount ...
- SpringBoot-dubbo自定义负载均衡实现简单灰度
本文介绍如何利用dubbo自定义负载实现简单灰度(用户纬度,部分用户访问一个服务,其余访问剩余服务). 其实在这之前,对dubbo了解的也不是很多,只是简单的使用过,跑了几个demo而已,但是得知接下 ...
- GreenPlum 大数据平台--增加segment
01,增加机器的配置 需要增加的机器安装greenplum 软件(操作见greenplum安装部署章节) 02,分配机器存储区域 03,配置互信 使用gpssh-exkeys确保Segment主机能通 ...
- java通过maven打包解决xml读取格式失败问题
<plugin> <groupId>org.apache.maven.plugins</groupId> <artifactId>maven-compi ...
- python 爬取媒体文件(无防火墙)
#coding = utf-8 import requests import pandas as pd import os,time root_path = './根目录/' input_file = ...
- 大话设计模式Python实现-装饰模式
装饰模式(Decorator Pattern):动态的给一个对象添加一些额外的职责,就增加功能来说,装饰模式比生成子类更为灵活. 下面是一个给人穿衣服的过程,使用装饰模式: #!/usr/bin/en ...
- CW2 Software Maintenance Spec Sheet
CW2 Software Maintenance Spec SheetAcademic Year 2019/2020CW2 is about maintaining and extending a r ...