lnmp+tp5安装纪要
1: lnmp :
https://lnmp.org/install.html 官网安装帮助
运行命令:wget http://soft.vpser.net/lnmp/lnmp1.6.tar.gz -cO lnmp1.6.tar.gz && tar zxf lnmp1.6.tar.gz && cd lnmp1.6 && ./install.sh lnmp
重要两项:选择mysql 版本 5.7, 选择php版本 :7.2
2:先把远程mysql 3306 给打开:
查看已有iptables表
 iptables -L -nv --line-number

-L是--list的简写,作用是列出规则

-n是ip以数字方式显示,有的会用域名方式显示。

-v是显示详细信息 v=verbose

--line-number:显示行号

常规性drop..................
运行命令 vi /etc/sysconfig/iptables

service iptables restart
改授权mysql 用户远程登录
mysql -uroot -p123456 设置的123456密码
use mysql
SELECT User,Host FROM user;
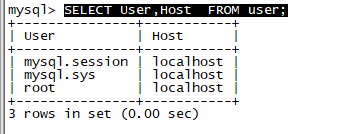
只有localhost才能访问
.设置访问权限
GRANT ALL PRIVILEGES ON *.* TO 'root'@'%' IDENTIFIED BY 'password' WITH GRANT OPTION;
FLUSH PRIVILEGES;
其中"*.*"代表所有资源所有权限, “'root'@%”其中root代表账户名,%代表所有的访问地址,也可以使用一个唯一的地址进行替换,只有一个地址能够访问。如果是某个网段的可以使用地址与%结合的方式,如10.0.42.%。IDENTIFIED BY 'password',这个password是指访问密码。WITH GRANT OPTION允许级联授权。
3:安装tp5.1
先说一下,这个lnmp 下nginx 安装tp5挺娇气的,配置文件一不小心就会出错,慎用啊,不过看了这篇文章,相信能躲过大多数坑
别看在app.php内打开了debug trace 路由配不好,是不显示bug的因为还没跑到程序里边,也就没有debug信息了,有时眼睁睁的看着 服务器出错的页面,很无助.
甚至即将要放弃了...还好加了该加的东西.出了404 页面找不到的错误,在理理问题解决了.
第一步:
linux下 参照这里https://www.kancloud.cn/manual/thinkphp5_1/353948
我用的是
添加阿里云仓库
composer config -g repo.packagist composer https://mirrors.aliyun.com/composer/composer 安装 一条命令搞定composer create-project topthink/think=5.1.* tp5
安装完之后
修改config 文件夹下的 app.php
'app_debug' => true,
// 应用Trace
'app_trace' => true,
别的就不用动了,5.1内没有 route_on类似打开路由这一项,默认是打开的应该,也就是 带问号的?s=的请求的这种方式
那个nginx.conf和fastcgi.conf文件没有配置好的时候,这种带?s=/html/html类似这种请求也是不行的.那不是因为没配置app.php 中的打开路由导致的
第二步 开始修改nginx.conf配置文件 先让s=/index这种路由请求的方式跑起来
由于设置了public 这个目录为 入口文件所在.所以程序跳到上一级会有禁止访问的 这个在fastcgi.conf内配置
# 进入 fastcgi.conf 文件目录

cd /usr/local/nginx/conf

# 修改 fastcgi.conf 配置文件

vim fastcgi.conf
fastcgi_param  SCRIPT_FILENAME    $document_root$fastcgi_script_name;

fastcgi_param  QUERY_STRING       $query_string;

fastcgi_param  REQUEST_METHOD     $request_method;

fastcgi_param  CONTENT_TYPE       $content_type;

fastcgi_param  CONTENT_LENGTH     $content_length;

fastcgi_param  SCRIPT_NAME        $fastcgi_script_name;

fastcgi_param  REQUEST_URI        $request_uri;

fastcgi_param  DOCUMENT_URI       $document_uri;

fastcgi_param  DOCUMENT_ROOT      $document_root;

fastcgi_param  SERVER_PROTOCOL    $server_protocol;

fastcgi_param  REQUEST_SCHEME     $scheme;

fastcgi_param  HTTPS              $https if_not_empty;

fastcgi_param  GATEWAY_INTERFACE  CGI/1.1;

fastcgi_param  SERVER_SOFTWARE    nginx/$nginx_version;

fastcgi_param  REMOTE_ADDR        $remote_addr;

fastcgi_param  REMOTE_PORT        $remote_port;

fastcgi_param  SERVER_ADDR        $server_addr;

fastcgi_param  SERVER_PORT        $server_port;

fastcgi_param  SERVER_NAME        $server_name;

# PHP only, required if PHP was built with --enable-force-cgi-redirect

fastcgi_param  REDIRECT_STATUS    ;

# 初始化配置文件

# fastcgi_param PHP_ADMIN_VALUE "open_basedir=$document_root/:/tmp/:/proc/";

#===========================================

#添加内容

# 开放目录访问权限(因为根目录设置到public下导致框架访问上级目录权限不够)

fastcgi_param PHP_ADMIN_VALUE "open_basedir=/home/wwwroot/:/tmp/:/proc/";
上边的配置文件中"open_basedir=默认是$documentroot 之类的 一定要改成 /home/wwwroot/ 如果你nginx没改wwwroot的根目录地址的话.就在此处,如果不改访问出现问题无法使用?s=方式请求的.
lnmp 的默认配置也存在问题......
nginx.conf 配置
 server_names_hash_bucket_size ;

        client_header_buffer_size 32k;

        large_client_header_buffers  32k;

        client_max_body_size 50m;

        sendfile on;

        sendfile_max_chunk 512k;

        tcp_nopush on;

        keepalive_timeout ;

        tcp_nodelay on;

        fastcgi_connect_timeout ;

        fastcgi_send_timeout ;

        fastcgi_read_timeout ;

        fastcgi_buffer_size 64k;

        fastcgi_buffers  64k;

        fastcgi_busy_buffers_size 128k;

        fastcgi_temp_file_write_size 256k;

        gzip on;

        gzip_min_length  1k;

        gzip_buffers      16k;

        gzip_http_version 1.1;

        gzip_comp_level ;

        gzip_types     text/plain application/javascript application/x-javascript text/javascript text/css application/xml application/xml+rss;

        gzip_vary on;

        gzip_proxied   expired no-cache no-store private auth;

        gzip_disable   "MSIE [1-6]\.";

        #limit_conn_zone $binary_remote_addr zone=perip:10m;

        ##If enable limit_conn_zone,add "limit_conn perip 10;" to server section.

        server_tokens off;

        access_log off;

server

    {

        listen  default_server reuseport;

        #listen [::]: default_server ipv6only=on;

        server_name _;

        index index.html index.htm index.php;

        root  /home/wwwroot/default/tp5/public;

        #error_page      /.html;

        # Deny access to PHP files in specific directory

        #location ~ /(wp-content|uploads|wp-includes|images)/.*\.php$ { deny all; }

        #include enable-php.conf;

        include enable-php-pathinfo.conf;

     #配置PHP的pathinfo

    location ~ .+\.php($|/) {

            set $root  /home/wwwroot/default/tp5/public;

       # fastcgi_pass 127.0.0.1:;

            fastcgi_pass  unix:/tmp/php-cgi.sock;

        fastcgi_index index.php;

        include fastcgi.conf;

        fastcgi_split_path_info ^((?U).+.php)(/?.+)$;

        fastcgi_param PATH_INFO $fastcgi_path_info;

        fastcgi_param PATH_TRANSLATED $document_root$fastcgi_path_info;

        fastcgi_param SCRIPT_FILENAME $root$fastcgi_script_name;
user  www www;

worker_processes auto;

worker_cpu_affinity auto;

error_log  /home/wwwlogs/nginx_error.log  crit;

pid        /usr/local/nginx/logs/nginx.pid;

#Specifies the value for maximum file descriptors that can be opened by this process.

worker_rlimit_nofile ;

events

    {

        use epoll;

        worker_connections ;

        multi_accept off;

        accept_mutex off;

    }

http

    {

        include       mime.types;

        default_type  application/octet-stream;

        server_names_hash_bucket_size ;

        client_header_buffer_size 32k;

        large_client_header_buffers  32k;

        client_max_body_size 50m;

        sendfile on;

        sendfile_max_chunk 512k;

        tcp_nopush on;

        keepalive_timeout ;

        tcp_nodelay on;

        fastcgi_connect_timeout ;

        fastcgi_send_timeout ;

        fastcgi_read_timeout ;

        fastcgi_buffer_size 64k;

        fastcgi_buffers  64k;

        fastcgi_busy_buffers_size 128k;

        fastcgi_temp_file_write_size 256k;

        gzip on;

        gzip_min_length  1k;

        gzip_buffers      16k;

        gzip_http_version 1.1;

        gzip_comp_level ;

        gzip_types     text/plain application/javascript application/x-javascript text/javascript text/css application/xml application/xml+rss;

        gzip_vary on;

        gzip_proxied   expired no-cache no-store private auth;

        gzip_disable   "MSIE [1-6]\.";

        #limit_conn_zone $binary_remote_addr zone=perip:10m;

        ##If enable limit_conn_zone,add "limit_conn perip 10;" to server section.

        server_tokens off;

        access_log off;

server

    {

        listen  default_server;

        #listen [::]: default_server ipv6only=on;

        server_name _;

        index index.html index.htm index.php;

        root  /home/wwwroot/tp5/public;

        #error_page      /.html;

        # Deny access to PHP files in specific directory

        #location ~ /(wp-content|uploads|wp-includes|images)/.*\.php$ { deny all; }

        #include enable-php.conf;

  #include enable-php.conf;

        include enable-php-pathinfo.conf;

#location /static {

   #   allow all;    }

 location / {

        root    $root;

        index    index.html index.php;

        if ( -f $request_filename) {

            break;

        }

        if ( !-e $request_filename) {

            rewrite ^(.*)$ /index.php/$ last;

            break;

        }

    }

     #脜脰PHP碌脛athinfo

    location ~ .+\.php($|/) {

            set $root  /home/wwwroot/tp5/public;

       # fastcgi_pass 127.0.0.1:;

            fastcgi_pass  unix:/tmp/php-cgi.sock;

        fastcgi_index index.php;

        include fastcgi.conf;

        fastcgi_split_path_info ^((?U).+.php)(/?.+)$;

        fastcgi_param PATH_INFO $fastcgi_path_info;

        fastcgi_param PATH_TRANSLATED $document_root$fastcgi_path_info;

        fastcgi_param SCRIPT_FILENAME $root$fastcgi_script_name;

         }

        #location /nginx_status

        #{

         #   stub_status on;

        #    access_log   off;

        #}

        location ~ .*\.(gif|jpg|jpeg|png|bmp|swf)$

        {

          expires      30d;

        }

        location ~ .*\.(js|css)?$

        {

           expires      12h;

        }

    #    location ~ /.well-known {

     #       allow all;

      #  }

#        location ~ /\.

 #       {

  #          deny all;

   #     }

        access_log  /home/wwwlogs/access.log;

    }

#include vhost/*.conf;

}
以上是两个服务器上的配置,因为没有子网站#include vhost/*.conf; 注释掉了
 location / {

        root    $root;

        index    index.html index.php;

        if ( -f $request_filename) {

            break;

        }

        if ( !-e $request_filename) {

            rewrite ^(.*)$ /index.php/$1 last;

            break;

        }

    }
这段在这次没加,也是跳转不了 .

一些是newadmin 的安装方法
第一步. chod -R 777 newadmin 目录,我偷懒这me设置测试环境 改变目录的读写权限,避免因为权限问题更新不了
:第二步:添加中国镜像 要不运行更新,停在那不动的
composer config repo.packagist composer https://packagist.phpcomposer.com
做完上边这部,打开composer.json 文件,看看文件下边是否成功,有时因权限问题写不到里边,所以确认一下
然后运行composer update

> BearAdmin的重构简化版本

# 安装步骤

* clone项目到本地,`git clone https://gitee.com/yupoxiong/NewAdmin.git`。

* 在项目根目录运行 `composer update` 命令

* 配置好数据库参数,这个文件 `/config/database.php` ,记住数据库建utf8mb4格式的。

* 运行数据库迁移命令 `php think migrate:run` 。

* 配置好伪静态,具体可参看[TP官方文档](https://www.kancloud.cn/manual/thinkphp5_1/353955)。

* 访问`/admin`,默认超级管理员的账号密码都为`super-admin`。
遇到问题
Package operations:  installs,  updates,  removals

  - Installing topthink/think-installer (v2.0.0): Downloading (%)

    The Process class relies on proc_open, which is not available on your PHP installation.

    The archive may contain identical file names with different capitalization (which fails on case insensitive filesystems)

    Unzip with unzip command failed, falling back to ZipArchive class

  - Installing topthink/framework (v5.1.38.): Downloading (%)
打开php.ini 吧proc_open proc_get_status去掉
disable_functions = passthru,exec,system,chroot,chgrp,chown,shell_exec,proc_open,proc_get_status,popen,ini_alter,ini_restore,dl,openlog,syslog,readlink,symlink,popepassthru,stream_socket_server
composer clear-cache
附录
在使用tp5框架,测试时不显示错误信息,只显示“页面有错误”,查了很多方法,现在来总结一下:

tp5在部署模式下是不显示错误信息的,要开启调试模式

在public/index.php即入口文件设置define('APP_DEBUG', true);

在config.php设置

'SHOW_PAGE_TRACE'=>true,

 'debug'           =>true,

开启完调试模式之后发现还是不显示报错,查了convention.php(文件入口thinkphp下)发现在异常及错误设置

有一项'show_error_msg'         => false,把它改为true,然后就能显示错误信息了。

补充:发现tp5在application目录下有config.php和database.php这两个文件,可以直接在这两个里

修改,就不用新建conf/config.php来修改了,如果建了这个文件,则原来的在application目录下的

config.php和database.php的设置就会无效
lnmp+tp5安装纪要的更多相关文章
- 阿里云服务器+宝塔环境+LNMP+tp5.1安装和调试
1.首先肯定得有个阿里云服务器,楼主是用来自己测试用得,所以就买了个1年得突发性实例,虽然网上都说别买这种,不过个人测试还是没有多少要求得 2.买了服务器之前可以顺带买个域名,再顺带去备案一下,阿里云 ...
- LNMP编译安装教程
LNMP编译安装教程 此次安装在Centos上,我采用的CentOS的版本是:CentOS release 6.5 (Final) 可以通过以下命令查看:lsb_release -a 一.准备工作: ...
- Lnmp下安装memcached
Lnmp下安装memcached 1.先安装 libevent,再安装 Memcached主程序 # tar xf libevent-2.0.21-stable.tar.gz # cd ...
- lnmp一键安装的卸载
http://blog.csdn.net/lansetiankong12/article/details/48130507 如果是lnmp一键安装的 进入安装包目录 [root@www home]# ...
- CentOS5.5 - lnmp环境安装与使用
CentOS5.5 - lnmp环境安装与使用 到公司搭建环境可以直接使用YUM. 安装一.rpm包安装(安装方便) yum:下载软件包并且安装.前提:连网. yum 使用流程: 1. yum lis ...
- 基于lnmp环境安装Discuz
安装环境 Linux:CentOS Linux release 7.5.1804 (Core) nginx:1.14.2 php-fpm:5.4.16 mariadb-server:5.5.60 基本 ...
- lnmp 一键安装
系统需求: CentOS/RHEL/Fedora/Debian/Ubuntu/Raspbian/Deepin Server/Aliyun/Amazon/Mint Linux发行版 需要5GB以上硬盘剩 ...
- HHvm建站环境搭建方法:Nginx,Mariadb,hhvm及lnmp/lamp安装部署
HHVM起源于Facebook公司,是一个开源的PHP虚拟机,使用JIT的编译方式以及其他技术,让PHP代码的执行性能大幅提升.HHVM提升PHP性能的途径,采用的方式就是替代Zend引擎来生成和执行 ...
- Lnmp上安装Yaf学习(二)
上一节主要实践了在Lnmp上安装Yaf扩展,那么这一节将测试 Yaf 的一个简单demo的运行. 一.通过Lnmp 创建 vhost 文件 [root@localhost yaf-3.0.6]# ln ...
随机推荐
- Docker 常用命令,自用,持续更
1.进入容器 docker exec -it 容器id /bin/bash docker exec -it db30f533ee1b /bin/bash 2.复制文件到容器 docker cp 文件路 ...
- avalon在公共页面里面写的功能,怎么让某些页面不引用到这个方法和html?
每一个页面都用用到head.html里面的东西,但是有些页面我不想调用这个js,但是在head.html我已经调用了怎么办? 比如我是这个页面不需要去调用 https://*******/mytry ...
- 制作OpenFOAM计算结果的gif动画【转载】
转载自:http://blog.sina.com.cn/s/blog_6277cbbf0100niqi.html PS:对其中错误地方进行了修正 1.用ParaView将每一帧都输出成图片(File- ...
- windows上hexo: command not found
使用hexo写博客已经有好几个月了,今天突然出现hexo: command not found,应该与我白天的时候调一下环境变量等有关.在对应的path添加环境变量,即可解决该问题.我的环境变量路径为 ...
- cmd命令net和sc
来看windows中启动和关闭服务的方法:在cmd下可有两种方法打开,分别是net和sc. 1.net用于打开没有被禁用的服务, NET命令是功能强大的以命令行方式执行的工具. 它包含了管理网络环境. ...
- Spring’s RestTemplate
Spring’s RestTemplate /** * After the word document is generated in memory we can upload it to the s ...
- Win10下轻松安装centos7.0(推荐)
Windows10下安装centos7.0虚拟机环境 Windows10自带了一个类似Vmware虚拟化产品Hyper-V管理器 如果没有找到这个的小伙伴可以从菜单中的windows管理工具找到如图: ...
- linux: ubuntu 14.04 和16.04 快速下载
由于官网服务器在国外,下载速度奇慢,所以我们可以利用阿里云镜像下载ubuntuubuntu 14.04:http://mirrors.aliyun.com/ubuntu-releases/14.04/ ...
- Flutter -------- dio网络请求
dio是Flutter中文网开源的一个强大的Dart Http请求库,支持Restful API.FormData.拦截器.请求取消.Cookie管理.文件上传/下载.超时等... 1.添加依赖# d ...
- AI学习网址记录
https://ai.yanxishe.com/ https://ai.yanxishe.com/page/blogDetail/14365 GAN网络 对抗式生成网络-图像超分辨及图像修复 完全可见 ...