ASP.NET MVC 4.0 学习4-Code First
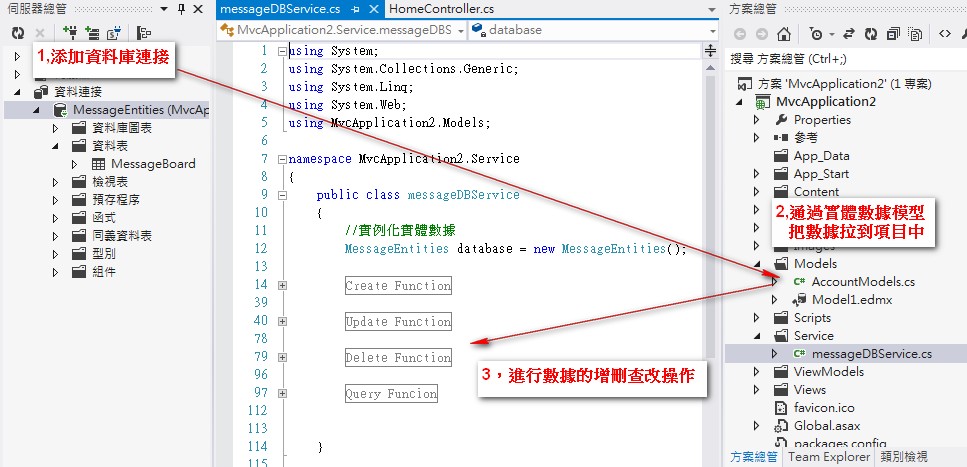
之前我們需要用到的數據,通過添加Entity實體數據模型把數據庫中需要的Database拉到項目中如下圖,
而就是Code First就是相對於這種處理數據的方法而言的
Code First更加準確的解讀是開發人員只需要編寫程式(Code Only),系統會自動建立模型和數據庫
我們來新建一個專案看一下Code First的具體實現
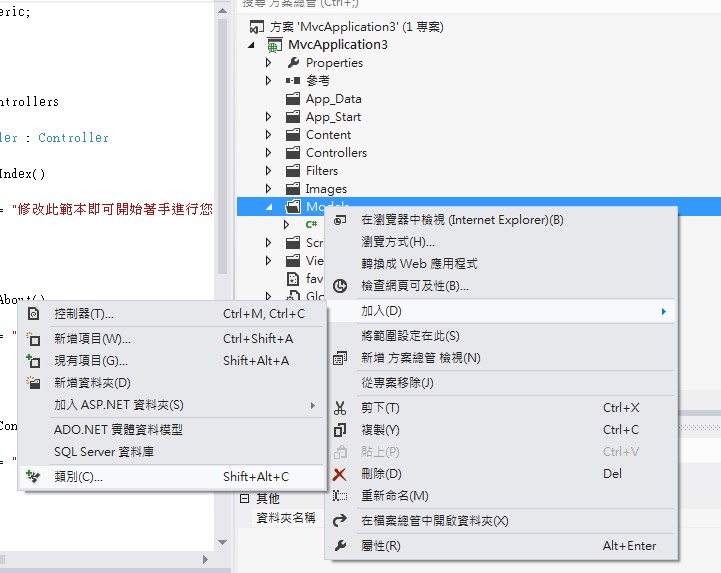
1,新專案的Model中加入類別MessageBoard存儲留言信息
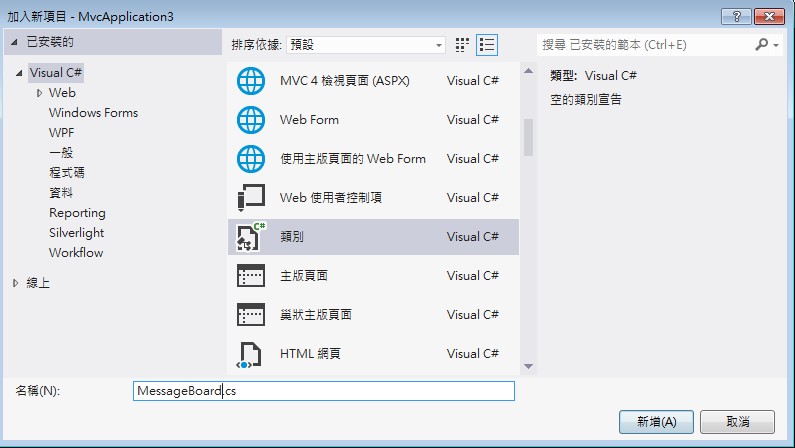
MessageBoard.cs中添加字段屬性:
using System;

using System.Collections.Generic;

using System.Linq;

using System.Web;

using System.ComponentModel.DataAnnotations;

using System.ComponentModel;

namespace MvcApplication3.Models

{

    public class MessageBoard

    {

        [Key]

        public int MsgID { get; set; }

        [Required]

        [DisplayName("姓名:")]

        public string Title { get; set; }

        [Required]

        [DisplayName("內容")]

        public string Content { get; set; }

    }

}
2,Ctrl+Shift+B重建方案後,添加MessageController

範本選擇讀寫功能,模型類別選擇剛建立的Model中的MessageBoard

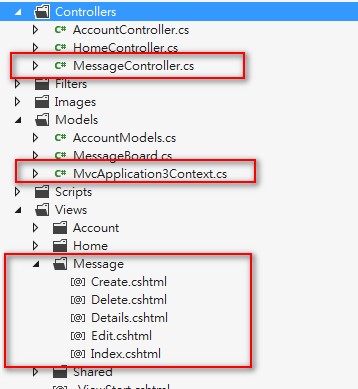
確認以後,我們看到Models和Views中自動生成了對應的文件,MessageController.cs和View中自動添加了相應增刪改:
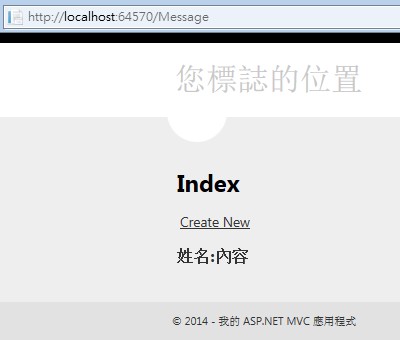
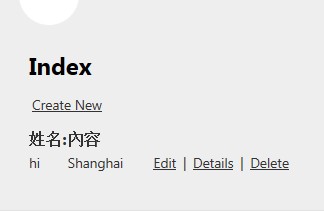
Ctrl+F5運行程式,輸入Message如:http://localhost:64570/Message 我們看到了Message的首頁,並且可以添加留言
增刪查改的功能是我們剛才在添加控制器的時候選擇了“具有讀取/寫入...”功能系統自動實現的:
 →
→ →
→ 
我們剛才並沒有建立數據庫,新增的留言存放在哪裡了?
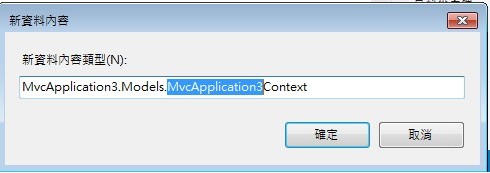
項目中點擊查看所有文件,我們發現App_Data下面產生了.mdf文件,.mdf文件以及Models下的MvcApplication3Context.cs也是在我們添加MessageController這一步選擇“資料內容類別”的時候產生的:
 →→→→
→→→→ 
雙擊.mdf我們看到了生成的Table和Models下MessageBoard.cs中的屬性是一致的:
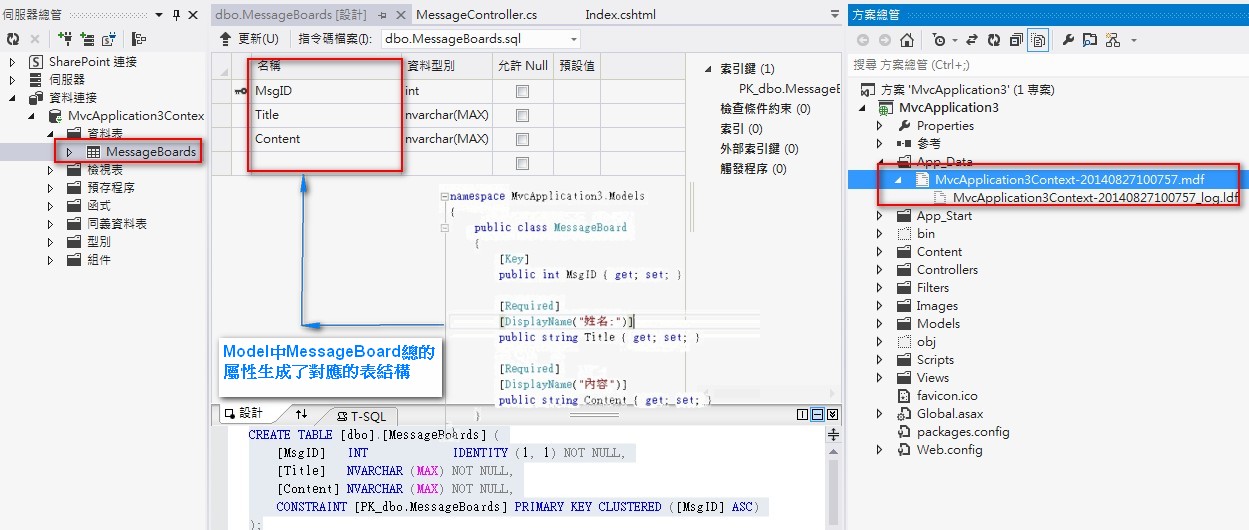
這就是Code First ,我們只需要去編寫Models中的模型,添加Controller時候系統自動幫我們生成了和模型一致的數據庫文件
接下來我們再看一下Models中的模型:
Code First,Model資料模型中的class對應生成了數據庫中的Table: MessageBoard.cs 對應 MessageBoards表
Model中的Class除了對屬性進行定義外,還能定義Table的名稱,Table中的主鍵以及Table間的一對多 多對多關係:
Model中添加兩個模型類,BookModel.cs和AuthorModel.cs,類中借住System.Collenctons命名空間下的Icollection實現了表與表之
間的對應關係:
1,更新MessageBoard.cs類,添加Book和Author的模型定義:
using System;

using System.Collections.Generic;

using System.Linq;

using System.Web;

using System.ComponentModel.DataAnnotations;

using System.ComponentModel;

using System.ComponentModel.DataAnnotations.Schema;

namespace MvcApplication3.Models

{

    public class MessageBoard

    {

        [Key]

        public int MsgID { get; set; }

        [Required]

        [DisplayName("姓名:")]

        public string Title { get; set; }

        [Required]

        [DisplayName("內容")]

        public string Content { get; set; }

    }

    //定義表名稱

    [Table("MyTable")]

    public class BookModels

    {

        //定義主鍵Key

        [Key]

        [DatabaseGeneratedAttribute(DatabaseGeneratedOption.Identity)]

        public int BookID { get; set; }

        [Required]

        public string BookName { get; set; }

        [Required]

        public DateTime PublishTime { get; set; }

        //Book和作者的對應關係: N*1

        public AuthorModels AuthorModels { get; set; }

    }

    //定義表名稱

    [Table("Author")]

    public class AuthorModels

    {

        [Key]

        [DatabaseGeneratedAttribute(DatabaseGeneratedOption.Identity)]

        public int AuthorID { get; set; }

        [Required]

        public string Name { get; set; }

        //作者和數的對應關係:一個作者對應多本數 1*多

        [Required]

        public ICollection<BookModels> BookModels { get; set; }

    }

}
2,更新MvcApplication3Context.cs文件:
using System.Data.Entity;

namespace MvcApplication3.Models

{

    public class MvcApplication3Context : DbContext

    {

        // 您可以將自訂程式碼新增到這個檔案。變更不會遭到覆寫。

        //

        // 如果您要 Entity Framework 每次在您變更模型結構描述時

        // 自動卸除再重新產生資料庫,請將下列

        // 程式碼新增到 Global.asax 檔案的 Application_Start 方法中。

        // 注意: 這將隨著每次模型變更而損毀並重新建立您的資料庫。

        //

        // System.Data.Entity.Database.SetInitializer(new System.Data.Entity.DropCreateDatabaseIfModelChanges<MvcApplication3.Models.MvcApplication3Context>());

        public MvcApplication3Context() : base("name=MvcApplication3Context")

        {

        }

        public DbSet<MessageBoard> MessageBoards { get; set; }

        public DbSet<BookModels> BookModels { get; set; }

        public DbSet<AuthorModels> AuthorModels { get; set; }

    }

}
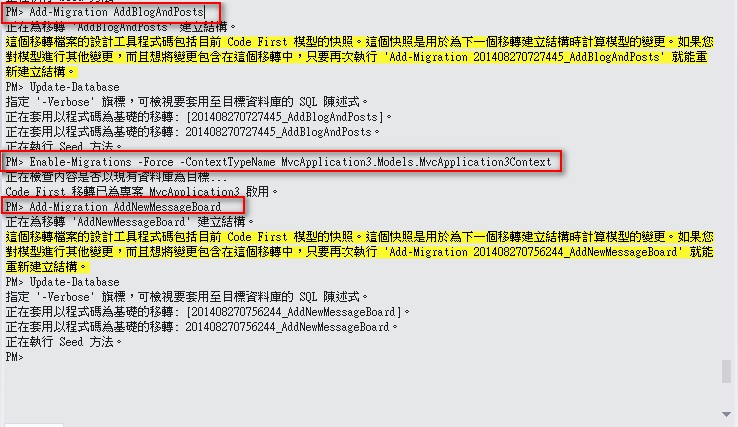
3,打開套件管理器控制臺,逐步執行以下命令:
以下是Code First Migration功能可以參考:http://msdn.microsoft.com/en-us/data/jj193542
- PM> Enable-Migrations -Force -ContextTypeName MvcApplication3.Models.MvcApplication3Context
- PM> Add-Migration AddNewMessageBoard
- PM> Update-Database

執行成功:
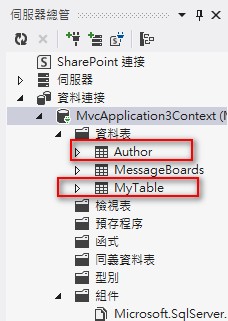
數據庫中我們看到新增加的Table:
ASP.NET MVC 4.0 学习4-Code First的更多相关文章
- ASP.NET MVC 4.0 学习5-ActionResult
一,Controller簡介 Controller擔任了資料傳遞的角色,負責流程控制,決定存取哪個Model以及決定顯示哪個View頁面,即ASP.NET MVC中有關於『傳遞』的任務皆由Contro ...
- ASP.NET MVC 4.0 学习6-Model Binding
一,ViewData,ViewBag與TempData ASP.NET MVC架構中,通過繼承在Controller中的ViewData,ViewBag和TempData和View頁面進行資料的存取, ...
- ASP.NET MVC 4.0 学习2-留言板實現
新增專案實現留言板功能,瞭解MVC的運行機制 1,新增專案 2,添加數據庫文件message.mdf Ctrl+W,L 打開資料庫連接,添加存放留言的Atricle表 添加字段,後點擊&quo ...
- ASP.NET MVC 4.0 学习1-C#基础语法
1,方法多載,相同的方法名稱,不同的參數類型.數量 class Program { static void Main(string[] args) { Program newObject = new ...
- ASP.NET MVC 4.0 学习3-Model
Model負責獲取數據庫中的資料,並對數據庫中的數據進行處理. MVC中有關 數據庫 的任務都由Model來完成,Model中對數據資料進行定義,Controller和View中都會參考到Model, ...
- 从零开始学习ASP.NET MVC 1.0
转自:http://www.cnblogs.com/zhangziqiu/archive/2009/02/27/ASPNET-MVC-1.html <从零开始学习ASP.NET MVC 1.0& ...
- 安装了VS2010 sp1 后再安装ASP.NET MVC 3.0的问题(Final Result: Installation failed with error code: (0x80070643), "安装时发生严重错误 " (Ela)
原文:安装了VS2010 sp1 后再安装ASP.NET MVC 3.0的问题(Final Result: Installation failed with error code: (0x800706 ...
- 系列文章--从零开始学习ASP.NET MVC 1.0
从零开始学习ASP.NET MVC 1.0 (一) 开天辟地入门篇 从零开始学习 ASP.NET MVC 1.0 (二) 识别URL的Routing组件 从零开始学习 ASP.NET MVC 1.0 ...
- 安装了VS2010 sp1 后再安装ASP.NET MVC 3.0的问题
安装了VS2010 sp1 后再安装ASP.NET MVC 3.0的问题(Final Result: Installation failed with error code: (0x80070643) ...
随机推荐
- IIS7 MVC网站生成、发布
imihiro IIS7 MVC网站生成.发布 (1)生成. 确保System.Web.Mvc.dll在bin目录下 (2)发布网站到文件系统 (3)在IIS中为网站添加应用程序池(一个虚拟目录,一个 ...
- Android原理View、ViewGroup
Android的UI界面都是由View和ViewGroup及其派生类组合而成的.其中,View是所有UI组件的基类,而ViewGroup是容纳这些组件的容器,其本身也是从View派生出来的.Andro ...
- 从头到尾彻底理解KMP(2014年8月22日版)
http://blog.csdn.net/v_july_v/article/details/7041827
- linux操作系下RAR的使用
============zip文件的操作================================== zip -r data.zip data 解释:将data文件夹压缩成了data.zip格 ...
- bootargs中的环境变量说明和一些常用的uboot命令
bootargs中的环境变量说明和一些常用的uboot命令 一些常见的uboot命令:Help [command]在屏幕上打印命令的说明Boom [addr]启动在内存储器的内核Tftpboot通过t ...
- 福建省队集训被虐记——DAY4
啊啊啊啊啊啊第四天考的是我最不擅长的图论--整个人都斯巴达了 //另外不得不吐槽下午的上课讲的都是网络流--难道是出题人觉得图论里除了网络流以外的其他算法都没有人权图样图森破? 愚蠢的算法(clums ...
- Textarea - 百度富文本编辑器插件UEditor
UEditor各种实例演示 Ueditor 是百度推出的一款开源在线 HTML 编辑器. 主要特点: 轻量级:代码精简,加载迅速. 定制化:全新的分层理念,满足多元化的需求.采用三层架构:1. 核心层 ...
- [置顶] Objective-C ,ios,iphone开发基础:自定义控件:Eg: UIButton
第一步:新建一个工程,在 .h文件中坐如下声明: #import <UIKit/UIKit.h> @interface MyButtonViewController : UIViewCon ...
- python之路-pip安装
pip类似RedHat里面的yum,安装Python包非常方便 安装pip方法: 1.安装环境:ubuntu-14.04.2 sudo apt-get install python-pip pyt ...
- Sort(归并)
Sort 时间限制:1000 ms | 内存限制:65535 KB 难度:4 描述 You want to processe a sequence of n distinct integers ...
