WPF布局的应用
一 写在开头
1.1 本文内容
本文主要内容是使用WPF来实现几个简单的界面。
二 登录窗口小例子
2.1 实现代码
XAML代码:
 <Window x:Class="LoginDialog.MainWindow"

         xmlns="http://schemas.microsoft.com/winfx/2006/xaml/presentation"

         xmlns:x="http://schemas.microsoft.com/winfx/2006/xaml"

         Title="Login" Height="200" Width="400">

     <Grid>

         <Grid>

             <Grid.RowDefinitions>

                 <RowDefinition></RowDefinition>

                 <RowDefinition></RowDefinition>

                 <RowDefinition></RowDefinition>

             </Grid.RowDefinitions>

             <Grid.ColumnDefinitions>

                 <ColumnDefinition></ColumnDefinition>

                 <ColumnDefinition></ColumnDefinition>

             </Grid.ColumnDefinitions>

             <TextBlock HorizontalAlignment="Center" VerticalAlignment="Center" Margin="5" Grid.Row="0" Grid.Column="0" Text="用户名:" FontSize="18px"></TextBlock>

             <TextBox Name="tbUserName" Margin="5" Grid.Row="0" Grid.Column="1"></TextBox>

             <TextBlock HorizontalAlignment="Center" VerticalAlignment="Center" Margin="5" Grid.Row="1" Grid.Column="0" Text="密码:" FontSize="18px"></TextBlock>

             <PasswordBox Name="pbPassword" Margin="5" Grid.Row="1" Grid.Column="1"></PasswordBox>

             <Button Name="btnLogin" Margin="10" Grid.Row="2" Grid.Column="0" Content="登录" FontSize="18px" Click="btnLogin_Click"></Button>

             <Button Name="btnCancel" Margin="10" Grid.Row="2" Grid.Column="1" Content="取消" FontSize="18px"></Button>

         </Grid>

     </Grid>

 </Window>
逻辑代码:
 private void btnLogin_Click(object sender, RoutedEventArgs e)

 {

     string username = tbUserName.Text;

     string password = pbPassword.Password;

     if ((username == "") || (password == ""))

     {

         MessageBox.Show("用户名或密码不能为空!");

     }

     else

     {

         if ((username == "admin") && (password == ""))

         {

             MessageBox.Show("登录成功!");

         }

         else

         {

             MessageBox.Show("用户名或密码错误!");

         }

     }

 }
上面的逻辑代码中有个需要注意的地方。在WPF中TextBox和PasswordBox这两个输入框在用户没有输入的时候返回值为空字符串(即"")而不是null!
2.2 效果图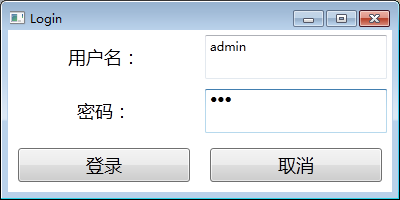
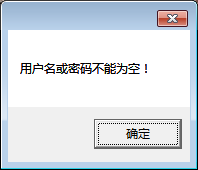
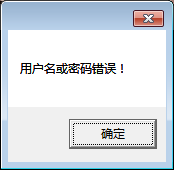
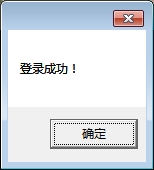
三 连连看游戏界面的实现
3.1 实现代码
XAML代码:
 <Window x:Class="连连看.MainWindow"

         xmlns="http://schemas.microsoft.com/winfx/2006/xaml/presentation"

         xmlns:x="http://schemas.microsoft.com/winfx/2006/xaml"

         Title="MainWindow" Height="600" Width="600" Loaded="Window_Loaded">

     <Grid>

         <Grid Name="gridGame"></Grid>

     </Grid>

 </Window>
为什么XAML里只有一个名为gridGame的Grid布局?因为界面中的元素在下面的逻辑代码中动态地创建了。
逻辑代码:
 private void Window_Loaded(object sender, RoutedEventArgs e)

 {

     // 修改窗口标题

     this.Title = "连连看";

     // 动态设定gridGame为10行10列

     for (int i = ; i < ; i++)

     {

         RowDefinition rd = new RowDefinition();

         gridGame.RowDefinitions.Add(rd);

         ColumnDefinition cd = new ColumnDefinition();

         gridGame.ColumnDefinitions.Add(cd);

     }

     // 随机数产生器

     Random random = new Random();

     // 随机产生图片名称并填入10行10列的格子中

     for (int i = ; i < ; i++)

     {

         for (int j = ; j < ; j++)

         {

             Image img = new Image();

             int imgNum = random.Next(, );

             img.Source = new BitmapImage(new Uri("img/" + imgNum + ".png", UriKind.Relative));

             Grid.SetRow(img, i);

             Grid.SetColumn(img, j);

             gridGame.Children.Add(img);

         }

     }

 }
3.2 效果图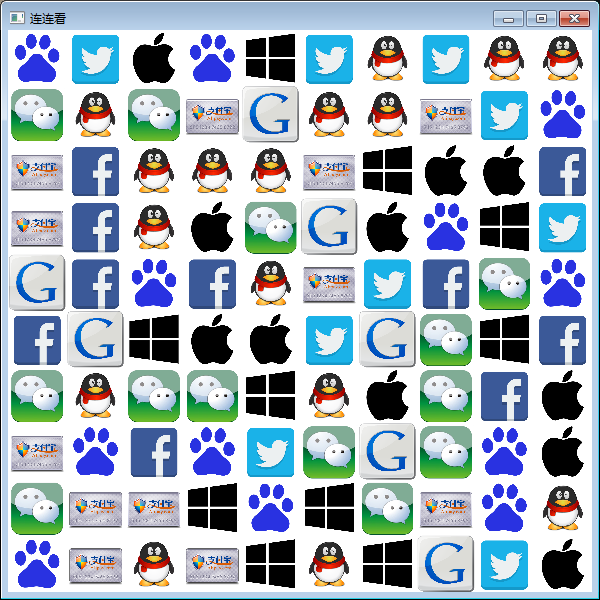
四 Windows计算器界面的实现
4.1 实现代码
XAML代码:
<Window x:Class="计算器.MainWindow"
xmlns="http://schemas.microsoft.com/winfx/2006/xaml/presentation"
xmlns:x="http://schemas.microsoft.com/winfx/2006/xaml"
Title="计算器" Height="332" Width="228">
<Grid>
<DockPanel>
<Menu DockPanel.Dock="Top">
<MenuItem Header="查看"></MenuItem>
<MenuItem Header="编辑"></MenuItem>
<MenuItem Header="帮助"></MenuItem>
</Menu>
<Grid>
<Grid.RowDefinitions>
<RowDefinition></RowDefinition>
<RowDefinition></RowDefinition>
<RowDefinition></RowDefinition>
<RowDefinition></RowDefinition>
<RowDefinition></RowDefinition>
<RowDefinition></RowDefinition>
<RowDefinition></RowDefinition>
</Grid.RowDefinitions>
<Grid.ColumnDefinitions>
<ColumnDefinition></ColumnDefinition>
<ColumnDefinition></ColumnDefinition>
<ColumnDefinition></ColumnDefinition>
<ColumnDefinition></ColumnDefinition>
<ColumnDefinition></ColumnDefinition>
</Grid.ColumnDefinitions>
<TextBlock Grid.Row="0" Grid.Column="0" FontSize="18px" TextAlignment="Right" Text="0" Grid.ColumnSpan="5"></TextBlock>
<Button Grid.Row="1" Grid.Column="0" Content="MC"></Button>
<Button Grid.Row="1" Grid.Column="1" Content="MR"></Button>
<Button Grid.Row="1" Grid.Column="2" Content="MS"></Button>
<Button Grid.Row="1" Grid.Column="3" Content="M+"></Button>
<Button Grid.Row="1" Grid.Column="4" Content="M-"></Button>
<Button Grid.Row="2" Grid.Column="0" Content="<--"></Button>
<Button Grid.Row="2" Grid.Column="1" Content="CE"></Button>
<Button Grid.Row="2" Grid.Column="2" Content="C"></Button>
<Button Grid.Row="2" Grid.Column="3" Content="±"></Button>
<Button Grid.Row="2" Grid.Column="4" Content="√"></Button>
<Button Grid.Row="3" Grid.Column="0" Content="7"></Button>
<Button Grid.Row="3" Grid.Column="1" Content="8"></Button>
<Button Grid.Row="3" Grid.Column="2" Content="9"></Button>
<Button Grid.Row="3" Grid.Column="3" Content="/"></Button>
<Button Grid.Row="3" Grid.Column="4" Content="%"></Button>
<Button Grid.Row="4" Grid.Column="0" Content="4"></Button>
<Button Grid.Row="4" Grid.Column="1" Content="5"></Button>
<Button Grid.Row="4" Grid.Column="2" Content="6"></Button>
<Button Grid.Row="4" Grid.Column="3" Content="*"></Button>
<Button Grid.Row="4" Grid.Column="4" Content="1/x"></Button>
<Button Grid.Row="5" Grid.Column="0" Content="1"></Button>
<Button Grid.Row="5" Grid.Column="1" Content="2"></Button>
<Button Grid.Row="5" Grid.Column="2" Content="3"></Button>
<Button Grid.Row="5" Grid.Column="3" Content="-"></Button>
<Button Grid.Row="5" Grid.RowSpan="2" Grid.Column="4" Content="="></Button>
<Button Grid.Row="6" Grid.Column="0" Grid.ColumnSpan="2" Content="0"></Button>
<Button Grid.Row="6" Grid.Column="2" Content="."></Button>
<Button Grid.Row="6" Grid.Column="3" Content="+"></Button>
</Grid>
</DockPanel>
</Grid>
</Window>
4.2 效果图
WPF布局的应用的更多相关文章
- 对比MFC资源文件谈谈WPF布局方式
对比MFC资源文件谈谈WPF布局方式 MFC方式 对于传统的MFC基于UI的应用程序设计通常分两步走,首先是设计UI,使用的是RC文件,然后是代码文件,对RC文件进行操作,如下面Figure 1 的基 ...
- WPF快速入门系列(1)——WPF布局概览
一.引言 关于WPF早在一年前就已经看过<深入浅出WPF>这本书,当时看完之后由于没有做笔记,以至于我现在又重新捡起来并记录下学习的过程,本系列将是一个WPF快速入门系列,主要介绍WPF中 ...
- 学习WPF——WPF布局——了解布局容器
WPF布局工作内部原理 WPF渲染布局时主要执行了两个工作:测量和排列 测量阶段,容器遍历所有子元素,并询问子元素所期望的尺寸 排列阶段,容器在合适的位置放置子元素,并设置元素的最终尺寸 这是一个递归 ...
- WPF 布局总结
一.WPF布局原理 WPF窗口只能包含单个元素,为在WPF窗口中放置多个元素,需要放置一个容器,让后在容器中添加其他元素.“理想的”WPF窗口需遵循以下几个原则: 1.不应显示设定元素的尺寸.元素应当 ...
- 浅谈 WPF布局
我们首先来了解一下图形化用户界面(Graphic User Interface)也就是我们常常听到的GUI.举个简单的例子,同样是数据,我们可以用控制台程序加格式控制符等输出,但是这些都不如GUI来的 ...
- WPF布局系统[转]
转自:http://www.cnblogs.com/niyw/archive/2010/10/31/1863908.html前言 前段时间忙了一阵子Google Earth,这周又忙了一阵子架构师论文 ...
- 意外地解决了一个WPF布局问题
原文:意外地解决了一个WPF布局问题 今天做了一个小测试,意外地将之前的一个困扰解决了,原问题见<WPF疑难杂症会诊>中的“怎么才能禁止内容撑大容器?” 以前我是在外侧嵌套Canvas容器 ...
- WPF布局控件与子控件的HorizontalAlignment/VerticalAlignment属性之间的关系
WPF布局控件与子控件的HorizontalAlignment/VerticalAlignment属性之间的关系: 1.Canvas/WrapPanel控件: 其子控件的HorizontalAlign ...
- WPF 10天修炼 第四天- WPF布局容器
WPF布局 WPF的窗口也就是Window类,是一个内容控件,该控件派生自ContentControl.内容控件有一个Content属性,该属性有一个限制,只能放置一个用户界面元素,或一个字符串.为了 ...
- WPF布局控件常用属性介绍
WPF布局控件常用属性介绍 其它 | 作者:慧都控件网 | 2011-04-06 13:41:57| 阅读 0次 有用(0) 评论(0) 概述:WPF布局控件都是派生自System.Windows ...
随机推荐
- Ubuntu17.04 sudo apt-get update升级错误
最近在折腾Ubuntu,安装的是17.04版本的.想安装PHP7.X最新版本,但是要先升级.利用sudo apt-get update命名后,出现了以下报错: 忽略:1 http://cn.archi ...
- ASP.NET -- WebForm -- ScriptManager 类
ASP.NET -- WebForm -- ScriptManager 类 通过 ScriptManager 可注册随后将作为页面一部分呈现的脚本. 1. 注册并立即执行脚本. --RegisterS ...
- SQLServer之UNIQUE约束
UNIQUE约束添加规则 1.唯一约束确保表中的一列数据没有相同的值. 2.与主键约束类似,唯一约束也强制唯一性,但唯一约束用于非主键的一列或者多列的组合,且一个表可以定义多个唯一约束. 使用SSMS ...
- linux下安装nodejs及npm
转:https://www.cnblogs.com/wuyoucao/p/7011666.html 1.下载npm包 官网下载npm安装包,https://nodejs.org/en/,左边是稳定版右 ...
- Linux运维基础
一.服务器硬件 二.Linux的发展史 三.Linux的系统安装和配置 四.Xshell的安装和优化 五.远程连接排错 六.Linux命令初识 七.Linux系统初识与优化 八.Linux目录结构 九 ...
- [LeetCode] 6. Z 字形变换
题目链接:(https://leetcode-cn.com/problems/zigzag-conversion/) 题目描述: 将一个给定字符串根据给定的行数,以从上往下.从左到右进行 Z 字形排列 ...
- multiset的erase()操作中出现跳过元素的问题
昨天,我写了一个multiset去重,让tt指向it的后面第一个元素,若重复则删除这2个元素,并令it=tt,it++:来使it指向tt的下一个元素(我想指向原it的后面第2个元素,并认为tt的下一个 ...
- Bootstrap开发框架视频整理
最近到客户处进行实地培训,整理了很多培训的材料,现将它们录制相关主题的视频,作为我的Bootstrap开发框架的知识补充,希望给感兴趣的朋友进行了解.培训内容主要包括基础框架部分.MVC框架部分.Bo ...
- 一段c++代码实现睡眠功能
#ifdef ACL_UNIX struct timeval tv; tv.tv_sec = delay / 1000; tv.tv_usec = (suseconds_t) (delay - tv. ...
- asp.net core 中间件粗解
中间件 中间件在asp.net core中非常重要,它用来处理httpcontext.而httpcontext封装了请求和响应.也就是说,中间件是用来处理请求和响应的. 本质上,中间件被封装到了IAp ...
