iOS模糊效果(毛玻璃效果)的实现
前一段时间项目中用到毛玻璃效果,那时对UIBlurEffect类和 UIVisualEffectView这两个类做了一部分了解。但当时并没有去特别的深入研究,直到项目做完后,才静下心来好好研究了一番。记录一下。
iOS8之后,Apple新添加UIBlurEffect类、UIVibrancyEffect类 和 UIVisualEffectView类这三种类,用途就是对背景色进行模糊化,也就是我们称的 "毛玻璃效果"。接下来就对具体的使用做一下分析吧。
其实细看下来,Apple对这种特效封装的很好,所以我们使用起来的并不需要什么步骤。不得不佩服Apple的强大啊。
1、关于UIBlurEffect类
我们首先看UIBlurEffect类,Apple文档中只给出了一个方法:
+ (UIBlurEffect *)effectWithStyle:(UIBlurEffectStyle)style;
我们实现也是这样:
 /**

     *   模糊效果的三种风格

     *

     *  @param UIBlurEffectStyle

       UIBlurEffectStyleExtraLight,//额外亮度,(高亮风格)

       UIBlurEffectStyleLight,//亮风格

       UIBlurEffectStyleDark//暗风格

     *

     */

    //实现模糊效果

    UIBlurEffect *blurEffrct =[UIBlurEffect effectWithStyle:UIBlurEffectStyleLight];
2、关于UIVibrancyEffect类
文档中给出的也是一个方法:
+ (UIVibrancyEffect *)effectForBlurEffect:(UIBlurEffect *)blurEffect;
官方给出的解释是这样的
/* UIVibrancyEffect amplifies and adjusts the color of content layered behind the view, allowing content placed inside the contentView to become more vivid. It is intended to be placed over, or as a subview of, a UIVisualEffectView that has been configured with a UIBlurEffect. This effect only affects content added to the contentView. Because the vibrancy effect is color dependent, subviews added to the contentView need to be tintColorDidChange aware and must be prepared to update themselves accordingly. UIImageView will need its image to have a rendering mode of UIImageRenderingModeAlwaysTemplate to receive the proper effect.
*/
翻译如下:
UIVibrancyEffect的作用是放大和调整UIVisualEffectView内容视图的内容的颜色,让UIVisualEffectView的contentView中的内容看起来更加生动。它作为一个子视图被放置在UIVisualEffectView上面,去连接UIBlurEffect。这种效果只会影响添加到UIVisualEffectView的contentView上的内容。因为活力影响是受颜色依赖的.....
我们可以看出:通常UIVibrancyEffect对象是与UIBlurEffect一起使用,主要用于处理在UIBlurEffect特效上的一些显示效果。
下面看看实现代码:
//实现模糊效果

    UIBlurEffect *blurEffrct =[UIBlurEffect effectWithStyle:UIBlurEffectStyleLight];

    UIVibrancyEffect *vibrancyEffect = [UIVibrancyEffect effectForBlurEffect:blurEffrct];

    UIVisualEffectView *visualEffectView = [[UIVisualEffectView alloc]initWithEffect:vibrancyEffect];

   // visualEffectView.backgroundColor = [ UIColor grayColor ];
visualEffectView.contentView.frame = CGRectMake(10, 100, 300, 500);
[self.view addSubview:visualEffectView];
下面我们往 UIVisualEffectView 的contentView上添加个view看看效果
UILabel *label = [[UILabel alloc]initWithFrame:CGRectMake(, , , )];

    label.text = @"曾经撒次考试了hhhhhhhhhhhhhhh";

    label.textAlignment = NSTextAlignmentLeft;

    label.font = [UIFont systemFontOfSize:];

    label.tintColor = [UIColor yellowColor];

    label.numberOfLines = ;

    [visualEffectView.contentView addSubview:label];
上面代码中可以看到, 我改变Label中text的颜色是使用的:tintColor ,这也是特别要注意的地方,文档中也有专门提出,并给出了解释:Because the vibrancy effect is color dependent, subviews added to the contentView need to be tintColorDidChange aware and must be prepared to update themselves accordingly. 所以我们使用 label.textColor去改变颜色是完全不起作用的。
运行效果图如下:(只剪切出效果部分)
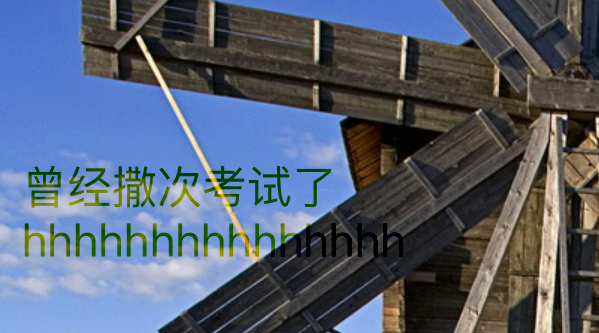
至于颜色不是设置的yellowColor,我想不需要多说了吧,这就是UIVibrancyEffect的功能。
3、UIVisualEffectView类
老规矩先看文档:也是寥寥的四种,其中值得一提的是:contentView。这里明确告诉我们:不要直接添加子视图去UIVisualEffectView,而是要添加到contentView上。
@property (nonatomic, strong, readonly) UIView *contentView; // Do not add subviews directly to UIVisualEffectView, use this view instead.

@property (nonatomic, copy, nullable) UIVisualEffect *effect;

- (instancetype)initWithEffect:(nullable UIVisualEffect *)effect NS_DESIGNATED_INITIALIZER;

- (nullable instancetype)initWithCoder:(NSCoder *)aDecoder NS_DESIGNATED_INITIALIZER;
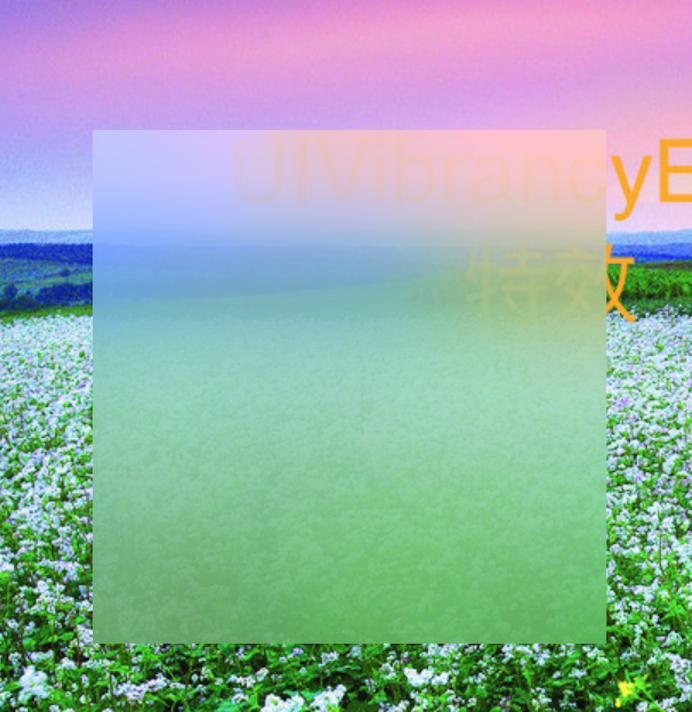
这里我就给出一个比较完整的代码(我们看一看UIBlurEffect类 和 UIVisualEffectView类 的效果):
    self.view.backgroundColor = [UIColor colorWithPatternImage:[UIImage imageNamed:@"6.jpg"]];

    /**

     *   模糊效果的三种风格

     *

     *  @param UIBlurEffectStyle

       UIBlurEffectStyleExtraLight,//额外亮度,(高亮风格)

       UIBlurEffectStyleLight,//亮风格

       UIBlurEffectStyleDark//暗风格

     *

     */

    //实现模糊效果

    UIBlurEffect *blurEffrct =[UIBlurEffect effectWithStyle:UIBlurEffectStyleLight];

    //毛玻璃视图

    UIVisualEffectView *visualEffectView = [[UIVisualEffectView alloc]initWithEffect:blurEffrct];

    visualEffectView.frame = CGRectMake(, , , );

    visualEffectView.alpha = 0.9;

    [self.view addSubview:visualEffectView];
看看效果图是不是你想要的:
关于iOS8之前的实现,可以去github上看看一些封装库。有很多不错的三方库不错,这里就不列出了。
iOS模糊效果(毛玻璃效果)的实现的更多相关文章
- iOS 实现毛玻璃效果
话说苹果在iOS7.0之后,很多系统界面都使用了毛玻璃效果,增加了界面的美观性,比如下图的通知中心界面; 但是其iOS7.0的SDK并没有提供给开发者实现毛玻璃效果的API,所以很多人都是通过一些别人 ...
- iOS制作毛玻璃效果
//添加一个图片 UIImageView *imageview = [[UIImageView alloc]init]; imageview.frame = CGRectMake(10, 100, 3 ...
- Swift 之模糊效果(毛玻璃效果,虚化效果)的实现
前言: 之前项目中有用到过Objective-C的的模糊效果,感觉很是不错,而且iOS8之后官方SDK也直接提供了可以实现毛玻璃效果的三个类:UIBlurEffect.UIVibrancyEffect ...
- iOS开发探索-高斯模糊&毛玻璃效果
iOS开发中有的时候需要将图片设置模糊,来实现特定的效果获取更好的用户体验, iOS7之后半透明模糊效果得到大范围使用的比较大,现在也可以看到很多应用局部用到了图片模糊效果,可以通过高斯模糊和毛玻璃效 ...
- iOS 毛玻璃效果的实现方法
iOS开发中有的时候需要将图片设置模糊,来实现特定的效果获取更好的用户体验, iOS7之后半透明模糊效果得到大范围使用的比较大,现在也可以看到很多应用局部用到了图片模糊效果,可以通过高斯模糊和毛玻璃效 ...
- iOS毛玻璃效果的实现方法
ios开发中常常用到的毛玻璃效果实现方法 iOS8以后使用系统里的UIBlurEffect可以实现,UIBlurEffect继承自UIVisualEffect UIBlurEffectStyle有三个 ...
- iOS开发小技巧--实现毛玻璃效果的方法
一.美工出图 二.第三方框架 -- DRNRealTimeBlur,框架继承自UIView.使用方法:创建UIView直接继承自框架的View,就有了毛玻璃效果 三.CoreImage -- 图片加高 ...
- iOS 实现简单的毛玻璃效果
最近在整理导航栏的渐隐渐现效果,整理过程中偶然学会了图片的毛玻璃效果实现,很简单,不多说了,先上图看看效果对比, 这是原图, 这是加了效果后的,创建图片的代码就不上了,下面看下添加效果的代码: // ...
- iOS - 毛玻璃效果封装
#import <UIKit/UIKit.h> #import <Accelerate/Accelerate.h> @interface UIImage (TY_ImageEd ...
随机推荐
- tensrflow python [defunct]
在ubuntu上面安装了GPU版本的tensorflow后,很容易碰到zombie thread 的问题,无法正常关闭tensorflow的线程,用ps aux|grep python可以看到 pyt ...
- 面试题目——《CC150》树与图
面试题4.1:实现一个函数,检查二叉树是否平衡.在这个问题中,平衡树的定义如下:任意一个结点,其两颗子树的高度差不超过1. 思路:两个方法,第一种速度较快 package cc150; public ...
- LoadRunner 函数之 web_custom_request
Allows you to create a custom HTTP request with any method supported by HTTP. List of Attributes URL ...
- memcached的key,value,过期时间的限制
1. key值最大长度? memcached的key的最大长度是250个字符,是memcached服务端的限制. 如果您使用的客户端支持"key的前缀"或类似特性,那么key( ...
- php中session锁--如何防止阻塞请求(译)
现代浏览器限制到一个host并发连接的数量一般为4或6.这意味着,如果您的web页面加载几十个来自同一个host的assert file(js.图像.css)时,由于并发数的限制,会产生排队.同样甚至 ...
- 浅谈Android中Activity的生命周期
引言 我想对于Android开发人员来说,Activity是再熟悉不过了,今天我们就来探讨下Activity的生命周期.熟悉的掌握Activity对于开发健壮的Android应用程序来说至关重要.下面 ...
- scp命令详解
\ svn 删除所有的 .svn文件 find . -name .svn -type d -exec rm -fr {} \; linux之cp/scp命令+scp命令详解 名称:cp 使用权限: ...
- R语言-处理异常值或报错的三个示例
博客总目录:http://www.cnblogs.com/weibaar/p/4507801.html Tuesday, March 31, 2015 之前用rvest帮人写了一个定期抓取amazon ...
- maven项目常见问题
问题1:Maven项目,右键-update project后报错如下的解决办法: 1).DescriptionResourcePathLocationType Java compiler level ...
- 第2月第25天 BlocksKit
1.blockskit https://github.com/zwaldowski/BlocksKit bk_showAlertViewWithTitle 2.toast +(void)showToa ...