Spring Boot配置方式
Spring提供了xml、注解、Java配置、groovy配置实现Bean的创建和注入。
配置元数据
无论xml配置、注解配置还是Java配置,都被称为配置元数据,所谓元数据即描述数据的数据。元数据本身不具备任何可执行的能力,只能通过外界代码对这些元数据进行解析后进行一些有意义操作。Spring容器解析这些配置元数据进行Bean初始化、配置和管理依赖。
准备工作
本文代码测试均在《Spring Boot应用连接数据库MySQL》基础上开发。在com.neon.apple包下,建立一个名为service。然后建立功能类TestService ,使用TestService 的功能类UseTestService,Java配置类JavaConfig,XML配置类XMLConfig。在src/main/resources下建立application-bean.xml。
xml配置
在Spring 1.x时代,使用Spring开发满眼都是xml配置的Bean。Spring IoC有个非常核心的概念bean。由Spring容器来负责Bean的实例化,装配和管理。xml用来描述Bean的配置关系,Spring从XML配置文件中读取任何类型的元数据并自动转换成相应的Java代码。使用XML来配置Bean失去编译时的类型安全检查,同时大量的XML配置使得整个项目变得更加复杂。
下面简单介绍xml配置的使用。
1、编写功能类的Bean
package com.neon.apple.service;

public class TestService {

    public TestService(){

        System.out.println("TestService.TestService()");

    }

    public void SayHello(){

        System.out.println("Hello World!");

    }

}
2、使用功能类的Bean
package com.neon.apple.service;

public class UseTestService {

    TestService testService;

    public UseTestService(TestService testService){

        System.out.println("UseTestService.UseTestService()");

        this.testService = testService;

        this.testService.SayHello();

        System.out.println(this.testService.getName());

     }

}
3、编辑XML文件application-bean.xml
编辑src/main/resources下的application-bean.xml,装配TestService Bean,通过属性注入法设置类的属性值,通过构造方法注入TestService Bean装配UseTestService。
<?xml version="1.0" encoding="UTF-8"?>

<beans xmlns="http://www.springframework.org/schema/beans"

 xmlns:xsi="http://www.w3.org/2001/XMLSchema-instance" xmlns:context="http://www.springframework.org/schema/context"

 xmlns:tx="http://www.springframework.org/schema/tx"

 xsi:schemaLocation="http://www.springframework.org/schema/beans http://www.springframework.org/schema/beans/spring-beans-2.5.xsd

 http://www.springframework.org/schema/context http://www.springframework.org/schema/context/spring-context-2.5.xsd

 http://www.springframework.org/schema/tx http://www.springframework.org/schema/tx/spring-tx-2.5.xsd">

 <!-- 通过属性注入(setter方法) -->

 <bean name="TestService" class="com.neon.apple.service.TestService">

  <property name="id" value="1"></property>

  <property name="name" value="张三"></property>

 </bean>

 <!-- 通过构造方法注入 -->

 <bean name="UseTestService" class="com.neon.apple.service.UseTestService" autowire="byName">

  <constructor-arg ref = "TestService"></constructor-arg>

 </bean>

</beans>
4、注入配置文件application-bean.xml
编写类XMLConfig ,确保application-bean.xml能被Spring Boot可以扫描到。
package com.neon.apple.service;

import org.springframework.context.annotation.Configuration;

import org.springframework.context.annotation.ImportResource;

@Configuration

@ImportResource(locations={"classpath:application-bean.xml"})

public class XMLConfig {

}
5、运行
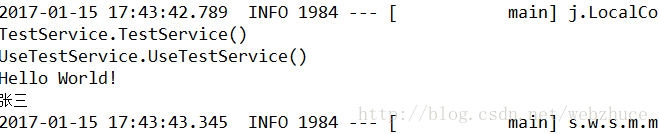
注解配置
在Spring 2.x时代,随着JDK 1.5带来的注解支持,Spring提供了声明Bean的注解(如@Service、@Component)大大减少了配置量。Spring使用注解来描述Bean的配置与采用XML相比,因类注释是在一个类源代码中,可以获得类型安全检查的好处,可以良好地支持重构。
1、编写功能类的Bean
使用@Service注解声明当前TestService类时Spring管理的一个Bean。
package com.neon.apple.service;

import org.springframework.stereotype.Service;

@Service

public class TestService {

    public TestService(){

        System.out.println("TestService.TestService()");

    }

    public void SayHello(){

        System.out.println("Hello World!");

    }

}
代码解释:
使用@Service注解声明当前TestService类是Spring 管理的一个Bean,其中,使用@Component、@Controller等是等效。
2、使用功能类的Bean
使用@Autowired将TestService的实体Bean注入到UseTestService中,让UserTestService具备FunctionService的功能。
package com.neon.apple.service;

import org.springframework.beans.factory.annotation.Autowired;

import org.springframework.stereotype.Service;

@Service

public class UseTestService {

    @Autowired

    TestService testService;

    public UseTestService(TestService testService){

         System.out.println("UseTestService.UseTestService()");

         testService.SayHello();

    }

}
代码解释:
使用@Autowired将TestService的实体Bean注入UseTestService中,让UseTestService具备TestService的功能。
3、运行
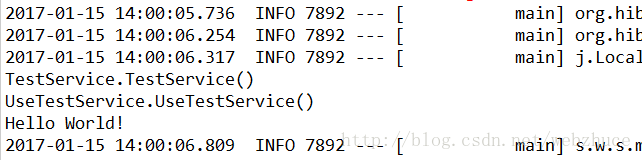
Java配置
从Spring 3.x开始,Spring提供了Java配置的能力。Java配置是Spring4.x推荐的配置方式,可以完全替代xml配置;Java配置也是Spring Boot推荐的配置方式。
Java配置是通过@Configuration和@Bean来实现的。
1、@Configuration声明当前类是一个配置类,相当于一个Spring配置的xml文件
2、@Bean注解在方法上,声明当前方法的返回值为一个Bean。
1、编写功能类的Bean
没有@Service注解用来声明Bean。
package com.neon.apple.service;

public class TestService {

    public TestService(){

        System.out.println("TestService.TestService()");

    }

    public void SayHello(){

        System.out.println("Hello World!");

    }

}
2、使用功能类的Bean
没有@Service注解用来声明Bean,没有@Autowired注解将TestService的实体Bean注入到UseTestService中,让UserTestService具备FunctionService的功能。
package com.neon.apple.service;
public class UseTestService { TestService testService; public UseTestService(TestService testService){
System.out.println("UseTestService.UseTestService()");
this.testService = testService;
this.testService.SayHello();
}
}3、配置类
编辑配置类JavaConfig 。package com.neon.apple.service; import org.springframework.context.annotation.Bean;
import org.springframework.context.annotation.Configuration; @Configuration
public class JavaConfig { @Bean
public TestService TestService(){
return new TestService();
} @Bean
public UseTestService UseTestService(){
return new UseTestService(TestService());
} // @Bean
// public UseTestService UseTestService(TestService testService ){
// return new UseTestService(testService);
// }
}代码解释:
1、@Configuration注解表明JavaConfig类是一个配置类,这意味着这个类里可能有零个或多个@Bean注解。
2、@Bean注解声明当前TestService的返回值是一个Bean,Bean的名称是方法名。
3、注入TestService的Bean时直接调用TestService()。
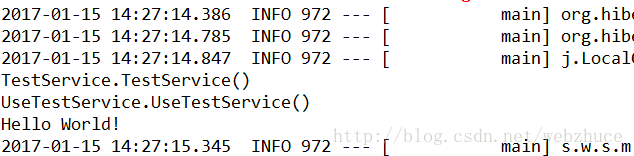
4、另外一种注入的方式,直接将TestService作为参数给UseTestService(),这也是Spring容器提供的极好的功能。在Spring容器中,只要存在某个Bean,就可以在另一个Bean的声明方法的参数中写入。4、运行
总结
何时使用Java配置或者注解配置?主要原则是:全局配置使用Java配置(如数据库相关配置、MVC相关配置),业务Bean的配置使用注解配置。
Spring Boot配置方式的更多相关文章
- 28. Spring Boot配置方式
转自:https://blog.csdn.net/webzhuce/article/details/54564019
- 程序配置的原则和实践以及 Spring Boot 支持方式
原则 软件需要在不同的环境中部署,代码是保持不变的,但是不同的运行环境存在差异,所以需要使用配置适应不同的环境.比如: 数据库,Redis,以及其他 后端服务 的配置: 第三方服务的证书,如 oAut ...
- Spring Boot配置过滤器的两种方式
过滤器(Filter)是Servlet中常用的技术,可以实现用户在访问某个目标资源之前,对访问的请求和响应进行拦截,常用的场景有登录校验.权限控制.敏感词过滤等,下面介绍下Spring Boot配置过 ...
- Spring Boot 配置优先级顺序
一般在一个项目中,总是会有好多个环境.比如: 开发环境 -> 测试环境 -> 预发布环境 -> 生产环境 每个环境上的配置文件总是不一样的,甚至开发环境中每个开发者的环境可能也会有一 ...
- spring boot 配置注入
spring boot配置注入有变量方式和类方式(参见:<spring boot 自定义配置属性的各种方式>),变量中又要注意静态变量的注入(参见:spring boot 给静态变量注入值 ...
- Spring boot配置多个Redis数据源操作实例
原文:https://www.jianshu.com/p/c79b65b253fa Spring boot配置多个Redis数据源操作实例 在SpringBoot是项目中整合了两个Redis的操作实例 ...
- spring boot配置springMVC拦截器
spring boot通过配置springMVC拦截器 配置拦截器比较简单, spring boot配置拦截器, 重写preHandle方法. 1.配置拦截器: 2重写方法 这样就实现了拦截器. 其中 ...
- spring boot配置mybatis和事务管理
spring boot配置mybatis和事务管理 一.spring boot与mybatis的配置 1.首先,spring boot 配置mybatis需要的全部依赖如下: <!-- Spri ...
- Spring Boot 配置 - Consul 配置中心
▶ Spring Boot 依赖与配置 Maven 依赖 <dependencyManagement> <dependencies> <dependency> &l ...
随机推荐
- https为数据传输保驾护航
为什么要使用https 谷歌官网已宣布,今年7月起,Chrome浏览器的地址栏将把所有HTTP标示为不安全网站. 在客户端与服务器数据传输过程中,http协议传输是不安全的,一般情况下,http协议的 ...
- PMP项目管理学习笔记(7)——整合管理之指导和管理项目执行过程
过程剖析 输入:组织过程资产.企业环境要素.项目管理计划.批准的变更请求 工具:专家判断.项目管理信息系统 输出:工作绩效信息.可交付成果.变更请求.项目文档和计划更新 指导和管理项目执行过程包括: ...
- tomcat 的log4j配置问题
#log4j.rootLogger=DEBUG,stdout,filelog4j.rootLogger=ERROR,stdout,filelog4j.appender.stdout=org.apach ...
- 【opencv】imread CV_LOAD_IMAGE_GRAYSCALE
转灰度图的操作很多,但是opencv中的CV_LOAD_IMAGE_GRAYSCALE的具体操作为: gray = 0.299 * r + 0.587 * g + 0.114 * b 然后,小数点部分 ...
- free - 显示系统中已用和未用的内存空间总和.
总览 (SYNOPSIS) free [-b | -k | -m] [-o] [-s delay ] [-t] [-V] 描述 (DESCRIPTION) free 显示 系统中 已用和未用的 物理内 ...
- 油猴 tamperMonkey 在百度首页 添加自己的自定义链接
发现 GM_addStyle 函数不能用了,从写加载css函数. 剩下找个定位 添加内容 就很简单了. // ==UserScript== // @name helloWorld // @namesp ...
- tree iview treeData json数据 添加 selected 数据 要进行vue.set 进行响应式添加
tree iview treeData json数据 添加 selected 数据 要进行vue.set 进行响应式添加
- 如何改android device monitor文件的权限
adb.exe在c/Android/platform-tools目录下,在这个目录下打开终端,然后adb shell,然后su http://blog.csdn.net/u012719153/arti ...
- 制作JPEGImages出现的bug
我用的是下面这个脚本进行改名字: import os import sys path = "/home/bnrc/py-faster-rcnn/data/VOCdevkit2007/VOC2 ...
- 小程序01 微信小程序介绍和开发准备
前言 火爆的微信小程序:跳一跳.摩拜单车.美柚.大众点评.滴滴出行 背景 为什么会有小程序? 微信最早推出公众号和服务号,公众号和服务号所传播的网页经常出现加载缓慢甚至页面空白的情况. 微信小程序的诞 ...