Prometheus(五):Prometheus+Alertmanager 配置企业微信报警
此处默认已安装Prometheus服务,服务地址:192.168.56.200
一、设置企业微信
1.1、企业微信注册(已有企业微信账号请跳过)
企业微信注册地址:https://work.weixin.qq.com/
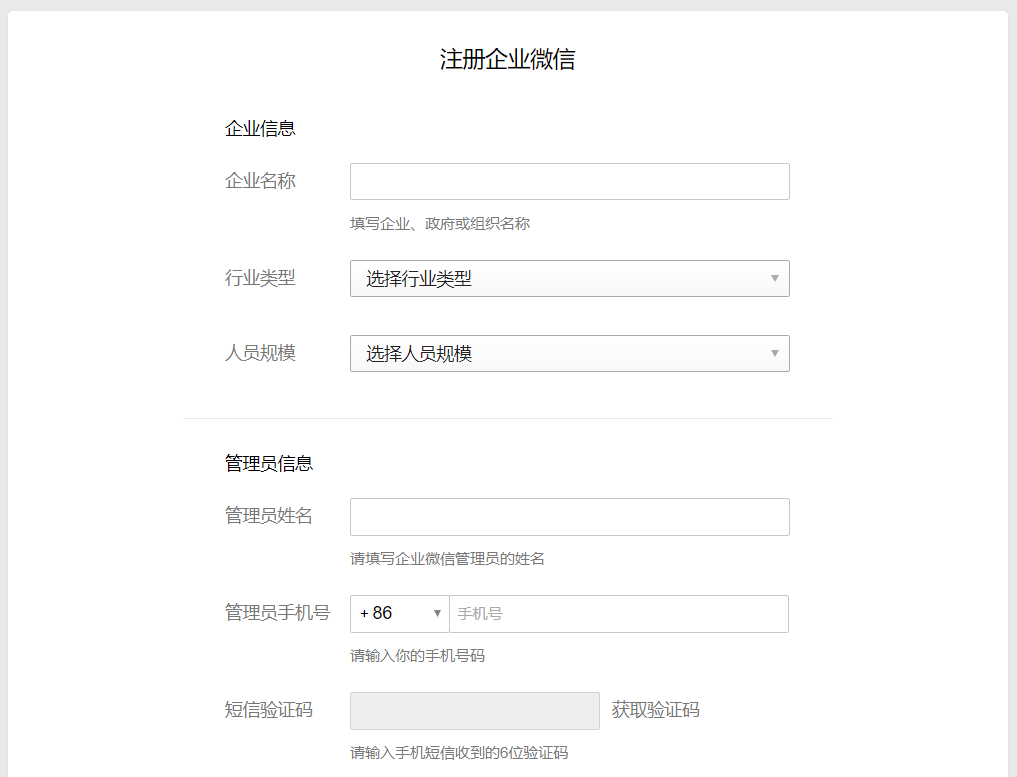
按照要求填写相应信息,注册企业微信
1.2 、创建自建应用
企业微信注册完成后,登录进去,点击上方导航条中的【应用管理】按钮,切换到应用管理页面。
然后选择【创建应用】,创建用于接收Alertmanager告警信息的自建应用
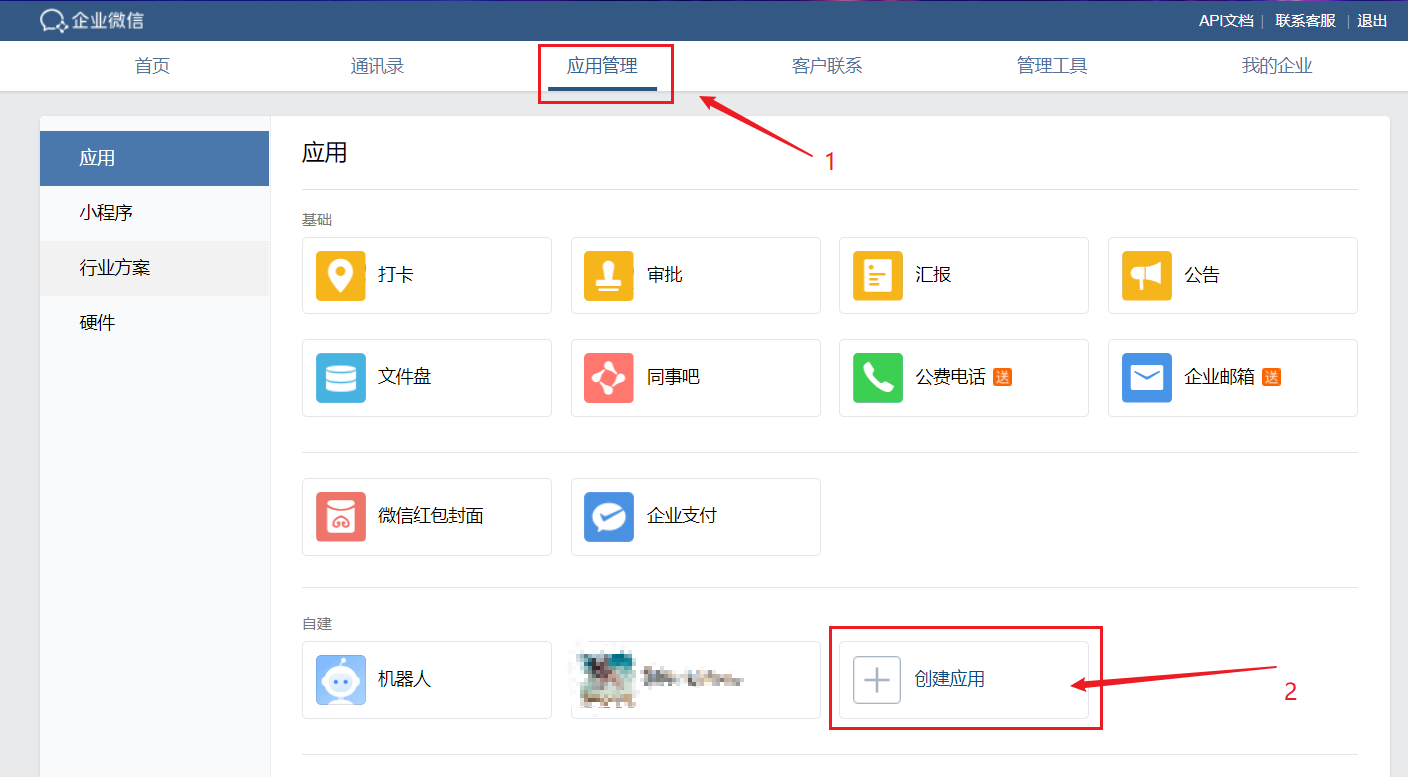
填写应用名称等信息,创建应用。创建应用后,记录应用的 AgentId 和 Secret 以备后用

然后点击上方导航条中的【我的企业】按钮,在页面最下方查看企业ID 并记录,以备后用。


二、安装Alertmanager
此处采用源码编译的方式安装。首先下载alertmanager的软件包,下载地址:https://github.com/prometheus/alertmanager/releases/download/v0.19.0/alertmanager-0.19.0.linux-amd64.tar.gz
下载完成后,将下载中软件包上传至Prometheus服务所在的机器(192.168.56.200)的 /usr/local 目录下

解压alertmanager软件包:
#   tar -zvxf alertmanager-0.19.0.linux-amd64.tar.gz

#   mv alertmanager-0.19.0.linux-amd64/ alertmanager
进入解压后的alertmanager文件夹,修改alertmanager.yml文件,配置报警信息,alertmanager.yml 内容如下:
global:

  resolve_timeout: 5m

templates:     #告警模板

  - './template/test.tmpl'

route:  # 设置报警分发策略

  group_by: ['alertname'] # 分组标签

  group_wait: 10s      # 告警等待时间。告警产生后等待10s,如果有同组告警一起发出

  group_interval: 10s  # 两组告警的间隔时间

  repeat_interval: 1m  # 重复告警的间隔时间,减少相同右键的发送频率 此处为测试设置为1分钟

  receiver: 'wechat'  # 默认接收者

receivers:

- name: 'wechat'

  wechat_configs:

    - send_resolved: true

      agent_id: ''     # 自建应用的agentId

      to_user: '*****'  # 接收告警消息的人员Id

      api_secret: '******' # 自建应用的secret

      corp_id: '******'  # 企业ID

#inhibit_rules:

 # - source_match:

  #    severity: 'critical'

   # target_match:

    #  severity: 'warning'

   # equal: ['alertname', 'dev', 'instance']
创建告警模板
进入Alertmanager安装文件夹,创建告警模板文件
#   cd /usr/local/alertmanager

#   mkdir template

#   cd template/

#   vim test.tmpl
将以下内容写入文件当中
{{ define "wechat.default.message" }}

{{ range .Alerts }}

========监控报警==========

告警状态:{{   .Status }}

告警级别:{{ .Labels.severity }}

告警类型:{{ .Labels.alertname }}

告警应用:{{ .Annotations.summary }}

告警主机:{{ .Labels.instance }}

告警详情:{{ .Annotations.description }}

触发阀值:{{ .Annotations.value }}

告警时间:{{ .StartsAt.Format "2006-01-02 15:04:05" }}
========end=============
{{ end }} {{ end }}
检查alertmanager.yml 配置是否正确
#   cd /usr/local/alertmanager

#   ./amtool check-config alertmanager.yml
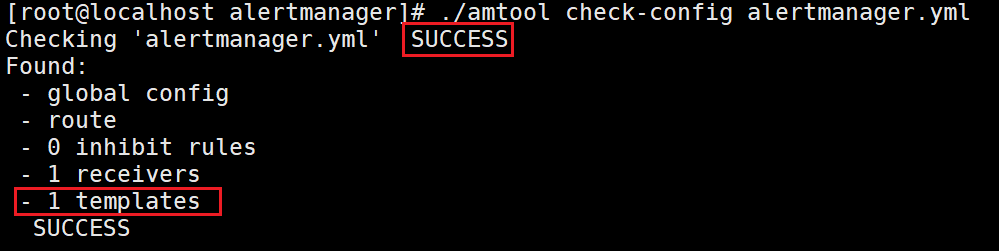
配置正确,模板文件也已经识别
启动alertmanager
# ./alertmanager

可以看到alertmanager服务已经起来,服务所在的端口为9093
浏览器访问: http://192.168.56.200:9093 (IP:9093)
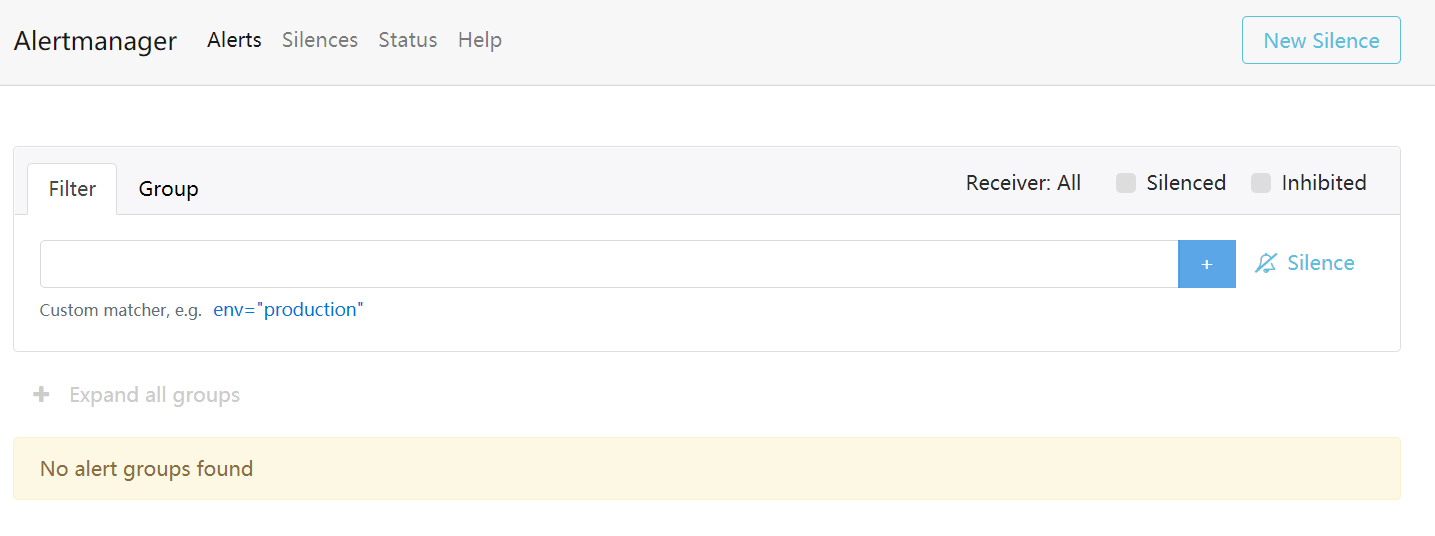
alertmanager成功启动。
三、配置Prometheus
Ctrl+C 结束掉alertmanager服务进程,进入Prometheus的安装目录下修改Prometheus配置。
#  cd /usr/local/prometheus

#  vim prometheus.yml
修改Prometheus.yml文件中的 alerting 配置项及rule_files配置项

alerting:

  alertmanagers:

  - static_configs:

    - targets: ['localhost:9093']
rule_files: #配置告警规则
- "rule.yml"
修改完成后保存退出
以下是Prometheus.yml 文件全部内容:
# my global config

global:

  scrape_interval:     15s # Set the scrape interval to every 15 seconds. Default is every 1 minute.

  evaluation_interval: 15s # Evaluate rules every 15 seconds. The default is every 1 minute.

  # scrape_timeout is set to the global default (10s).

# Alertmanager configuration

alerting:

  alertmanagers:

  - static_configs:

    - targets: ['localhost:9093']

      # - alertmanager:9093

# Load rules once and periodically evaluate them according to the global 'evaluation_interval'.

rule_files:

  - "rule.yml"

  # - "first_rules.yml"

  # - "second_rules.yml"

# A scrape configuration containing exactly one endpoint to scrape:

# Here it's Prometheus itself.

scrape_configs:

  # The job name is added as a label `job=<job_name>` to any timeseries scraped from this config.

  - job_name: 'prometheus'

    # metrics_path defaults to '/metrics'

    # scheme defaults to 'http'.

    static_configs:

    - targets: ['localhost:9090']

  - job_name: 'Linux'

    static_configs:

    - targets: ['192.168.56.201:9100']

      labels:

        instance: Linux

  - job_name: 'Windows'

    static_configs:

    - targets: ['192.168.56.1:9182']

      labels:

        instance: Windows

  - job_name: 'snmp'

    scrape_interval: 10s

    static_configs:

     - targets:

       - 172.20.2.83  # 交换机IP地址

    metrics_path: /snmp

    # params:

     # module: [if_mib]

    relabel_configs:

      - source_labels: [__address__]

        target_label: __param_target

      - source_labels: [__param_target]

        target_label: instance

      - target_label: __address__

        replacement: 192.168.56.100:9116 # snmp_exporter 服务IP地址
创建并编写告警规则文件rule.yml
# vim rule.yml
将以下内容写入文件当中,(此处用于测试,设置为当内存占用高于10%时,就会告警)
groups:

- name: mem-rule

  rules:

  - alert: "内存报警"

    expr: (node_memory_MemTotal_bytes - (node_memory_MemFree_bytes+node_memory_Buffers_bytes+node_memory_Cached_bytes )) / node_memory_MemTotal_bytes * 100 > 10

    for: 30s

    labels:

      severity: warning

    annotations:

      summary: "服务名:{{$labels.alertname}} 内存报警"

      description: "{{ $labels.alertname }} 内存资源利用率大于 10%"

      value: "{{ $value }}"
保存退出
四、告警检测
重启Prometheus服务,使配置的告警规则生效
# systemctl restart prometheus
进入alertmanager的安装文件夹,启动alertmanager
#  cd /usr/local/alertmanager

#  ./alertmanager
稍等片刻,登录企业微信,可以看到已经接收到告警信息

浏览器访问 http://192.168.56.200:9093/#/alerts ,也能看到告警信息

五、配置alertmanager服务开机自启
Ctrl+C 结束掉 alertmanager 服务进程,创建 alertmanager服务,让 alertmanager 以服务的方式,开机自启。
添加系统服务
# vim /etc/systemd/system/alertmanager.service
将以下内容写入文件中
[Unit]
Description=alertmanager
After=network.target
[Service]
WorkingDirectory=/usr/local/alertmanager
ExecStart=/usr/local/alertmanager/alertmanager --config.file=alertmanager.yml --log.level=debug --log.format=json
Restart=on-failure
[Install]
WantedBy=multi-user.target
保存退出
启动服务,设置开机自启
#  systemctl daemon-reload

#  systemctl enable alertmanager

#  systemctl start alertmanager
至此Prometheus+alertmanage配置企业微信报警完成。
Prometheus(五):Prometheus+Alertmanager 配置企业微信报警的更多相关文章
- Zabbix 3.0 配置企业微信报警(注册---测试)
一.申请企业微信 1.登录企业微信官网,点击企业注册 二.配置企业微信 1.邀请管理员使用企业微信,如果有多个人直接添加新成员 2.管理员收到邀请,下载手机版企业微信,使用微信号登陆即可 3.创建应用 ...
- zabbix配置企业微信报警
+++++++++++++++++++++++++++++++++++++++++ 1. 工作中最长使用的就是微信,普及,开源,而且免费!!! 2. 在企业微信中要记录的值: · 部门id · 企业i ...
- Zabbix4.0报警配置-企业微信报警
一:前期准备 1.1:企业号注册 https://qy.weixin.qq.com/ 微信调用接口说明 http://qydev.weixin.qq.com/wiki/index.php?title ...
- Zabbix 3.0 配置企业微信报警(配置zabbix-web)
一.添加报警媒体类型 Name:自定义 Type:选择script Scripts name:填写脚本名称 Script parameters:脚本参数 --corpid=XXX --corpsecr ...
- Zabbix4.2.0使用Python连接企业微信报警
目录 1. 配置企业微信 2. 脚本配置 2.1 安装python依赖的库 2.2 编写脚本 2. 搭建FTP 3. 配置Zabbix监控FTP 3.1 添加FTP模板 3.2 添加报警媒介 3.3 ...
- Nagios通过企业微信报警
主要分两部分进行: 注册企业微信,自建应用,获取与发送消息相关的信息: 编写调用微信API脚本(bash),配置Nagios微信报警: 一.企业微信 1.注册企业微信:https://work.wei ...
- Prometheus 企业微信报警/inhibit抑制 /静默(二)
创建企业微信应用 注册企业微信:访问https://work.weixin.qq.com/,注册企业,随便填,不需要认证 创建应用 创建告警配置 vim /usr/local/prometheus-2 ...
- 配置zabbix通过微信报警企业微信报警
如今势态: 报警的方式可谓是八仙过海各显神通,如电话报警,短信报警,邮件报警,QQ报警,微信报警等等. 电话报警:一般都是使用别的平台的工具,平台给你提供一个接口供你使用,大多数为限量收费款 短信报警 ...
- zabbix企业微信报警实现
企业微信配置 # 注册 企业微信注册地址:https://work.weixin.qq.com 笔者注册的企业微信名称为 5iik # 配置 # 在主干5iik(企业名称)下添加子部门(监控组),并将 ...
随机推荐
- React 获取真实Dom v8.6.2版本
<!DOCTYPE html> <html lang="en"> <head> <meta charset="UTF-8&quo ...
- pose_graph的优化变量和优化函数
1.优化变量 优化变量就是vertex,也就是pose,pose-graph的优化目标就是,调整所有vertex的位置来尽量满足所有边的约束. 上述的还是表层的理解,深一步理解: pose-graph ...
- Spring Security教程(五)
在之前的几篇security教程中,资源和所对应的权限都是在xml中进行配置的,也就在http标签中配置intercept-url,试想要是配置的对象不多,那还好,但是平常实际开发中都往往是非常多的资 ...
- Centos目录及其常用处理命令
1.Centos之常见目录作用介绍[1] 我们先切换到系统根目录 / 看看根目录下有哪些目录 [root@localhost ~]# cd / [root@localhost /]# ls bin ...
- hanlp添加词典不起作用
不起作用的原因很多,这里列举几个 这里的hanlp我虽然用的maven建立的但是要添加自定义词典,所以没有用maven引入的方式,而是下载了data+hanlp.jar文件 data ...
- Javascript的闭包(上)
了解了预编译和作用域的相关知识以后我们来看一下开发中常见的工具——闭包.还是来看一个实例. function a(){ function b() { ; console.log(aa); } ; re ...
- 迭代子(Iterator)模式
迭代子模式又叫做游标模式.迭代子模式可以顺序地访问一个聚集中的元素而必暴露聚集的内部表象. 1. 聚集和Java聚集 多个对象在一起形成的总体形成聚集(Aggregate),聚集对象是能够包容一组对 ...
- C基础 带你手写 redis sds
前言 - Simple Dynamic Strings antirez 想统一 Redis,Disque,Hiredis 项目中 SDS 代码, 因此构建了这个项目 https://github.c ...
- Java学习:字符串概述与特点
字符串概述与特点 java.lang.String类 代表字符串 API当中说:Java程序中的所有字符串字面值(如“abc“)都作为此类的实例实现.其实就是说:程序当中所用的双引号字符串,都是Str ...
- RabbitMQ 的消息持久化与 Spring AMQP 的实现剖析
文章目录 1. 原生的实现方式 2. Spring AMQP 的实现方式 要从奔溃的 RabbitMQ 中恢复的消息,我们需要做消息持久化.如果消息要从 RabbitMQ 奔溃中恢复,那么必须满足 ...