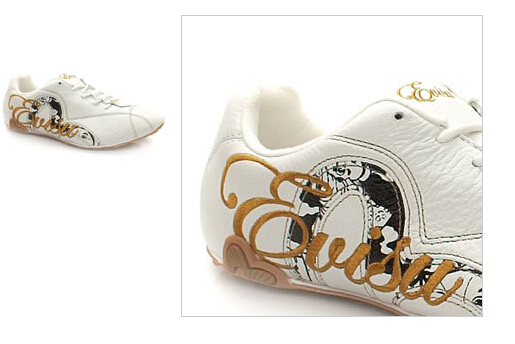
jquery.jqzoom.js图片放大镜
jqzoom插件实现图片放大镜效果

1. jquery.jqzoom.js
//**************************************************************
// jQZoom allows you to realize a small magnifier window,close
// to the image or images on your web page easily.
//
// jqZoom version 2.2
// Author Doc. Ing. Renzi Marco(www.mind-projects.it)
// First Release on Dec 05 2007
// i'm looking for a job,pick me up!!!
// mail: renzi.mrc@gmail.com
//**************************************************************
(function ($) {
$.fn.jqueryzoom = function (options) {
var settings = {
xzoom: 200, //zoomed width default width
yzoom: 200, //zoomed div default width
offset: 10, //zoomed div default offset
position: "right",//zoomed div default position,offset position is to the right of the image
lens: 1, //zooming lens over the image,by default is 1;
preload: 1
};
if (options)
{
$.extend(settings, options);
}
var noalt = '';
$(this).hover(function () {
var imageLeft = $(this).offset().left;
var imageTop = $(this).offset().top;
var imageWidth = $(this).children('img').get(0).offsetWidth;
var imageHeight = $(this).children('img').get(0).offsetHeight;
noalt = $(this).children("img").attr("alt");
var bigimage = $(this).children("img").attr("jqimg");
$(this).children("img").attr("alt", '');
if ($("div.zoomdiv").get().length == 0)
{
$(this).after("<div class='zoomdiv'><img class='bigimg' src='" + bigimage + "'/></div>");
$(this).append("<div class='jqZoomPup'> </div>");
}
if (settings.position == "right")
{
if (imageLeft + imageWidth + settings.offset + settings.xzoom > screen.width)
{
leftpos = imageLeft - settings.offset - settings.xzoom;
} else
{
leftpos = imageLeft + imageWidth + settings.offset;
}
} else
{
leftpos = imageLeft - settings.xzoom - settings.offset;
if (leftpos < 0)
{
leftpos = imageLeft + imageWidth + settings.offset;
}
}
$("div.zoomdiv").css({ top: imageTop, left: leftpos });
$("div.zoomdiv").width(settings.xzoom);
$("div.zoomdiv").height(settings.yzoom);
$("div.zoomdiv").show();
if (!settings.lens)
{
$(this).css('cursor', 'crosshair');
}
$(document.body).mousemove(function (e) {
mouse = new MouseEvent(e);
/*$("div.jqZoomPup").hide();*/
var bigwidth = $(".bigimg").get(0).offsetWidth;
var bigheight = $(".bigimg").get(0).offsetHeight;
var scaley = 'x';
var scalex = 'y';
if (isNaN(scalex) | isNaN(scaley))
{
var scalex = (bigwidth / imageWidth);
var scaley = (bigheight / imageHeight);
$("div.jqZoomPup").width((settings.xzoom) / scalex);
$("div.jqZoomPup").height((settings.yzoom) / scaley);
if (settings.lens)
{
$("div.jqZoomPup").css('visibility', 'visible');
}
}
xpos = mouse.x - $("div.jqZoomPup").width() / 2 - imageLeft;
ypos = mouse.y - $("div.jqZoomPup").height() / 2 - imageTop;
if (settings.lens)
{
xpos = (mouse.x - $("div.jqZoomPup").width() / 2 < imageLeft) ? 0 : (mouse.x + $("div.jqZoomPup").width() / 2 > imageWidth + imageLeft) ? (imageWidth - $("div.jqZoomPup").width() - 2) : xpos;
ypos = (mouse.y - $("div.jqZoomPup").height() / 2 < imageTop) ? 0 : (mouse.y + $("div.jqZoomPup").height() / 2 > imageHeight + imageTop) ? (imageHeight - $("div.jqZoomPup").height() - 2) : ypos;
}
if (settings.lens)
{
$("div.jqZoomPup").css({ top: ypos, left: xpos });
}
scrolly = ypos;
$("div.zoomdiv").get(0).scrollTop = scrolly * scaley;
scrollx = xpos;
$("div.zoomdiv").get(0).scrollLeft = (scrollx) * scalex;
});
}, function () {
$(this).children("img").attr("alt", noalt);
$(document.body).unbind("mousemove");
if (settings.lens)
{
$("div.jqZoomPup").remove();
}
$("div.zoomdiv").remove();
});
count = 0;
if (settings.preload)
{
$('body').append("<div style='display:none;' class='jqPreload" + count + "'>sdsdssdsd</div>");
$(this).each(function () {
var imagetopreload = $(this).children("img").attr("jqimg");
var content = jQuery('div.jqPreload' + count + '').html();
jQuery('div.jqPreload' + count + '').html(content + '<img src=\"' + imagetopreload + '\">');
});
}
}
})(jQuery);
function MouseEvent(e) {
this.x = e.pageX;
this.y = e.pageY;
}
2. jqzoom.css
/*jQzoom*/

.jqzoom{

    border:1px solid #BBB;

    float:left;

    position:relative;

    padding:0px;

    cursor:pointer;

}

div.zoomdiv {

    z-index:;

    position                : absolute;

    top:0px;

    left:0px;

    width                   : 200px;

    height                  : 200px;

    background: #ffffff;

    border:1px solid #CCCCCC;

    display:none;

    text-align: center;

    overflow: hidden;

}

div.jqZoomPup {

    z-index                 :;

    visibility              : hidden;

    position                : absolute;

    top:0px;

    left:0px;

    width                   : 50px;

    height                  : 50px;

    border: 1px solid #aaa;

    background: #ffffff url(../images/zoomlens.gif) 50% top  no-repeat;

    opacity: 0.5;

    -moz-opacity: 0.5;

    -khtml-opacity: 0.5;

    filter: alpha(Opacity=50);

}
3. html代码
<!DOCTYPE html PUBLIC "-//W3C//DTD XHTML 1.0 Transitional//EN" "http://www.w3.org/TR/xhtml1/DTD/xhtml1-transitional.dtd">

<html xmlns="http://www.w3.org/1999/xhtml" >

<head>

    <title></title>

    <script src="jquery-1.8.2.min.js" type="text/javascript"></script>

    <script src="jquery.jqzoom.js" type="text/javascript"></script>

    <link href="jqzoom.css" rel="stylesheet" type="text/css" />

    <script type="text/javascript">

        /*使用jqzoom*/

        $(function() {

            $(".jqzoom").jqueryzoom({

                xzoom: 400, //放大图的宽度(默认是 200)

                yzoom: 400, //放大图的高度(默认是 200)

                offset: 10, //离原图的距离(默认是 10)

                position: "right", //放大图的定位(默认是 "right")

                preload: 1

            });

        });

    </script>

</head>

<body>

<div class="jqzoom">

    <img src="data:images/shoe1_small.jpg" style="width:300px; height:300px;" alt=""  jqimg="images/shoe1_big.jpg" id="bigImg"/>

</div>

</body>

</html>
附件:放大镜图标(zoomlens.gif)

jquery.jqzoom.js图片放大镜的更多相关文章
- jquery.lazyload.js图片延迟加载
转:http://www.jb51.net/article/50273.htm 这篇文章主要介绍了Jquery图片延迟加载插件jquery.lazyload.js的使用方法,需要的朋友可以参考下 ...
- jquery.lazyload.js图片延迟加载(懒加载)--转载
一.插件介绍 jquery.lazyload.js 是一个用 JavaScript 编写的jQuery 插件. 它可以延迟加载长页面中的图片. 在浏览器可视区域外的图片不会被载入, 直到用户将页面滚动 ...
- JS 图片放大镜
今天练习一个小demo, 从本地读取图片, 然后实现类似淘宝放大镜的效果, 再加两个需求 1 .可以调节缩放比例,默认放大两倍 2 . 图片宽高自适应, 不固定宽高 话不多说先看效果: 原理:1, 右 ...
- jquery.lazyload.js 图片延迟加载
当做网页的时候,特别是整个网页展示图片较多的时候,用到图片延迟效果是很好的 使用方法也非常简单. 1.在网页任何位置(一般是在</body>前面)加上如下代码(注意<script&g ...
- JQuery,JS图片操作(上一张,下一张,旋转,放大,缩小)
1.html代码:我是从数据库获取图片路径. <div id="divprint" align="center"> @{DataTable dt = ...
- Jquery插件开发之图片放大镜效果(仿淘宝)
原网转载地址:http://www.cnblogs.com/hnvvv/archive/2011/11/19/2255197.html 需求:公司某个网站,需要实现图片预览效果,并能像淘宝一样实现局部 ...
- jquery.roundabout.js图片叠加3D旋转
Roundabout是一个jQuery插件能够将一组静态HTML元素转换成可以灵活定制具有类似于转盘旋转效果的交互区域.有多种旋转形状可供选择.官方说明:roundabout.js是一个jQuery插 ...
- js 图片放大镜功能
原理:放置两张相同的图片,一张作为主图片(图片1),另一张作为用来裁剪并放大的图片(图片2) 鼠标移动时,计算鼠标在图片1的位置(距离图片1左上角的x,y距离),以此决定在图片2开始 ...
- ♫【jQuery插件】图片放大镜
JQZoom
随机推荐
- office2003-2007 绿色版 出错 文件丢失(未解决)
- 这个版本是我大学时候(2012)年一直用到现在的版本:目录结构如下: 原来一直在32位系统中使用,没有出错过; - 刚装的两台电脑系统分别为 Win7Pro 和 Win10Pro ,都是64位的: ...
- iOS开发 multipart 上传多张图片
- (void)uploade:(NSDictionary *)dic pic:(NSArray *)picArray { NSString *hyphens = @"--" ...
- iOS 开发者必知的 75 个工具(译文)
原文地址:http://benscheirman.com/2013/08/the-ios-developers-toolbelt (需FQ) 如果你去到一位熟练的木匠的工作室,你总是能发现他/她有 ...
- sublime text 3 技巧
sublime text 技巧 学习目的:熟悉sublime快捷键和功能,改进自己的工作方式. 学习流程:先把视频中涉及到的技巧记录下,再完整的看一遍所有的菜单和功能. 前端开发工具技巧介绍-Subl ...
- python文件选择:tkFileDialog 基础
tkFileDialog有两种形式: 一个是.askopenfilename(option=value, ...) 这个是"打开"对话框 另一个是:asksaveasfilenam ...
- haskell中的cps
cps全称叫continuation passing style,简要来讲就是告诉函数下一步做什么的递归方式,由于普通递归有栈溢出的问题,而cps都是尾递归(tail recursion),尾递归则是 ...
- Android 自定义View 三板斧之一——继承现有控件
通常情况下,Android实现自定义控件无非三种方式. Ⅰ.继承现有控件,对其控件的功能进行拓展. Ⅱ.将现有控件进行组合,实现功能更加强大控件. Ⅲ.重写View实现全新的控件 本文重点讨论继承现有 ...
- Kali Linux Web 渗透测试视频教程—第十课 w3af
Kali Linux Web 渗透测试视频教程—第十课 w3af 文/玄魂 原文链接:http://www.xuanhun521.com/Blog/2014/10/24/kali-linux-web- ...
- [WinAPI] API 13 [遍历指定目录 打印文件和其他属性]
Windows API中,有一组专门的函数和结构,用于遍历目录,它们是FindFirstFile函数.FindNextFile函数和WIN32_FIND_DATA结构.使用FindFirstFile和 ...
- linxu ffmpeg 编译安装
1.下载ffmpeg. 下载网址:http://www.ffmpeg.org/download.html 2.解压缩 tar -zxvf ffmpeg-2.0.1.tar.gz 3.配置,生成Make ...
