从FBV到CBV三(权限)
丛FBC到CBV三(权限)
span::selection, .CodeMirror-line > span > span::selection { background: #d7d4f0; }.CodeMirror-line::-moz-selection, .CodeMirror-line > span::-moz-selection, .CodeMirror-line > span > span::-moz-selection { background: #d7d4f0; }.cm-searching {background: #ffa; background: rgba(255, 255, 0, .4);}.cm-force-border { padding-right: .1px; }@media print { .CodeMirror div.CodeMirror-cursors {visibility: hidden;}}.cm-tab-wrap-hack:after { content: ""; }span.CodeMirror-selectedtext { background: none; }.CodeMirror-activeline-background, .CodeMirror-selected {transition: visibility 0ms 100ms;}.CodeMirror-blur .CodeMirror-activeline-background, .CodeMirror-blur .CodeMirror-selected {visibility:hidden;}.CodeMirror-blur .CodeMirror-matchingbracket {color:inherit !important;outline:none !important;text-decoration:none !important;}.CodeMirror-sizer {min-height:auto !important;}
-->
li {list-style-type:decimal;}.wiz-editor-body ol.wiz-list-level2 > li {list-style-type:lower-latin;}.wiz-editor-body ol.wiz-list-level3 > li {list-style-type:lower-roman;}.wiz-editor-body li.wiz-list-align-style {list-style-position: inside; margin-left: -1em;}.wiz-editor-body blockquote {padding: 0 12px;}.wiz-editor-body blockquote > :first-child {margin-top:0;}.wiz-editor-body blockquote > :last-child {margin-bottom:0;}.wiz-editor-body img {border:0;max-width:100%;height:auto !important;margin:2px 0;}.wiz-editor-body table {border-collapse:collapse;border:1px solid #bbbbbb;}.wiz-editor-body td,.wiz-editor-body th {padding:4px 8px;border-collapse:collapse;border:1px solid #bbbbbb;min-height:28px;word-break:break-word;box-sizing: border-box;}.wiz-editor-body td > div:first-child {margin-top:0;}.wiz-editor-body td > div:last-child {margin-bottom:0;}.wiz-editor-body img.wiz-svg-image {box-shadow:1px 1px 4px #E8E8E8;}.wiz-hide {display:none !important;}
-->
权限
准备数据表
| 用户组(group) | |
| id | group_name |
| 1 | usual |
| 2 | vip |
| 3 | svip |
| 4 | admin |
| 用户(user) | |||
| id | username | password | group_id |
| 1 | Joshua | 123 | 1 |
| 2 | William | 123 | 2 |
| 3 | Daniel | 123 | 3 |
| 4 | Michael | 123 | 4 |
创建项目及app:

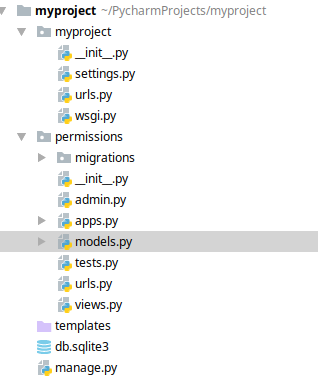
- # -*- coding:utf-8 -*-
- from django.db import models
- class Group(models.Model):
- id = models.AutoField(primary_key=True)
- group_name = models.CharField(max_length=40)
- class Meta:
- db_table = 'group'
- class User(models.Model):
- id = models.AutoField(primary_key=True)
- username = models.CharField(max_length=40,unique=True)
- password = models.CharField(max_length=40)
- group_id = models.ForeignKey(Group, default=1)
- class Meta:
- db_table = 'user'
- from django.http.response import JsonResponse
- from rest_framework.views import APIView
- from permissions.models import User, Group
- class Users(APIView):
- def get(self, request):
- users = User.objects.all().values()
- return JsonResponse(list(users), safe=False)
- class Groups(APIView):
- def get(self, request):
- groups = Group.objects.all().values()
- return JsonResponse(list(groups), safe=False)
- from django.conf.urls import url
- from django.contrib import admin
- from permissions.views import Users, Groups
- urlpatterns = [
- url(r'^admin/', admin.site.urls),
- url(r'^user/$', Users.as_view(), name='user'),
- url(r'^group/$', Groups.as_view(), name='group'),
- ]

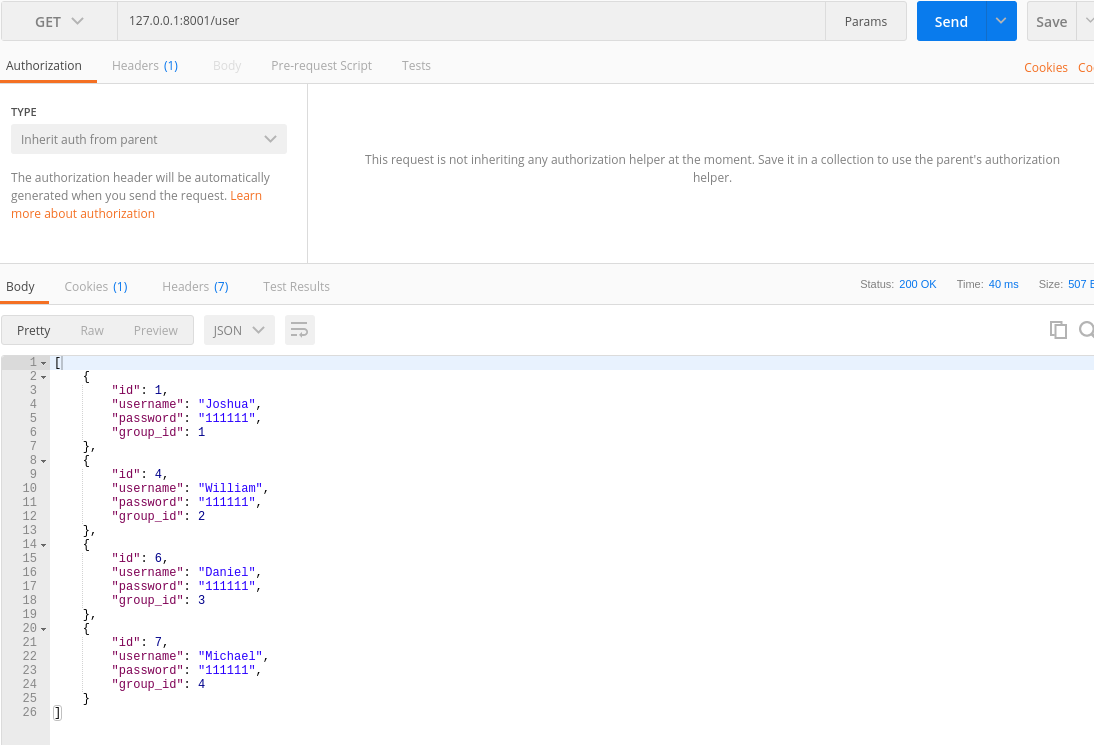
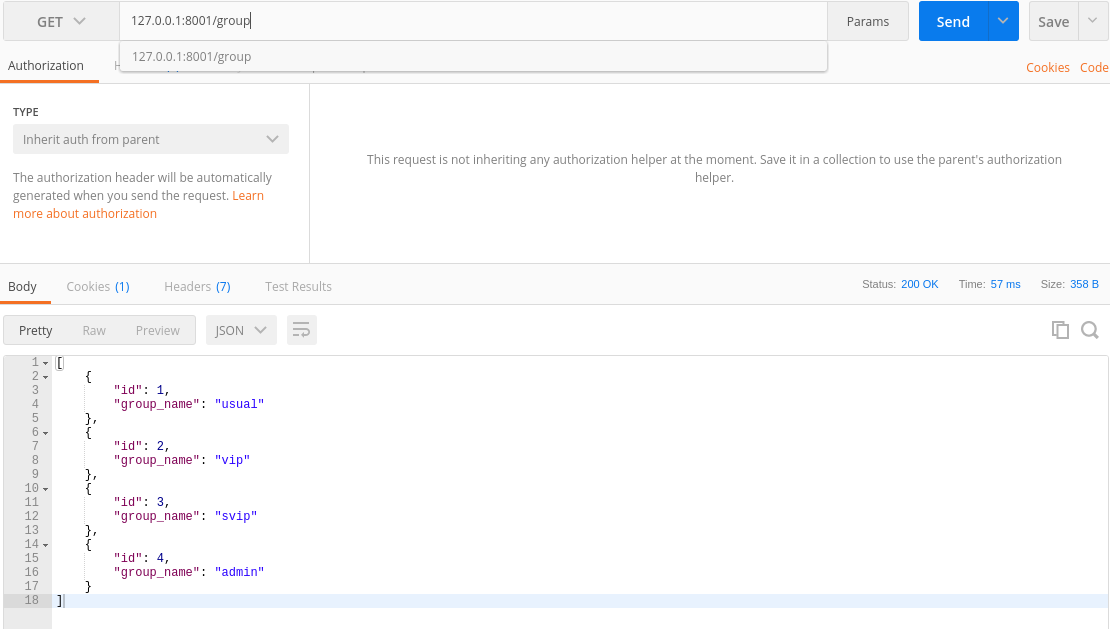

| 会员项目(member_programs) | |
| id | program_name |
| 1 | 书法长卷 |
| 2 | 书法碑帖 |
| 3 | 墓志塔铭 |
| 4 | 兰亭集序 |
- class MemberProgram(models.Model):
- id = models.AutoField(primary_key=True)
- program_name = models.CharField(max_length=100)
- class Meta:
- db_table = 'member_program'
- from django.conf.urls import url
- from permissions.views import Users, Groups, MemberPrograms
- urlpatterns = [
- url(r'^user/$', Users.as_view(), name='user'),
- url(r'^group/$', Groups.as_view(), name='group'),
- url(r'^program/$', MemberPrograms.as_view(), name='program'),
- ]
- class MemberPrograms(APIView):
- def get(self, request):
- programs = MemberProgram.objects.all().values()
- return JsonResponse(list(programs), safe=False)

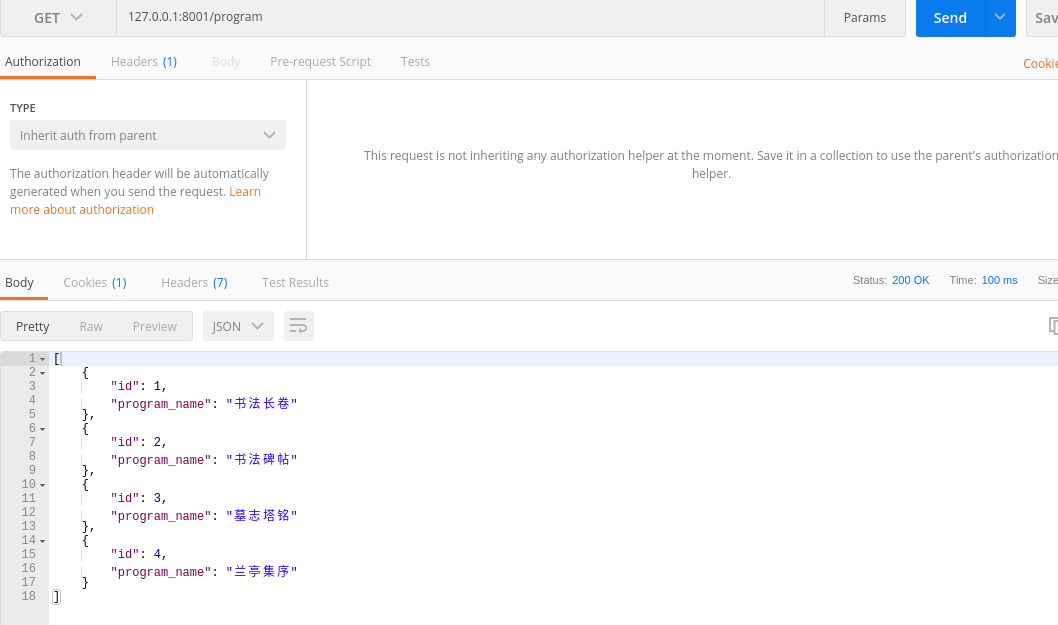
- class MyAuthentication(BaseAuthentication):
- def authenticate(self, request):
- name = request._request.GET.get('username')
- print(name)
- return (name, None)
- class MemberPrograms(APIView):
- authentication_classes = [MyAuthentication, ]
- def get(self, request):
- if not request.user: # 没有用户身份,不允许访问
- ret = {'code': 1002, 'error': '权限被拒'}
- return JsonResponse(ret)
- username = request.user
- try:
- group_name = User.objects.get(username=username).group.group_name
- except User.DoesNotExist: # 用户身份不存在,返回错误信息
- ret = {'code': 1003, 'error': '用户不存在'}
- return JsonResponse(ret)
- if group_name == 'usual': # 是普通用户,没有权限
- ret = {'code': 1002, 'error': '权限被拒'}
- return JsonResponse(ret)
- programs = MemberProgram.objects.all().values() # 用户权限满足条件 返回接口信息
- return JsonResponse(list(programs), safe=False)
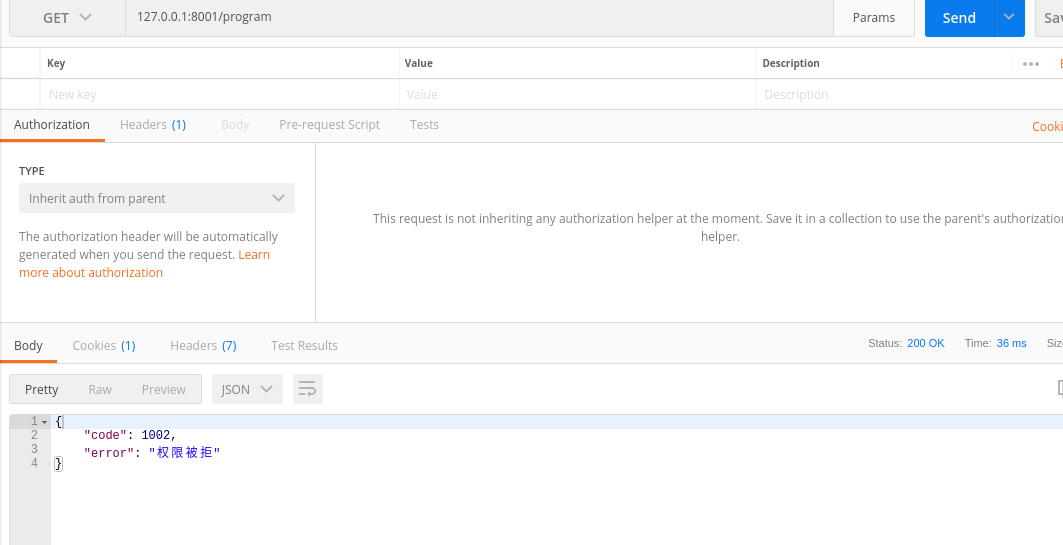
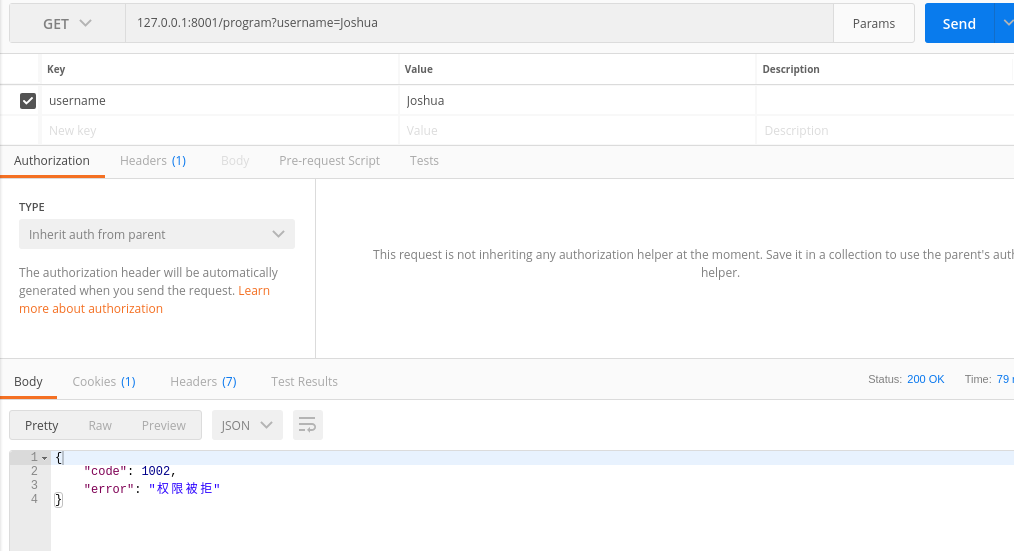
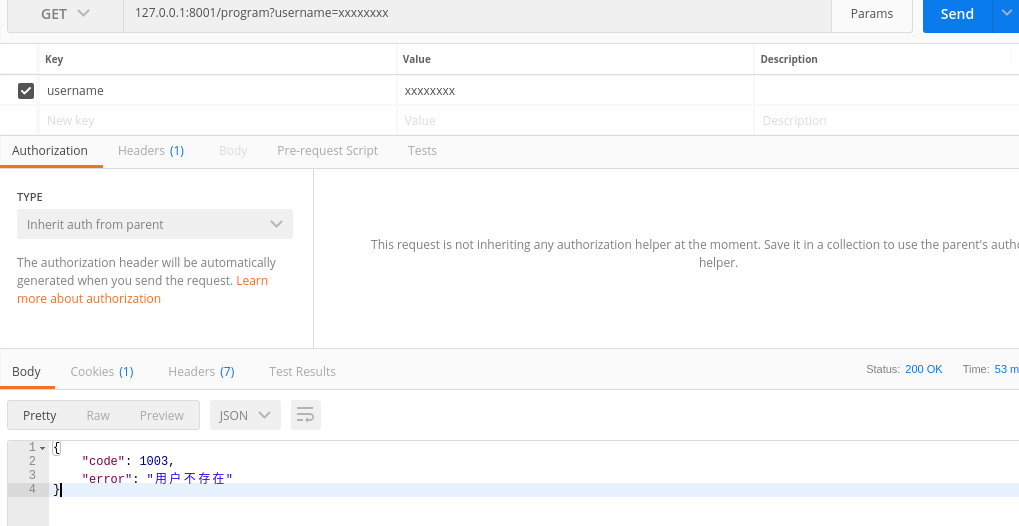


- from rest_framework.authentication import BaseAuthentication
- from rest_framework.permissions import BasePermission
- from rest_framework.exceptions import PermissionDenied
- lass MyAuthentication(BaseAuthentication):
- def authenticate(self, request):
- name = request._request.GET.get('username')
- print(name)
- return (name, None)
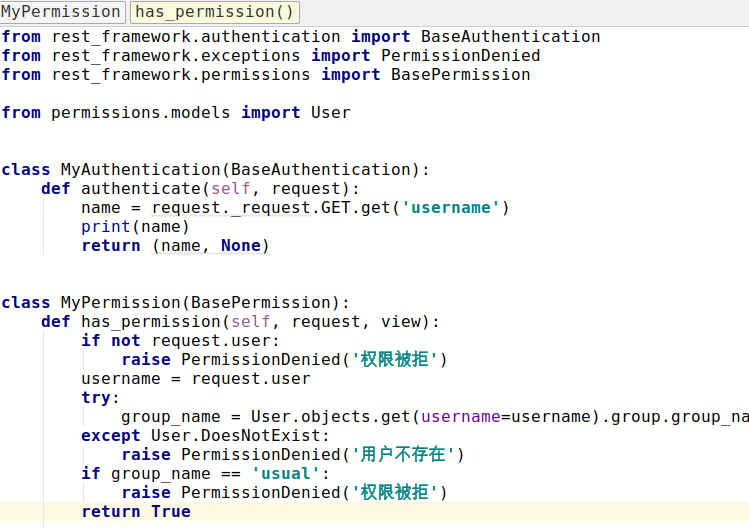
- class MyPermission(BasePermission):
- def has_permission(self, request, view):
- if not request.user:
- raise PermissionDenied('权限被拒')
- username = request.user
- try:
- group_name = User.objects.get(username=username).group.group_name
- except User.DoesNotExist:
- raise PermissionDenied('用户不存在')
- if group_name == 'usual':
- raise PermissionDenied('权限被拒')
- return True
- class MemberPrograms(APIView):
- authentication_classes = [MyAuthentication, ]
- permission_classes = [MyPermission, ]
- def get(self, request):
- programs = MemberProgram.objects.all().values()
- return JsonResponse(list(programs), safe=False)

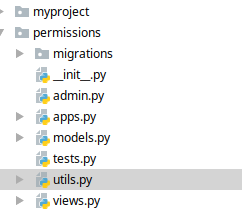


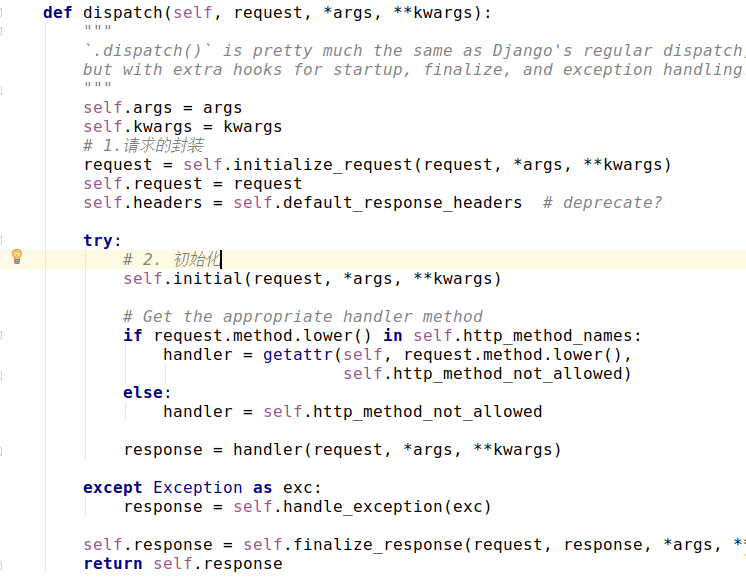

- x
- def initial(self, request, *args, **kwargs):
- """
- Runs anything that needs to occur prior to calling the method handler.
- """
- self.format_kwarg = self.get_format_suffix(**kwargs)
- # Perform content negotiation and store the accepted info on the request
- neg = self.perform_content_negotiation(request)
- request.accepted_renderer, request.accepted_media_type = neg
- # Determine the API version, if versioning is in use.
- version, scheme = self.determine_version(request, *args, **kwargs)
- request.version, request.versioning_scheme = version, scheme
- # Ensure that the incoming request is permitted
- # 身份验证
- self.perform_authentication(request)
- # 权限验证
- self.check_permissions(request)
- self.check_throttles(request)
- x
- def check_permissions(self, request):
- """
- Check if the request should be permitted.
- Raises an appropriate exception if the request is not permitted.
- """
- for permission in self.get_permissions(): # 1
- if not permission.has_permission(request, self): # 2
- self.permission_denied( # 3
- request, message=getattr(permission, 'message', None)
- )
第一步: self.get_permissions:
- x
- def get_permissions(self):
- """
- Instantiates and returns the list of permissions that this view requires.
- """
- return [permission() for permission in self.permission_classes]
- self.permission_classes 就是我们定义的permissions,默认是从seeting.py配置文件中找,如果我们的view中制定了这一项,就使用view中的permission,而不用配置文件中的
- permission_classes = api_settings.DEFAULT_PERMISSION_CLASSES
- x
- def permission_denied(self, request, message=None):
- """
- If request is not permitted, determine what kind of exception to raise.
- """
- if request.authenticators and not request.successful_authenticator:
- raise exceptions.NotAuthenticated()
- raise exceptions.PermissionDenied(detail=message)
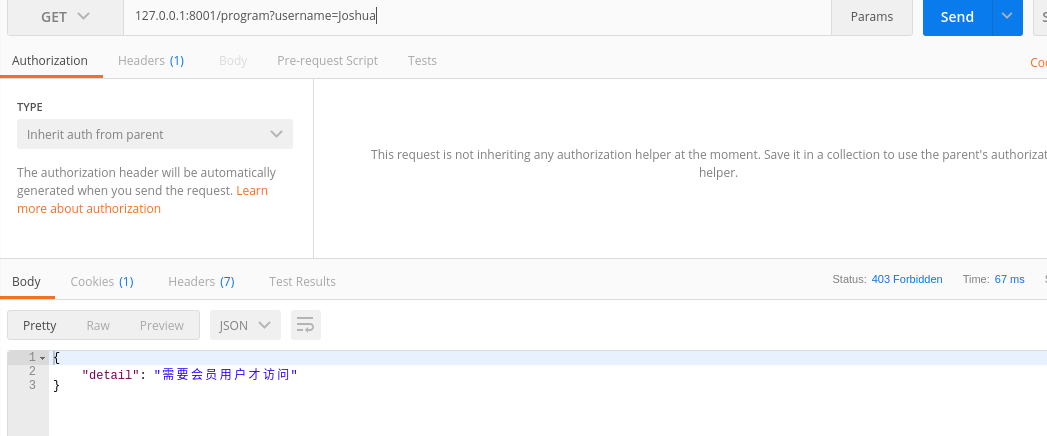
message = '需要会员用户才能访问'
def has_permission(self, request, view):
if not request.user:
return False
username = request.user
try:
group_name = User.objects.get(username=username).group.group_name
except User.DoesNotExist:
return False
if group_name == 'usual':
return False
return True
- x
- class MyPermission(BasePermission):
- message = '需要会员用户才能访问'
- def has_permission(self, request, view):
- if not request.user:
- return False
- username = request.user
- try:
- group_name = User.objects.get(username=username).group.group_name
- except User.DoesNotExist:
- return False
- if group_name == 'usual':
- return False
- return True

从FBV到CBV三(权限)的更多相关文章
- 一、虚拟环境.二、路由配置主页与404.三、2.x路由分发.四、伪静态.五、request对象.六、FBV与CBV.七、文件上传.
一.虚拟环境 ''' 解决版本共存 1. 用pycharm选择File点击NewProject然后选择virtualenv创建一个纯净环境 2. 打开下载的目录将venv文件夹下的所有文件(纯净的环境 ...
- python 视图 (FBV、CBV ) 、Request 和Response对象 、路由系统
一.FBV和CBV1.基于函数的view,就叫FBV(Function Based View) 示例: def add_book(request): pub_obj=models.Publisher. ...
- django请求生命周期,FBV和CBV,ORM拾遗,Git
一.django 请求生命周期 流程图: 1. 当用户在浏览器中输入url时,浏览器会生成请求头和请求体发给服务端请求头和请求体中会包含浏览器的动作(action),这个动作通常为get或者post, ...
- Django之FBV与CBV
一.FBV与CBV FBV(function based views),即基于函数的视图:CBV(class based views),即基于类的视图,也是基于对象的视图.当看到这个解释时,我是很萌的 ...
- python 全栈开发,Day84(django请求生命周期,FBV和CBV,ORM拾遗,Git)
一.django 请求生命周期 流程图: 1. 当用户在浏览器中输入url时,浏览器会生成请求头和请求体发给服务端请求头和请求体中会包含浏览器的动作(action),这个动作通常为get或者post, ...
- django基础 -- 4. 模板语言 过滤器 模板继承 FBV 和CBV 装饰器 组件
一.语法 两种特殊符号(语法): {{ }}和 {% %} 变量相关的用{{}},逻辑相关的用{%%}. 二.变量 1. 可直接用 {{ 变量名 }} (可调用字符串, 数字 ,列表,字典,对象等) ...
- Django FBV和CBV -
一.FBV和CBV 在Python菜鸟之路:Django 路由.模板.Model(ORM)一节中,已经介绍了几种路由的写法及对应关系,那种写法可以称之为FBV: function base view ...
- django基础之FBV与CBV,ajax序列化补充,Form表单
目录: FBV与CBV ajax序列化补充 Form表单(一) 一.FBV与CBV 1.什么是FBV.CBV? django书写view时,支持两种格式写法,FBV(function bases vi ...
- Python菜鸟之路:Django 路由补充1:FBV和CBV - 补充2:url默认参数
一.FBV和CBV 在Python菜鸟之路:Django 路由.模板.Model(ORM)一节中,已经介绍了几种路由的写法及对应关系,那种写法可以称之为FBV: function base view ...
随机推荐
- CSS操作表格的边框和表格的属性示例代码
<!DOCTYPE html PUBLIC "-//W3C//DTD XHTML 1.0 Transitional//EN" "http://www.w3.org/ ...
- spring整合mybatis(非代理方式)【我】
首先创建要给 maven 的war项目 不用代理的方式: 如果不适用Mapper代理的方式,配置就非常简单: 首先是pom文件(以下配置文件包含其他多余内容,仅供参考): <project xm ...
- 小D课堂 - 新版本微服务springcloud+Docker教程_汇总
小D课堂 - 新版本微服务springcloud+Docker教程_1_01课程简介 小D课堂 - 新版本微服务springcloud+Docker教程_1_02技术选型 小D课堂 - 新版本微服务s ...
- Extjs4 修改combox中store的数据
{ xtype: "combo", fieldLabel: '选择模板', name: "TemplateType", fieldName: "Tem ...
- SQL学习(六)select into:复制表信息
在实际工作中,可能需要将一个表中的数据复制到另一个表中,以供后续使用.此时可以用关键字select into(在MySQL中不支持select into,可使用insert into...select ...
- Python re 正则表达式【一】【转】
数量词的贪婪模式与非贪婪模式 正则表达式通常用于在文本中查找匹配的字符串.Python里数量词默认是贪婪的(在少数语言里也可能是默认非贪婪),总是尝试匹配尽可能多的字符:非贪婪的则相反,总是尝试匹配尽 ...
- docker随笔
--查看系统内核版本,docker对于centos系统内核版本需要高于3.10uname -r--移除旧的版本sudo yum remove docker \ docker-client \ dock ...
- 解析之Nginx解析
- python 爬虫 requests模块 目录
requests模块(response常用属性) 基于requests模块的get请求 基于requests模块发起ajax的get请求 基于requests模块发起ajax的post请求
- adb工具介绍与安装
一天笑嘻嘻是一名测试人员,想了解Android的测试方法,于是,就找到了小测试. 笑嘻嘻:身为一名测试人员需要了解ADB的哪些内容? 小测试:了解原理和简单的命令使用就可以了. 笑嘻嘻:你有毒啊,都了 ...
