使用Spring实现AOP(XML+注解)
一、Spring对AOP的支持
AOP并不是Spring框架特有的,Spring只是支持AOP编程的框架之一,每一个框架对AOP的支持各有特点,有些AOP能够对方法的参数进行拦截,有些AOP对方法进行拦截。而Spring AOP是一只基于方法拦截的AOP,换句话说Spring只能支持方法拦截的AOP。
在Spring中有4种方式去实现AOP的拦截功能:
1、使用ProxyFactoryBean和对应的接口实现AOP
2、使用XML配置AOP
3、使用@AspectJ注解驱动切面
4、使用Aspect注入切面
Spring AOP 的拦截方式中,真正常用的是用@AspectJ注解的方式实现的切面,有时候XML配置也有一定的辅助作用
spring AOP使用@AspectJ注解:https://www.cnblogs.com/weibanggang/p/10137217.html
二、面向切面编程的术语
1、切面(ASPECT)
切面就是一套规范的流程,可以理解为一个拦截器,能定义被拦截方法执行前后可以执行的操作。(即,它是一个类。)
2、通知(Advice)
通知就是切面中的方法,它根据在代理真实对象方法调用前、后的顺序和业务逻辑进行区分,Spring AOP中有四种通知:(即,它是类中的一个方法。)
- 前置通知(before):在动态代理反射原有对象方法或者执行环绕通知前执行的通知功能;
- 后置通知(after):在动态代理反射原有对象方法或者执行环绕通知后执行的通知功能,不管是否返回异常都会被执行;
- 返回通知(afterReturning):在动态代理反射原有对象方法或者执行环绕通知正常返回无异常时执行的通知功能;
- 异常通知(afterThrowing):在动态代理反射原有对象方法或者执行环绕通知产生异常时执行的通知功能;
- 环绕通知(around):在动态代理中,它可以取代当前被拦截对象的方法,提供回调原有被拦截对象的方法;
3、引入(Introduction)
引入允许我们在现有类里添加的自定义类或方法。比如我们要对一个被代理对象的逻辑进行优化,但是不能修改原方法时,可以使用引入来进行增强;
4、切点(Pointcut)
切点就是告诉Spring AOP什么时候启动拦截器并织入对应流程中。
5、连接点(join point)
连接点对应的是具体需要拦截的东西,比如通过切点的正则表达式去判断哪些方法是连接点,从而织入对应的通知;
6、织入(Weaving)
织入是一个生成代理对象,并且将切面内容放入到流程中的过程,它的实现方式就是动态代理
SpringAOP中,通过Advice定义横切逻辑,Spring中支持5种类型的Advice:

一、基于XML配置的Spring AOP
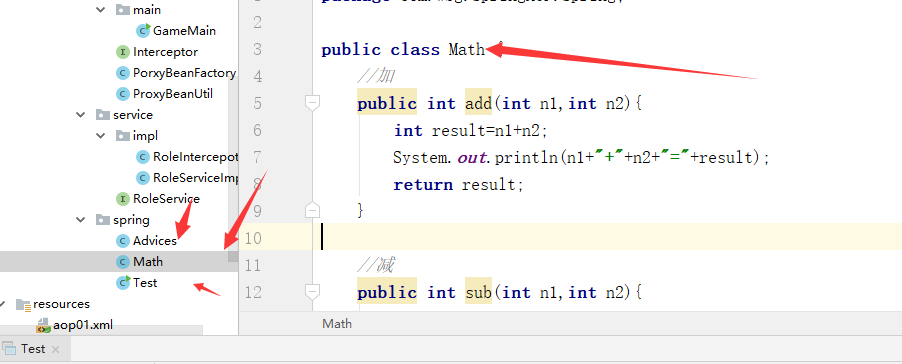
1、创建要被代理的Math类,代码如下
创建类:Math
package com.wbg.springAOP.spring;

public class Math {

    //加

    public int add(int n1,int n2){

        int result=n1+n2;

        System.out.println(n1+"+"+n2+"="+result);

        return result;

    }

    //减

    public int sub(int n1,int n2){

        int result=n1-n2;

        System.out.println(n1+"-"+n2+"="+result);

        return result;

    }

    //乘

    public int mut(int n1,int n2){

        int result=n1*n2;

        System.out.println(n1+"X"+n2+"="+result);

        return result;

    }

    //除

    public int div(int n1,int n2){

        int result=n1/n2;

        System.out.println(n1+"/"+n2+"="+result);

        return result;

    }

}
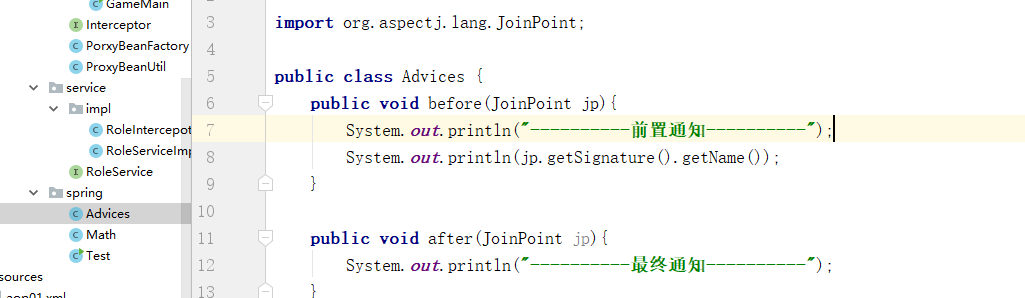
2、编辑AOP中需要使用到的通知类Advices.java代码如下:
package com.wbg.springAOP.spring;

import org.aspectj.lang.JoinPoint;

public class Advices {

    public void before(JoinPoint jp){

        System.out.println("----------前置通知----------");

        System.out.println(jp.getSignature().getName());

    }

    public void after(JoinPoint jp){

        System.out.println("----------最终通知----------");

    }

}
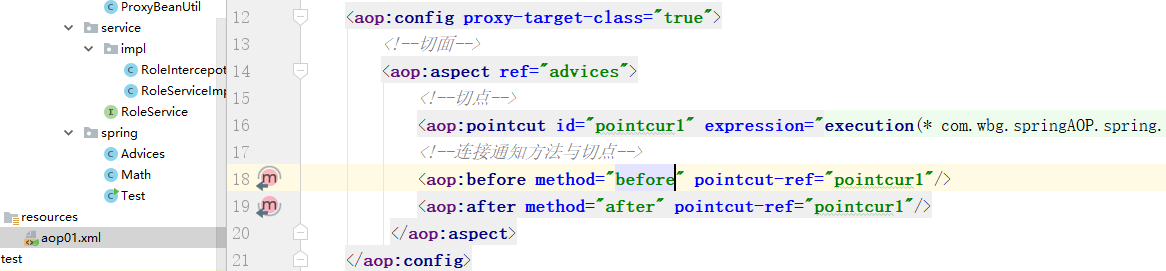
3、配置容器初始化时需要的XML文件,aop01.xml文件内容如下:
<?xml version="1.0" encoding="UTF-8"?>

<beans xmlns="http://www.springframework.org/schema/beans"

       xmlns:xsi="http://www.w3.org/2001/XMLSchema-instance" xmlns:aop="http://www.springframework.org/schema/aop"

       xsi:schemaLocation="http://www.springframework.org/schema/beans http://www.springframework.org/schema/beans/spring-beans.xsd http://www.springframework.org/schema/aop http://www.springframework.org/schema/aop/spring-aop.xsd">

    <!--被代理对象-->

    <bean id="math" class="com.wbg.springAOP.spring.Math"/>

    <!--通知-->

    <bean id="advices" class="com.wbg.springAOP.spring.Advices"/>

    <!--aop配置-->

    <aop:config proxy-target-class="true">

        <!--切面-->

        <aop:aspect ref="advices">

            <!--切点-->

            <aop:pointcut id="pointcur1" expression="execution(* com.wbg.springAOP.spring.Math.*(..))"/>

            <!--连接通知方法与切点-->

            <aop:before method="before" pointcut-ref="pointcur1"/>

            <aop:after method="after" pointcut-ref="pointcur1"/>

         </aop:aspect>

    </aop:config>

</beans>
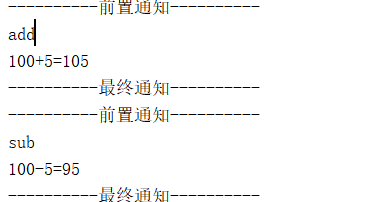
4、测试:
 ApplicationContext context = new ClassPathXmlApplicationContext("aop01.xml");

        Math math = context.getBean("math",Math.class);

        int n=100;

        int m=5;

        math.add(n,m);

        math.sub(n,m);

        math.mut(n,m);

        math.div(n,m);
二、使用注解配置AOP
1、创建代理类:Math2 ,类上注解了@Service并命名bean为math2。
代码:
package com.wbg.springAOP.spring.annotation;

import org.springframework.stereotype.Component;

import org.springframework.stereotype.Service;

import java.util.Random;

/**

 * 被代理的目标类

 */

@Service("math2")

public class Math2 {

    //加

    public int add(int n1,int n2){

        //开始时间

        long start = getTime();

        delay();

        int result=n1+n2;

        System.out.println(n1+"+"+n2+"="+result);

        System.out.println("共用时:" + (getTime() - start));

        return result;

    }

    //减

    public int sub(int n1,int n2){

        //开始时间

        long start = getTime();

        delay();

        int result=n1*n2;

        System.out.println(n1+"-"+n2+"="+result);

        System.out.println("共用时:" + (getTime() - start));

        return result;

    }

    //乘

    public int mut(int n1,int n2){

        //开始时间

        long start = getTime();

        delay();

        int result=n1*n2;

        System.out.println(n1+"X"+n2+"="+result);

        System.out.println("共用时:" + (getTime() - start));

        return result;

    }

    //除

    public int div(int n1,int n2){

        //开始时间

        long start = getTime();

        delay();

        int result=n1/n2;

        System.out.println(n1+"/"+n2+"="+result);

        System.out.println("共用时:" + (getTime() - start));

        return result;

    }

    public static long getTime() {

        return System.currentTimeMillis();

    }

    public static void delay(){

        try {

            int n = (int) new Random().nextInt(500);

            Thread.sleep(n);

        } catch (InterruptedException e) {

            e.printStackTrace();

        }

    }

}

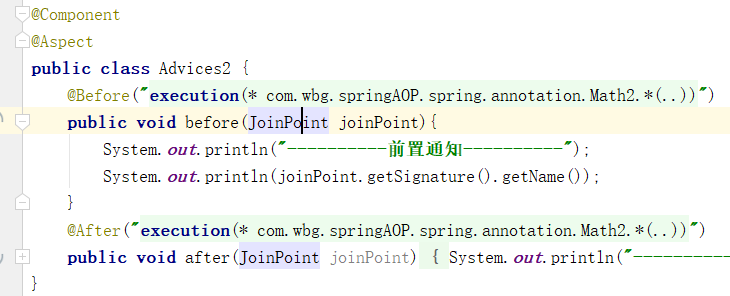
2、创建Advices2类
@Component表示该类的实例会被Spring IOC容器管理
@Aspect表示声明一个切面
@Before表示before为前置通知,通过参数execution声明一个切点
代码:
execution(<修饰符模式>?<返回类型模式><方法名模式>(<参数模式>)<异常模式>?)切点函数,可以满足多数需求。

package com.wbg.springAOP.spring.annotation;

import org.aspectj.lang.JoinPoint;

import org.aspectj.lang.annotation.After;

import org.aspectj.lang.annotation.Aspect;

import org.aspectj.lang.annotation.Before;

import org.springframework.stereotype.Component;

@Component

@Aspect

public class Advices2 {

    @Before("execution(* com.wbg.springAOP.spring.annotation.Math2.*(..))")

    public void before(JoinPoint joinPoint){

        System.out.println("----------前置通知----------");

        System.out.println(joinPoint.getSignature().getName());

    }

    @After("execution(* com.wbg.springAOP.spring.annotation.Math2.*(..))")

    public void after(JoinPoint joinPoint){

        System.out.println("----------最终通知----------");

    }

}
3、创建xml
<?xml version="1.0" encoding="UTF-8"?>

<beans xmlns="http://www.springframework.org/schema/beans"

       xmlns:xsi="http://www.w3.org/2001/XMLSchema-instance"

       xmlns:context="http://www.springframework.org/schema/context"

       xmlns:aop="http://www.springframework.org/schema/aop"

       xsi:schemaLocation="http://www.springframework.org/schema/beans http://www.springframework.org/schema/beans/spring-beans.xsd http://www.springframework.org/schema/context http://www.springframework.org/schema/context/spring-context.xsd http://www.springframework.org/schema/aop http://www.springframework.org/schema/aop/spring-aop.xsd">

        <context:component-scan base-package="com.wbg.springAOP.spring.annotation"/>

    <!--

    在配置IOC的基础上增加了aop:aspectj-autoproxy节点

    Spring框架会自动为与AspectJ切面配置的Bean创建代理

    proxy-target-class="true"属性表示被代理的目标对象是一个类

    而非实现了接口的类,主要是为了选择不同的代理方式

    -->

    <aop:aspectj-autoproxy proxy-target-class="true"/>

</beans>
4、测试
ApplicationContext context = new ClassPathXmlApplicationContext("aop2.xml");

        Math2 math = context.getBean("math2",Math2.class);

        int n=100;

        int m=5;

        math.add(n,m);

        math.sub(n,m);

        math.mut(n,m);

        math.div(n,m);

使用Spring实现AOP(XML+注解)的更多相关文章
- Spring 中aop切面注解实现
spring中aop的注解实现方式简单实例 上篇中我们讲到spring的xml实现,这里我们讲讲使用注解如何实现aop呢.前面已经讲过aop的简单理解了,这里就不在赘述了. 注解方式实现aop我们 ...
- [Spring框架]Spring开发实例: XML+注解.
前言: 本文为自己学习Spring记录所用, 文章内容包括Spring的概述已经简单开发, 主要涉及IOC相关知识, 希望能够对新入门Spring的同学有帮助, 也希望大家一起讨论相关的知识. 一. ...
- spring中aop的注解实现方式简单实例
上篇中我们讲到spring的xml实现,这里我们讲讲使用注解如何实现aop呢.前面已经讲过aop的简单理解了,这里就不在赘述了. 注解方式实现aop我们主要分为如下几个步骤(自己整理的,有更好的方法的 ...
- spring框架aop用注解形式注入Aspect切面无效的问题解决
由于到最后我的项目还是有个邪门的错没解决,所以先把文章大概内容告知: 1.spring框架aop注解扫描默认是关闭的,得手动开启. 2.关于Con't call commit when autocom ...
- Spring 使用AOP——xml配置
目录 AOP介绍 Spring进行2种实现AOP的方式 导入jar包 基于schema-based方式实现AOP 创建前置通知 创建后置通知 修改Spring配置文件 基于schema-based方式 ...
- redis分布式锁-spring boot aop+自定义注解实现分布式锁
接这这一篇redis分布式锁-java实现末尾,实现aop+自定义注解 实现分布式锁 1.为什么需要 声明式的分布式锁 编程式分布式锁每次实现都要单独实现,但业务量大功能复杂时,使用编程式分布式锁无疑 ...
- 黑马Spring学习 AOP XML和注解配置 5种通知 切点切面通知织入
业务类 package cn.itcast.aop; import org.aspectj.lang.JoinPoint; import org.aspectj.lang.ProceedingJoin ...
- Spring 使用AOP——基于注解配置
首先,使用注解实现AOP是基于AspectJ方式的. 创建包含切点方法的类 package cn.ganlixin.test; import org.aspectj.lang.annotation.P ...
- 浅谈spring中AOP以及spring中AOP的注解方式
AOP(Aspect Oriented Programming):AOP的专业术语是"面向切面编程" 什么是面向切面编程,我的理解就是:在不修改源代码的情况下增强功能.好了,下面在 ...
随机推荐
- mysql client does not support authentication
打开mysql 命令行 mysql> alter user 'root'@'localhost' identified with mysql_native_password by '123456 ...
- 一:HttpClient知识整理
一:httpclient 简介 HttpClient 是 Apache Jakarta Common 下的子项目,可以用来提供高效的.最新的.功能丰富的支持 HTTP 协议的客户端编程工具包,并且它支 ...
- java 阿里云接口实现发送短信验证码
此刻自己做的小项目中,需要用到手机发送短信验证码实现注册功能,于是就去阿里云注册了账号,并实现随机发送验证码的功能 第一步:在阿里云官网登录注册 已有支付宝或淘宝的账号可以直接登录,最后需要实名认 ...
- JS里的居民们6-数组排序
编码 var arr = [43, 54, 4, -4, 84, 100, 58, 27, 140]; 将上面数组分别按从大到小以及从小到大进行排序后在console中输出 var arr = ['a ...
- csharp: Aspose.Words create table
/// <summary> /// 20141118 /// Geovin Du /// Aspose.Words创建表 /// </summary> /// <para ...
- “没有用var声明的为全局变量”这种说法不准确
结论: “没有用var声明的变量为全局变量”这样的说法不太正确,需要在这句话前面加一个前提,如果①变量前面没有用var声明,②在变量所在在的作用域链中没有这个变量名称,则设置该变量为全局变量. 代码 ...
- DB DBS 和DBMS区别
DB:是指datebase(数据库) DBS:是指datebase systerm (数据库系统) DBMS:是指datebase mangement systerm(数据库管理系统)区别:数据库 ...
- 001服务注册与发现Eureka
1.POM配置 和普通Spring Boot工程相比,仅仅添加了Eureka Server依赖和Spring Cloud依赖管理 <dependencies> <!--添加Eurek ...
- System.Net.Mail 邮件发送示例
前言:OA自动发送邮件的程序不好使,SQL Server 存储过程邮件发送程序好使,但是不利于标准化和维护,于是觉得是适合找些“轮子”武装一下.想起之前学习过System.Net.Mail ,于是再次 ...
- arcMap 进度条
private void kk() { IProgressDialogFactory progressDialogFactory = new ProgressDialogFactoryClass(); ...