实践笔记_J2EE_Server_Tomcat_tomcat域名绑定_1_单域名绑定
Tomcat域名绑定(1)单域名绑定
1. 测试环境说明
| 名称 | 版本 | 备注 |
| 操作系统 | win10 教育版1803 | |
| web服务器 | tomcat7.0 | |
| 浏览器 | Google Chrome71.0.3578.98 | |
2.简单方式一:操作步骤
预期的结果是: 通过www.slm.cn 直接访问到tomcat中的项目的首页
2.1 实现访问时用 域名 代替 localhost或ip
2.1.1 修改host文件
A. 打开运行 输入 C:\WINDOWS\system32\drivers\etc

B.记事本打开host文件,添加域名映射
这里我用的是一个测试过还在外租售的域名 www.slm.cn (PS:不是我的)
#代表注释
以下面的方式映射:
127.0.0.1 www.slm.cn


2.1.2 保存host文件 访问
ps:
到目前为止已经完成了ip和域名的绑定,这时候我们通过www.slm.cn就能访问到本机了.
以tomcat为例访问项目, 现在的访问地址就是: http://www.slm.cn:8080/项目名
但是这样端口和项目名还是暴露了,下面来解决这个问题
2.2 隐藏8080端口
这个很简单,就是将tomcat响应端口从8080端口修改为80端口
2.2.1 操作步骤如下:
A.打开tomcat server.xml文件,找到下行代码:
<Connector port="8080" protocol="HTTP/1.1" connectionTimeout="20000" redirectPort="8443" URIEncoding="UTF-8" />
B.将上述代码中的 8080 修改为 80 .如下:
<Connector port="80" protocol="HTTP/1.1" connectionTimeout="20000" redirectPort="8443" URIEncoding="UTF-8" />
C.保存 server.xml文件
这时访问地址中的端口就隐藏成功了.访问地址就变成了: http://www.slm.cn/项目名
但是项目名还是存在,所以接下来我们还要隐藏项目名.
2.3 隐藏项目名
同样是修改server.xml文件.操作如下
2.3.1 操作步骤:
A.打开server.xml,找到 host节点

B.将一个host节点中的localhost 全部改为www.slm.cn
并添加子节点:<Context path="" docBase="/项目名/" reloadable="true" />
比如我的项目名叫WEBTEST 所以修改后就是:
<Host name="www.slm.com" appBase="webapps"unpackWARs="true" autoDeploy="true" xmlValidation="false" xmlNamespaceAware="false">

		<Valve className="org.apache.catalina.valves.AccessLogValve" directory="logs"

               prefix="localhost_access_log." suffix=".txt"

               pattern="%h %l %u %t "%r" %s %b" />

		<Context path="" docBase="/WEBTEST/" reloadable="true" ></Context>

</Host>
C.找到
<Engine name="Catalina" defaultHost="localhost">
将defaultHost 的值 localhost 更改为 www.slm.cn 如下:
<Engine name="Catalina" defaultHost="www.slm.cn">
从这里可以看到,它其实是映射关系,所以HOST其实可以有多个,但默认的就只有一个.
这就为后面配置多个项目日共了便利.这里我们只设置单个项目的映射.
2.3.2 完整的示例
以tomcat为服务器,www.slm.cn为访问域名 crm为项目名 ,那么完整修改后的server.xml如下

2.4 保存修改的server.xml文件 重启tomcat
3.测试
3.1 这个时候加端口号的这个访问就访问不到了:

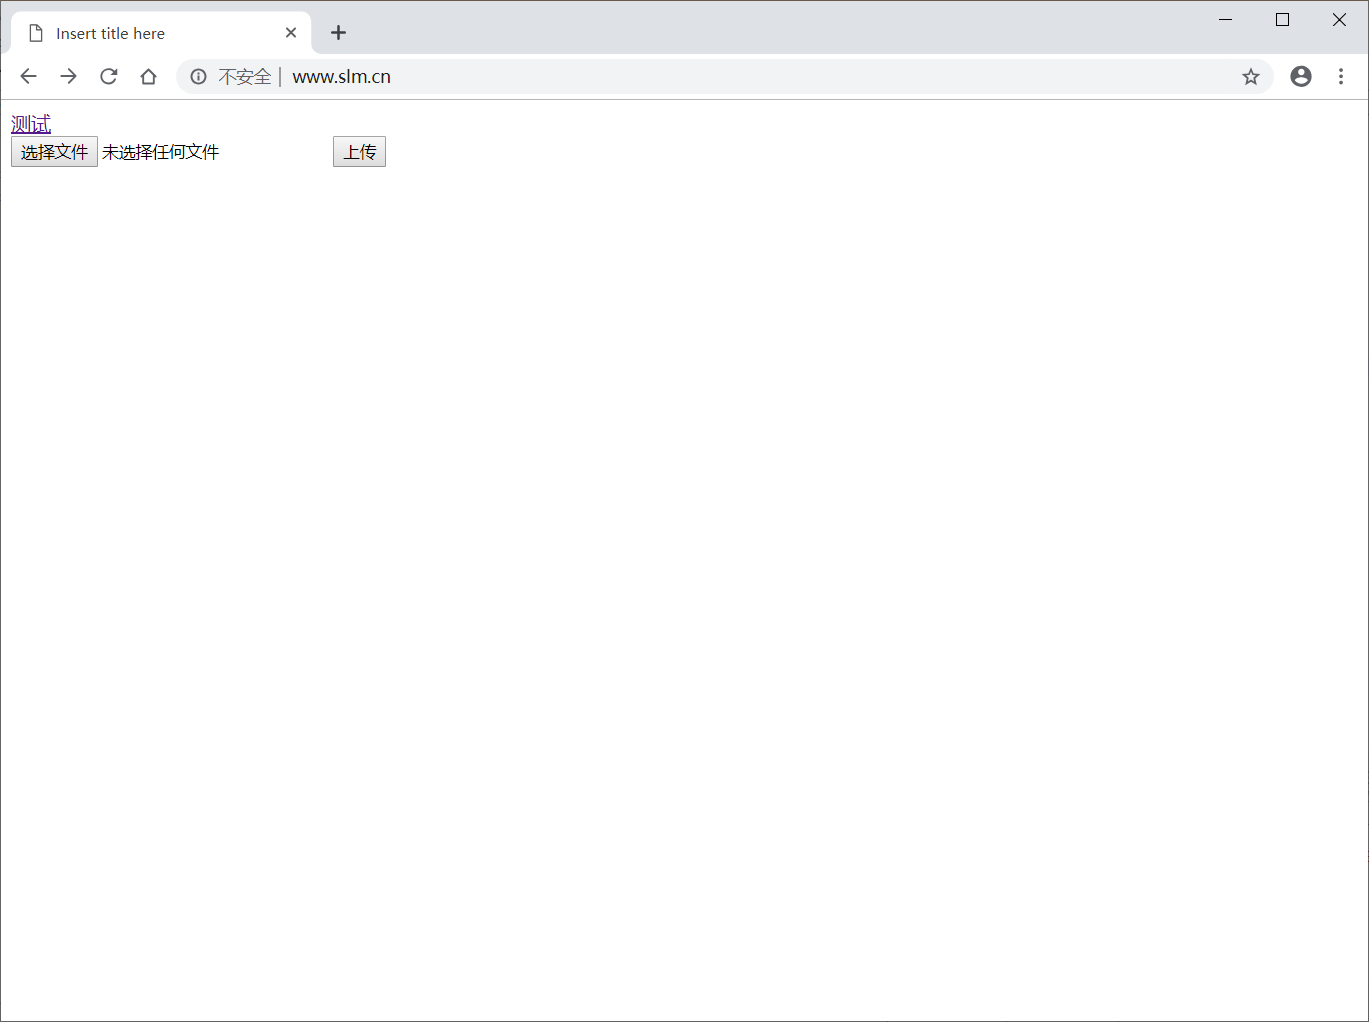
3.2 我们访问域名: http://www.slm.cn 结果如下:

4.其它版本测试
4.1. Tomcat8.5 winX64
4.1.1 server.xml 配置
<?xml version="1.0" encoding="UTF-8"?>

<!--

  Licensed to the Apache Software Foundation (ASF) under one or more

  contributor license agreements.  See the NOTICE file distributed with

  this work for additional information regarding copyright ownership.

  The ASF licenses this file to You under the Apache License, Version 2.0

  (the "License"); you may not use this file except in compliance with

  the License.  You may obtain a copy of the License at

      http://www.apache.org/licenses/LICENSE-2.0

  Unless required by applicable law or agreed to in writing, software

  distributed under the License is distributed on an "AS IS" BASIS,

  WITHOUT WARRANTIES OR CONDITIONS OF ANY KIND, either express or implied.

  See the License for the specific language governing permissions and

  limitations under the License.

--><!-- Note:  A "Server" is not itself a "Container", so you may not

     define subcomponents such as "Valves" at this level.

     Documentation at /docs/config/server.html

 --><Server port="8005" shutdown="SHUTDOWN">

  <Listener className="org.apache.catalina.startup.VersionLoggerListener"/>

  <!-- Security listener. Documentation at /docs/config/listeners.html

  <Listener className="org.apache.catalina.security.SecurityListener" />

  -->

  <!--APR library loader. Documentation at /docs/apr.html -->

  <Listener SSLEngine="on" className="org.apache.catalina.core.AprLifecycleListener"/>

  <!-- Prevent memory leaks due to use of particular java/javax APIs-->

  <Listener className="org.apache.catalina.core.JreMemoryLeakPreventionListener"/>

  <Listener className="org.apache.catalina.mbeans.GlobalResourcesLifecycleListener"/>

  <Listener className="org.apache.catalina.core.ThreadLocalLeakPreventionListener"/>

  <!-- Global JNDI resources

       Documentation at /docs/jndi-resources-howto.html

  -->

  <GlobalNamingResources>

    <!-- Editable user database that can also be used by

         UserDatabaseRealm to authenticate users

    -->

    <Resource auth="Container" description="User database that can be updated and saved" factory="org.apache.catalina.users.MemoryUserDatabaseFactory" name="UserDatabase" pathname="conf/tomcat-users.xml" type="org.apache.catalina.UserDatabase"/>

  </GlobalNamingResources>

  <!-- A "Service" is a collection of one or more "Connectors" that share

       a single "Container" Note:  A "Service" is not itself a "Container",

       so you may not define subcomponents such as "Valves" at this level.

       Documentation at /docs/config/service.html

   -->

  <Service name="Catalina">

    <!--The connectors can use a shared executor, you can define one or more named thread pools-->

    <!--

    <Executor name="tomcatThreadPool" namePrefix="catalina-exec-"

        maxThreads="150" minSpareThreads="4"/>

    -->

    <!-- A "Connector" represents an endpoint by which requests are received

         and responses are returned. Documentation at :

         Java HTTP Connector: /docs/config/http.html

         Java AJP  Connector: /docs/config/ajp.html

         APR (HTTP/AJP) Connector: /docs/apr.html

         Define a non-SSL/TLS HTTP/1.1 Connector on port 8080

    -->

    <Connector connectionTimeout="20000" port="80" protocol="HTTP/1.1" redirectPort="8443"/>

    <Connector port="8009" protocol="AJP/1.3" redirectPort="8443" URIEncoding="utf-8"/>

    <Engine defaultHost="www.slm.cn" name="Catalina">

      <Realm className="org.apache.catalina.realm.LockOutRealm">

        <Realm className="org.apache.catalina.realm.UserDatabaseRealm" resourceName="UserDatabase"/>

      </Realm>

      <Host appBase="webapps" autoDeploy="true" name="www.slm.cn" unpackWARs="true">

        <Valve className="org.apache.catalina.valves.AccessLogValve" directory="logs" pattern="%h %l %u %t "%r" %s %b"

        prefix="localhost_access_log" suffix=".txt"/>

      <Context docBase="/SpringMVCDemo/" path="" reloadable="true" /></Host>

    </Engine>

  </Service>

</Server>
4.1.2 效果

5.参考文献
5.1 tomcat设置直接通过域名访问项目(不需要接 /项目名)
https://blog.csdn.net/qq_33647275/article/details/52585489
5.2 一个Tomcat下部署两个,甚至多个项目
https://blog.csdn.net/junhou5/article/details/61923837
5.3 同一个Tomcat部署多个项目
https://blog.csdn.net/dreamstar613/article/details/75282962/
5.4 把域名和IP地址绑定后,利用域名+端口号访问自己搭建的网站
https://blog.csdn.net/liuzhongyefirst/article/details/81946686
实践笔记_J2EE_Server_Tomcat_tomcat域名绑定_1_单域名绑定的更多相关文章
- Vue的指令系统、计算属性和表单输入绑定
指令系统 指令 (Directives) 是带有 v- 前缀的特殊特性.指令特性的值预期是单个 JavaScript 表达式 (v-for 是例外情况,稍后我们再讨论).指令的职责是,当表达式的值改变 ...
- Taurus.MVC 微服务框架 入门开发教程:项目部署:2、让Kestrel支持绑定多个域名转发,替代Ngnix使用。
系列目录: 本系列分为项目集成.项目部署.架构演进三个方向,后续会根据情况调整文章目录. 本系列第一篇:Taurus.MVC V3.0.3 微服务开源框架发布:让.NET 架构在大并发的演进过程更简单 ...
- 阿里云Nginx绑定多个域名的方法
nginx绑定多个域名,可通过把多个域名规则写一个配置文件里实现,也可通过分别建立多个域名配置文件实现,一般为了管理方便,建议每个域名建一个文件,有些同类域名也可写在一个总的配置文件里. 一.每个域名 ...
- PHP同一个IP绑定多个域名(六)
原理图 一个ip绑定如何绑定多个域名? 解决方案: A.方案一:端口号来区别不同的站点 1.绑定一个网站 1.1先开发好自己的网站 d:/ApacheProject/myanimal 1.2 配置我们 ...
- nginx绑定多个域名
nginx绑定多个域名涉及到的技术为url rewrite,可以先了解下知识背景再过来学习. 这里以域名:www.sample.com为例 1.在/usr/local/nginx/conf文件夹中创建 ...
- APACHE如何里一个站点绑定多个域名?用ServerAlias
APACHE2如何里一个站点绑定多个域名?用ServerAlias以前很笨,要使多个域名指向同一站点总是这样写: <VirtualHost *:80>ServerAdmin i@kuigg ...
- nginx 多域名配置 (nginx如何绑定多个域名)
nginx绑定多个域名可又把多个域名规则写一个配置文件里,也可又分别建立多个域名配置文件,我一般为了管理方便,每个域名建一个文件,有些同类域名也可又写在一个总的配置文件里. 一.每个域名一个 ...
- Apache 一台主机绑定多个域名及虚拟主机
今天研究了下Apache下如何使用一台主机绑定多个域名且使用80端口.说白了就是在一台主机上运行多个网站,并且网站域名都是使用的80端口. 具体方法如下: 1.进入Apache conf目录,找到ht ...
- CentOS6.5 服务器+apache5.3绑定多个域名+SELinux设置
下面简单的介绍了如何通过设置Apache的http.conf文件,进行多个域名以及其相关的二级域名的绑定(假设我们要绑定的域名是minidx.com和ntt.cc,二级域名是blog.minidx.c ...
随机推荐
- flex布局实例demo全解
上篇文章介绍了Flex布局的语法,今天介绍常见布局的Flex写法. 你会看到,不管是什么布局,Flex往往都可以几行命令搞定. 我只列出代码,详细的语法解释请查阅<Flex布局教程:语法篇> ...
- 【pytorch】pytorch-LSTM
pytorch-LSTM() torch.nn包下实现了LSTM函数,实现LSTM层.多个LSTMcell组合起来是LSTM. LSTM自动实现了前向传播,不需要自己对序列进行迭代. LSTM的用到的 ...
- ImageMagick 安装 window10与错误总结
一般默认安装最新的版本(目前是7.0.8),但是通过测试发现这个版本会报错(ImportError: MagickWand shared library not found.)所以建议安装 im6版本 ...
- WC2019游记
本来不打算写游记的,但后来想了想这么一次难忘的经历总该留下点痕迹吧...... DAY-1 走之前的最后一天,因为前一天晚上打了CF,所以早上9点才到机房.写了一道圆方树深深地体会到了来自仙人掌的恶意 ...
- GWAS基因芯片数据预处理:质量控制(quality control)
一.数据为什么要做质量控制 比起表观学研究,GWAS研究很少有引起偏差的来源,一般来说,一个人的基因型终其一生几乎不会改变的,因此很少存在同时影响表型又影响基因型的变异.但即便这样,我们在做GWAS时 ...
- uninitialized_copy()效果试验
根据<STL源码剖析>这段节选描述,实现如下代码进行测试 #include "2jjalloca.h" #include <vector> #include ...
- Linux Centos6.9下安装部署VNC的实操详述
VNC (Virtual Network Console)是虚拟网络控制台的缩写.它 是一款优秀的远程控制工具软件,由著名的AT&T的欧洲研究实验室开发的.VNC 是在基于 UNIX和 Lin ...
- Windows7系统基础操作
Windows7系统基础操作 操作系统是人机交互的时候桥梁,一种计算机软件,软件分为:系统软件+应用软件 区别是:系统软件是可以直接安装在硬件上的计算机由硬件和软件两部分组成 操作电脑核心是操作电脑的 ...
- \t \r \n \f
\t 的意思是 :水平制表符.将当前位置移到下一个tab位置. \r 的意思是: 回车.将当前位置移到本行的开头. \n 的意思是:回车换行.将当前位置移到下一行的开头. \f的意思是:换页.将当前位 ...
- Python模拟弹道轨迹
http://www.itongji.cn/cms/article/articledetails?articleid=5029 最近美国把萨德系统部署到韩国,一时心血来潮就用python模拟最简单的弹 ...
