通过注解配置Bean
之前说的三种配置方式,都是使用XML配置,现在我们说说使用注解配置Bean。
这部分内容主要分为两个部分:使用注解配置Bean,使用注解配置Bean属性。
在classpath中扫描组件
组件扫描:Spring能够从ClassPath下自动扫描,侦测和实例化具有特定注释的组件
特定组件包括:
@Component
@Respository 持久层
@Service 业务层
@Controller 控制层
这四个标签可以混用,暂时没有什么区别,不过建议在不同层用不同的注释,方便阅读。
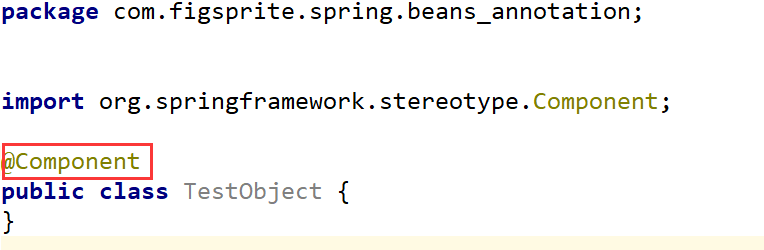
创建一个新的包com.figsprite.spring.beans_annotation,新的类com.figsprite.spring.beans_annotation.TestObject:
在TestObject.java里我们先放上注释,
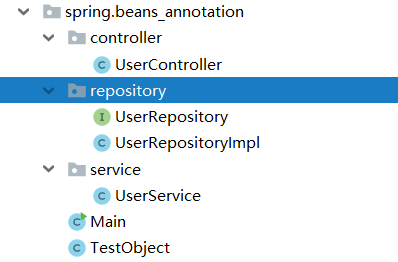
现在Bean还没有被IOC容器管理,我们再来建一个子包com.figsprite.spring.beans_annotation.repository,写一个接口com.figsprite.spring.beans_annotation.repository.UserRepository和实现类com.figsprite.spring.beans_annotation.repository.UserRepositoryImpl,接下来写业务层和控制层,分别创建一个包,然后写上相应代码,并写上注释:
UserController.java:
package com.figsprite.spring.beans_annotation.controller;

import org.springframework.stereotype.Controller;

@Controller

public class UserController {

    public void execute(){

        System.out.println("Controller execute");

    }

}
UserService.java:
package com.figsprite.spring.beans_annotation.service;

import org.springframework.stereotype.Service;

@Service

public class UserService {

    public void add(){

        System.out.println("Service Add");

    }

}
UserRepository.java
package com.figsprite.spring.beans_annotation.repository;

public interface UserRepository {

    void save();

}
UserRepositoryImpl.java
package com.figsprite.spring.beans_annotation.repository;

import org.springframework.stereotype.Repository;

@Repository("userRepository")

public class UserRepositoryImpl implements UserRepository{

    @Override

    public void save() {

        System.out.println("SAVE");

    }

}
做完这些,我们可以创建一个配置文件beans-annotation.xml,然后我们在这个配置文件里,通过<context:component-scan>标签扫描具有这些注释的类的包:
<context:component-scan base-package="com.figsprite.spring.beans_annotation"/>
接下来做一个测试,创建Main.java
在我们没有指明Bean对象的id时,在注释配置下,默认id为类名的驼峰命名。
如何命名呢?只要在我们刚刚写的标签里加个括号指定就行:
@Repository("userRepository")
Main.java:
- package com.figsprite.spring.beans_annotation;
- import com.figsprite.spring.beans_annotation.controller.UserController;
- import com.figsprite.spring.beans_annotation.repository.UserRepositoryImpl;
- import com.figsprite.spring.beans_annotation.service.UserService;
- import org.springframework.context.ApplicationContext;
- import org.springframework.context.support.ClassPathXmlApplicationContext;
- public class Main {
- public static void main(String[] args) {
- ApplicationContext ctx = new ClassPathXmlApplicationContext("beans-annotation.xml");
- TestObject to = (TestObject) ctx.getBean("testObject") ;
- System.out.println(to);
- UserController userController = (UserController) ctx.getBean("userController");
- System.out.println(userController);
- UserRepositoryImpl userRepository = (UserRepositoryImpl) ctx.getBean("userRepository");
- System.out.println(userRepository);
- UserService userService = (UserService) ctx.getBean("userService");
- System.out.println(userService);
- }
- }

接下来回到<context:compomenr-scan>标签,再来说说里面的其他属性resource-pattern
,这个属性可以过滤特定类,比如我只想扫描repository底下的类,
<context:component-scan
base-package="com.figsprite.spring.beans_annotation"
resource-pattern="repository/*.class"/>
这样在Main里面,我们只会得到UserRepository的对象,其他的就得不到了,肯定报错,

<context:compomenr-scan>标签还有两个子标签
<context:include-filtter>包含哪些指定表达式的组件
< context:exclude-filtter >排除哪些指定表达式的组件
type属性:这里就介绍两种常用的annotation根据注解锁定目标,

比如不包含Repository注解
<context:exclude-filter type="annotation" expression="org.springframework.stereotype.Repository"/>
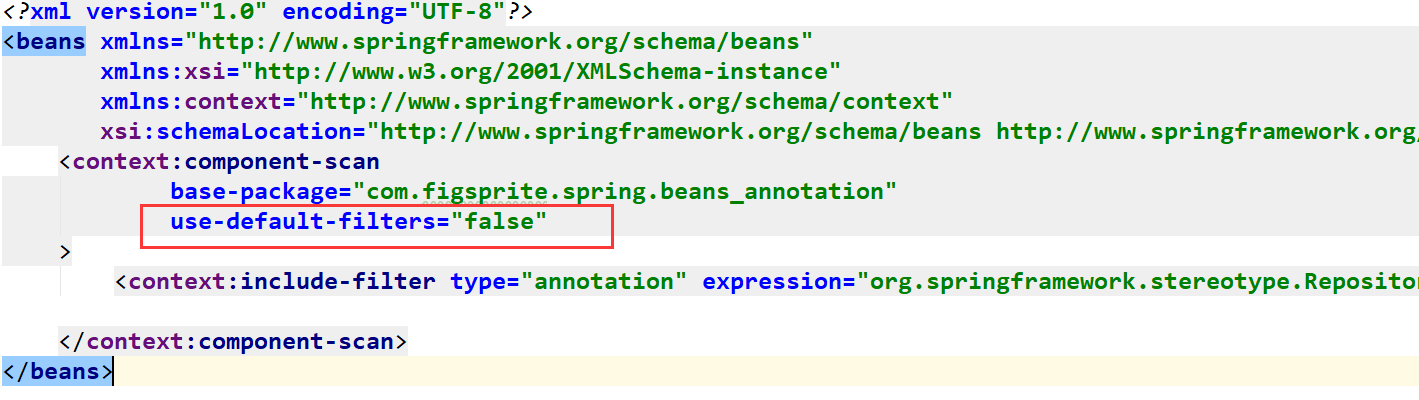
对于<context:include-filtter>,由于<context:compomenr-scan>默认是扫描包下的所有指定表达式组件,所有我们要加上use-default-filters="false",这样就不会自动扫描了,<context:include-filtter>与< context:exclude-filtter >使用方法一致,
另外一种是使用assignable方式,根据类名锁定目标。这里就再演示了
通过注解配置Bean的更多相关文章
- [原创]java WEB学习笔记103:Spring学习---Spring Bean配置:基于注解的方式(基于注解配置bean,基于注解来装配bean的属性)
本博客的目的:①总结自己的学习过程,相当于学习笔记 ②将自己的经验分享给大家,相互学习,互相交流,不可商用 内容难免出现问题,欢迎指正,交流,探讨,可以留言,也可以通过以下方式联系. 本人互联网技术爱 ...
- Spring(二)--FactoryBean、bean的后置处理器、数据库连接池、引用外部文件、使用注解配置bean等
实验1:配置通过静态工厂方法创建的bean [通过静态方法提供实例对象,工厂类本身不需要实例化!] 1.创建静态工厂类 public class StaticFactory { private st ...
- Spring(十五):通过注解配置 Bean
在ClassPath中扫描组件 1)组件扫描(component scanning):Spring能够从classpath下自动扫描,侦测和实例化具有特定注解的组件: 2)特定组件包含: --- @C ...
- IDEA02 利用Maven创建Web项目、为Web应用添加Spring框架支持、bean的创建于获取、利用注解配置Bean、自动装配Bean、MVC配置
1 环境版本说明 Jdk : 1.8 Maven : 3.5 IDEA : 专业版 2017.2 2 环境准备 2.1 Maven安装及其配置 2.2 Tomcat安装及其配置 3 详细步骤 3.1 ...
- Spring IOC机制之使用注解配置bean
一. 通过注解配置bean 1.1 概述 相对于XML方式而言,通过注解的方式配置bean更加简洁和优雅,而且和MVC组件化开发的理念十分契合,是开发中常用的使用方式. 1.2 ...
- 14Spring通过注解配置Bean(2)
下面将对13Spring通过注解配置Bean(1)的中Repository.Service.Controller通过注解方式来建立关联. <context:component-scan>元 ...
- 13Spring通过注解配置Bean(1)
配置Bean的形式:基于XML文件的方式:基于注解的方式(基于注解配置Bean:基于注解来装配Bean的属性) 下面介绍基于注解的方式来配置Bean. ——组件扫描(component scannin ...
- Spring框架入门之基于Java注解配置bean
Spring框架入门之基于Java注解配置bean 一.Spring bean配置常用的注解 常用的有四个注解 Controller: 用于控制器的注解 Service : 用于service的注解 ...
- Spring 注解配置Bean
一.使用注解配置Bean 1.注解 在类定义.方法定义.成员变量定义前使用.其简化<bean>标签,功能同<bean>标签.格式为: @注解标记名. 2.组件扫描 Spring ...
随机推荐
- Predicate--入门简介
说明:表示定义一组条件并确定指定对象是否符合这些条件的方法.此委托由 Array 和 List 类的几种方法使用,用于在集合中搜索元素. var predicate = new Predicate&l ...
- CSS代码片段
定位: 将元素居中 将元素水平居中 将元素垂直居中 样式: 文字毛玻璃效果 -------------------------------------------代码----------------- ...
- 环境搭建 - Java(Windows)
Java开发环境搭建 本文以window7下搭建JDK8示例,其他版本无特殊说明同理. 下载JDK安装包 网址:JDK8 非C盘下根目录新建文件夹:Java D:\Java 安装JDK至Jav ...
- 灵活使用 console 让 js 调试更简单
摘要: 玩转console. 原文:灵活使用 console 让 js 调试更简单 作者:前端小智 Fundebug经授权转载,版权归原作者所有. Web 开发最常用的就是 console.log , ...
- 当桌面的快捷方式图标左下角出现一个X(叉)的时候应该怎么去掉
win+r打开运行,然后复制粘贴如下命令就OK辣 cmd /k reg delete "HKEY_CLASSES_ROOT\lnkfile" /v IsShortcut /f &a ...
- Easyui 修改|新增jquery-easyui icon图标
修改|新增jquery-easyui icon图标 by:授客 QQ:1033553122 测试环境 jquery-easyui-1.5.3 修改配置文件 打开jquery-easyui-1.5.3\ ...
- C#的String.Split 分割字符串用法详解的代码
代码期间,把代码过程经常用的内容做个珍藏,下边代码是关于C#的String.Split 分割字符串用法详解的代码,应该对码农们有些用途. 1) public string[] Split(params ...
- WPF:使用TypeConverter
所谓TypeConverter就是类型转换器,支持两种类型之间相互转换 你可以重写转换逻辑,只要你清楚转换的协议,就可以实现类型互转. 定义一个Person类型,具有一个int类型的Age属性: pu ...
- XUnit 依赖注入
XUnit 依赖注入 Intro 现在的开发中越来越看重依赖注入的思想,微软的 Asp.Net Core 框架更是天然集成了依赖注入,那么在单元测试中如何使用依赖注入呢? 本文主要介绍如何通过 XUn ...
- MySQL游标循环取出空值的BUG
早上同事要我写个MySQL去除重复数据的SQL,想起来上次写过一篇MySQL去除重复数据的博客,使用导入导出加唯一索引实现的,但是那种方式对业务影响较大,所以重新写一个存储过程来删重复数据,这一写就写 ...