最近弄swwager文档,被搞得恼火,故记录一下
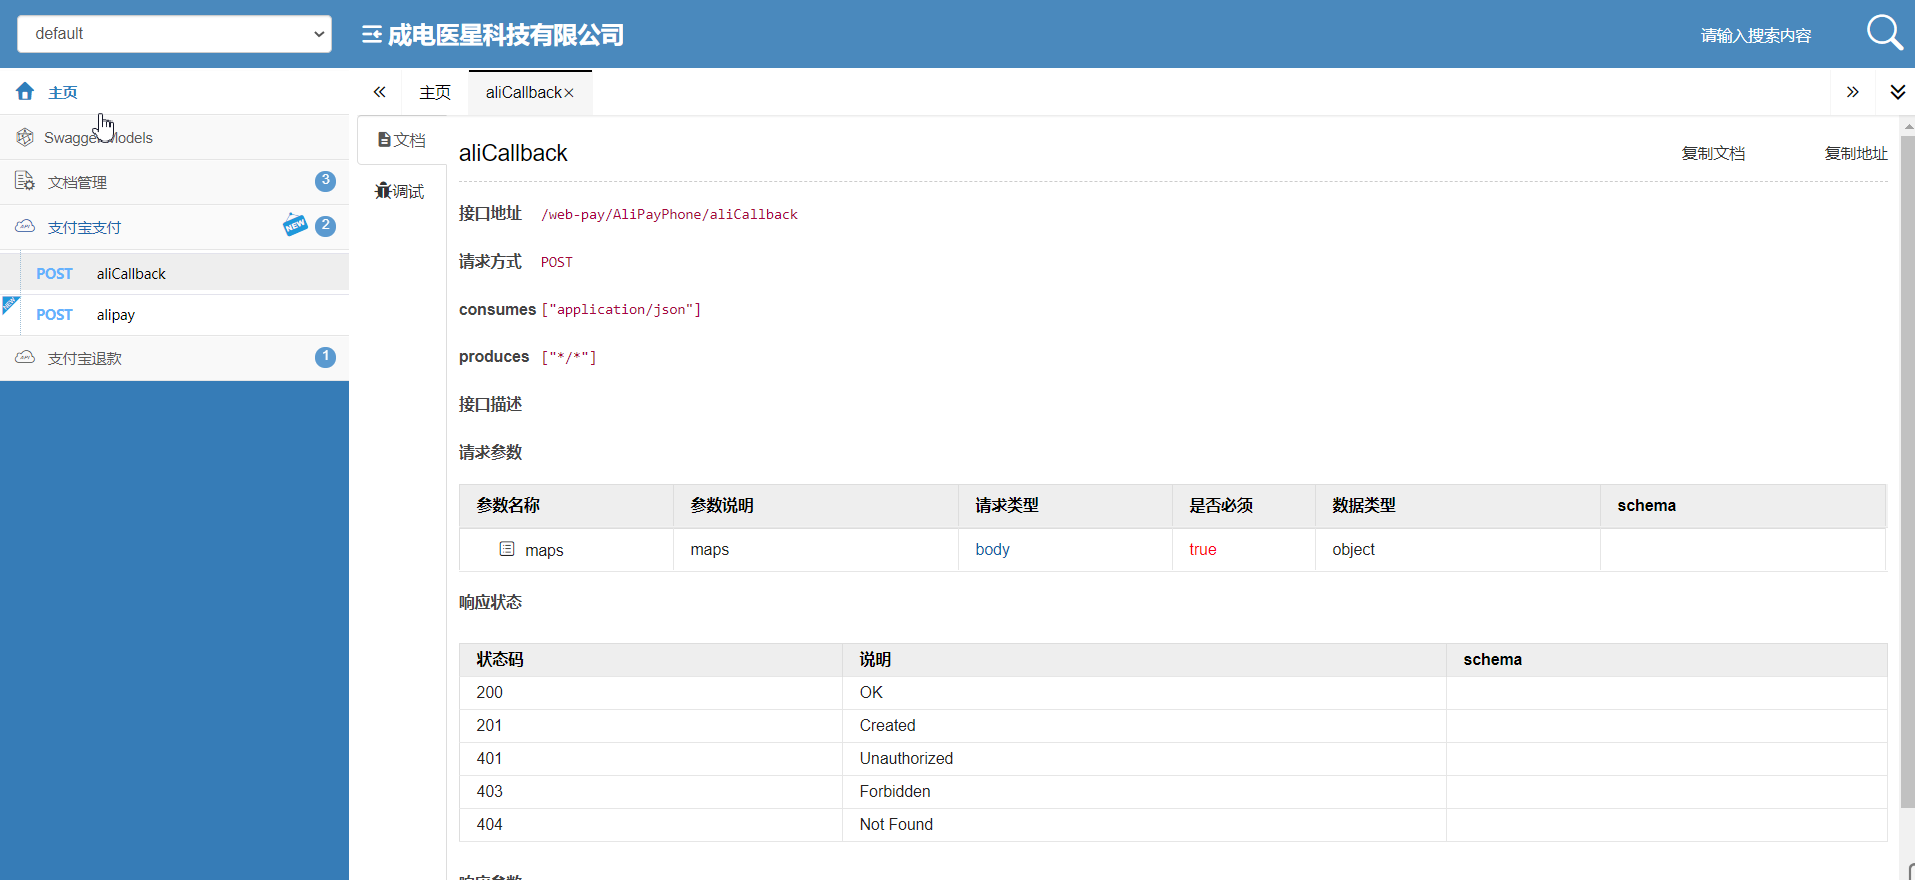
先展示一下现有的页面,此页面由swwager自动生成
配置步骤:
一:导入swwager的依赖
<!-- ===================Swagger2 Begin=================== -->
<dependency>
   <groupId>io.springfox</groupId>
   <artifactId>springfox-swagger2</artifactId>
   <version>2.9.2</version>
   <exclusions>
      <exclusion>
         <groupId>io.swagger</groupId>
         <artifactId>swagger-annotations</artifactId>
      </exclusion>
      <exclusion>
         <groupId>io.swagger</groupId>
         <artifactId>swagger-models</artifactId>
      </exclusion>
   </exclusions>
</dependency>
<dependency>
   <groupId>com.github.xiaoymin</groupId>
   <artifactId>swagger-bootstrap-ui</artifactId>
   <version>1.9.4</version>
</dependency>
<dependency>
   <groupId>io.swagger</groupId>
   <artifactId>swagger-annotations</artifactId>
   <version>1.5.21</version>
</dependency>
<dependency>
   <groupId>io.swagger</groupId>
   <artifactId>swagger-models</artifactId>
   <version>1.5.21</version>
</dependency>
<!-- ===================Swagger2 End=================== -->
|
第二步:编写配置文件
package com.yxkj.web.webpaypre.config;

import com.google.common.base.Function;
import com.google.common.base.Optional;
import com.google.common.base.Predicate;
import org.springframework.context.annotation.Bean;
import org.springframework.context.annotation.Configuration;
import springfox.documentation.RequestHandler;
import springfox.documentation.builders.ApiInfoBuilder;
import springfox.documentation.builders.PathSelectors;
import springfox.documentation.builders.RequestHandlerSelectors;
import springfox.documentation.service.ApiInfo;
import springfox.documentation.service.Parameter;
import springfox.documentation.spi.DocumentationType;
import springfox.documentation.spring.web.plugins.Docket;
import springfox.documentation.swagger2.annotations.EnableSwagger2;

import java.util.ArrayList;
import java.util.List;

/**
 * Swagger2 UI配置
 * <pre>
 * 通过访问http://{yourip}:8090/api/swagger-ui.html查看发布的REST接口;
 * </pre>
 */
@Configuration
@EnableSwagger2
//@Profile({"dev", "test"})
public class SwaggerConfig {
    // 定义分隔符
    private static final String SEPARATOR = ",";

    /**
     * 设置全局参数
     * @return
     */
    private List<Parameter> getGlobalOperationParameters() {
        List<Parameter> pars = new ArrayList<>();
//        ParameterBuilder parameterBuilder = new ParameterBuilder();
//        parameterBuilder.name("token").description("token").modelRef(new ModelRef("string")).parameterType("header").required(true);
//        pars.add(parameterBuilder.build());
//        parameterBuilder.name("sign").description("数据签名").modelRef(new ModelRef("string")).parameterType("header").required(true);
//        pars.add(parameterBuilder.build());
        return pars;
    }

    /**
     * Swagger2创建Docket的Bean
     * @return Docket
     */
    @Bean
    public Docket createRestApi() {
        return new Docket(DocumentationType.SWAGGER_2)
                .globalOperationParameters(getGlobalOperationParameters())
                .apiInfo(apiInfo())
                .select()
                .apis(basePackage("com.yxkj.web.webpaypre.controller" ))
                .paths(PathSelectors.any())
                .build();
    }

    /**
     * Swagger2创建该Api的基本信息
     *
     * @return ApiInfo
     */
    @Bean
    public ApiInfo apiInfo() {
        return new ApiInfoBuilder().title("西藏医典科技健康管理有限公司")
                .termsOfServiceUrl("https://springfox.github.io/springfox/docs/current/").version("1.0").build();
    }

    /**
     * @param basePackage
     * @return
     * @see RequestHandlerSelectors#basePackage(String)
     */
    public static Predicate<RequestHandler> basePackage(final String basePackage) {
        return input -> {
            return declaringClass(input).transform(handlerPackage(basePackage)).or(true);
        };
    }

    private static Function<Class<?>, Boolean> handlerPackage(final String basePackage) {
        return input -> {
            // 循环判断匹配
            for (String strPackage : basePackage.split(SEPARATOR)) {
                boolean isMatch = input.getPackage().getName().startsWith(strPackage);
                if (isMatch) {
                    return true;
                }
            }
            return false;
        };
    }

    private static Optional<? extends Class<?>> declaringClass(RequestHandler input) {
        return Optional.fromNullable(input.declaringClass());
    }

}
|
第三步:在浏览器中输入访问地址:http://IP:8082/项目的访问路径/doc.html
- gradle多模块构建集成swagger
1.首先说一下软件的版本:springboot:1.5.2:springcloud:D-SR1:swaager2:2.6.0:gradle:4.5.工程模块是分开的单独的entity,api,mapp ...
随机推荐
- TGAN
目录 概 主要内容 Saito M., Matsumoto E. & Saito S. Temporal Generative Adversarial Nets with Singular V ...
- openmesh - src - trimesh delete and add elements
openmesh - src - trimesh delete and add elements openmesh 版本 8.1 About 本文主要介绍openmesh的如下接口 add_verte ...
- 新装CentOS7用yum安装软件提示 cannot find a valid baseurl for repobase7x86_64
1.打开网络配置文件:vi /etc/sysconfig/network-scripts/ifcfg-ens33(每个机子都可能不一样,但格式会是"ifcfg-e..."). 2. ...
- 初识python 之 爬虫:BeautifulSoup 的 find、find_all、select 方法
from bs4 import BeautifulSoup lxml 以lxml形式解析html,例:BeautifulSoup(html,'lxml') # 注:html5lib 容错率最高fin ...
- 禁止yum update 自动更新系统内核
使用yum update更新系统软件时,禁止升级内核,可以防止产生因不兼容导致的未知错误. 设置前请先备份原设置文件yum.conf cp /etc/yum.conf /etc/yum.conf ...
- bind 标签
<select id="finduserbylikename" parameterType="string" resultMap="cour ...
- CentOS7 安装mysql并解决安装慢的问题
0.centOS7 mini版安装及网络配置 //可从我的网盘保存下载,可用虚拟机安装 链接:https://pan.baidu.com/s/10_AHxN0DtJ75s1oFOaaZ3A 密码:ud ...
- 微软开源Kubernetes服务网格项目Open Service Mesh
尽管微服务环境提供可移植性,允许更快更频繁的部署周期,甚至还能让组织创建关注于特定领域的团队,但这也伴随着对于流量管理.安全以及可观测性等需求的增长.在整个生态系统中,针对这些需求的服务网格模式的实现 ...
- warmup(HCTF 2018)
为啥想写这道题的wp呢,因为这道题就是照着phpmyadmin 4.8.1 远程文件包含漏洞(CVE-2018-12613)复现出来的 题目 查看源码很容易找到source.php,直接访问 分析 题 ...
- 利用quake捡洞
quake一开漏洞全靠捡 定位资产 通过主域名定位子域名资产 domain:"target.com" 通过C段定位资产 ip: "1.1.1.1/24" 通过证 ...