Ubuntu 14.04上安装caffe
本来实在windows 10上尝试安装caffe,装了一天没装上,放弃; 改在windows上装ubuntu的双系统,装了一个下午,不小心windows的系统盘被锁死了,也不会unlock?只好含泪卸掉了windows10,只装ubuntu 15.10。过程真是让人揩一把辛酸泪。。。不过又在ubuntu中用错了一个命令,系统崩溃,重新安装win8.1 + ubuntu 14.04, 成功,继续安装caffe。。。
安装:
ubuntu 14 .04,
1. 安装开发所需依赖包:
sudo apt-get install build-essential  # basic requirement

sudo apt-get install libprotobuf-dev libleveldb-dev libsnappy-dev libopencv-dev libboost-all-dev libhdf5-serial-dev libgflags-dev libgoogle-glog-dev liblmdb-dev protobuf-compiler #required by caffe
2. 安装CUDA 7.5:
根据Nvidia官方文档http://developer.download.nvidia.com/compute/cuda/7.5/Prod/docs/sidebar/CUDA_Installation_Guide_Linux.pdf一步一步安装
1) 确定GPU支持CUDA
lspci | grep -i nvidia
结果显示:
 到
到
http://developer.nvidia.com/cuda-gpus去验证,发现支持CUDA
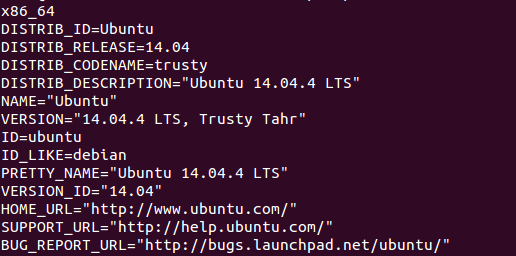
2) 确定linux版本支持CUDA:
uname -m && cat /etc/*release
结果显示:
3) 确定系统已经安装了gcc:
gcc --version
结果显示:

4) 确定系统已经安装了正确的Kernel Headers和开发包:
查看系统正在运行的kernel版本:
uname -r
结果:4.2.0-35-generic,这个是必须安装的kernel headers和开发包的版本
安装对应的kernels header和开发包:
sudo apt-get install linux-headers-$(uname -r)
5) 安装CUDA:下载对应版本的cuda,从https://developer.nvidia.com/cuda-downloads,下载deb(network)版
首先进行md5校验:
md5sum cuda-repo-ubuntu1404_7.-18_amd64.deb
对比相同,然后使用deb文件进行安装:
sudo dpkg -i cuda-repo-ubuntu1404_7.-18_amd64.deb

sudo apt-get update
sudo apt-get install cuda
重启,完成cuda安装
3. 安装cuDNN
下载从https://developer.nvidia.com/rdp/cudnn-download cuDNN,版本为cudnn-7.0-linux-x64-v3.0-prod.tgz
tar -zxvf cudnn-7.0-linux-x64-v3.0-prod.tgz

cd cuda

sudo cp lib64/* /usr/local/cuda/lib64/

sudo cp include/cudnn.h /usr/local/cuda/include/
更新软链接?不懂,照做
cd /usr/local/cuda/lib64

sudo rm -rf libcudnn.so libcudnn.so.7.0

sudo ln -s libcudnn.so.7.0.6 libcudnn.so.7.0

sudo ln -s libcudnn.so.7.0 libcudnn.so
4. 设置环境变量:
在/etc/profile中添加CUDA 环境变量
sudo gedit /etc/profile,在打开的文件中加入如下两句话
export PATH=/usr/local/cuda/bin:$PATH

export LD_LIBRARY_PATH=/usr/local/cuda/lib64:$LD_LIBRARY_PATH
保存后,使环境变量立即生效:source /etc/profile
5. 安装cuda samples
进入/usr/local/cuda/samples,执行下面的命令来build samples
sudo make all -j4
全部编译完成后,进入 samples/bin/x86_64/linux/release, 运行deviceQuery: ./deviceQuery
如果出现显卡信息,则驱动及显卡安装成功,结果如下:
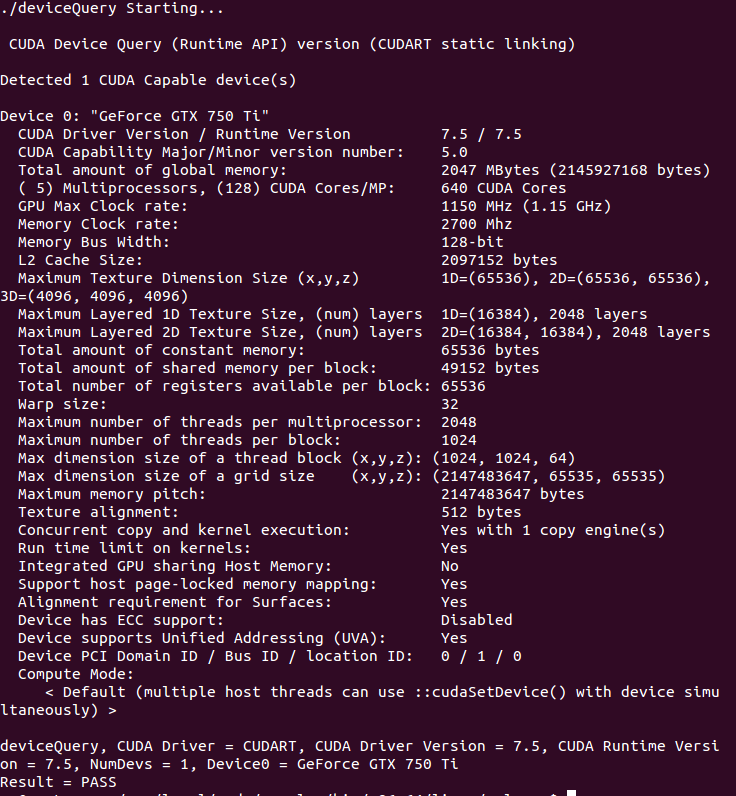
安装成功!
6. 安装Intel MKL,openBlas 或Atlas:
我选择的是Atlas,为caffe默认使用的,不要额外配置,安装命令
sudo apt-get install libatlas-base-dev
7. 安装opencv:
首先安装必须的包
sudo apt-get install cmake git libgtk2.-dev pkg-config libavcodec-dev libavformat-dev libswscale-dev
从opencv官网下载最新版本opencv,opencv-3.1.0.zip
解压unzip opencv-3.1.0.zip
编译
cd  opencv-3.1.

mkdir release

cd release

cmake -D CMAKE_BUILD_TYPE=RELEASE -D CMAKE_INSTALL_PREFIX=/usr/local ..

make

sudo make install
测试是否安装成功:
 mkdir ~/opencv-workshop

cd ~/opencv-workshop/

gedit DisplayImage.cpp

gedit CMakeLists.txt

cmake .

make
其中 Display.cpp的代码为
#include <stdio.h>

#include <opencv2/opencv.hpp>

using namespace cv;

int main(int argc, char** argv)

{

    Mat image;

    image = imread(argv[], );

    if (!image.data)

    {

        printf("No image data\n");

        return -;

    }

    namedWindow("display", WINDOW_AUTOSIZE);

    imshow("display", image);

    waitKey();

    return ;

}
其中 CMakeList.txt的内容是
cmake_minimum_required(VERSION 2.8)

project(DisplayImage)

find_package(OpenCV REQUIRED)

add_executable(DisplayImage DisplayImage.cpp)

target_link_libraries(DisplayImage ${OpenCV_LIBS})
脚本运行后,运行可执行文件,看是否能正确显示图片,能,则成功
./DisplayImage ~/图片/--\ \:\:01屏幕截图.png
8. 安装caffe所需要的Python环境Anaconda:
按caffe推荐,python环境使用Anaconda,去官网下载安装包http://conda.pydata.org/miniconda.html,
下载Anaconda2-4.0.0-Linux-x86_64.sh,切换到文件所在路径,执行
bash Anaconda2-4.0.-Linux-x86_64.sh
按照提示进行安装。
安装好后,在/etc/ld.so.conf中添加一下路径:/home/wm/anaconda2/lib
在~/.bashrc最后添加下面一句:
export LD_LIBRARY_PATH="/home/wm/anaconda2/lib:$LD_LIBRARY_PATH"
9. 安装python依赖库
下载caffe源码,解压后进入caffe-master下的python目录,
(首先要安装python-pip
sudo apt-get install python-pip
)执行如下命令
for req in $(cat requirements.txt); do pip install $req; done
10. 编译Caffe
进入caffe-master目录,复制一份Makefile.config.examples
cp Makefile.config.example Makefile.config
修改Makefile.config中的路径,只需要将默认的Python路径注释掉,去掉对Anaconda路径的注释,并且开启CuDNN和Opencv3的支持即可,修改好的如下:
## Refer to http://caffe.berkeleyvision.org/installation.html

# Contributions simplifying and improving our build system are welcome!

# cuDNN acceleration switch (uncomment to build with cuDNN).

USE_CUDNN :=

# CPU-only switch (uncomment to build without GPU support).

# CPU_ONLY :=

# uncomment to disable IO dependencies and corresponding data layers

# USE_OPENCV :=

# USE_LEVELDB :=

# USE_LMDB :=

# uncomment to allow MDB_NOLOCK when reading LMDB files (only if necessary)

#    You should not set this flag if you will be reading LMDBs with any

#    possibility of simultaneous read and write

# ALLOW_LMDB_NOLOCK :=

# Uncomment if you're using OpenCV 3

OPENCV_VERSION :=

# To customize your choice of compiler, uncomment and set the following.

# N.B. the default for Linux is g++ and the default for OSX is clang++

# CUSTOM_CXX := g++

# CUDA directory contains bin/ and lib/ directories that we need.

CUDA_DIR := /usr/local/cuda

# On Ubuntu 14.04, if cuda tools are installed via

# "sudo apt-get install nvidia-cuda-toolkit" then use this instead:

# CUDA_DIR := /usr

# CUDA architecture setting: going with all of them.

# For CUDA < 6.0, comment the *_50 lines for compatibility.

CUDA_ARCH := -gencode arch=compute_20,code=sm_20 \

        -gencode arch=compute_20,code=sm_21 \

        -gencode arch=compute_30,code=sm_30 \

        -gencode arch=compute_35,code=sm_35 \

        -gencode arch=compute_50,code=sm_50 \

        -gencode arch=compute_50,code=compute_50

# BLAS choice:

# atlas for ATLAS (default)

# mkl for MKL

# open for OpenBlas

BLAS := atlas

# Custom (MKL/ATLAS/OpenBLAS) include and lib directories.

# Leave commented to accept the defaults for your choice of BLAS

# (which should work)!

# BLAS_INCLUDE := /path/to/your/blas

# BLAS_LIB := /path/to/your/blas

# Homebrew puts openblas in a directory that is not on the standard search path

# BLAS_INCLUDE := $(shell brew --prefix openblas)/include

# BLAS_LIB := $(shell brew --prefix openblas)/lib

# This is required only if you will compile the matlab interface.

# MATLAB directory should contain the mex binary in /bin.

# MATLAB_DIR := /usr/local

# MATLAB_DIR := /Applications/MATLAB_R2012b.app

# NOTE: this is required only if you will compile the python interface.

# We need to be able to find Python.h and numpy/arrayobject.h.

# PYTHON_INCLUDE := /usr/include/python2. \

#        /usr/lib/python2./dist-packages/numpy/core/include

# Anaconda Python distribution is quite popular. Include path:

# Verify anaconda location, sometimes it's in root.

ANACONDA_HOME := $(HOME)/anaconda

PYTHON_INCLUDE := $(ANACONDA_HOME)/include \

         $(ANACONDA_HOME)/include/python2. \

         $(ANACONDA_HOME)/lib/python2./site-packages/numpy/core/include \

# Uncomment to use Python  (default is Python )

# PYTHON_LIBRARIES := boost_python3 python3.5m

# PYTHON_INCLUDE := /usr/include/python3.5m \

#                 /usr/lib/python3./dist-packages/numpy/core/include

# We need to be able to find libpythonX.X.so or .dylib.

# PYTHON_LIB := /usr/lib

PYTHON_LIB := $(ANACONDA_HOME)/lib

# Homebrew installs numpy in a non standard path (keg only)

# PYTHON_INCLUDE += $(dir $(shell python -c 'import numpy.core; print(numpy.core.__file__)'))/include

# PYTHON_LIB += $(shell brew --prefix numpy)/lib

# Uncomment to support layers written in Python (will link against Python libs)

# WITH_PYTHON_LAYER :=

# Whatever else you find you need goes here.

INCLUDE_DIRS := $(PYTHON_INCLUDE) /usr/local/include

LIBRARY_DIRS := $(PYTHON_LIB) /usr/local/lib /usr/lib

# If Homebrew is installed at a non standard location (for example your home directory) and you use it for general dependencies

# INCLUDE_DIRS += $(shell brew --prefix)/include

# LIBRARY_DIRS += $(shell brew --prefix)/lib

# Uncomment to use `pkg-config` to specify OpenCV library paths.

# (Usually not necessary -- OpenCV libraries are normally installed in one of the above $LIBRARY_DIRS.)

# USE_PKG_CONFIG :=

BUILD_DIR := build

DISTRIBUTE_DIR := distribute

# Uncomment for debugging. Does not work on OSX due to https://github.com/BVLC/caffe/issues/171

# DEBUG :=

# The ID of the GPU that 'make runtest' will use to run unit tests.

TEST_GPUID :=

# enable pretty build (comment to see full commands)

Q ?= @
保存退出,编译
make all

make test

make runtest
没有报错,成功。
11. 使用MNIST数据集进行测试
1) 数据预处理:
sh data/mnist/get_mnist.sh
2) 重建lmdb/leveldb文件,命令
sh examples/mnist/create_mnist.sh
3) 训练mnist,命令
sh examples/mnist/train_lenet.sh
这是可以看到caffe的训练过程,至此caffe配置已成功:

接下来会学习caffe的使用。。。 加油
Ubuntu 14.04上安装caffe的更多相关文章
- 翻译:在Ubuntu 14.04上安装FTP服务器的方法
说明: 1.原文地址:http://www.krizna.com/ubuntu/setup-ftp-server-on-ubuntu-14-04-vsftpd/ 2.今天要做一个网络日志的迁移程序,搬 ...
- Ubuntu 14.04 上安装 Gurobi
参考: Installing Gurobi 7 on Linux Ubuntu 14.04 上安装 Gurobi 1.在gurobi上创建一个账户,并登陆: 2.从gurobi optimizer上下 ...
- 在Ubuntu 14.04 上安装 FTP 服务
1. sudo apt-get update 2. sudo apt-get install vsftpd 3. adduser sammy Assign a password when prompt ...
- 如何在 Ubuntu 14.04 上安装 Elasticsearch,Logstash 和 Kibana
介绍 在本教程中,我们将去的 Elasticsearch 麋鹿堆栈安装 Ubuntu 14.04 — — 那就是,Elasticsearch 5.2.x,Logstash 2.2.x 和 Kibana ...
- 在Ubuntu 14.04 上安装网易云音乐
之前因为电脑有网络的原因,一直使用网页网易云音乐听歌,最近电脑没网络使用,才发现网易云音乐有linux版本,果断下载. 在Chrome浏览器中,登陆官网下载Linux版本中的Ubuntu 14.04 ...
- ubuntu 14.04 上安装有道词典
Ubuntu 14.04用户在安装前要更新系统,即update&dist-upgrade. 下载地址:32/64bits http://codown.youdao.com/cidian/lin ...
- 在ubuntu 14.04上安装2.6的内核
1.到http://www.kernel.org/pub/linux/kernel/v2.6/linux-2.6.32.tar.bz2这里下载最新的稳定版内核: 2.根据各自系统,安装如下软件:l b ...
- 在 Ubuntu 14.04 上安装 Ubuntu Tweak 0.8.8
转自:http://linux.cn/article-3335-1.html 关于 Ubuntu Tweak,Ubuntu 老用户再熟悉不过了,Ubuntu tweak 相当于 windows 的优化 ...
- Ubuntu 14.04上安装Riak
一.安装riak 1. 安装包:riak_2.0.2-1_amd64.deb 路 径:~/software/riak_2.0.2-1_amd64.deb 2. 安装riak $ ...
随机推荐
- 【转】react 状态与属性区别
prop state 能否从父组件获取初始值 是 否 能否由父组件修改 ...
- berkeley db 内存池分配机制
__memp_alloc() 注: MPOOL_ALLOC_SEARCH_DYN 没有 出现在 bdb document上, 也没出现在 除了mp_alloc外的代码里. 先删了 以便代码清楚. 按 ...
- oracle中imp命令详解 .
转自http://www.cnblogs.com/songdavid/articles/2435439.html oracle中imp命令详解 Oracle的导入实用程序(Import utility ...
- nil、Nil、NULL和NSNull的理解
http://blog.sina.com.cn/s/blog_4930f8e60101h71b.html 其实早就想研究一下nil.Nil.NULL和NSNull之间的区别,只是工作上除了nil,其它 ...
- Ajax异步调用Controller的Return JsonResult生成下拉列表
@using System.Web.Optimization; @{ Layout = null; } <!DOCTYPE html> <html> <head> ...
- 如何获得DataGrid中某行某列的对象
假如某行是 Xm_struct x = this.Brow.SelectedItem as Xm_struct;则下面分别是第5和第七列的对象 TextBlock Ddjs = this.Brow.C ...
- sql语句:插入的时候判断是否有重复项
把t_table1中数据插入到t_table中,同时确保t_table中不会有重复的项 insert into t_table (column1,column2,column3) select co ...
- On One Side Kolmogorov Type Inequalities
Let \(X_1,X_2,\ldots,X_n\) be independent random variables. Denote \[S_n=\sum_{i=1}^n X_i.\] The we ...
- [ASE][Daily Scrum]11.28
昨天基本上已经完成了sprint2的task, 现在剩下一些bug还需要来修正, 然后我正式加入码代码的大军啦~ Shilin Liu 显示聊天框 Zhao Li 搭建聊天服务器 Yimin ...
- 【腾讯Bugly干货分享】Android ListView与RecyclerView对比浅析--缓存机制
本文来自于腾讯bugly开发者社区,非经作者同意,请勿转载,原文地址:http://dev.qq.com/topic/5811d3e3ab10c62013697408 作者:黄宁源 一,背景 Recy ...