centos 7 lamp (linux+apache+mysql+php)开发环境搭建(转+原创)
准备篇:
CentOS 7.0系统安装配置图解教程 http://www.jb51.net/os/188487.html
一、配置防火墙,开启80端口、3306端口
CentOS 7.0默认使用的是firewall作为防火墙,这里改为iptables防火墙。
1、关闭firewall:
systemctl stop firewalld.service #停止firewall
systemctl disable firewalld.service #禁止firewall开机启动
2、安装iptables防火墙
yum install iptables-services #安装
vi /etc/sysconfig/iptables #编辑防火墙配置文件
# Firewall configuration written by system-config-firewall
# Manual customization of this file is not recommended.
*filter
:INPUT ACCEPT [0:0]
:FORWARD ACCEPT [0:0]
:OUTPUT ACCEPT [0:0]
-A INPUT -m state --state ESTABLISHED,RELATED -j ACCEPT
-A INPUT -p icmp -j ACCEPT
-A INPUT -i lo -j ACCEPT
-A INPUT -m state --state NEW -m tcp -p tcp --dport 22 -j ACCEPT
-A INPUT -m state --state NEW -m tcp -p tcp --dport 80 -j ACCEPT
-A INPUT -m state --state NEW -m tcp -p tcp --dport 3306 -j ACCEPT
-A INPUT -j REJECT --reject-with icmp-host-prohibited
-A FORWARD -j REJECT --reject-with icmp-host-prohibited
COMMIT
:wq! #保存退出
systemctl restart iptables.service #最后重启防火墙使配置生效
systemctl enable iptables.service #设置防火墙开机启动
二、关闭SELINUX
vi /etc/selinux/config
#SELINUX=enforcing #注释掉
#SELINUXTYPE=targeted #注释掉
SELINUX=disabled #增加
:wq! #保存退出
setenforce 0 #使配置立即生效
安装篇:
一、安装Apache

系统运维 www.osyunwei.com 温馨提醒:qihang01原创内容©版权所有,转载请注明出处及原文链
yum install httpd #根据提示,输入Y安装即可成功安装
systemctl start httpd.service #启动apache
systemctl stop httpd.service #停止apache
systemctl restart httpd.service #重启apache
systemctl enable httpd.service #设置apache开机启动
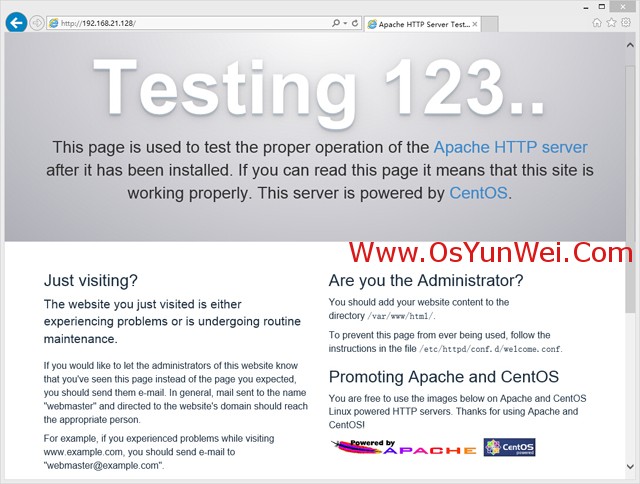
在客户端浏览器中打开服务器IP地址,会出现下面的界面,说明apache安装成功
系统运维 www.osyunwei.com 温馨提醒:qihang01原创内容©版权所有,转载请注明出处及原文链
二、安装MariaDB
CentOS 7.0中,已经使用MariaDB替代了MySQL数据库
1、安装MariaDB
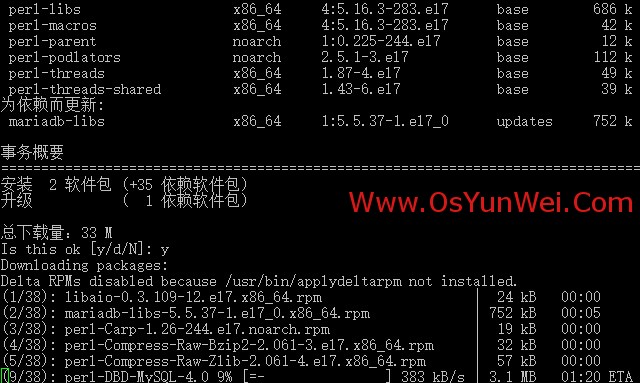
yum install mariadb mariadb-server #询问是否要安装,输入Y即可自动安装,直到安装完成
systemctl start mariadb.service #启动MariaDB
systemctl stop mariadb.service #停止MariaDB
systemctl restart mariadb.service #重启MariaDB
systemctl enable mariadb.service #设置开机启动
cp /usr/share/mysql/my-huge.cnf /etc/my.cnf #拷贝配置文件(注意:如果/etc目录下面默认有一个my.cnf,直接覆盖即可)
2、为root账户设置密码
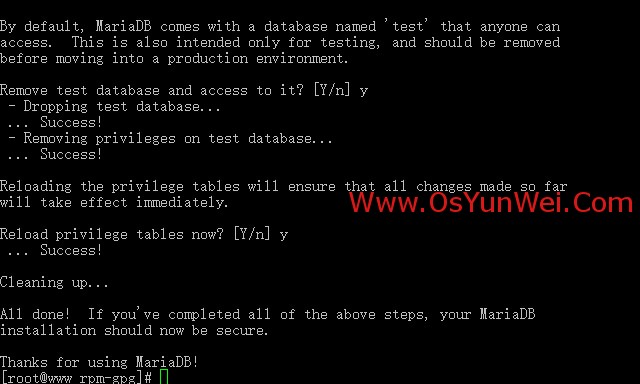
mysql_secure_installation
回车,根据提示输入Y
输入2次密码,回车
根据提示一路输入Y
最后出现:Thanks for using MySQL!
MySql密码设置完成,重新启动 MySQL:
systemctl restart mariadb.service #重启MariaDB
三、安装PHP
1、安装PHP

yum install php #根据提示输入Y直到安装完成
2、安装PHP组件,使PHP支持 MariaDB
yum install php-mysql php-gd libjpeg* php-ldap php-odbc php-pear php-xml php-xmlrpc php-mbstring php-bcmath php-mhash
#这里选择以上安装包进行安装,根据提示输入Y回车
systemctl restart mariadb.service #重启MariaDB
systemctl restart httpd.service #重启apache
配置篇
一、Apache配置
vi /etc/httpd/conf/httpd.conf #编辑文件
ServerSignature On #添加,在错误页中显示Apache的版本,Off为不显示
Options Indexes FollowSymLinks #修改为:Options Includes ExecCGI FollowSymLinks(允许服务器执行CGI及SSI,禁止列出目录)
#AddHandler cgi-script .cgi #修改为:AddHandler cgi-script .cgi .pl (允许扩展名为.pl的CGI脚本运行)
AllowOverride None #修改为:AllowOverride All (允许.htaccess)
AddDefaultCharset UTF-8 #修改为:AddDefaultCharset GB2312 (添加GB2312为默认编码)
#Options Indexes FollowSymLinks #修改为 Options FollowSymLinks(不在浏览器上显示树状目录结构)
DirectoryIndex index.html #修改为:DirectoryIndex index.html index.htm Default.html Default.htm index.php(设置默认首页文件,增加index.php)
MaxKeepAliveRequests 500 #添加MaxKeepAliveRequests 500 (增加同时连接数)
:wq! #保存退出
systemctl restart httpd.service #重启apache
rm -f /etc/httpd/conf.d/welcome.conf /var/www/error/noindex.html #删除默认测试页
二、php配置
vi /etc/php.ini #编辑
date.timezone = PRC #把前面的分号去掉,改为date.timezone = PRC
disable_functions =
passthru,exec,system,chroot,scandir,chgrp,chown,shell_exec,proc_open,proc_get_status,ini_alter,ini_alter,ini_restore,dl,openlog,syslog,readlink,symlink,popepassthru,stream_socket_server,escapeshellcmd,dll,popen,disk_free_space,checkdnsrr,checkdnsrr,getservbyname,getservbyport,disk_total_space,posix_ctermid,posix_get_last_error,posix_getcwd,
posix_getegid,posix_geteuid,posix_getgid,
posix_getgrgid,posix_getgrnam,posix_getgroups,posix_getlogin,posix_getpgid,posix_getpgrp,posix_getpid,
posix_getppid,posix_getpwnam,posix_getpwuid, posix_getrlimit,
posix_getsid,posix_getuid,posix_isatty,
posix_kill,posix_mkfifo,posix_setegid,posix_seteuid,posix_setgid,
posix_setpgid,posix_setsid,posix_setuid,posix_strerror,posix_times,posix_ttyname,posix_uname
#列出PHP可以禁用的函数,如果某些程序需要用到这个函数,可以删除,取消禁用。
expose_php = Off #禁止显示php版本的信息
short_open_tag = ON #支持php短标签
open_basedir = .:/tmp/
#设置表示允许访问当前目录(即PHP脚本文件所在之目录)和/tmp/目录,可以防止php木马跨站,如果改了之后安装程序有问题(例如:织梦内容管
理系统),可以注销此行,或者直接写上程序的目录/data/www.osyunwei.com/:/tmp/
:wq! #保存退出
systemctl restart mariadb.service #重启MariaDB
systemctl restart httpd.service #重启apache
测试篇
cd /var/www/html
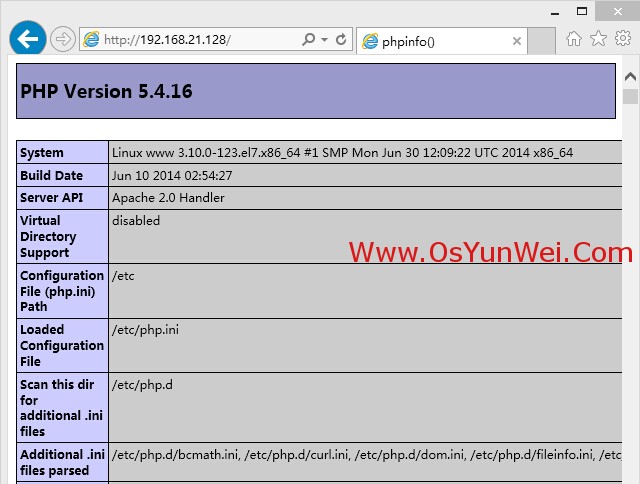
vi index.php #输入下面内容
<?php
phpinfo();
?>
:wq! #保存退出
在客户端浏览器输入服务器IP地址,可以看到如下图所示相关的配置信息!
注意:apache默认的程序目录是/var/www/html
权限设置:chown apache.apache -R /var/www/html
至此,CentOS 7.0安装配置LAMP服务器(Apache+PHP+MariaDB)教程完成!
之后可以自己写php脚本运行,若发现不能链接数据库,mysql_error()报错为“”SQL Error (1130): Host '192.168.1.126' is not allowed to connect to this MySQL server“;
则处理方法如下:
通过HeidiSQL连接MYSQL数据库报错:
SQL Error (1130): Host '192.168.1.126' is not allowed to connect to this MySQL server
说明所连接的用户帐号没有远程连接的权限,只能在本机(localhost)登录。
需更改 mysql 数据库里的 user表里的 host项把localhost改称%
首先按下面的步骤登录Mysql服务器
登录mysql需要切换到dos下的mysql的bin目录,进行如下操作:
mysql>use mysql;
mysql>update user set host = '%' where user ='root';
MariaDB [mysql]> update user set host = '%' where host = 'localhost';
Query OK, 0 rows affected (0.00 sec)
Rows matched: 0 Changed: 0 Warnings: 0
mysql>flush privileges;
mysql> select host, user from user;
mysql>quit
OK。远程连接成功!
centos 7 lamp (linux+apache+mysql+php)开发环境搭建(转+原创)的更多相关文章
- Ubuntu在下面LAMP(Linux+Apache+MySQL+PHP) 开发环境的搭建
LAMP在行业是一个非常流行的词.此4字母代表Linux.Apache,MySQL和PHP. LAMP其高效.灵活的特点已经成为中小企业的首选. 它已经推出了快速构建LAMP道路. 1 在Ubuntu ...
- CentOS 6.3下源码安装LAMP(Linux+Apache+Mysql+Php)环境【转载】
本文转载自 园友David_Tang的博客,如有侵权请联系本人及时删除,原文地址: http://www.cnblogs.com/mchina/archive/2012/11/28/2778779.h ...
- Centos下安装配置LAMP(Linux+Apache+MySQL+PHP)
Centos下安装配置LAMP(Linux+Apache+MySQL+PHP) 关于LAMP的各种知识,还请大家自行百度谷歌,在这里就不详细的介绍了,今天主要是介绍一下在Centos下安装,搭建一 ...
- 转:CentOS/Debian/Ubuntu一键安装LAMP(Apache/MySQL/PHP)环境
CentOS/Debian/Ubuntu一键安装LAMP(Apache/MySQL/PHP) 今天遇到一个网友提到需要在Linux VPS服务器中安装LAMP(Apache/MySQL/PHP)网站环 ...
- Lamp(linux+apache+mysql+php)环境搭建
Lamp(linux+apache+mysql+php)环境搭建 .安装apache2:sudo apt-get installapache2 安装完毕后.执行例如以下命令重新启动apache:sud ...
- Apache+MySQL+PHP开发环境的搭建(二)
通过自主选择相应的apache,mysql,php等软件,根据自己的应用开发需求进行安装.此方法搭建的环境自主性较强,搭建过程较为复杂,繁琐. 1.所需软件: Apache: http-2.2.22- ...
- Apache+MySQL+PHP开发环境的搭建(一)
通过套件来安装和配置php开发环境. 1.所需软件:AppServ(因为是开源,任何网站都能下载) 安装本软件基本上就是下一步. 2.进行安装 选择一个盘安装该软件点击next继续: 根据自己的实际情 ...
- windows下搭建Apache+Mysql+PHP开发环境
原文:windows下搭建Apache+Mysql+PHP开发环境 要求 必备知识 熟悉基本编程环境搭建. 运行环境 windows 7(64位); Apache2.2;MySQL Server 5. ...
- Debian7配置LAMP(Apache/MySQL/PHP)环境及搭建建站
完整Debian7配置LAMP(Apache/MySQL/PHP)环境及搭建建站 第一.安装和配置Apache Web服务器 运行升级命令来确保我们的系统组件各方面都是最新的. apt-get upd ...
- c++::Mysql::ORM 开发环境搭建
官网地址:https://www.codesynthesis.com/products/odb/ 环境搭建:ubuntu16.04-64 1.安装mysqlClient sudo apt-get in ...
随机推荐
- NFA引擎匹配原理
1 为什么要了解引擎匹配原理 一个个音符杂乱无章的组合在一起,弹奏出的或许就是噪音,同样的音符经过作曲家的手,就可以谱出非常动听的乐曲,一个演奏者同样可以照着乐谱奏出动听的乐曲,但他/她或 ...
- mysql分组合并GROUP_CONCAT
SELECT pid, GROUP_CONCAT(field ORDER BY coder desc) 'msg'from product_field GROUP BY pid 分 ...
- html slelect 标签默认值
<select name="channelCode" id="channelCode" class="all_input" style ...
- STEP模块——电子钟
原理 显示时分秒(日期也可以加上),两个按键调节时间 原理图 代码 /*---------------------------------------------------------------- ...
- 高性能javascript(记录三)
DOM(文档对象模型)是一个独立的语言,用于操作XML和HTML文档的程序接口(API).在游览器中,主要用来与HTML文档打交道,同样也用在Web程序中获取XML文档,并使用DOM API用来访问文 ...
- onethink导出excel
function customer_daochu() { /** * 客户名单导出 * */ $customer = D('WcoaUCustomers'); $data = $customer-&g ...
- Rhel6-csync配置文档
系统环境: rhel6 x86_64 iptables and selinux disabled 主机:192.168.122.160 server60.example.com 192.168.122 ...
- LDAP抛出Error Code 3 - Timelimit Exceeded 异常,导致CAS连接报错
最近公司使用CAS连接LDAP,实现单点登录.遇到了这个问题:登录后,抛出错误: 查看CAS后台,看到这个异常. javax.naming.TimeLimitExceededException: LD ...
- Android Build System
归类一些Android build system 相关的知识. http://elinux.org/Android_Build_System make <local_module> - m ...
- Cheap Hollister Clothing
(link to hollisterco site), Spectacles don't simply take care of the eye area inside sun; Putting th ...