XFire Web Service客户端开发
一、项目创建:
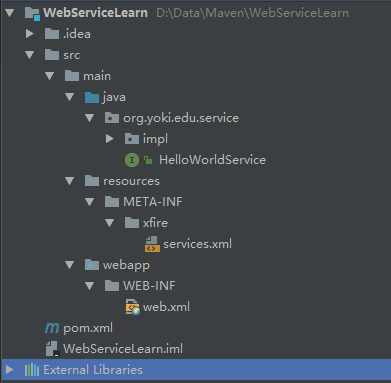
创建一个Maven的web工程
Maven包导入pom.xml
<project xmlns="http://maven.apache.org/POM/4.0.0" xmlns:xsi="http://www.w3.org/2001/XMLSchema-instance"

         xsi:schemaLocation="http://maven.apache.org/POM/4.0.0 http://maven.apache.org/xsd/maven-4.0.0.xsd">

    <modelVersion>4.0.0</modelVersion>

    <groupId>org.yoki.edu</groupId>

    <artifactId>WebServiceLearn</artifactId>

    <version>1.0-SNAPSHOT</version>

    <packaging>war</packaging>

    <name>WebServiceLearn</name>

    <url>http://maven.apache.org</url>

    <properties>

        <project.build.sourceEncoding>UTF-8</project.build.sourceEncoding>

    </properties>

    <dependencies>

        <dependency>

            <groupId>javax.servlet</groupId>

            <artifactId>servlet-api</artifactId>

            <version>2.3</version>

        </dependency>

        <!-- xfire webservice -->

        <dependency>

            <groupId>org.codehaus.xfire</groupId>

            <artifactId>xfire-all</artifactId>

            <version>1.2.6</version>

            <exclusions>

                <exclusion>

                    <!-- 不去除报版本冲突 -->

                    <artifactId>activation</artifactId>

                    <groupId>javax.activation</groupId>

                    <!--<version>1.0.2</version>-->

                </exclusion>

            </exclusions>

        </dependency>

        <!-- xfire webservice -->

    </dependencies>

    <build>

        <plugins>

            <plugin>

                <!-- jetty -->

                <groupId>org.mortbay.jetty</groupId>

                <artifactId>maven-jetty-plugin</artifactId>

                <version>6.1.26</version>

                <configuration>

                    <webAppSourceDirectory>${basedir}/src/main/webapp</webAppSourceDirectory>

                </configuration>

            </plugin>

        </plugins>

    </build>

</project>
二、服务端编写:
1、创建服务端接口:HelloWorldService.java
package org.yoki.edu.service;

/**

 * Created by SunnyWen on 2017/9/4.

 */

public interface HelloWorldService {

    /**

     * return welcome

     *

     * @param username

     * @return

     */

    String sayHello(String username);

}
2、创建服务端接口实现:HelloWorldServiceImpl.java
package org.yoki.edu.service.impl;

/**

 * Created by SunnyWen on 2017/9/4.

 */

public class HelloWorldServiceImpl {

    public String sayHello(String name) {

        return "Hello , " + name + " welcome to new world";

    }

}
3、web.xml文件配置:
<?xml version="1.0" encoding="UTF-8"?>

<!--

 Licensed to the Apache Software Foundation (ASF) under one or more

  contributor license agreements.  See the NOTICE file distributed with

  this work for additional information regarding copyright ownership.

  The ASF licenses this file to You under the Apache License, Version 2.0

  (the "License"); you may not use this file except in compliance with

  the License.  You may obtain a copy of the License at

      http://www.apache.org/licenses/LICENSE-2.0

  Unless required by applicable law or agreed to in writing, software

  distributed under the License is distributed on an "AS IS" BASIS,

  WITHOUT WARRANTIES OR CONDITIONS OF ANY KIND, either express or implied.

  See the License for the specific language governing permissions and

  limitations under the License.

-->

<web-app xmlns="http://xmlns.jcp.org/xml/ns/javaee"

         xmlns:xsi="http://www.w3.org/2001/XMLSchema-instance"

         xsi:schemaLocation="http://xmlns.jcp.org/xml/ns/javaee

                      http://xmlns.jcp.org/xml/ns/javaee/web-app_3_1.xsd"

         version="3.1"

         metadata-complete="true">

    <servlet>

        <servlet-name>XFireServlet</servlet-name>

        <servlet-class>

            org.codehaus.xfire.transport.http.XFireConfigurableServlet

        </servlet-class>

    </servlet>

    <servlet-mapping>

        <servlet-name>XFireServlet</servlet-name>

        <url-pattern>/services/*</url-pattern>

    </servlet-mapping>

</web-app>
4、编写services.xml配置:
在classpath目录下创建META-INF/xfire/services.xml,并加入如下配置:
<beans xmlns="http://xfire.codehaus.org/config/1.0">

    <service>

        <!-- 服务名称 -->

        <name>HelloWorldService</name>

        <!-- 命名空间 -->

        <namespace>http://org.yoki.edu/HelloWoldService</namespace>

        <!-- 服务提供类 -->

        <serviceClass>org.yoki.edu.service.HelloWorldService</serviceClass>

        <!-- 服务提供实现类 -->

        <implementationClass>org.yoki.edu.service.impl.HelloWorldServiceImpl</implementationClass>

    </service>

</beans>
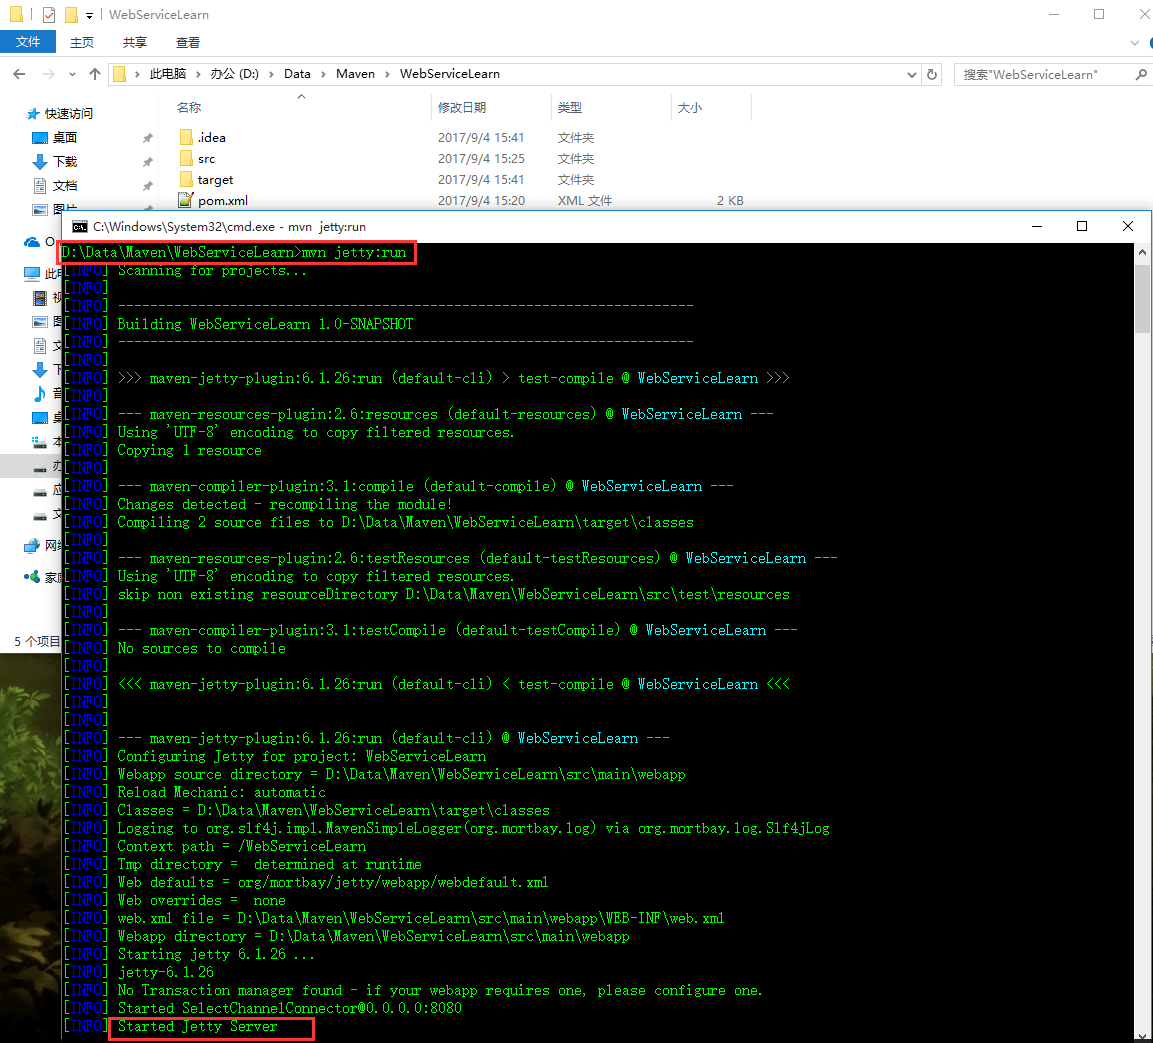
4、启动项目:
因为我们在pom.xml文件中配置了jetty,所有可以直接使用命令mvn jetty:run运行项目,如下:
或者使用mvn clean package命令打包成war,放在web容器中运行:
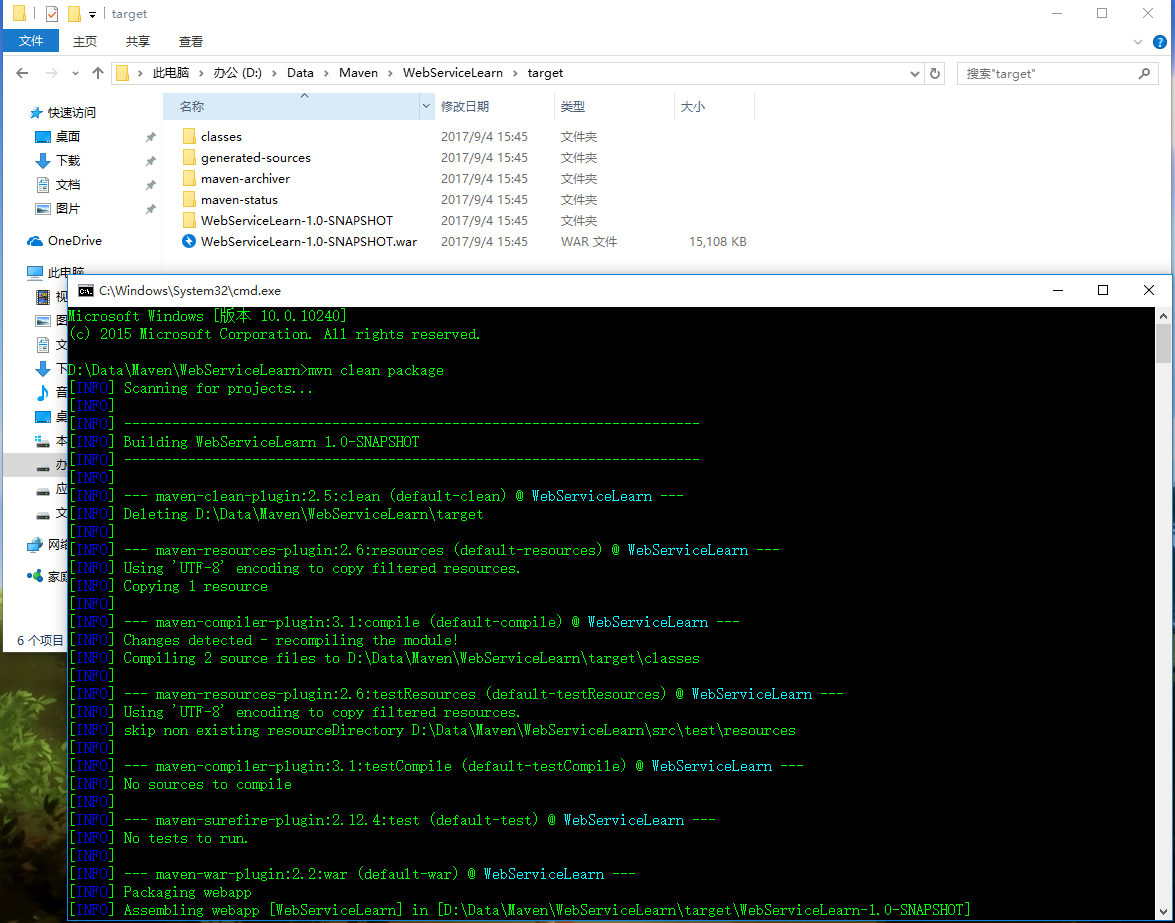
放入Tomcat中并运行Tomcat:

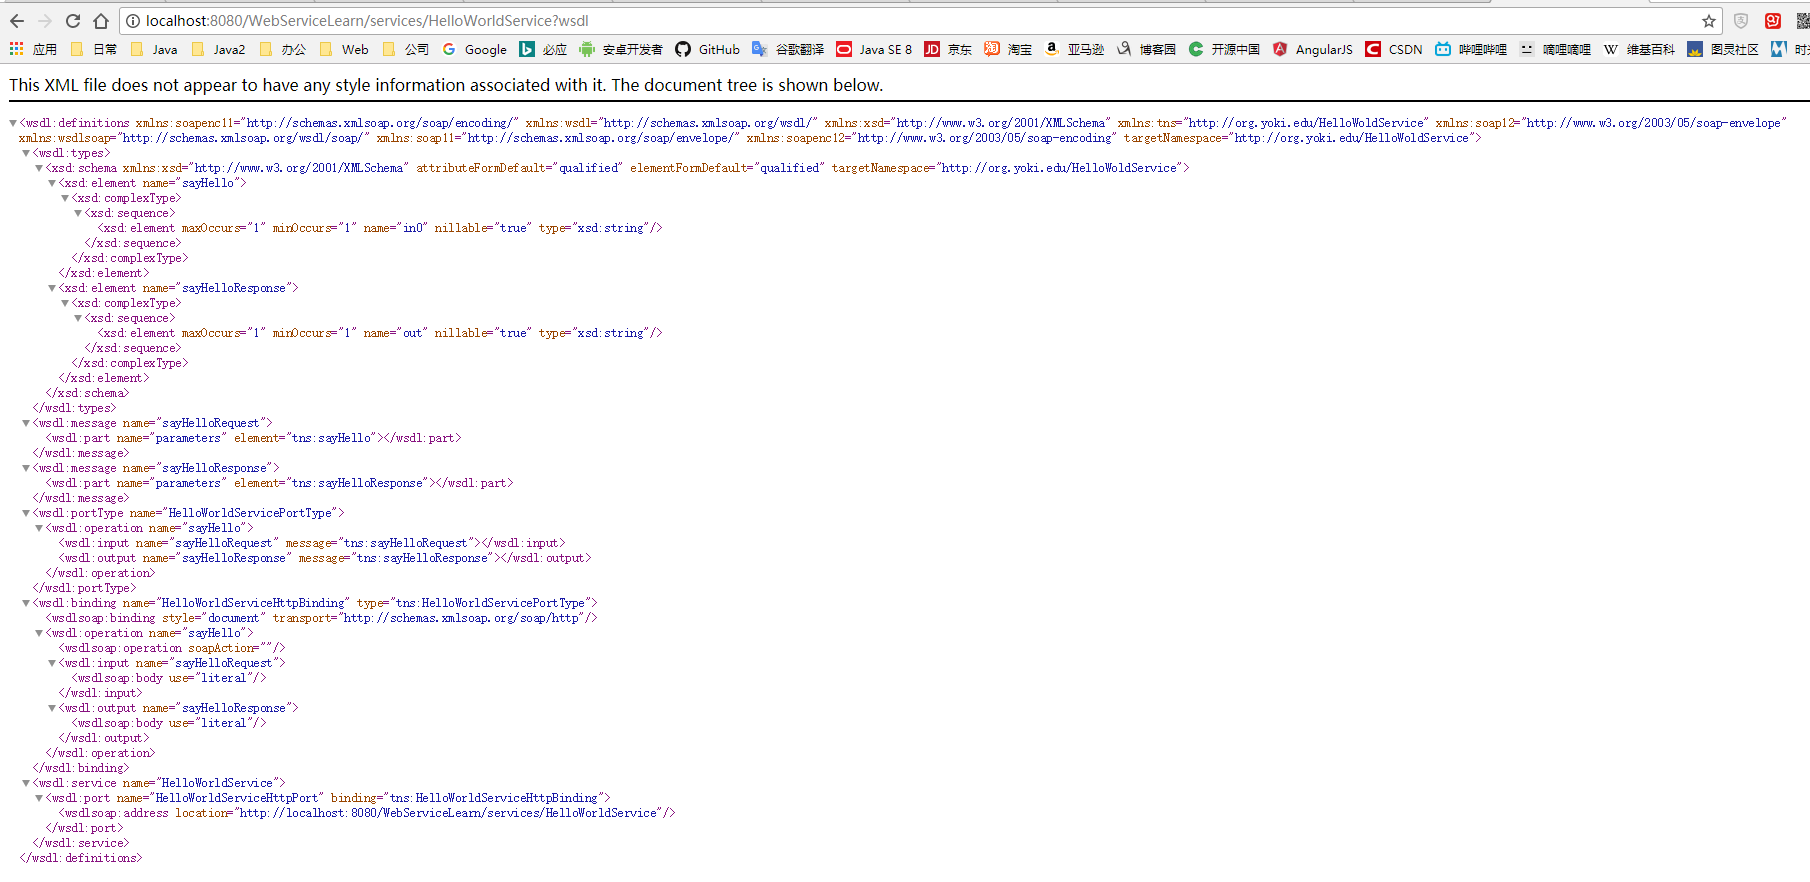
访问网站http://localhost:8080/WebServiceLearn/services/HelloWorldService?wsdl:
二、客户端编写:
package com.yunzhitx.sdy.task.utils;

import org.codehaus.xfire.client.Client;

import org.codehaus.xfire.transport.http.CommonsHttpMessageSender;

import org.springframework.stereotype.Component;

import javax.xml.namespace.QName;

import java.net.HttpURLConnection;

import java.net.URL;

import java.util.Observable;

/**

 * Created by SunnyWen on 2017/8/8.

 */

@Component

public class WsXfireClientUtil {

    public Sender buildSender(String url, String method, Object[] param) {

        Sender sender = new Sender(url, method, param);

        return sender;

    }

    public class Sender extends Observable {

        /**

         * WebService 访问地址

         */

        private String url;

        /**

         * WebService 访问方法

         */

        private String method;

        /**

         * 需要传递的参数

         */

        private Object[] param;

        /**

         * 设置命名空间

         */

        private String targetNamespace;

        /**

         * 是否同步,默认为异步

         */

        private Boolean isSynchro = false;

        public Sender(String url, String method, Object[] param) {

            this.url = url;

            this.method = method;

            this.param = param;

        }

        private Sender setTargetNamespace(String targetNamespace) {

            this.targetNamespace = targetNamespace;

            return this;

        }

        public Sender setSynchro() {

            this.isSynchro = true;

            return this;

        }

        public void send() {

            Runnable runnable = new Runnable() {

                @Override

                public void run() {

                    privateSend() ;

                }

            };

            Thread thread = new Thread(runnable);

            if (!isSynchro)

                thread.start();

            else

                thread.run();

        }

        public Object[] sendSynchro() {

            return privateSend() ;

        }

        private Object[] privateSend(){

            Object[] results = null;

            try {

                HttpURLConnection httpConnection = (HttpURLConnection) new URL(url).openConnection();

                httpConnection.setReadTimeout(240000);//设置http连接的读超时,单位是毫秒

                httpConnection.connect();

                Client client = new Client(httpConnection.getInputStream(), null);

                client.setProperty(CommonsHttpMessageSender.HTTP_TIMEOUT, String.valueOf(240000));//设置发送的超时限制,单位是毫秒;

                client.setProperty(CommonsHttpMessageSender.DISABLE_KEEP_ALIVE, "true");

                client.setProperty(CommonsHttpMessageSender.DISABLE_EXPECT_CONTINUE, "true");

                //Client client = new Client(new URL(wsURL));

                //client.setTimeout(20000);

                // 解决服务端收不到时参数值的情况 (设置的值为:targetNamespace)

                if (null != targetNamespace && targetNamespace.length() > 0)

                    client.getService().setName(new QName(targetNamespace));

                if(null == param)

                    param = new Object[0] ;

                results = client.invoke(method, param);

//                System.out.println("Web Service Xfire 发送数据成功!发送地址:" + url);

                setChanged();

                this.notifyObservers(results);

            } catch (Exception e) {

                e.printStackTrace();

            }

            return results ;

        }

    }

    public static void main(String[] args){

        WsXfireClientUtil ws = new WsXfireClientUtil() ;

        ws.buildSender("http://localhost:8088/ws/countries2.wsdl" , "getCountry2" , null).send();

    }

}
XFire Web Service客户端开发的更多相关文章
- SOAP: java+xfire(web service) + php客户端
作者: 吴俊杰 web service这项技术暂不说它有多落伍,但是项目中用到了,没法逃避! xml和json各有各的好处,但是JSON无疑是当今数据交互的主流了.客户soap服务器端用的是 j ...
- XFire构建web service客户端的五种方式
这里并未涉及到JSR 181 Annotations 的相关应用,具体的三种方式如下 ① 通过WSDL地址来创建动态客户端 ② 通过服务端提供的接口来创建客户端 ③ 使用Ant通过WSDL文件来生成客 ...
- XFire Web Service
Web Service 创建HelloWorldService项目 首先要启动Web Service Project 向导.该向导由三个页面组成,第一页设置Web项目配置的详细信息:第二页设置XFir ...
- .NET基础拾遗(7)Web Service的开发与应用基础
Index : (1)类型语法.内存管理和垃圾回收基础 (2)面向对象的实现和异常的处理 (3)字符串.集合与流 (4)委托.事件.反射与特性 (5)多线程开发基础 (6)ADO.NET与数据库开发基 ...
- MyEclipse XFire Web Service
我们在做系统集成时,经常会需要调用webservice接口,本文将讲解在myeclipse中建立一个webservice项目,编写接口和实现类, 并且发布webservice,最后在myeclipse ...
- Web Service 之 开发、部署
一.C#开发WebService 在 VS2010 中新建 ASP.NET Web 应用程序,取名 WebTest. 应用程序下新建项其实最简单的就是建一个网站项目,直接" 添加新项→Web ...
- MyEclipse JAX-WS Web Service
在Myeclipse8.5下开发Web service程序,目前系统支持的开发框架有3个,JAX-WS,REST(JAX-RS),XFire.其中系统建议不要使用XFire 的框架,可能是要被淘汰了( ...
- MyEclipse 10 之下Web Service 的创建和实现
(一)Web service服务端开发 1. 新建一个Web service project, 菜单New -> Web Service Project, 2. 新建一个 Java Bean, ...
- 4.菜鸟教你一步一步开发 web service 之 axis 客户端创建
转自:https://blog.csdn.net/shfqbluestone/article/details/37723517 在上个教程中我们创建了一个 axis 服务端的 web service ...
随机推荐
- FileInputStream/FileOutputStream的应用
这是一对继承于InputStream和OutputStream的类,用于本地文件读写(二进制格式读写并且是顺序读写,读和写要分别创建出不同的文件流对象): 本地文件读写编程的基本过程为: ① 生成文 ...
- MOSFET 符號解說
符號 上面這個是 空乏型 的 MOSFET 符號 (有做過修改), 一個是 P channel, 一個是 N channel, 空乏型本身就有通道,所以中間是沒有斷掉的直線, P 代表 + , 有外放 ...
- 二叉树遍历 Morris
二叉树的遍历,先根遍历,不适用递归,存储空间为 O(1) 转自:http://chuansongme.com/n/100461 MorrisInOrder(): while 没有结束 如果当前节点没有 ...
- eclipse主题样式
Eclipse Color Themeshttp://eclipsecolorthemes.org/ Get it Download from Eclipse Marketplace Install ...
- Codeforces 761C Dasha and Password(枚举+贪心)
题目链接 Dasha and Password 题目保证一定有解. 考虑到最多只有两行的指针需要移动,那么直接预处理出该行移动到字母数字或特殊符号的最小花费. 然后O(N^3)枚举求最小值即可. 时间 ...
- 洛谷——P1227 [JSOI2008]完美的对称
P1227 [JSOI2008]完美的对称 题目描述 在峰会期间,必须使用许多保镖保卫参加会议的各国代表.代表们除了由他自己的随身保镖保护外,组委会还指派了一些其他的特工和阻击手保护他们.为了使他们的 ...
- POJ 3264 Balanced Lineup RMQ ST算法
题意:有n头牛,编号从1到n,每头牛的身高已知.现有q次询问,每次询问给出a,b两个数.要求给出编号在a与b之间牛身高的最大值与最小值之差. 思路:标准的RMQ问题. RMQ问题是求给定区间内的最值问 ...
- Spring Cloud学习总结(非原创)
文章大纲 一.课程内容总结二.课程学习地址三.学习资料下载四.参考文章 一.课程内容总结 二.课程学习地址 第一天:https://www.jianshu.com/p/a086421f4bfd第二 ...
- FTP的主动模式与被动模式
FTP服务器使用20和21两个网络端口与FTP客户端进行通信. FTP服务器的21端口用于传输FTP的控制命令,20端口用于传输文件数据. FTP主动模式: FTP客户端向服务器的FTP控制端口(默认 ...
- MapWindowPoints
中文名 MapWindowPoints Windows CE 1.0及以上版本 头文件 winuser.h 库文件 user32.lib MapWindowPoints函数把相对于一个窗口的坐标空间的 ...