paddlepaddle实现猫狗分类
声明:这是我的个人学习笔记,大佬可以点评,指导,不喜勿喷。实现过程参考自夜雨飘零的博客以及实现代码。框架是百度开源的框架paddlepaddle。
1.预备工作
这是我上学期一直没有去填补的坑,之前想通过传统机器学习方法来实现,不过没做完。暑假难得回一次家,所以我想该把我没做完的坑填完吧。
代码到现在为止已经写完了,不过还是存在坑的,比如哈士奇它会识别成猫。。。。
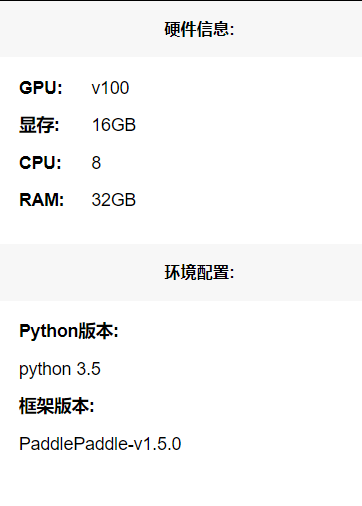
依赖的平台是百度的AIStudio,因为本地电脑960M的显卡受不了呀。
配置环境如下图所示。
1.1 数据集准备
我采用的是猫狗大战的数据集,从官方下载而来。
https://www.microsoft.com/en-us/download/confirmation.aspx?id=54765
下载完成后,把它解压到合适的位置。文件夹的结构是:
AiStuido上的解压命令是
!unzip -qo /home/aistudio/data/data10141/origin.zip -d /home/aistudio/data/datas
PetImages
┣ Cat
┗ Dog
1.2 数据预处理
1.2.1 删除无用的图片
因为猫狗分类中可能会出现很多因素影响分类效果,所以在进行训练之前,我们需要将图片进行一定的预处理。以提高训练的准确精度。
大概思路:
如果图片格式不是JPEG同时也不是PNG就删除图片
删除灰度图
如果图片大小为0(因为猫狗大战的数据集里面存在大小为0B的图片)
具体实现代码如下
# 删除不是JPEG或者PNG格式的图片

def delete_error_image(father_path):

    print(father_path)

    # 获取父级目录的所有文件以及文件夹

    try:

        image_dirs = os.listdir(father_path)

        for image_dir in image_dirs:

            image_dir = os.path.join(father_path, image_dir)

            # 如果是文件夹就继续获取文件夹中的图片

            if os.path.isdir(image_dir):

                images = os.listdir(image_dir)

                for image in images:

                    image = os.path.join(image_dir, image)

                    try:

                        # 获取图片的类型

                        image_type = imghdr.what(image)

                        # 如果图片格式不是JPEG同时也不是PNG就删除图片

                        if image_type is not 'jpeg' and image_type is not 'png':

                            os.remove(image)

                            print('已删除:%s' % image)

                            continue

                        # 删除灰度图

                        img = np.array(Image.open(image))

                        if len(img.shape) is 2:

                            os.remove(image)

                            print('已删除:%s' % image)

                        # 如果图片大小为0(因为猫狗大战的数据集里面存在大小为0B的图片)

                        if img.size == (0,0):

                            os.remove(image)

                            print('已删除:%s' % image)

                    except:

                        os.remove(image)

                        print('已删除:%s' % image)

    except:

        pass
主要利用的框架库是numpy,PIL,os库。
运行效果如下图所示:
因为,当前数据集是我已经处理过的,所以说不存在以上情况的图片。

1.2.2 reshape
通过查看我们知道所有图片的尺寸是不一样的,这就需要我们通过代码对于图片尺寸进行一定的调整。此处我统一调整成了224,224。(前提是之前要成功删除了一些无用的图片,否则在此步骤处理图片的时候会报错。)
# 预处理图片

def load_image(file,f):

    img = Image.open(file)

    # 统一图像大小

    img = img.resize((224, 224), Image.ANTIALIAS)

	# 输出处理日志,便于排错。

    f.write("the file path is " + str(file) + ",the size is " + str(img.size) + "\n")

    img = img.convert("RGB")

    img.save(file)
1.2.3 数据集划分
读取前8000张代码进行训练,(增大数据集,提高模型的准确性!)
def __load_data_set():

    srcDog = os.listdir(dog_origin_path)

    # 读取前8000张图片复制到训练集中

    fnames = ['{}.jpg'.format(i) for i in range(0,8000)]

    i = 0

    for fname in fnames:

        src = os.path.join(dog_origin_path, srcDog[i])

        dst = os.path.join(dog_train_path, "dog." + fname)

        shutil.copyfile(src, dst)

        i+=1

    srcCat = os.listdir(cat_origin_path)

    j = 0

    for fname in fnames:

        src = os.path.join(cat_origin_path, srcCat[j])

        dst = os.path.join(cat_train_path, "cat." + fname)

        shutil.copyfile(src, dst)

        j+=1

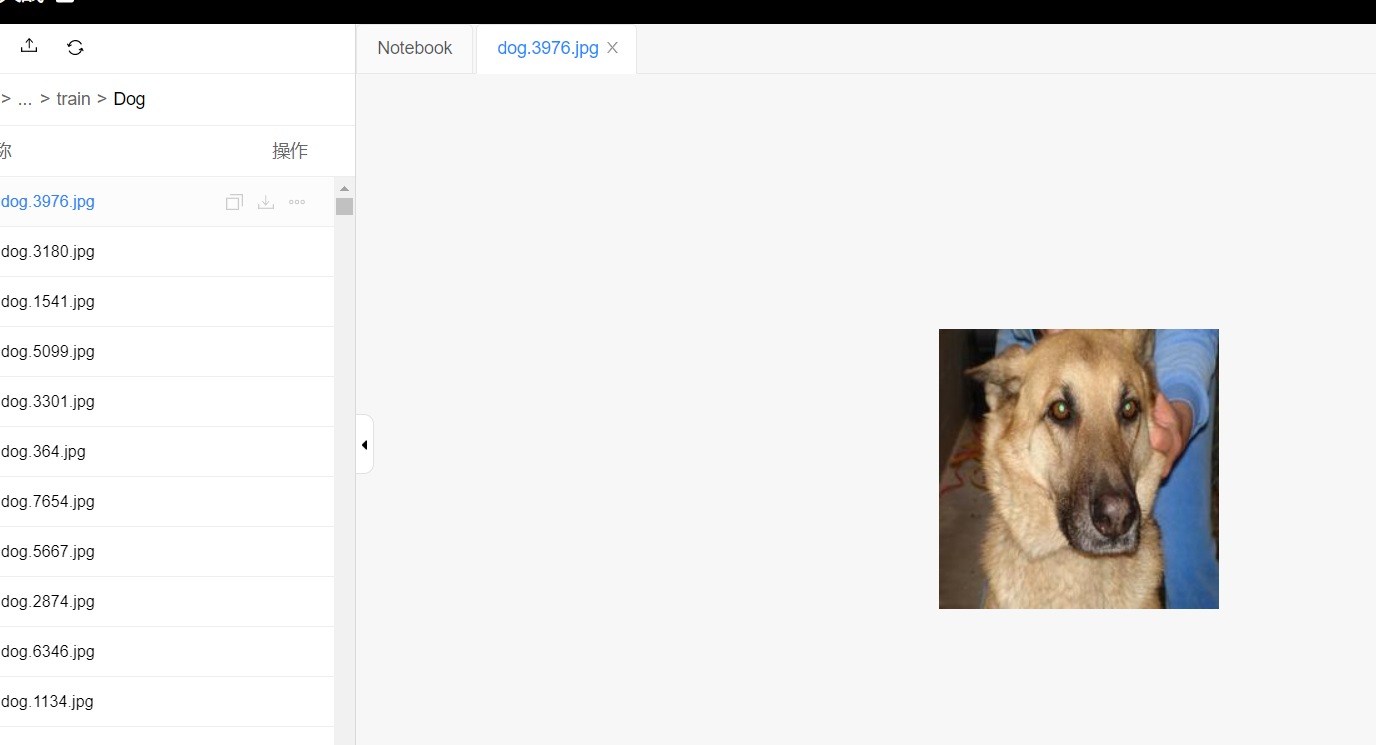
    print('total training cat images:',len(os.listdir(cat_train_path)))

    print('total training dog images:',len(os.listdir(dog_train_path)))
输出结果

已经生成了。
1.2.4 创建数据列表
#创建数据列表
import json
import os
def create_data_list(data_root_path):
with open(data_root_path + "test.list", 'w') as f:
pass
with open(data_root_path + "train.list", 'w') as f: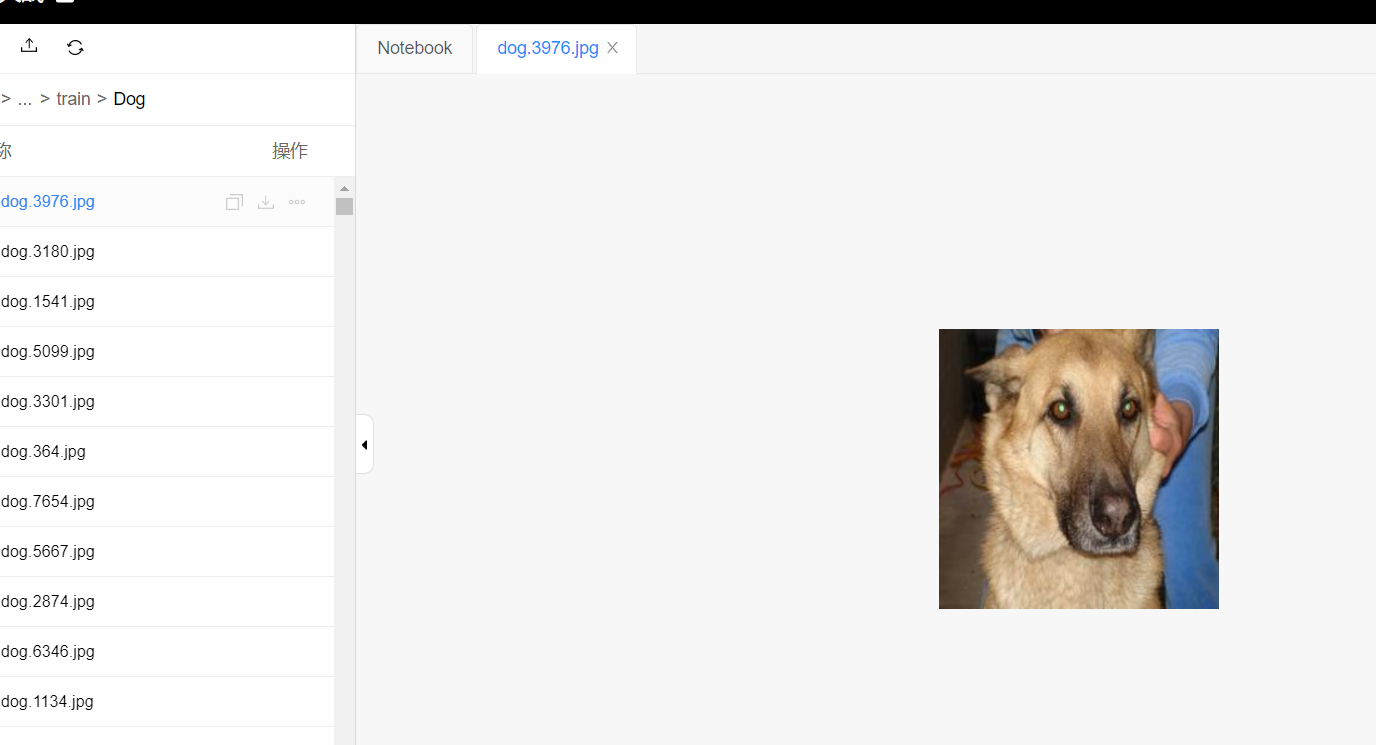
pass
# 所有类别的信息
class_detail = []
# 获取所有类别
class_dirs = os.listdir(data_root_path)
# 类别标签
class_label = 0
# 获取总类别的名称
father_paths = data_root_path.split('/')
while True:
if father_paths[len(father_paths) - 1] == '':
del father_paths[len(father_paths) - 1]
else:
break
father_path = father_paths[len(father_paths) - 1]
all_class_images = 0
other_file = 0
# 读取每个类别
for class_dir in class_dirs:
if class_dir == 'test.list' or class_dir == "train.list" or class_dir == 'readme.json':
other_file += 1
continue
print('正在读取类别:%s' % class_dir)
# 每个类别的信息
class_detail_list = {}
test_sum = 0
trainer_sum = 0
# 统计每个类别有多少张图片
class_sum = 0
# 获取类别路径
path = data_root_path + "/" + class_dir
# 获取所有图片
img_paths = os.listdir(path)
for img_path in img_paths:
# 每张图片的路径
name_path = class_dir + '/' + img_path
# 如果不存在这个文件夹,就创建
if not os.path.exists(data_root_path):
os.makedirs(data_root_path)
# 每10张图片取一个做测试数据
if class_sum % 10 == 0:
test_sum += 1
with open(data_root_path + "test.list", 'a') as f:
f.write(name_path + "\t%d" % class_label + "\n")
else:
trainer_sum += 1
with open(data_root_path + "train.list", 'a') as f:
f.write(name_path + "\t%d" % class_label + "\n")
class_sum += 1
all_class_images += 1
# 说明的json文件的class_detail数据
class_detail_list['class_name'] = class_dir
class_detail_list['class_label'] = class_label
class_detail_list['class_test_images'] = test_sum
class_detail_list['class_trainer_images'] = trainer_sum
class_detail.append(class_detail_list)
class_label += 1
# 获取类别数量
all_class_sum = len(class_dirs) - other_file
# 说明的json文件信息
readjson = {}
readjson['all_class_name'] = father_path
readjson['all_class_sum'] = all_class_sum
readjson['all_class_images'] = all_class_images
readjson['class_detail'] = class_detail
jsons = json.dumps(readjson, sort_keys=True, indent=4, separators=(',', ': '))
with open(data_root_path + "readme.json", 'w') as f:
f.write(jsons)
print('图像列表已生成')
输出结果:

2.训练
2.1 模型
我们针对移动端以及嵌入式视觉的应用提出了一类有效的模型叫MobileNets。MobileNets基于一种流线型结构使用深度可分离卷积来构造轻型权重深度神经网络。我们介绍两个能够有效权衡延迟和准确率的简单的全局超参数。这些超参数允许模型构造器能够根据特定问题选择合适大小的模型。我们在资源和准确率的权衡方面做了大量的实验并且相较于其他在ImageNet分类任务上著名的模型有很好的表现。然后,我们演示了MobileNets在广泛应用上的有效性,使用实例包含目标检测、细粒度分类、人脸属性以及大规模地理位置信息。\
实现代码是现成的,直接在百度官方网站上获取的。
2.2 定义训练
以下代码是定义训练的代码,基本上代码都是类似的,完成一个训练,都需要定义这些东西。
# 定义输入层(此处我们没有处理灰度图,所以还是三通道)

image = fluid.layers.data(name='image', shape=[3, crop_size, crop_size], dtype='float32')

label = fluid.layers.data(name='label', shape=[1], dtype='int64')

# 获取分类器(猫狗属于二分类)

model = net(image, 2)

# 获取损失函数和准确率函数

cost = fluid.layers.cross_entropy(input=model, label=label)

avg_cost = fluid.layers.mean(cost)

acc = fluid.layers.accuracy(input=model, label=label)

# 获取训练和测试程序

test_program = fluid.default_main_program().clone(for_test=True)

# 定义优化方法(设置学习率,和规则化函数,预防过拟合事件的发生)

optimizer = fluid.optimizer.AdamOptimizer(learning_rate=1e-3,

                                          regularization=fluid.regularizer.L2DecayRegularizer(1e-4))

opts = optimizer.minimize(avg_cost)

# 获取自定义数据

train_reader = paddle.batch(train_reader('data/datas/train/train.list', crop_size, resize_size), batch_size=64)

test_reader = paddle.batch(test_reader('data/datas/train/test.list', crop_size), batch_size=64)

# 定义一个使用GPU的执行器(处理图像,CPU太慢(本地笔记本亲测))

place = fluid.CUDAPlace(0)

# place = fluid.CPUPlace()

exe = fluid.Executor(place)

# 进行参数初始化

exe.run(fluid.default_startup_program())

# 定义输入数据维度

feeder = fluid.DataFeeder(place=place, feed_list=[image, label])
2.3 训练
代码
# 训练10次

for pass_id in range(20):

# 进行训练

#

    for batch_id, data in enumerate(train_reader()):

        train_cost, train_acc = exe.run(program=fluid.default_main_program(),

                                        feed=feeder.feed(data),

                                        fetch_list=[avg_cost, acc])
   # 每100个batch打印一次信息

    if batch_id % 100 == 0:

        print('Pass:%d, Batch:%d, Cost:%0.5f, Accuracy:%0.5f' %

              (pass_id, batch_id, train_cost[0], train_acc[0]))

# 进行测试

test_accs = []

test_costs = []

for batch_id, data in enumerate(test_reader()):

    test_cost, test_acc = exe.run(program=test_program,

                                  feed=feeder.feed(data),

                                  fetch_list=[avg_cost, acc])

    test_accs.append(test_acc[0])

    test_costs.append(test_cost[0])

# 求测试结果的平均值

test_cost = (sum(test_costs) / len(test_costs))

test_acc = (sum(test_accs) / len(test_accs))

print('Test:%d, Cost:%0.5f, Accuracy:%0.5f' % (pass_id, test_cost, test_acc))

# 保存预测模型

save_path = 'infer_model/'

# 删除旧的模型文件

shutil.rmtree(save_path, ignore_errors=True)

# 创建保持模型文件目录

os.makedirs(save_path)

# 保存预测模型

fluid.io.save_inference_model(save_path, feeded_var_names=[image.name], target_vars=[model], executor=exe)
输出结果
Pass:0, Batch:0, Cost:0.67030, Accuracy:0.59375

Pass:0, Batch:100, Cost:0.73609, Accuracy:0.62500

Pass:0, Batch:200, Cost:0.65755, Accuracy:0.62500

Test:0, Cost:0.69298, Accuracy:0.61500

Pass:1, Batch:0, Cost:0.70980, Accuracy:0.56250

Pass:1, Batch:100, Cost:0.67554, Accuracy:0.54688

Pass:1, Batch:200, Cost:0.64920, Accuracy:0.56250

Test:1, Cost:0.69018, Accuracy:0.60250

Pass:2, Batch:0, Cost:0.51662, Accuracy:0.79688

Pass:2, Batch:100, Cost:0.62268, Accuracy:0.60938

Pass:2, Batch:200, Cost:0.58238, Accuracy:0.68750

Test:2, Cost:0.61693, Accuracy:0.67188

Pass:3, Batch:0, Cost:0.61814, Accuracy:0.65625

Pass:3, Batch:100, Cost:0.52823, Accuracy:0.76562

Pass:3, Batch:200, Cost:0.50346, Accuracy:0.75000

Test:3, Cost:0.56010, Accuracy:0.69437

Pass:4, Batch:0, Cost:0.51497, Accuracy:0.70312

Pass:4, Batch:100, Cost:0.54908, Accuracy:0.75000

Pass:4, Batch:200, Cost:0.44495, Accuracy:0.82812

Test:4, Cost:0.51263, Accuracy:0.73750

Pass:5, Batch:0, Cost:0.53596, Accuracy:0.76562

Pass:5, Batch:100, Cost:0.57464, Accuracy:0.75000

Pass:5, Batch:200, Cost:0.67699, Accuracy:0.65625

Test:5, Cost:0.53518, Accuracy:0.74000

Pass:6, Batch:0, Cost:0.46548, Accuracy:0.79688

Pass:6, Batch:100, Cost:0.54030, Accuracy:0.70312

Pass:6, Batch:200, Cost:0.48817, Accuracy:0.78125

Test:6, Cost:0.48508, Accuracy:0.77312

Pass:7, Batch:0, Cost:0.41523, Accuracy:0.84375

Pass:7, Batch:100, Cost:0.47442, Accuracy:0.73438

Pass:7, Batch:200, Cost:0.45649, Accuracy:0.76562

Test:7, Cost:0.44587, Accuracy:0.78375

Pass:8, Batch:0, Cost:0.42541, Accuracy:0.81250

Pass:8, Batch:100, Cost:0.38169, Accuracy:0.81250

Pass:8, Batch:200, Cost:0.54646, Accuracy:0.71875

Test:8, Cost:0.54019, Accuracy:0.74187

Pass:9, Batch:0, Cost:0.41468, Accuracy:0.82812

Pass:9, Batch:100, Cost:0.50506, Accuracy:0.78125

Pass:9, Batch:200, Cost:0.26215, Accuracy:0.93750

Test:9, Cost:0.44446, Accuracy:0.78875

Pass:10, Batch:0, Cost:0.45576, Accuracy:0.76562

Pass:10, Batch:100, Cost:0.35473, Accuracy:0.79688

Pass:10, Batch:200, Cost:0.45957, Accuracy:0.73438

Test:10, Cost:0.44609, Accuracy:0.79812

Pass:11, Batch:0, Cost:0.43150, Accuracy:0.76562

Pass:11, Batch:100, Cost:0.48615, Accuracy:0.79688

Pass:11, Batch:200, Cost:0.25434, Accuracy:0.87500

Test:11, Cost:0.40623, Accuracy:0.82125

Pass:12, Batch:0, Cost:0.31509, Accuracy:0.89062

Pass:12, Batch:100, Cost:0.35438, Accuracy:0.90625

Pass:12, Batch:200, Cost:0.44042, Accuracy:0.82812

Test:12, Cost:0.38933, Accuracy:0.82688

Pass:13, Batch:0, Cost:0.35025, Accuracy:0.84375

Pass:13, Batch:100, Cost:0.39380, Accuracy:0.82812

Pass:13, Batch:200, Cost:0.29557, Accuracy:0.85938

Test:13, Cost:0.40181, Accuracy:0.83000

Pass:14, Batch:0, Cost:0.22922, Accuracy:0.90625

Pass:14, Batch:100, Cost:0.49781, Accuracy:0.84375

Pass:14, Batch:200, Cost:0.23470, Accuracy:0.85938

Test:14, Cost:0.44674, Accuracy:0.81375

Pass:15, Batch:0, Cost:0.32143, Accuracy:0.85938

Pass:15, Batch:100, Cost:0.31085, Accuracy:0.87500

Pass:15, Batch:200, Cost:0.36961, Accuracy:0.82812

Test:15, Cost:0.41548, Accuracy:0.82812

Pass:16, Batch:0, Cost:0.24269, Accuracy:0.90625

Pass:16, Batch:100, Cost:0.29280, Accuracy:0.82812

Pass:16, Batch:200, Cost:0.19174, Accuracy:0.92188

Test:16, Cost:0.32385, Accuracy:0.86375

Pass:17, Batch:0, Cost:0.28380, Accuracy:0.85938

Pass:17, Batch:100, Cost:0.30588, Accuracy:0.81250

Pass:17, Batch:200, Cost:0.32704, Accuracy:0.85938

Test:17, Cost:0.31492, Accuracy:0.86000

Pass:18, Batch:0, Cost:0.29551, Accuracy:0.85938

Pass:18, Batch:100, Cost:0.18694, Accuracy:0.90625

Pass:18, Batch:200, Cost:0.25631, Accuracy:0.85938

Test:18, Cost:0.29839, Accuracy:0.87125

Pass:19, Batch:0, Cost:0.16484, Accuracy:0.95312

Pass:19, Batch:100, Cost:0.11558, Accuracy:0.96875

Pass:19, Batch:200, Cost:0.17472, Accuracy:0.90625

Test:19, Cost:0.25351, Accuracy:0.88813
模型训练之后最终的acc是0.88813。整体还是不错的。
3.预测
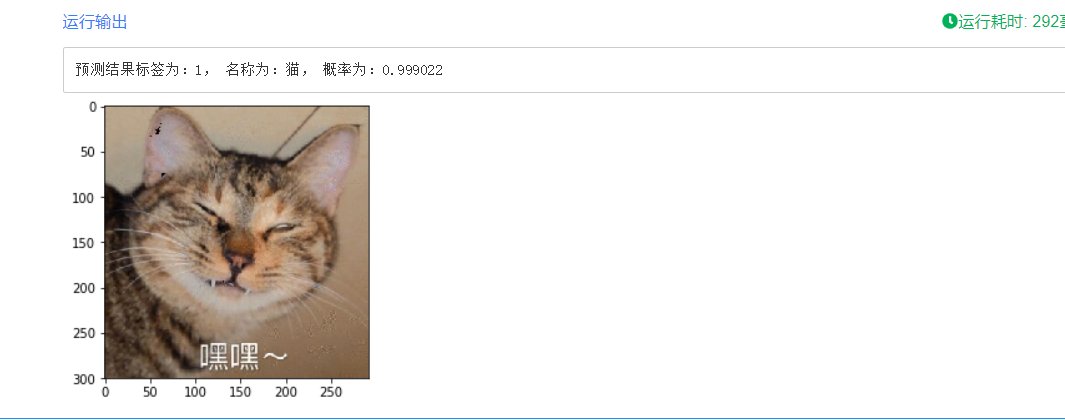
这里我准备了1只猫,1只狗来进行测试(不要用哈士奇,,效果不行,这个坑后面解决)。
预测代码如下
import paddle.fluid as fluid

from PIL import Image

import numpy as np

# 创建执行器

place = fluid.CUDAPlace(0)

exe = fluid.Executor(place)

exe.run(fluid.default_startup_program())

infer_image = 'work/train/test2.jpg'

# 保存预测模型路径

save_path = 'infer_model/'

# 从模型中获取预测程序、输入数据名称列表、分类器

[infer_program, feeded_var_names, target_var] = fluid.io.load_inference_model(dirname=save_path, executor=exe)

# 预处理图片

def load_image(file):

    img = Image.open(file)

    # 统一图像大小

    img = img.resize((224, 224), Image.ANTIALIAS)

    # 转换成numpy值

    img = np.array(img).astype(np.float32)

    # 转换成CHW

    img = img.transpose((2, 0, 1))

    # 转换成BGR

    img = img[(2, 1, 0), :, :] / 255.0

    img = np.expand_dims(img, axis=0)

    return img

# 获取图片数据

img = load_image(infer_image)

# 执行预测

result = exe.run(program=infer_program,

                 feed={feeded_var_names[0]: img},

                 fetch_list=target_var)

# 显示图片并输出结果最大的label

lab = np.argsort(result)[0][0][-1]

names = ['猫', '狗']

print('预测结果标签为:%d, 名称为:%s, 概率为:%f' % (lab, names[lab], result[0][0][lab]))

infer_image_show = Image.open(infer_image)

infer_image_show.show()
测试图片

结果:
结果

4.参考文献
https://blog.csdn.net/qq_33200967/article/details/87895105 《PaddlePaddle从入门到炼丹》十一——自定义图像数据集识别
https://github.com/yeyupiaoling/LearnPaddle2/tree/master/note11 github地址
https://ai.baidu.com/docs#/AIStudio_Project_Unit/top 百度平台介绍
paddlepaddle实现猫狗分类的更多相关文章
- 人工智能——CNN卷积神经网络项目之猫狗分类
首先先导入所需要的库 import sys from matplotlib import pyplot from tensorflow.keras.utils import to_categorica ...
- 用tensorflow迁移学习猫狗分类
笔者这几天在跟着莫烦学习TensorFlow,正好到迁移学习(至于什么是迁移学习,看这篇),莫烦老师做的是预测猫和老虎尺寸大小的学习.作为一个有为的学生,笔者当然不能再预测猫啊狗啊的大小啦,正好之前正 ...
- 猫狗分类--Tensorflow实现
贴一张自己画的思维导图 数据集准备 kaggle猫狗大战数据集(训练),微软的不需要FQ 12500张cat 12500张dog 生成图片路径和标签的List step1:获取D:/Study/Py ...
- 1.keras实现-->自己训练卷积模型实现猫狗二分类(CNN)
原数据集:包含 25000张猫狗图像,两个类别各有12500 新数据集:猫.狗 (照片大小不一样) 训练集:各1000个样本 验证集:各500个样本 测试集:各500个样本 1= 狗,0= 猫 # 将 ...
- 使用pytorch完成kaggle猫狗图像识别
kaggle是一个为开发商和数据科学家提供举办机器学习竞赛.托管数据库.编写和分享代码的平台,在这上面有非常多的好项目.好资源可供机器学习.深度学习爱好者学习之用.碰巧最近入门了一门非常的深度学习框架 ...
- Kaggle系列1:手把手教你用tensorflow建立卷积神经网络实现猫狗图像分类
去年研一的时候想做kaggle上的一道题目:猫狗分类,但是苦于对卷积神经网络一直没有很好的认识,现在把这篇文章的内容补上去.(部分代码参考网上的,我改变了卷积神经网络的网络结构,其实主要部分我加了一层 ...
- pytorch实现kaggle猫狗识别
参考:https://blog.csdn.net/weixin_37813036/article/details/90718310 kaggle是一个为开发商和数据科学家提供举办机器学习竞赛.托管数据 ...
- keras猫狗图像识别
这里,我们介绍的是一个猫狗图像识别的一个任务.数据可以从kaggle网站上下载.其中包含了25000张毛和狗的图像(每个类别各12500张).在小样本中进行尝试 我们下面先尝试在一个小数据上进行训练, ...
- 猫狗识别-CNN与VGG实现
本次项目首先使用CNN卷积神经网络模型进行训练,最终训练效果不太理想,出现了过拟合的情况.准确率达到0.72,loss达到0.54.使用预训练的VGG模型后,在测试集上准确率达到0.91,取得了不错的 ...
随机推荐
- Spring Boot:使用Redis存储技术
综合概述 Redis是一个开源免费的高性能key-value数据库,读取速度达110000次/s,写入速度达81000次/s.Redis支持丰富的数据类型,如Lists, Hashes, Sets 及 ...
- Spark学习之路(十二)—— Spark SQL JOIN操作
一. 数据准备 本文主要介绍Spark SQL的多表连接,需要预先准备测试数据.分别创建员工和部门的Datafame,并注册为临时视图,代码如下: val spark = SparkSession.b ...
- 【React】遍历的两种方式
1.foreach(推荐) list.forEach((item)=>{ }); eg: dataSource.forEach((item) => { const est = item.e ...
- SSM(二)MyBatis多表联查
这篇文章写了以下几个简单的例子,用来说明MyBatis多标联查基本语法 1.sql片段的用法 2.一对多查询 3.多条sql的一对多查询 4.多对一查询 5.多条sql一对多查询 6.多对多查询 这里 ...
- Jenkins+Python+GitLab持续集成
创建任务 登录Jenkins,点击左侧列表的新建选项.输入任务名称,选择构建一个自由风格的软件项目,点击确定. 配置 在任务配置界面,可以设置General标签中的丢弃旧的构建选项,设置保持构建的天数 ...
- 小白开学Asp.Net Core 《四》
小白开学Asp.Net Core<三> —— 使用AspectCore-Framework 一.AspectCore-Frame ...
- 从无到有构建vue实战项目(二)
二.vue项目的初步搭建 该项目我采用了当下最流行的vue ui框架---element-ui,首先用vue-cli构建一个vue项目: vue create education 然后会出现一系列配置 ...
- BZOJ 2957:楼房重建(分块)
http://www.lydsy.com/JudgeOnline/problem.php?id=2957 题意:…… 思路:对于每一个块,维护一个单调递增的斜率(因为小于前面的斜率的话是肯定看不见的) ...
- .NET Core学习笔记(1)——在Linux下运行Console APP
都说.NET Core可以跨平台,说实话Linux咱也不太懂,咱也不敢问.怎样把一个简单的Console App在Linux下跑起来,真是费了我一番功夫.特做此篇以供指北. .NET Core的大饼我 ...
- redis 命令的调用过程
参考文献: Redis 是如何处理命令的(客户端) 我是如何通过添加一条命令学习redis源码的 从零开始写redis客户端(deerlet-redis-client)之路--第一个纠结很久的问题,r ...
