你好spring-cloud-kubernetes
关于spring-cloud-kubernetes
spring-cloud-kubernetes是springcloud官方推出的开源项目,用于将Spring Cloud和Spring Boot应用运行在kubernetes环境,并且提供了通用的接口来调用kubernetes服务,GitHub上官方地址是:https://github.com/spring-cloud/spring-cloud-kubernetes
该项目的提交者之一,就是SpringCloud的作者之一Spencer Gibb:

系列文章列表
本文是《spring-cloud-kubernetes实战系列》的第二篇,全文链接如下:
- 《spring-cloud-kubernetes官方demo运行实战》
- 《你好spring-cloud-kubernetes》
- 《spring-cloud-kubernetes背后的三个关键知识点》
- 《spring-cloud-kubernetes的服务发现和轮询实战(含熔断)》
- 《spring-cloud-kubernetes与SpringCloud Gateway》
- 《spring-cloud-kubernetes与k8s的configmap》
通过官方demo来了解spring-cloud-kubernetes
spring-cloud-kubernetes项目也提供了丰富的官方demo来帮助开发者了解和学习spring-cloud-kubernetes,您可以参考《spring-cloud-kubernetes官方demo运行实战》快速体验官方demo;
实战spring-cloud-kubernetes
今天实战的内容是开发一个简单的java应用,然后将其部署在kubernetes环境(minikube 1.1.1),该应用通过spring-cloud-kubernetes调用当前kubernetes的服务;
环境信息
本次实战的环境和版本信息如下:
- 操作系统:CentOS Linux release 7.6.1810
- minikube:1.1.1
- Java:1.8.0_191
- Maven:3.6.0
- fabric8-maven-plugin插件:3.5.37
- spring-cloud-kubernetes:1.0.1.RELEASE
上面的linux、minikube、java、maven,请确保已准备好,linux环境下minikube的安装和启动请参考《Linux安装minikube指南 》。
准备工作已经OK,开始编码吧。
源码下载
如果您不打算写代码,也可以从GitHub上下载本次实战的源码,地址和链接信息如下表所示:
| 名称 | 链接 | 备注 |
|---|---|---|
| 项目主页 | https://github.com/zq2599/blog_demos | 该项目在GitHub上的主页 |
| git仓库地址(https) | https://github.com/zq2599/blog_demos.git | 该项目源码的仓库地址,https协议 |
| git仓库地址(ssh) | git@github.com:zq2599/blog_demos.git | 该项目源码的仓库地址,ssh协议 |
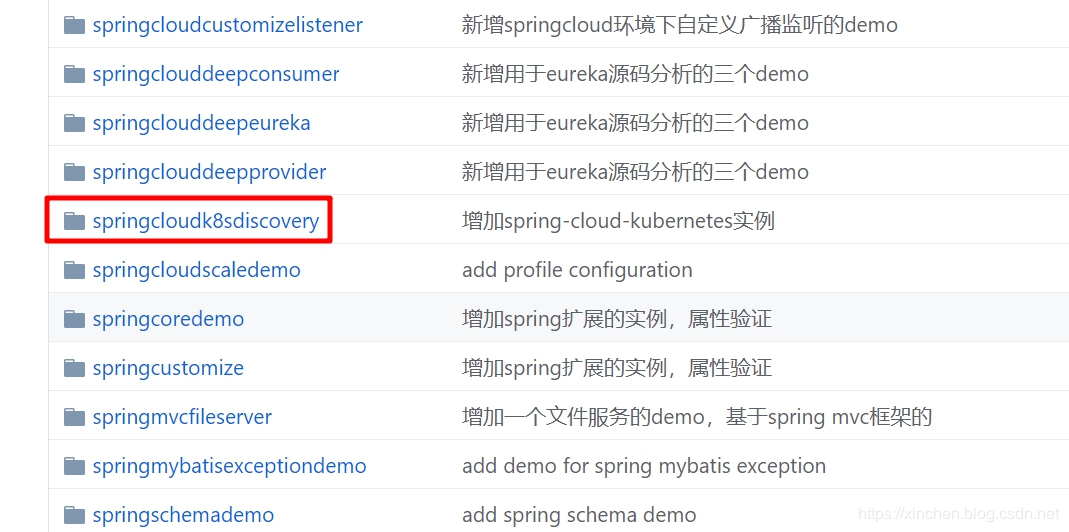
这个git项目中有多个文件夹,本章源码在springcloudk8sdiscovery这个文件夹下,如下图红框所示:
开发应用
- 基于maven创建一个springboot应用,名为springcloudk8sdiscovery;
- 该应用完整的pom.xml内容如下:
<?xml version="1.0" encoding="UTF-8"?>

<project xmlns="http://maven.apache.org/POM/4.0.0" xmlns:xsi="http://www.w3.org/2001/XMLSchema-instance"

         xsi:schemaLocation="http://maven.apache.org/POM/4.0.0 http://maven.apache.org/xsd/maven-4.0.0.xsd">

    <modelVersion>4.0.0</modelVersion>

    <parent>

        <groupId>org.springframework.boot</groupId>

        <artifactId>spring-boot-starter-parent</artifactId>

        <version>2.1.1.RELEASE</version>

        <relativePath/> <!-- lookup parent from repository -->

    </parent>

    <groupId>com.bolingcavalry</groupId>

    <artifactId>springcloudk8sdiscovery</artifactId>

    <version>0.0.1-SNAPSHOT</version>

    <name>springcloudk8sdiscovery</name>

    <description>Demo project for Spring Boot</description>

    <properties>

        <java.version>1.8</java.version>

        <spring-boot.version>2.1.1.RELEASE</spring-boot.version>

        <maven-compiler-plugin.version>3.5</maven-compiler-plugin.version>

        <maven-deploy-plugin.version>2.8.2</maven-deploy-plugin.version>

        <maven-failsafe-plugin.version>2.18.1</maven-failsafe-plugin.version>

        <maven-surefire-plugin.version>2.21.0</maven-surefire-plugin.version>

        <fabric8.maven.plugin.version>3.5.37</fabric8.maven.plugin.version>

    </properties>

    <dependencyManagement>

        <dependencies>

            <dependency>

                <groupId>org.springframework.boot</groupId>

                <artifactId>spring-boot-dependencies</artifactId>

                <type>pom</type>

                <scope>import</scope>

                <version>${spring-boot.version}</version>

            </dependency>

        </dependencies>

    </dependencyManagement>

    <dependencies>

        <dependency>

            <groupId>org.springframework.cloud</groupId>

            <artifactId>spring-cloud-kubernetes-core</artifactId>

            <version>1.0.1.RELEASE</version>

        </dependency>

        <dependency>

            <groupId>org.springframework.cloud</groupId>

            <artifactId>spring-cloud-kubernetes-discovery</artifactId>

            <version>1.0.1.RELEASE</version>

        </dependency>

        <dependency>

            <groupId>org.springframework.cloud</groupId>

            <artifactId>spring-cloud-commons</artifactId>

            <version>2.1.1.RELEASE</version>

        </dependency>

        <dependency>

            <groupId>org.springframework.boot</groupId>

            <artifactId>spring-boot-starter</artifactId>

            <version>2.1.1.RELEASE</version>

        </dependency>

        <dependency>

            <groupId>org.springframework.boot</groupId>

            <artifactId>spring-boot-starter-web</artifactId>

            <version>2.1.1.RELEASE</version>

        </dependency>

        <!--

            We need that(actuator) so that it can be used in readiness probes.

            Readiness checks are needed by arquillian, so that it

            knows when to run the actual test.

        -->

        <dependency>

            <groupId>org.springframework.boot</groupId>

            <artifactId>spring-boot-starter-actuator</artifactId>

            <version>2.1.1.RELEASE</version>

        </dependency>

        <dependency>

            <groupId>com.alibaba</groupId>

            <artifactId>fastjson</artifactId>

            <version>1.2.28</version>

        </dependency>

    </dependencies>

    <build>

        <plugins>

            <plugin>

                <groupId>org.springframework.boot</groupId>

                <artifactId>spring-boot-maven-plugin</artifactId>

                <version>${spring-boot.version}</version>

                <executions>

                    <execution>

                        <goals>

                            <goal>repackage</goal>

                        </goals>

                    </execution>

                </executions>

            </plugin>

            <plugin>

                <!--skip deploy -->

                <groupId>org.apache.maven.plugins</groupId>

                <artifactId>maven-deploy-plugin</artifactId>

                <version>${maven-deploy-plugin.version}</version>

                <configuration>

                    <skip>true</skip>

                </configuration>

            </plugin>

            <plugin>

                <groupId>org.apache.maven.plugins</groupId>

                <artifactId>maven-surefire-plugin</artifactId>

                <version>${maven-surefire-plugin.version}</version>

                <configuration>

                    <skipTests>true</skipTests>

                    <!-- Workaround for https://issues.apache.org/jira/browse/SUREFIRE-1588 -->

                    <useSystemClassLoader>false</useSystemClassLoader>

                </configuration>

            </plugin>

            <plugin>

                <groupId>io.fabric8</groupId>

                <artifactId>fabric8-maven-plugin</artifactId>

                <version>${fabric8.maven.plugin.version}</version>

                <executions>

                    <execution>

                        <id>fmp</id>

                        <goals>

                            <goal>resource</goal>

                        </goals>

                    </execution>

                </executions>

            </plugin>

        </plugins>

    </build>

    <profiles>

        <profile>

            <id>kubernetes</id>

            <build>

                <plugins>

                    <plugin>

                        <groupId>io.fabric8</groupId>

                        <artifactId>fabric8-maven-plugin</artifactId>

                        <version>${fabric8.maven.plugin.version}</version>

                        <executions>

                            <execution>

                                <id>fmp</id>

                                <goals>

                                    <goal>resource</goal>

                                    <goal>build</goal>

                                </goals>

                            </execution>

                        </executions>

                        <configuration>

                            <enricher>

                                <config>

                                    <fmp-service>

                                        <type>NodePort</type>

                                    </fmp-service>

                                </config>

                            </enricher>

                        </configuration>

                    </plugin>

                </plugins>

            </build>

        </profile>

        <profile>

            <id>release</id>

            <build>

                <plugins>

                    <plugin>

                        <groupId>io.fabric8</groupId>

                        <artifactId>fabric8-maven-plugin</artifactId>

                        <version>${fabric8.maven.plugin.version}</version>

                        <executions>

                            <execution>

                                <id>fmp</id>

                                <goals>

                                    <goal>resource</goal>

                                    <goal>helm</goal>

                                </goals>

                            </execution>

                        </executions>

                    </plugin>

                </plugins>

            </build>

        </profile>

        <profile>

            <id>integration</id>

            <build>

                <plugins>

                    <plugin>

                        <groupId>io.fabric8</groupId>

                        <artifactId>fabric8-maven-plugin</artifactId>

                        <version>${fabric8.maven.plugin.version}</version>

                        <executions>

                            <execution>

                                <id>fmp</id>

                                <goals>

                                    <goal>resource</goal>

                                    <goal>build</goal>

                                </goals>

                            </execution>

                        </executions>

                    </plugin>

                    <plugin>

                        <groupId>org.apache.maven.plugins</groupId>

                        <artifactId>maven-failsafe-plugin</artifactId>

                        <version>${maven-failsafe-plugin.version}</version>

                        <executions>

                            <execution>

                                <id>run-integration-tests</id>

                                <phase>integration-test</phase>

                                <goals>

                                    <goal>integration-test</goal>

                                    <goal>verify</goal>

                                </goals>

                            </execution>

                        </executions>

                        <configuration>

                            <skipTests>false</skipTests>

                            <skipITs>false</skipITs>

                        </configuration>

                    </plugin>

                </plugins>

            </build>

        </profile>

    </profiles>

</project>
上述pom.xml文件有几处需要关注:
a. 直接依赖了spring-cloud-kubernetes的以下两个库,后面才能使用spring-cloud-kubernetes的服务:
org.springframework.cloud:spring-cloud-kubernetes-core:1.0.1.RELEASE

org.springframework.cloud:spring-cloud-kubernetes-discovery:1.0.1.RELEASE
b. 使用插件fabric8-maven-plugin来构建镜像并部署到minikube环境:
<plugin>

  <groupId>io.fabric8</groupId>

  <artifactId>fabric8-maven-plugin</artifactId>

  <version>${fabric8.maven.plugin.version}</version>

  <executions>

    <execution>

      <id>fmp</id>

      <goals>

        <goal>resource</goal>

      </goals>

    </execution>

  </executions>

</plugin>
c. 为fabric8-maven-plugin插件准备了三个profile,本次实战主要用到kubernetes这个:
<profile>

  <id>kubernetes</id>

  <build>

    <plugins>

      <plugin>

        <groupId>io.fabric8</groupId>

        <artifactId>fabric8-maven-plugin</artifactId>

        <version>${fabric8.maven.plugin.version}</version>

        <executions>

          <execution>

            <id>fmp</id>

            <goals>

              <goal>resource</goal>

              <goal>build</goal>

            </goals>

          </execution>

        </executions>

        <configuration>

          <enricher>

            <config>

              <fmp-service>

                <!--部署到kubernetes后,会创建一个类型为NodePort的service-->

                <type>NodePort</type>

              </fmp-service>

            </config>

          </enricher>

        </configuration>

      </plugin>

    </plugins>

  </build>

</profile>
以上就是pom.xml的内容了,主要是添加spring-cloud-kubernetes的依赖,以及使用fabric8来构建和部署;
- 在application.properties文件中设置应用名称:
spring.application.name=springcloudk8sdiscovery
- 创建应用启动类Springcloudk8sdiscoveryApplication,可见这是个很普通的springboot启动类:
package com.bolingcavalry.springcloudk8sdiscovery;

import org.springframework.boot.SpringApplication;

import org.springframework.boot.autoconfigure.SpringBootApplication;

import org.springframework.cloud.client.discovery.EnableDiscoveryClient;

@SpringBootApplication

@EnableDiscoveryClient

public class Springcloudk8sdiscoveryApplication {

    public static void main(String[] args) {

        SpringApplication.run(Springcloudk8sdiscoveryApplication.class, args);

    }

}
- 创建controller类,对外提供http服务,部署完成后通过这些http服务来验证功能:
@RestController

public class DiscoveryController {

    @Autowired

    private DiscoveryClient discoveryClient;

    /**

     * 探针检查响应类

     * @return

     */

    @RequestMapping("/health")

    public String health() {

        return "health";

    }

    /**

     * 返回远程调用的结果

     * @return

     */

    @RequestMapping("/getservicedetail")

    public String getservicedetail(

            @RequestParam(value = "servicename", defaultValue = "") String servicename) {

        return "Service [" + servicename + "]'s instance list : " + JSON.toJSONString(discoveryClient.getInstances(servicename));

    }

    /**

     * 返回发现的所有服务

     * @return

     */

    @RequestMapping("/services")

    public String services() {

        return this.discoveryClient.getServices().toString()

                + ", "

                + new SimpleDateFormat("yyyy-MM-dd HH:mm:ss").format(new Date());

    }

}
上述代码有几点需要注意:
a. health方法用于响应kubernetes的探针检查;
b. getservicedetail方法接收名为servicename的参数,然后去服务列表中检查对应的服务对象并返回;
c. services方法返回的是所有服务的名称;
以上就是所有代码了,功能是通过autowire得到DiscoveryClient实例,再调用该实例的API取得服务信息。
接下来我们将应用构建并部署到minikube环境;
编译构建
- 请确保当前电脑上java、maven、minikube都是正常的;
- 在pom.xml文件所在目录执行以下命令,即可编译构建部署一次性完成:
mvn clean package fabric8:deploy -Pkubernetes
构建成功后,控制台输出信息如下:
...

[INFO]

[INFO] <<< fabric8-maven-plugin:3.5.37:deploy (default-cli) < install @ springcloudk8sdiscovery <<<

[INFO]

[INFO]

[INFO] --- fabric8-maven-plugin:3.5.37:deploy (default-cli) @ springcloudk8sdiscovery ---

[INFO] F8: Using Kubernetes at https://192.168.121.133:8443/ in namespace default with manifest /usr/local/work/demo/springcloudk8sdiscovery/target/classes/META-INF/fabric8/kubernetes.yml

[INFO] Using namespace: default

[INFO] Updating a Service from kubernetes.yml

[INFO] Updated Service: target/fabric8/applyJson/default/service-springcloudk8sdiscovery.json

[INFO] Using namespace: default

[INFO] Updating Deployment from kubernetes.yml

[INFO] Updated Deployment: target/fabric8/applyJson/default/deployment-springcloudk8sdiscovery.json

[INFO] F8: HINT: Use the command `kubectl get pods -w` to watch your pods start up

[INFO] ------------------------------------------------------------------------

[INFO] BUILD SUCCESS

[INFO] ------------------------------------------------------------------------

[INFO] Total time:  11.207 s

[INFO] Finished at: 2019-06-09T18:50:09+08:00

[INFO] ------------------------------------------------------------------------
- 用kubectl命令查看部署和服务,都处于正常状态:
[root@minikube springcloudk8sdiscovery]# kubectl get deployments

NAME                      READY   UP-TO-DATE   AVAILABLE   AGE

springcloudk8sdiscovery   1/1     1            1           75m

[root@minikube springcloudk8sdiscovery]# kubectl get svc

NAME                      TYPE        CLUSTER-IP      EXTERNAL-IP   PORT(S)          AGE

kubernetes                ClusterIP   10.96.0.1       <none>        443/TCP          33h

springcloudk8sdiscovery   NodePort    10.102.167.79   <none>        8080:31583/TCP   75m
- 执行命令minikube service springcloudk8sdiscovery --url,得到的是可以从外部访问的服务地址:http://192.168.121.133:31583 ,其中192.168.121.133是宿主机IP地址;
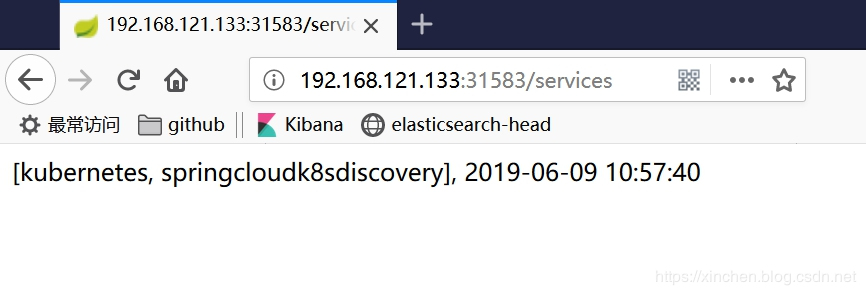
- 在浏览器上访问地址http://192.168.121.133:31583/services ,如下图,返回的"所有服务"其实是kubernetes中的所有service:
- 为了验证当前namespace下的所有服务都能被发现,我们再创建个服务实施,执行以下命令,会创建名为my-tomcat的部署和服务:
kubectl run my-tomcat --image=tomcat:7.0.94-jre7-alpine --replicas=2 --port=8080 \

&& kubectl expose deployment my-tomcat --port=8080 --target-port=8080 --external-ip=192.168.50.7 --type=LoadBalancer
由于下载镜像需要一定时间,所以需要稍作等待;
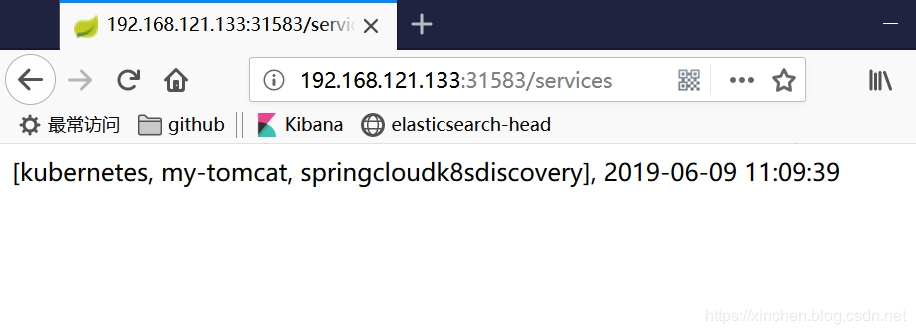
7. 再去访问地址http://192.168.121.133:31583/services ,如下图,my-tomcat赫然在列:
8. 访问地址http://192.168.121.133:31583/getservicedetail?servicename=my-tomcat ,会得到名为my-tomcat的服务信息,该信息格式化后的内容如下所示:
[

    {

        "host": "172.17.0.4",

        "instanceId": "91201db9-8aa6-11e9-a5b5-000c29fd2001",

        "metadata": {

            "run": "my-tomcat"

        },

        "port": 8080,

        "scheme": "http://",

        "secure": false,

        "serviceId": "my-tomcat",

        "uri": "http://172.17.0.4:8080"

    },

    {

        "host": "172.17.0.5",

        "instanceId": "91223cda-8aa6-11e9-a5b5-000c29fd2001",

        "metadata": {

            "$ref": "$[0].metadata"

        },

        "port": 8080,

        "scheme": "http://",

        "secure": false,

        "serviceId": "my-tomcat",

        "uri": "http://172.17.0.5:8080"

    }

]
可见spring-cloud-kubernetes的DiscoveryClient服务将kubernetes中的"service"资源与SpringCloud中的服务对应起来了,有了这个DiscoveryClient,我们在kubernetes环境就不需要eureka来做注册发现了,而是直接使用kubernetes的服务机制,此时不得不感慨SpringCloud的对DiscoveryClient的设计是如此的精妙。
至此,spring-cloud-kubernetes的初体验就结束了,通过简单的编码我们的程序在kubernetes环境可以取得service资源的信息,随着学习的深入,我们会用到更多的spring-cloud-kubernetes能力,感谢spring-cloud-kubernetes的设计者,让我们的SpringCloud应用畅游在在kubernetes世界。
疑惑待解
您可能会有些疑惑:上面的代码都是和SpringCloud相关的,和spring-cloud-kubernetes没什么关系呀,为什么程序运行起来后就能取得kubernetes环境中的服务信息呢?
此问题如果不弄清楚,后面的学习很难展开,因为我们都不知道自己的代码与kubernetes环境有什么关系,和kubernetes有没有交互?
以上问题,欢迎访问《spring-cloud-kubernetes背后的三个关键知识点》,这里面有详细的分析。
欢迎关注我的公众号

你好spring-cloud-kubernetes的更多相关文章
- 朱晔和你聊Spring系列S1E11:小测Spring Cloud Kubernetes @ 阿里云K8S
有关Spring Cloud Kubernates(以下简称SCK)详见https://github.com/spring-cloud/spring-cloud-kubernetes,在本文中我们主要 ...
- Spring Cloud Config整合Spring Cloud Kubernetes,在k8s上管理配置
1 前言 欢迎访问南瓜慢说 www.pkslow.com获取更多精彩文章! Kubernetes有专门的ConfigMap和Secret来管理配置,但它也有一些局限性,所以还是希望通过Spring C ...
- Springboot整合Spring Cloud Kubernetes读取ConfigMap,支持自动刷新配置
1 前言 欢迎访问南瓜慢说 www.pkslow.com获取更多精彩文章! Docker & Kubernetes相关文章:容器技术 之前介绍了Spring Cloud Config的用法,但 ...
- spring cloud kubernetes之serviceaccount permisson报错
spring boot项目引用spring-cloud-starter-kubernetes <dependency> <groupId>org.springframework ...
- Netflix OSS、Spring Cloud还是Kubernetes? 都要吧!
Netflix OSS是由Netflix公司主持开发的一套代码框架和库,目的是解决上了规模之后的分布式系统可能出现的一些有趣问题.对于当今时代的Java开发者们来说,Netflix OSS简直就是在云 ...
- 【架构】Kubernetes和Spring Cloud哪个部署微服务更好?
Spring Cloud 和Kubernetes都自称自己是部署和运行微服务的最好环境,但是它们在本质上和解决不同问题上是有很大差异的.在本文中,我们将看到每个平台如何帮助交付基于微服务的架构(MSA ...
- 微服务Spring Cloud与Kubernetes比较
转 http://www.tuicool.com/articles/VnMf2y3 Spring Cloud或Kubernetes都宣称它们是开发运行微服务的最好环境,哪个更好?答案是两个都是,但他们 ...
- Spring Cloud 2020.0.0正式发布,再见了Netflix
目录 ✍前言 版本约定 ✍正文 Spring Cloud版本管理 与Spring Boot版本对应关系 当前支持的版本 阻断式升级(不向下兼容) 1.再见了,Netflix Netflix组件替代方案 ...
- Spring Cloud Greenwich 正式发布,Hystrix 即将寿终正寝。。
Spring Cloud Greenwich 正式版在 01/23/2019 这天正式发布了,下面我们来看下有哪些更新内容. 生命周期终止提醒 Spring Cloud Edgware Edgware ...
- Spring Cloud Hoxton正式发布,Spring Boot 2.2 不再孤单
距离Spring Boot 2.2.0的发布已经有一个半月左右时间,由于与之匹配的Spring Cloud版本一直没有Release,所以在这期间碰到不少读者咨询的问题都是由于Spring Boot和 ...
随机推荐
- T-SQL 镜像测试
--====================================================== ----镜像计划建立 2016-05-10 17:05:16.463 hubiyun ...
- C++单继承、多继承情况下的虚函数表分析
C++的三大特性之一的多态是基于虚函数实现的,而大部分编译器是采用虚函数表来实现虚函数,虚函数表(VTAB)存在于可执行文件的只读数据段中,指向VTAB的虚表指针(VPTR)是包含在类的每一个实例当中 ...
- Qtech 暑假未讲到的算法(不完全)
一.数据结构: 优先队列.堆.RMQ问题(区间最值问题,可以用线段树解决,还有一个Sparse-Table算法).排序二叉树.划分树.归并树..... 字符串处理: KMP.字典树.后 ...
- LongAdder和AtomicLong性能对比
jdk1.8中新原子操作封装类LongAdder和jdk1.5的AtomicLong和synchronized的性能对比,直接上代码: package com.itbac.cas; import ja ...
- 的Blog
作者:Ovear链接:https://www.zhihu.com/question/20215561/answer/40316953来源:知乎著作权归作者所有.商业转载请联系作者获得授权,非商业转载请 ...
- Micropython TPYBoard v102 温湿度短信通知器(基于SIM900A模块)
前言 前段时间看了追龙2,感受就是如果你是冲着追龙1来看追龙2的话,劝你还是不要看了,因为追龙2跟追龙1压根没什么联系,给我的感觉就像是看拆弹专家似的,估计追龙2这个名字就是随便蹭蹭追龙1的热度来的. ...
- MySQL数据库基本知识(理论总结)
定义:数据库就是一个文件系统,通过sql语句来获取数据 关系型数据库:关系型数据库存放的是实体时间的关系,在数据库层面来看就是存放的是表和表之间的关联关系 常见的关系型数据库 MySQL D ...
- Ubuntu 18.04 LTS版本 GoldenDict安装与配置
为何安装? GoldenDict是一款Linux下很好用的词典软件,其具有的关于词典的裁剪功能使得用户能够方便地对各种词典进行添加或删除,其具有的屏幕取词功能能够帮助用户方便地进行翻译,其具有的网络源 ...
- 【0808 | Day 11】文件的高级应用/修改以及函数的定义/使用/参数
文件的高级应用 一.三种模式 'r+'模式 with open('test.py','r',encoding = 'utf8') as fr: print(fr.writable()) fr.writ ...
- UVA - 1152 --- 4 Values whose Sum is 0(二分)
问题分析 首先枚举a和b, 把所有a+b记录下来放在一个有序数组,然后枚举c和d, 在有序数组中查一查-c-d共有多少个.注意这里不可以直接用二分算法的那个模板,因为那个模板只能查找是否有某个数,一旦 ...