oracle单机数据库搭建巨详细文档
规划
环境:redhat6.9
安装包:p13390677_112040_Linux-x86-64_1of7.zip
p13390677_112040_Linux-x86-64_2of7.zip
数据库配置
ORACLE_SID=csk;
ORACLE_BASE=/home/app/oracle;
ORACLE_HOME= $ORACLE_BASE/product/11.2.0/dbhome_1;
ORACLE IP = 192.168.17.133
ORACLE 端口= 1521、1158
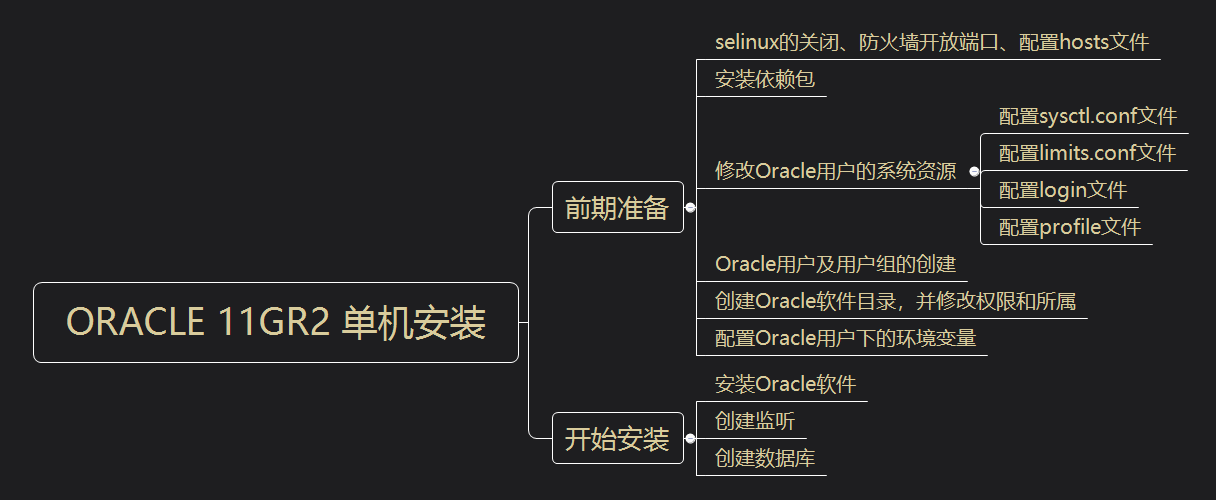
具体过程
配置网卡
[root@database ~]# vim /etc/sysconfig/network-scripts/ifcfg-eth0
添加如下内容:
+++++++++++++++ETH0++++++++++++++++++++++
DEVICE=eth0
HWADDR=00:0C:29:0C:1F:38
TYPE=Ethernet
UUID=3e6bd021-df81-40e1-a4c5-e8215fa9ec95
ONBOOT=yes
NM_CONTROLLED=no
BOOTPROTO=static
IPADDR=192.168.17.133
NETMASK=255.255.255.0
GATEWAY=192.168.17.2
++++++++++++++++++++++++++++++++++++++++
关闭selinux
[root@database ~]# vim /etc/sysconfig/selinux
修改如下内容:
SELINUX=disabled
开放防火墙1521、1158端口
配置防火墙
[root@database ~]# vim /etc/sysconfig/iptables
在端口号22后添加如下内容:
-A INPUT -m state --state NEW -m tcp -p tcp --dport 1521 -j ACCEPT
-A INPUT -m state --state NEW -m tcp -p tcp --dport 1158 -j ACCEPT
##1521是Oracle默认开放的远程端口;1158则是OME端口。##
重启防火墙
[root@database ~]# service iptables restart
iptables:将链设置为政策 ACCEPT:filter [确定]
iptables:清除防火墙规则: [确定]
iptables:正在卸载模块: [确定]
iptables:应用防火墙规则: [确定]
查看防火墙状态
[root@database ~]# service iptables status
表格:filter
Chain INPUT (policy ACCEPT)
num target prot opt source destination
1 ACCEPT all -- 0.0.0.0/0 0.0.0.0/0 state RELATED,ESTABLISHED
2 ACCEPT icmp -- 0.0.0.0/0 0.0.0.0/0
3 ACCEPT all -- 0.0.0.0/0 0.0.0.0/0
4 ACCEPT tcp -- 0.0.0.0/0 0.0.0.0/0 state NEW tcp dpt:22
5 ACCEPT tcp -- 0.0.0.0/0 0.0.0.0/0 state NEW tcp dpt:1521
6 ACCEPT tcp -- 0.0.0.0/0 0.0.0.0/0 state NEW tcp dpt:1158
7 REJECT all -- 0.0.0.0/0 0.0.0.0/0 reject-with icmp-host-prohibited
Chain FORWARD (policy ACCEPT)
num target prot opt source destination
1 REJECT all -- 0.0.0.0/0 0.0.0.0/0 reject-with icmp-host-prohibited
Chain OUTPUT (policy ACCEPT)
num target prot opt source destination
修改hosts文件
[root@database ~]# vim /etc/hosts
添加如下内容:
192.168.17.133 database
添加YUM源
1、挂载ISO镜像
[root@database ~]# mount /dev/sr0 /media
2、配置repo文件
[root@database ~]# vim /etc/yum.repos.d/rhel-source.repo
添加如下内容:
[rhel-source]
name=rhel-source
baseurl=file:///media
enabled=1
gpgcheck=0
3、更新yum源
[root@database ~]# yum clean all
[root@database ~]# yum list
安装数据库所需依赖软件包
1、检查还有哪些依赖包没有安装
[root@database ~]# rpm -q --qf '%{NAME}-%{VERSION}-%{RELEASE} (%{ARCH}) \n' binutils \compat-libstdc++ \elfutils-libelf \elfutils-libelf-devel \gcc \gcc-c++ \glibc \glibc-common \glibc-devel \glibc-headers \ksh \libaio \libaio-devel \libgcc \libstdc++ \libstdc++-devel \make\sysstat \unixODBC \unixODBC-devel
+++++++++++++++++++++++++++++++++++++++++++++++++++++++++++++++++++
binutils-2.20.51.0.2-5.36.el6 (x86_64)
package compat-libstdc++ is not installed
elfutils-libelf-0.152-1.el6 (x86_64)
package elfutils-libelf-devel is not installed
package gcc is not installed
package gcc-c++ is not installed
glibc-2.12-1.132.el6 (x86_64)
glibc-common-2.12-1.132.el6 (x86_64)
glibc-devel-2.12-1.132.el6 (x86_64)
glibc-headers-2.12-1.132.el6 (x86_64)
package ksh is not installed
libaio-0.3.107-10.el6 (x86_64)
package libaio-devel is not installed
libgcc-4.4.7-4.el6 (x86_64)
libstdc++-4.4.7-4.el6 (x86_64)
package libstdc++-devel is not installed
package makesysstat is not installed
package unixODBC is not installed
package unixODBC-devel is not installed
++++++++++++++++++++++++++++++++++++++++++++++++++++++++++++++++++++++
2、安装
[root@database ~]# yum install -y compat-libstdc++* elfutils-libelf-devel* gcc* gcc-c++* ksh* libaio-devel* libstdc++-devel* libstdc++-devel* makesysstat* unixODBC* unixODBC-devel*
修改内核参数
[root@database ~]# vim /etc/sysctl.conf
添加如下内容:
kernel.sem = 250 32000 100 128
kernel.shmall = 2097152
kernel.shmmax = 1073741824
kernel.shmmni = 4096
fs.aio-max-nr = 1048576
fs.file-max = 6815744
net.core.rmem_default = 4194304
net.core.rmem_max = 4194304
net.core.wmem_default = 262144
net.core.wmem_max = 1048576
net.ipv4.ip_local_port_range = 9000 65500
##########################################################################
注意: kernel.shmmax 的值是物理内存的一半。 我的是2G内存,所以是1073741824。
参数说明: kernel.shmmni:整个系统共享内存段的最大数目
fs.file-max:系统中所允许的文件句柄最大数目
net.core.rmem_default:套接字接收缓冲区大小的缺省值
net.core.rmem_max:套接字接收缓冲区大小的最大值
net.core.wmem_default:套接字发送缓冲区大小的缺省值
net.core.wmem_max:套接字发送缓冲区大小的最大值
net.ipv4.ip_local_port_range:应用程序可使用的IPv4端口范围
使内核参数立即生效
[root@database ~]# sysctl -p
添加如下内容:
net.ipv4.ip_forward = 0
net.ipv4.conf.default.rp_filter = 1
net.ipv4.conf.default.accept_source_route = 0
kernel.sysrq = 0
kernel.core_uses_pid = 1
net.ipv4.tcp_syncookies = 1
error: "net.bridge.bridge-nf-call-ip6tables" is an unknown key
error: "net.bridge.bridge-nf-call-iptables" is an unknown key
error: "net.bridge.bridge-nf-call-arptables" is an unknown key
kernel.sem = 250 32000 100 128
kernel.shmall = 2097152
kernel.shmmax = 1073741824
kernel.shmmni = 4096
fs.aio-max-nr = 1048576
fs.file-max = 6815744
net.core.rmem_default = 4194304
net.core.rmem_max = 4194304
net.core.wmem_default = 262144
net.core.wmem_max = 1048576
net.ipv4.ip_local_port_range = 9000 65500
修改/etc/security/limits.conf文件
限制Oracle用户资源
[root@database ~]# vim /etc/security/limits.conf
添加如下内容:
oracle soft nproc 2047 #oracle用户进程告警值
oracle hard nproc 16384 #oracle用户进程最大阈值
oracle soft nofile 1024 #oracle用户文件使用量告警值
oracle hard nofile 65536 #oracle用户文件使用量最大阈值
修改/etc/pam.d/login文件
将配置文件加入到登录验证模块中
[root@database ~]# vim /etc/pam.d/login
添加如下内容:
session required pam_limits.so #调用pam_limits.so模块
修改/etc/profile文件
限制oracle用户使用的系统资源
[root@database ~]# vim /etc/profile
if [ $USER = "oracle" ]; then
if [ $SHELL = "/bin/ksh" ]; then
ulimit -p 16384
ulimit -n 65536
else
ulimit -u 16384 -n 65536
fi
umask 022
fi
创建用户和用户组
groupadd dba
groupadd oinstall
useradd -g oinstall -G dba oracle
passwd oracle
查看是否创建成功
[root@database ~]# id oracle
uid=500(oracle) gid=502(oinstall) 组=502(oinstall),501(dba)
新建安装目录并设置目录所有者和权限
mkdir -p /home/app/oracle
mkdir -p /home/app/oraInventory
mkdir -p /home/app/oracle/product/11.2.0/dbhome_1
chown -R oracle:oinstall /home/app/oracle/
chown -R oracle:oinstall /home/app/oraInventory/
chown -R oracle:oinstall /home/app/oracle/product/11.2.0/dbhome_1
chmod -R 775 /home/app/
修改oracle用户环境变量,并限制Oracle用户系统资源使用
[root@database ~]# su - oracle
[root@database ~]# vim .bash_profile
添加如下内容:
export TMP=/tmp;
export TMPDIR=$TMP;
export LANG=en_us;
export ORACLE_BASE=/home/app/oracle;
export ORACLE_HOME=$ORACLE_BASE/product/11.2.0/dbhome_1;
export ORACLE_SID=orcl;
export ORACLE_TERM=xterm;
export PATH=$ORACLE_HOME/bin:/usr/sbin:$PATH;
export LD_LIBRARY_PATH=$ORACLE_HOME/lib:/lib:/usr/lib;
export CLASSPATH=$ORACLE_HOME/JRE:$ORACLE_HOME/jlib:$ORACLE_HOME/rdbms/jlib;
if [ $USER = "oracle" ]; then
if [ $SHELL = "/bin/ksh" ]; then
ulimit -p 16384
ulimit -n 65536
else
ulimit -u 16384 -n 65536
fi
fi
umask 022
使Oracle用户下的环境变量文件立即生效
[oracle@database ~]$ source .bash_profile
上传Oracle单机安装包
补丁集1和2
解压并修改权限
[root@database oracle_rj]# unzip p13390677_112040_Linux-x86-64_1of7.zip && unzip p13390677_112040_Linux-x86-64_2of7.zip
[root@database oracle_rj]# chmod 775 -R database/
Oracle用户下运行runInstaller开始安装Oracle
[oracle@database ~]$ /oracle_rj/database/runInstaller
Starting Oracle Universal Installer...
Checking Temp space: must be greater than 120 MB. Actual 25657 MB Passed
Checking swap space: must be greater than 150 MB. Actual 3999 MB Passed
Checking monitor: must be configured to display at least 256 colors. Actual 16777216 Passed
Preparing to launch Oracle Universal Installer from /tmp/OraInstall2020-01-20_04-10-49AM. Please wait ...
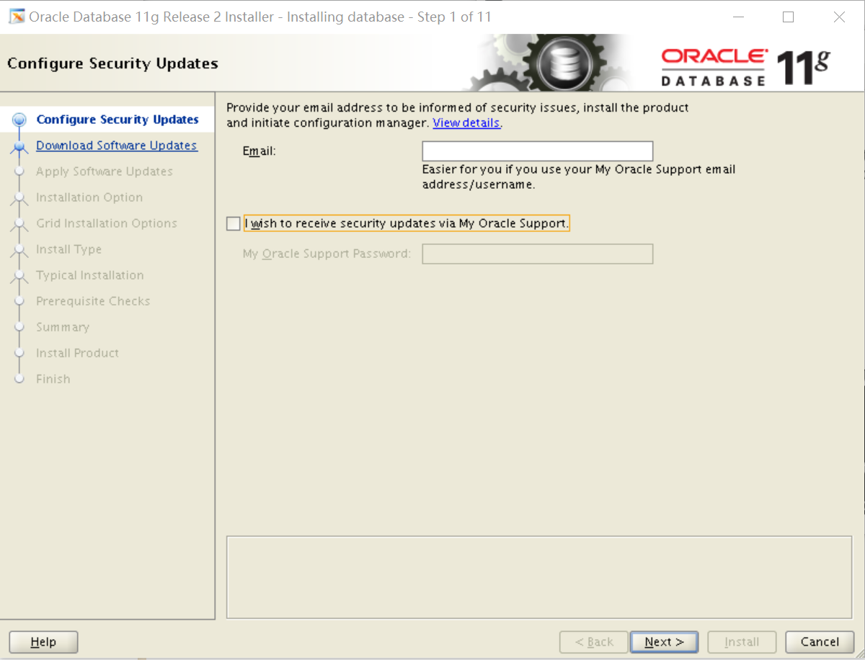
Step01.配置安全更新
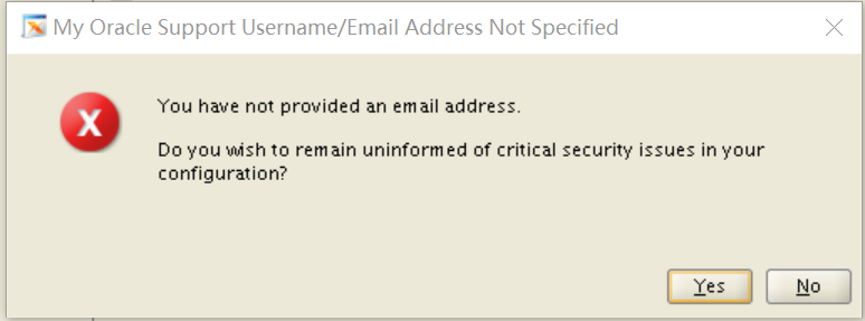
取消勾选,不接收安全更新,然后点击【Next】,弹出提示窗口,选择【Yes】
step02.选择跳过更新
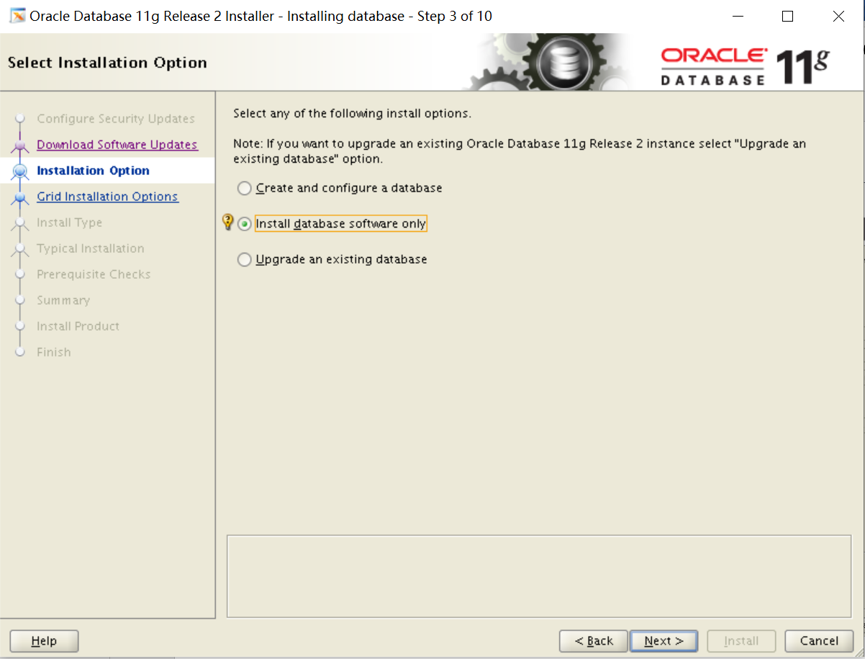
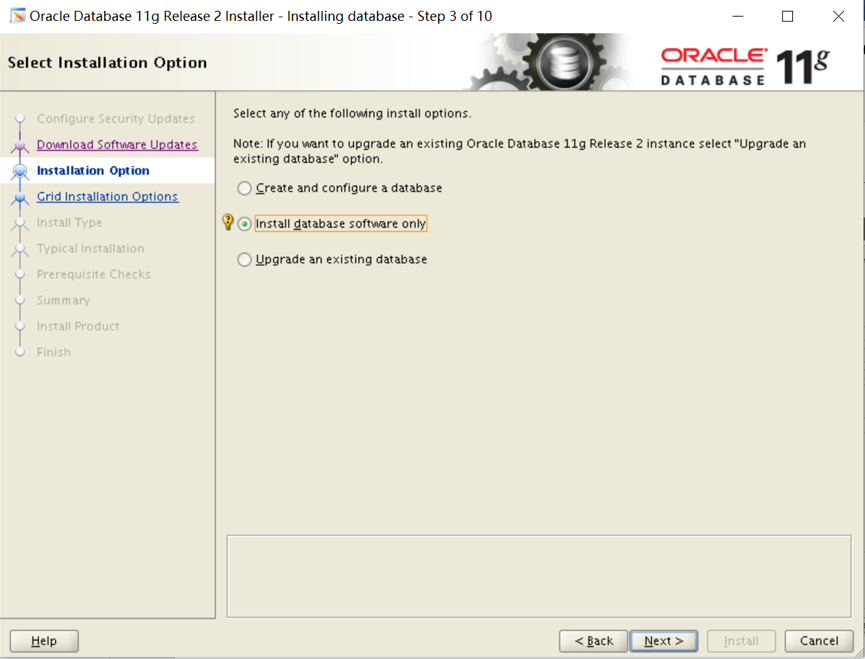
tep03.选择安装选项
包含3个安装选项:
1. 创建和配置数据库
2. 仅安装数据库软件
3. 升级现有数据库
这里我们选择【仅安装数据库软件】,然后点击【Next】:
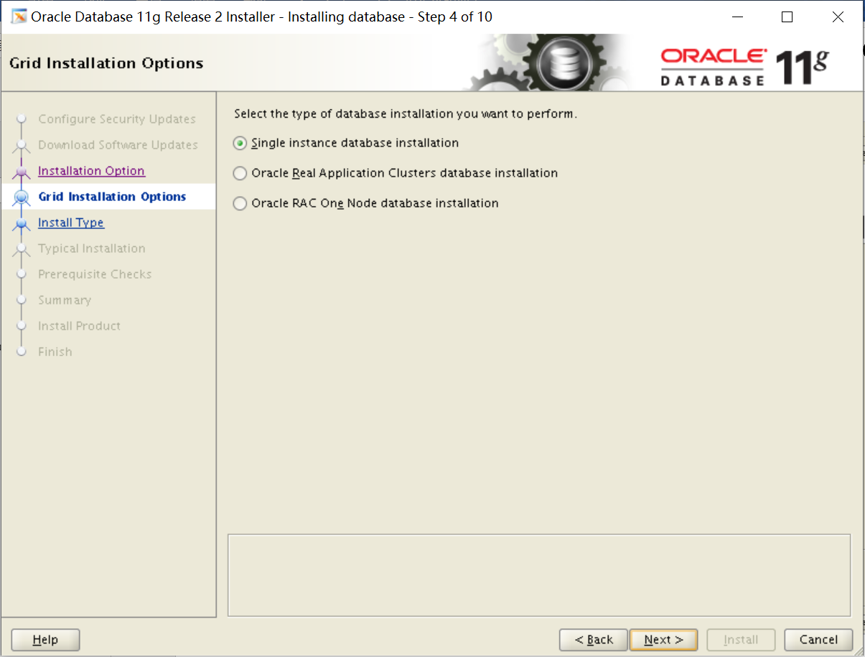
Step04.节点选择
包含3个选项:
1. 单实例数据库安装
2. Real Application Clusters数据库安装
3. ORACLE RAC 单节点安装
选择【单实例数据库安装】,然后点击【Next】:
Step05.选择产品语言
默认已添加了【English】,在左侧语言列表中找到简体中文【Simplified Chinese】,并添加到右侧,然后点击【Next】:

Step06.选择数据库版本
包含3个选项:
1. 企业版:具有可伸缩性、高性能、高可用性和安全功能的自行管理的数据库,能够满足大多数高标准的关键任务应用程序的需求。
2. 标准版:标准版是寻求低成本解决方案的工作组、部门和中小企业的理想选择。
3. 标准版1:标准版1是寻求低成本解决方案的工作组、部门和中小企业的理想选择。
选择【企业版】,然后点击【Next】:

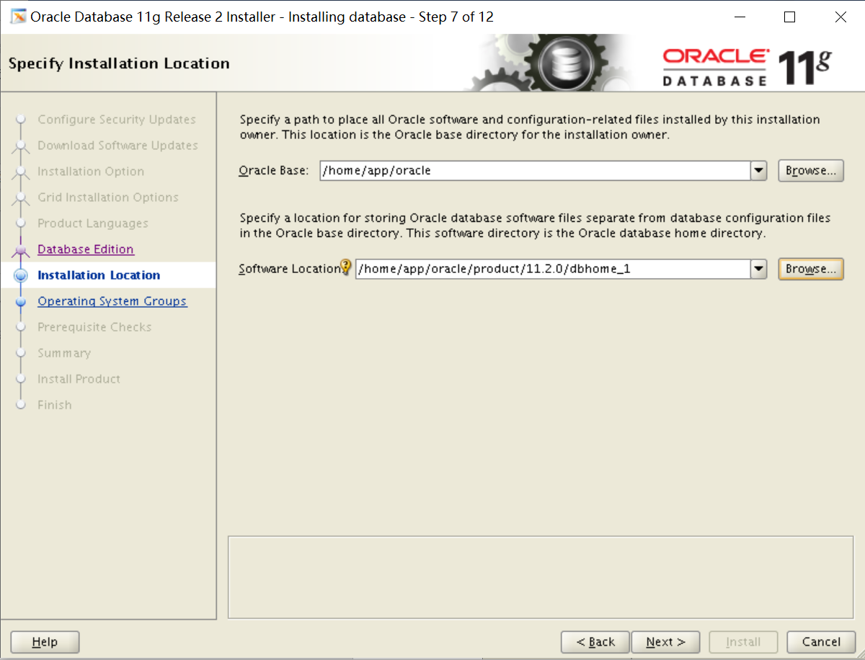
Step07.指定安装位置
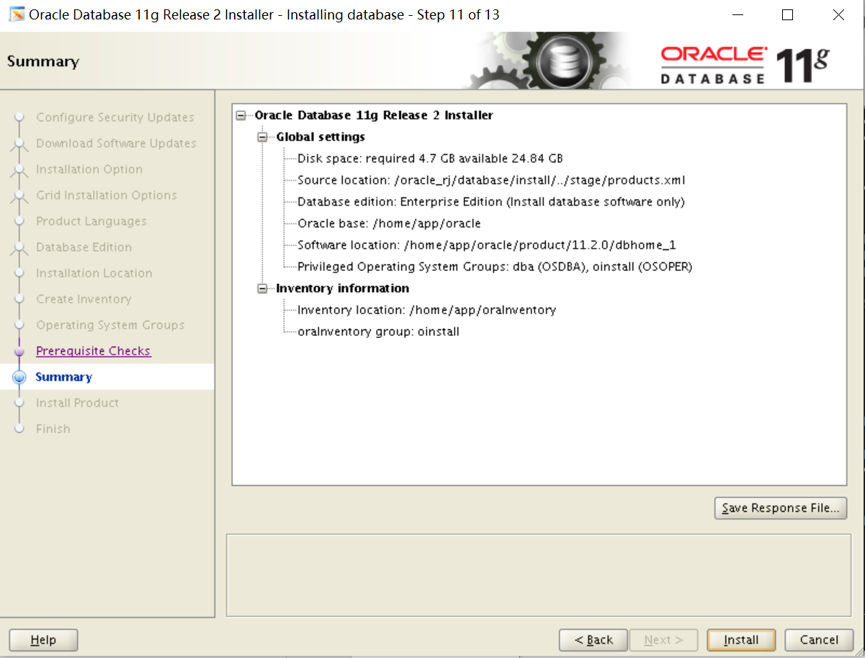
设置Oracle基目录为新建的目录:/home/app/oracle,则软件位置会自动为:/home/app/oracle/product/11.2.0/dbhome_1,然后点击【Next】:
Step08.创建产品清单
设置Oracle清单目录为新建的目录:/home/app/ oraInventory,选择组"oinstall",然后点击【Next】:


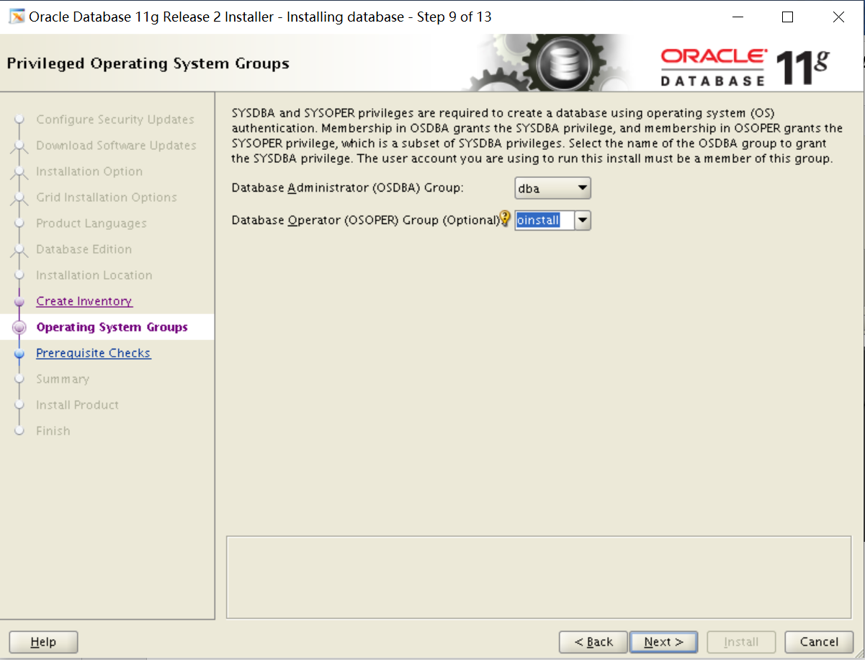
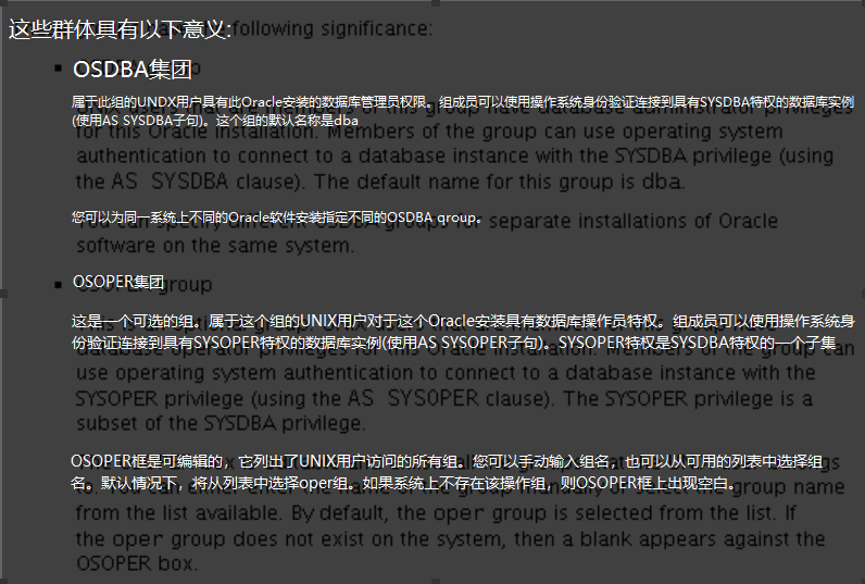
Step09.特权操作系统组
设置数据库管理员组为【dba】,数据库操作者组为【oinstall】。然后点击【Next】:
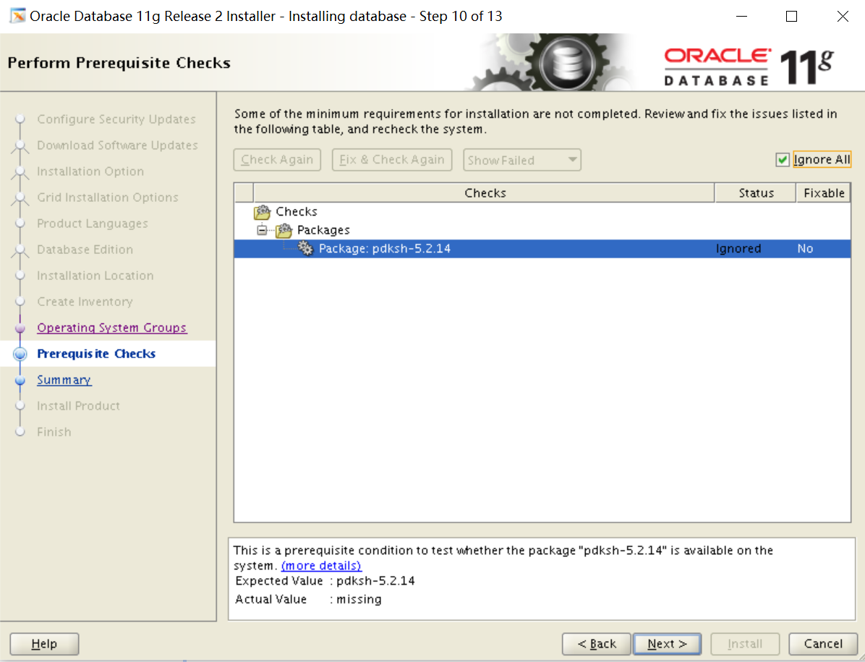
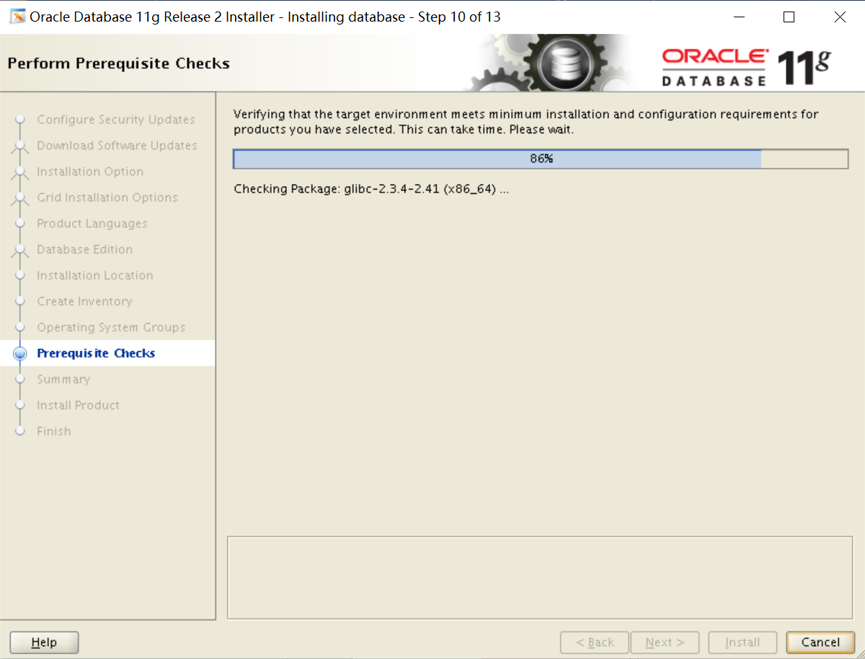
Step10.执行先决条件检查
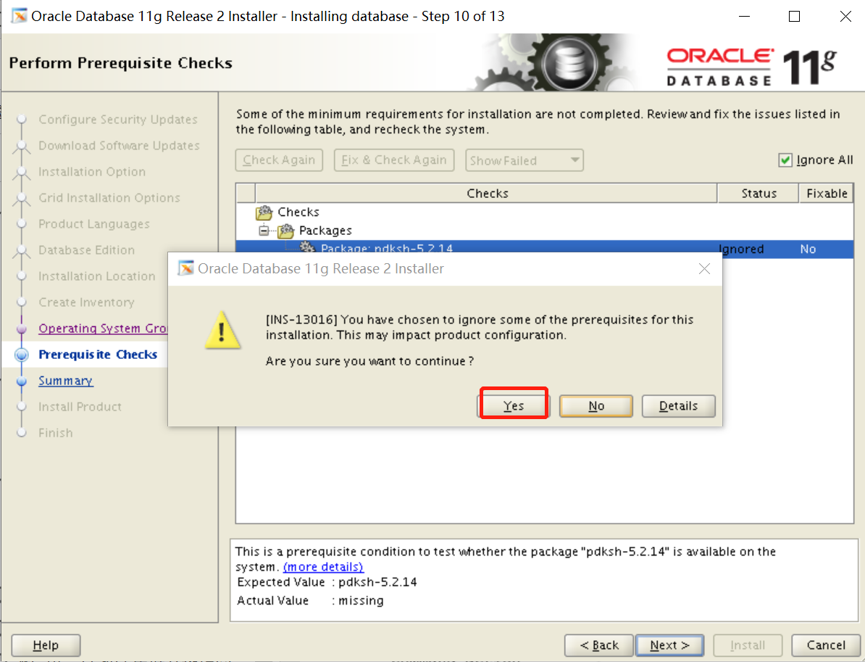
若提示有程序包不存在,是因为Linux6之后,pdksh依赖包被ksh包替代,所有可选择【忽略全部】,然后点击【Next】:
Step12.运行配置脚本

软件及数据库配置完成后,需要运行配置脚本:
打开命令终端,切换到root用户,并执行脚本:

按照提示运行这两脚本
[root@database oraInventory]# ./orainstRoot.sh
Changing permissions of /home/app/oraInventory.
Adding read,write permissions for group.
Removing read,write,execute permissions for world.
Changing groupname of /home/app/oraInventory to oinstall.
The execution of the script is complete.
[root@database oraInventory]# cd /home/app/oracle/product/11.2.0/dbhome_1/
[root@database dbhome_1]# ./root.sh
Performing root user operation for Oracle 11g
The following environment variables are set as:
ORACLE_OWNER= oracle
ORACLE_HOME= /home/app/oracle/product/11.2.0/dbhome_1
Enter the full pathname of the local bin directory: [/usr/local/bin]: 【默认就好,直接回车】
Copying dbhome to /usr/local/bin ...
Copying oraenv to /usr/local/bin ...
Copying coraenv to /usr/local/bin ...
Creating /etc/oratab file...
Entries will be added to the /etc/oratab file as needed by
Database Configuration Assistant when a database is created
Finished running generic part of root script.
Now product-specific root actions will be performed.
Finished product-specific root actions.
创建监听
netca
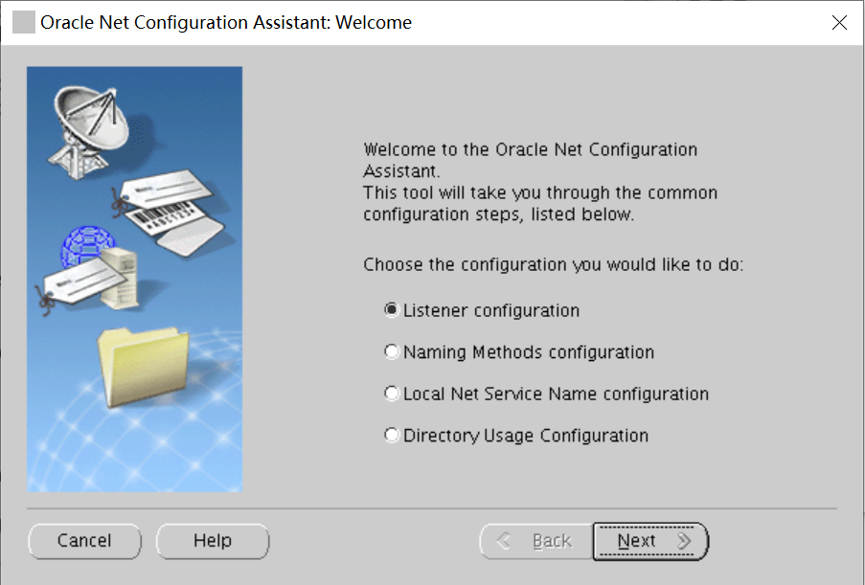
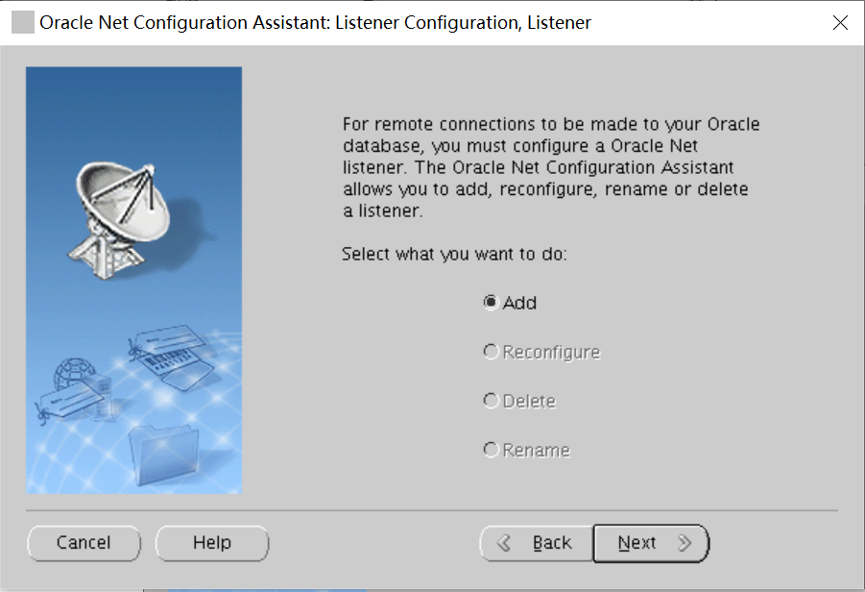


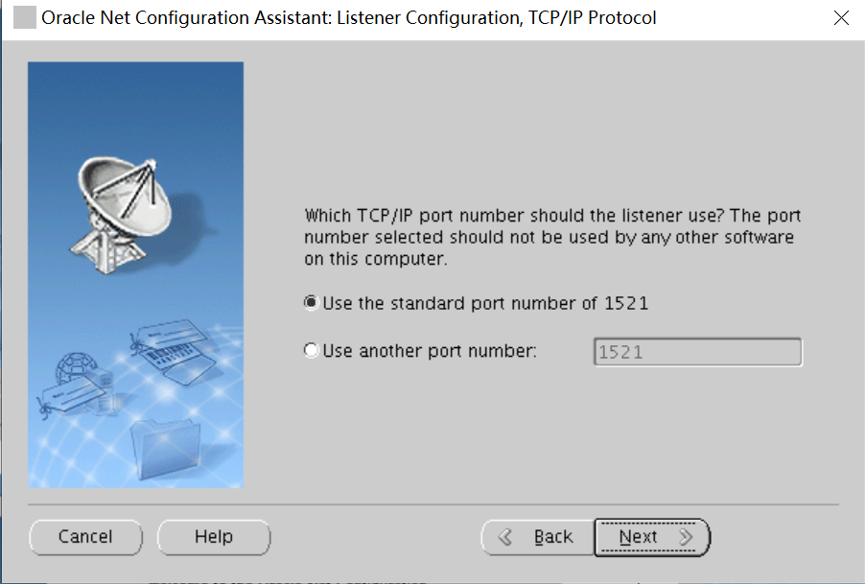


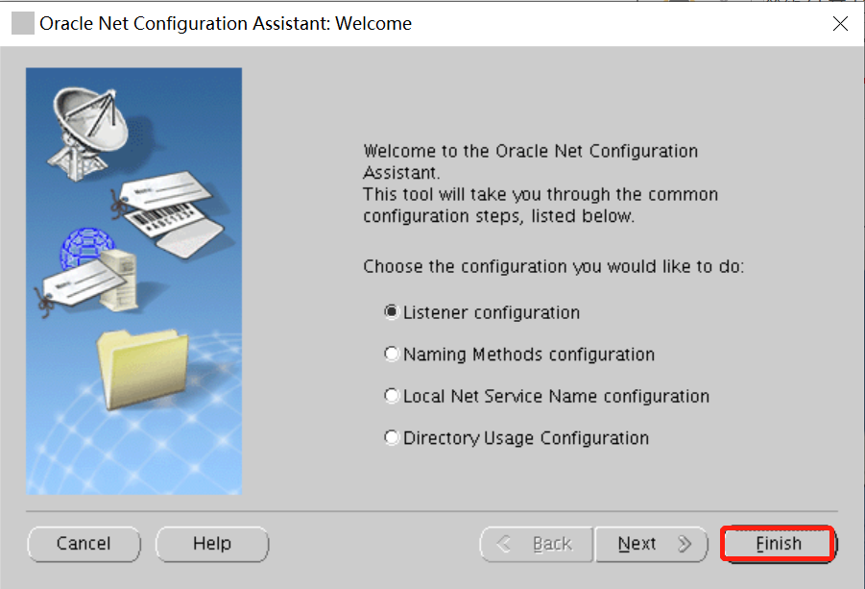
点击 Finish,完成创建。
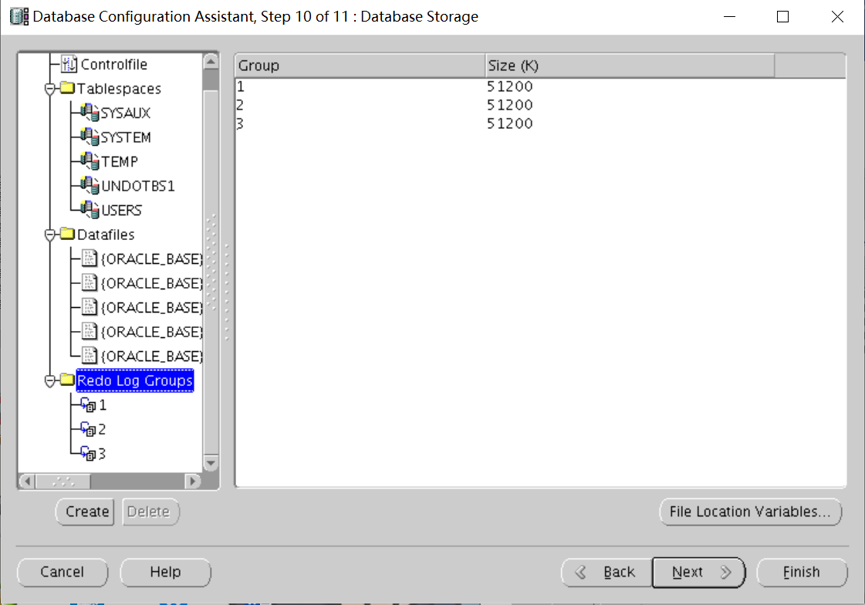
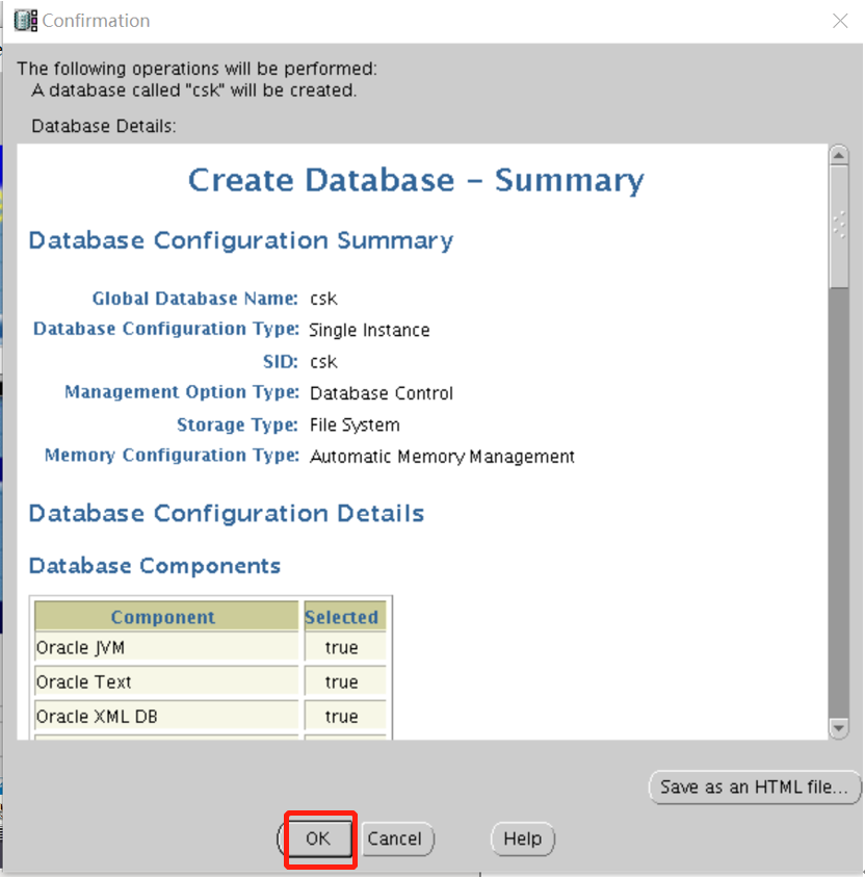
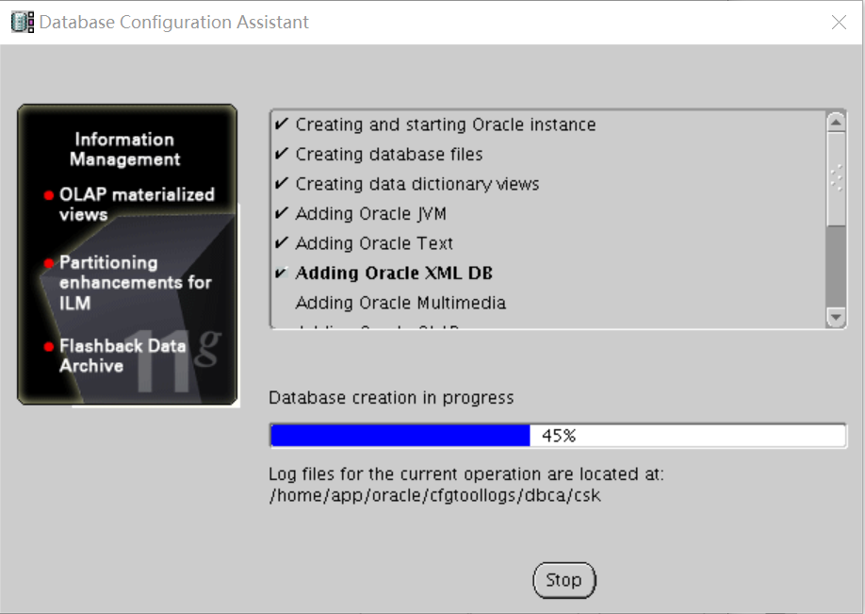
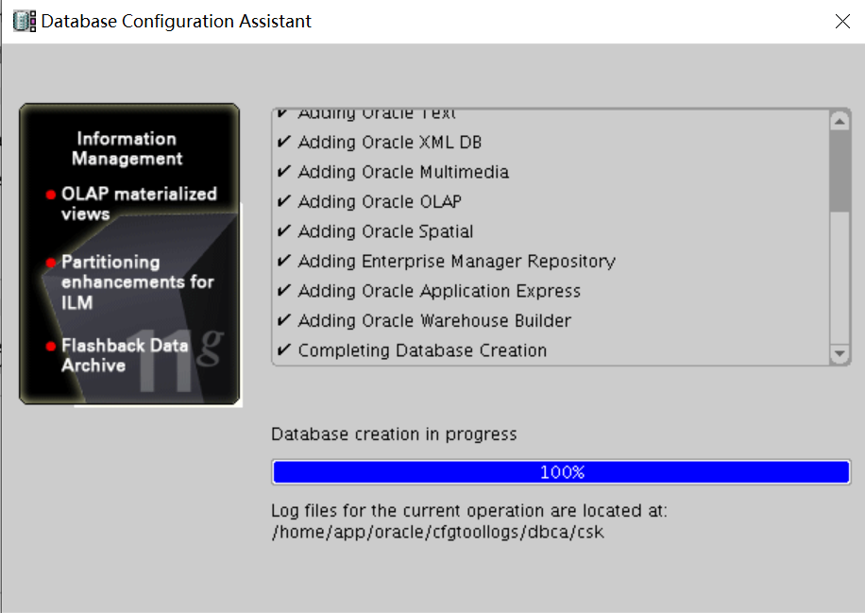
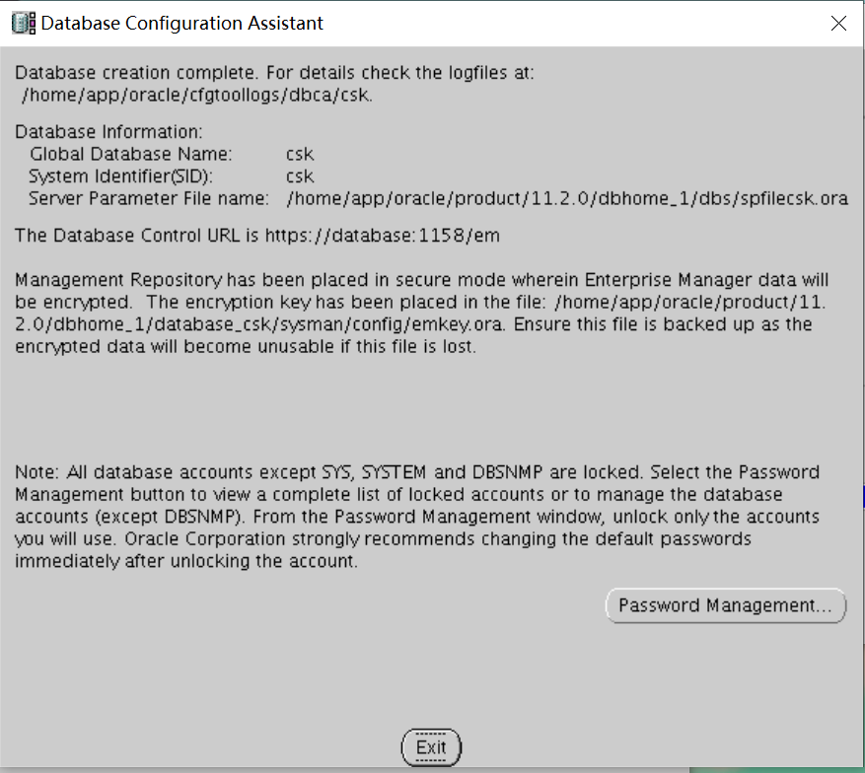
创建数据库
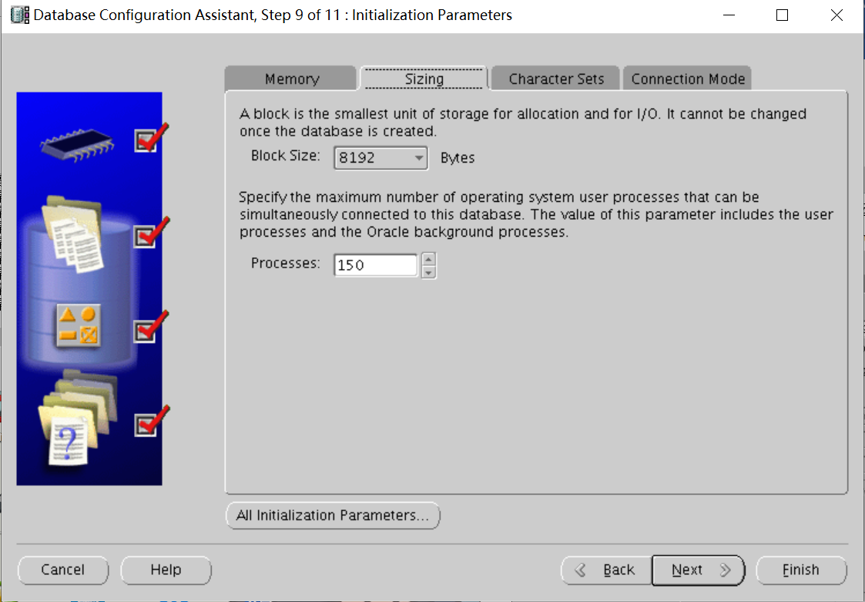
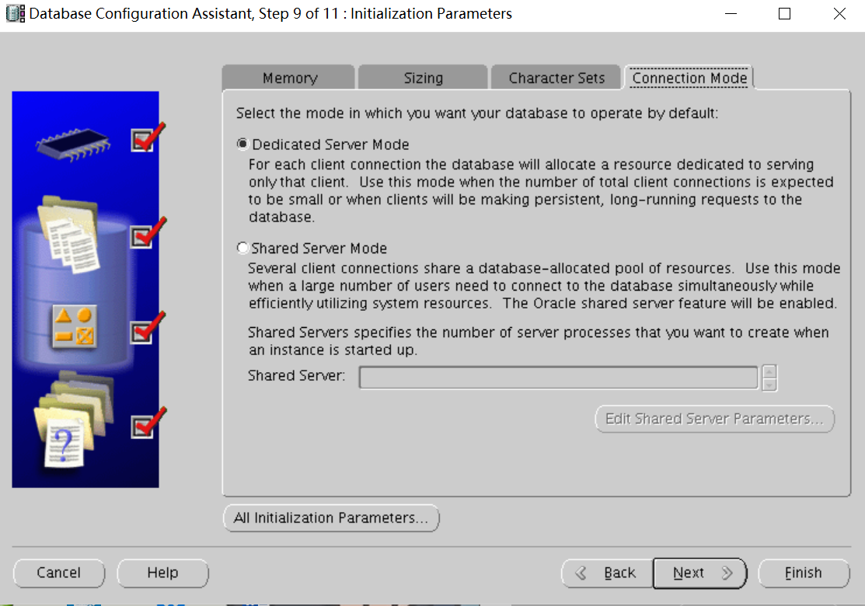
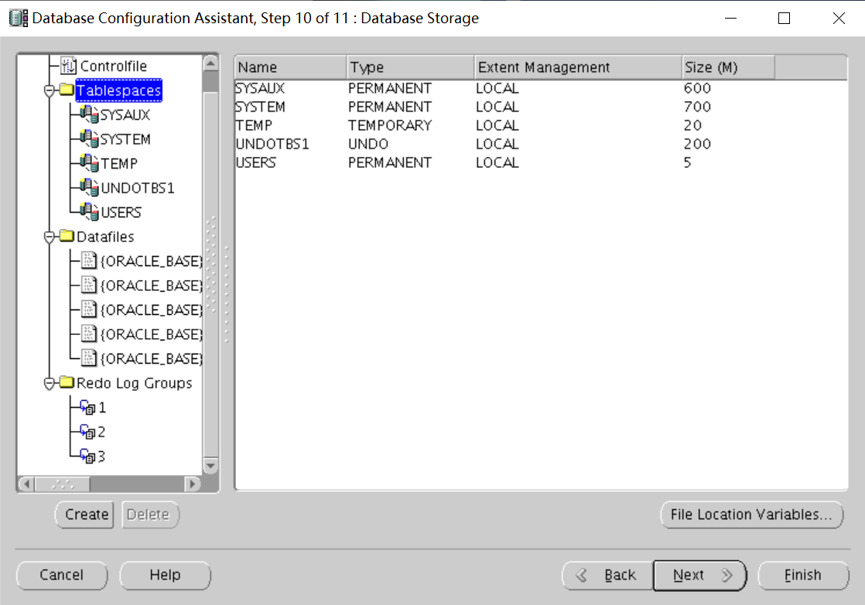
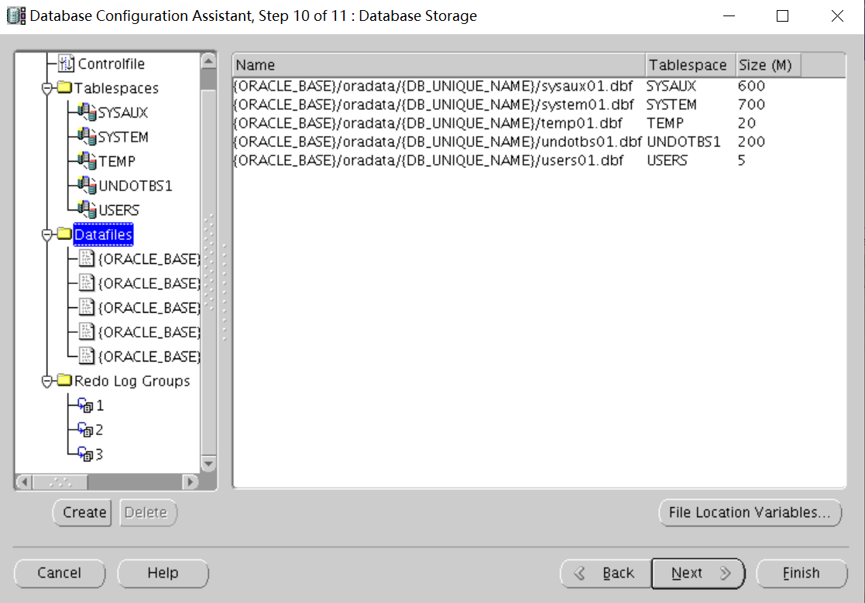
dbca
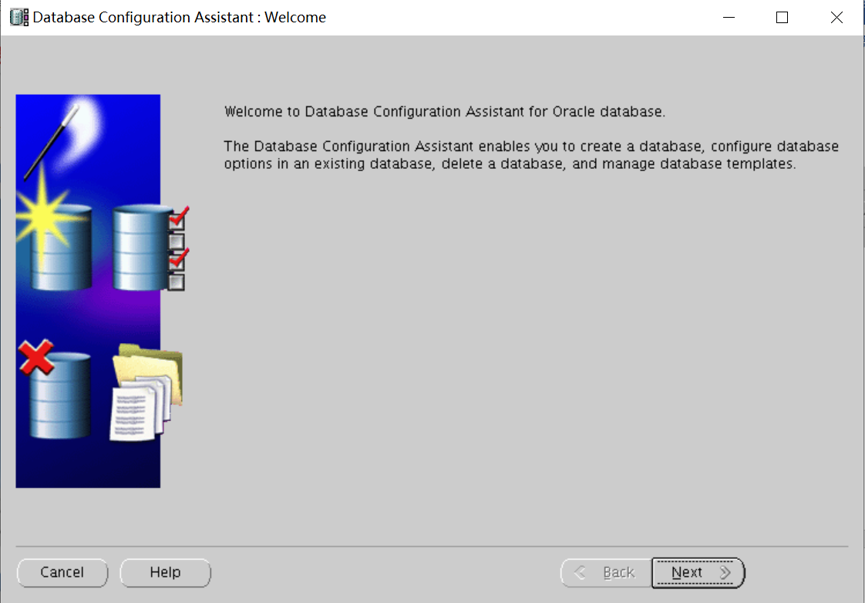
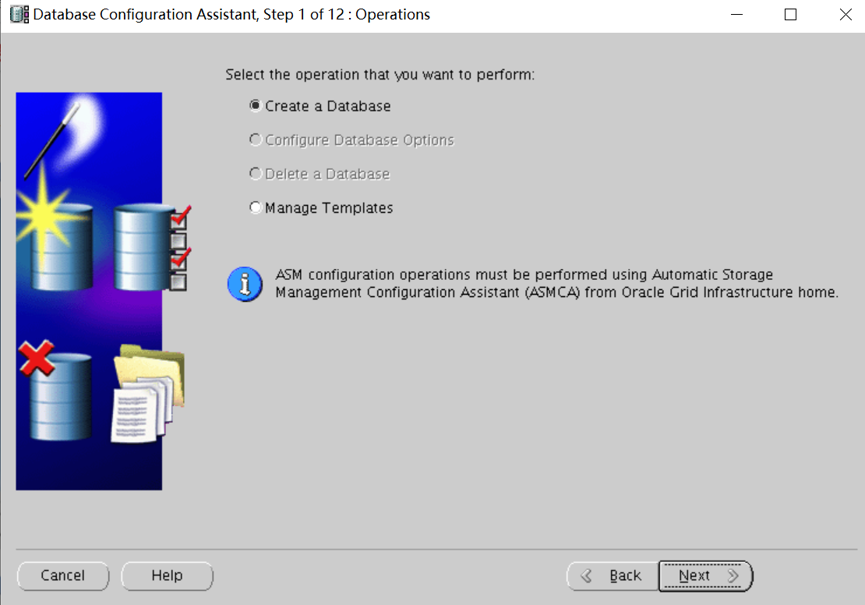
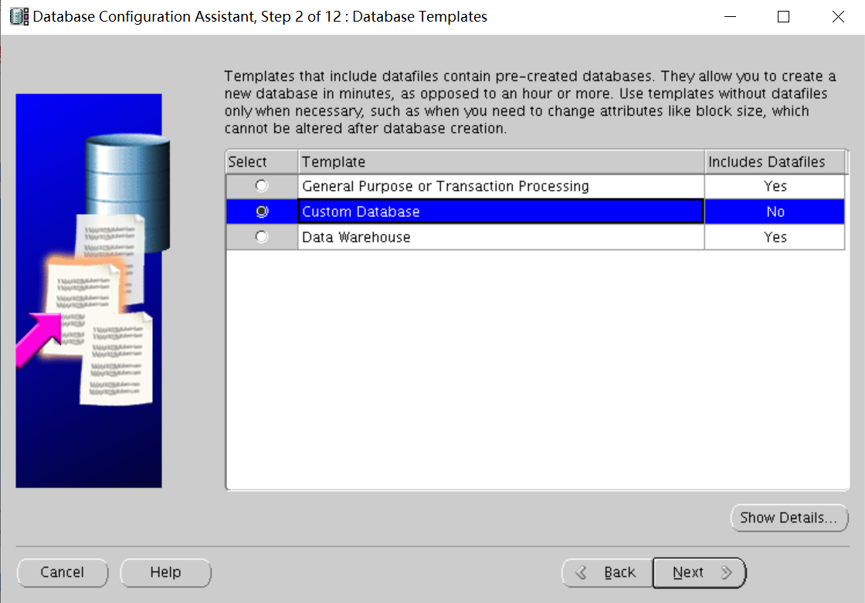
选择数据库模板
选择定制数据库

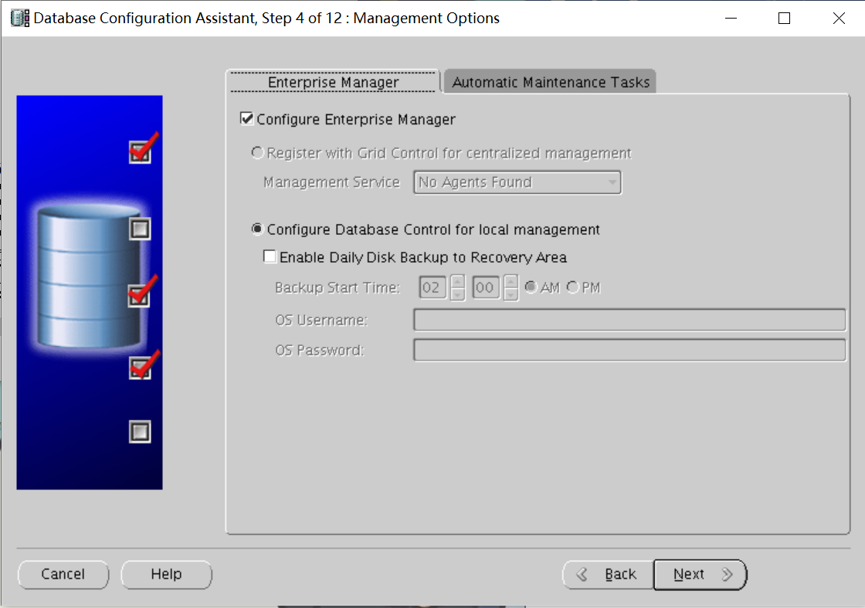
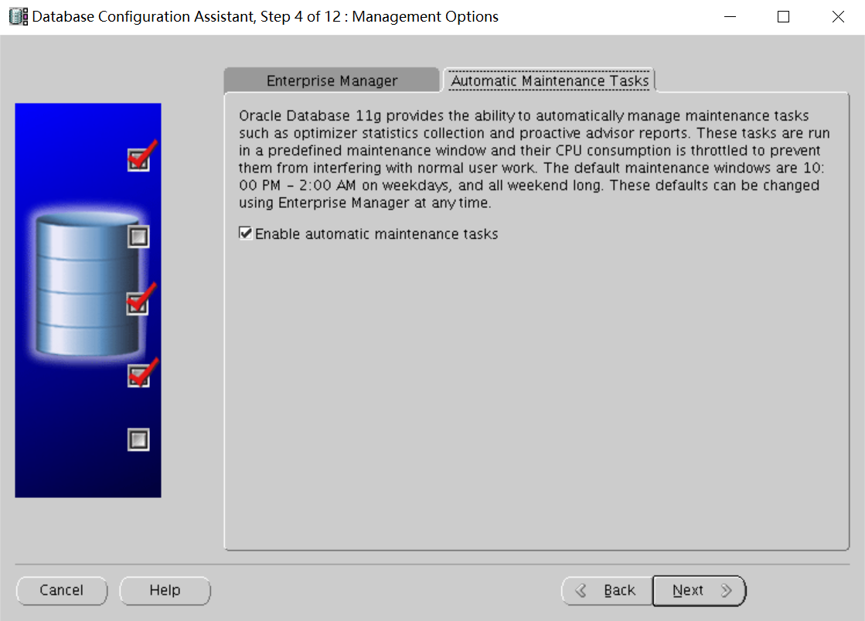
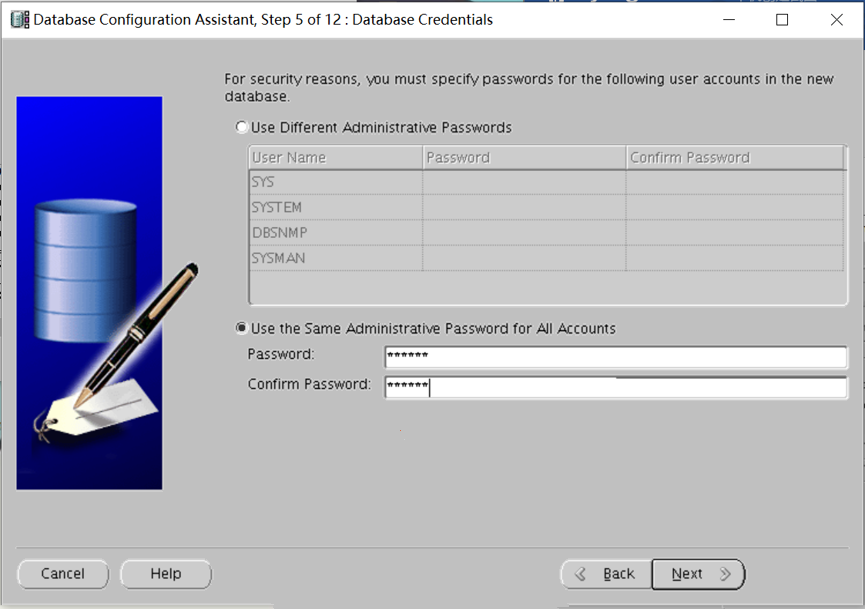
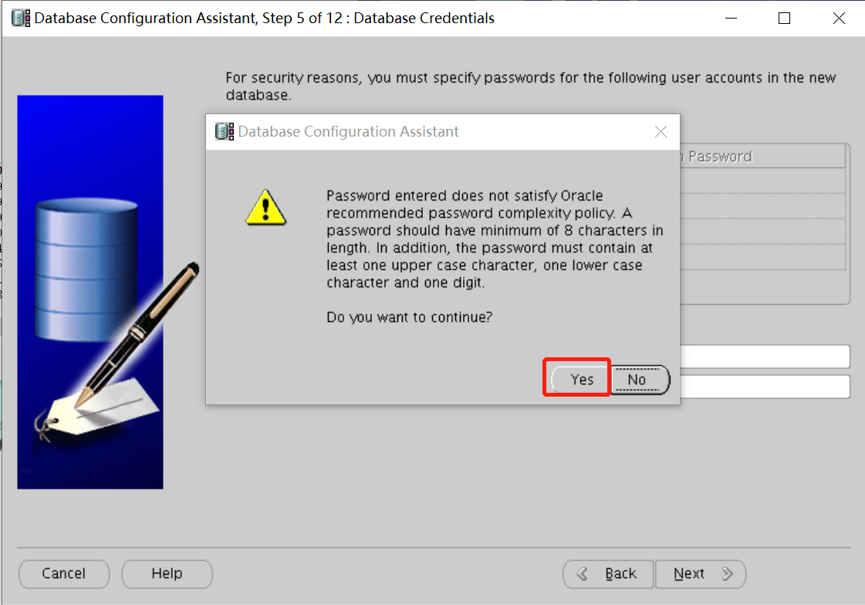
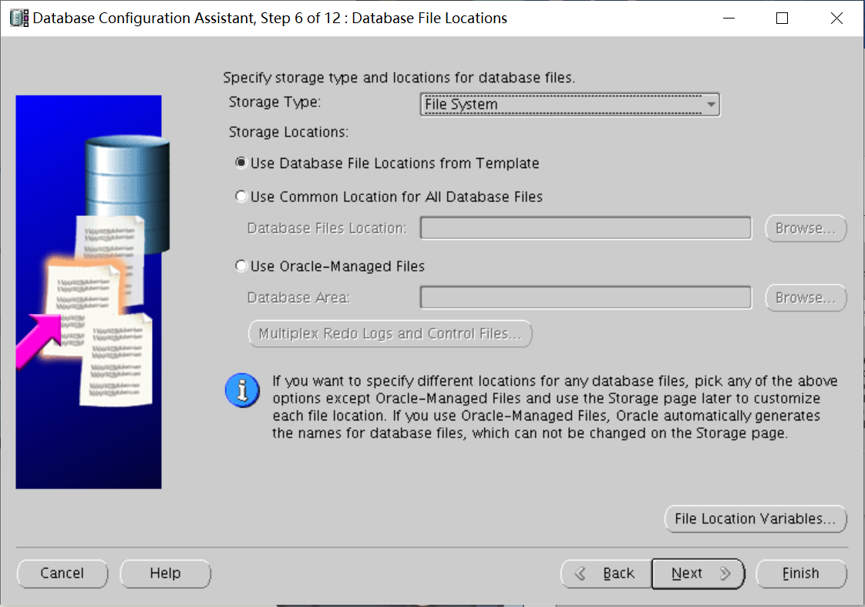
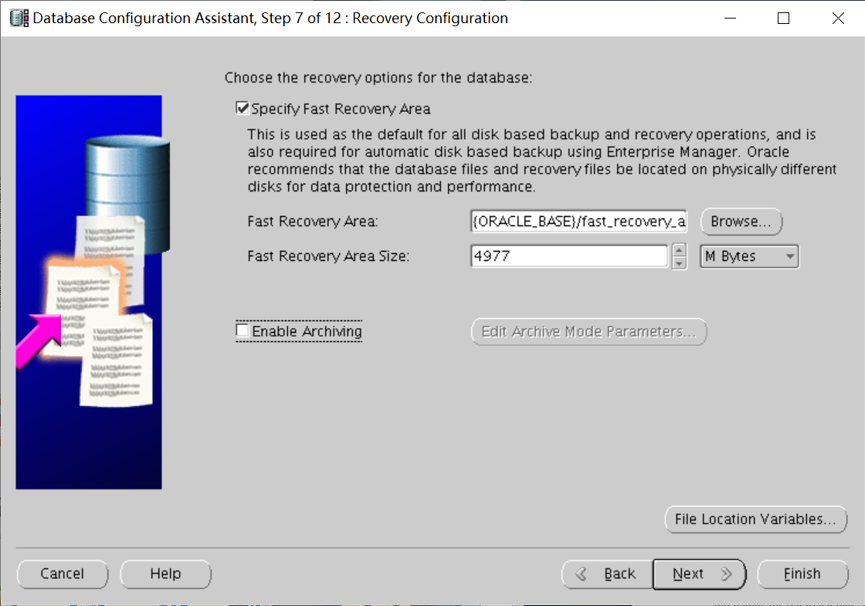
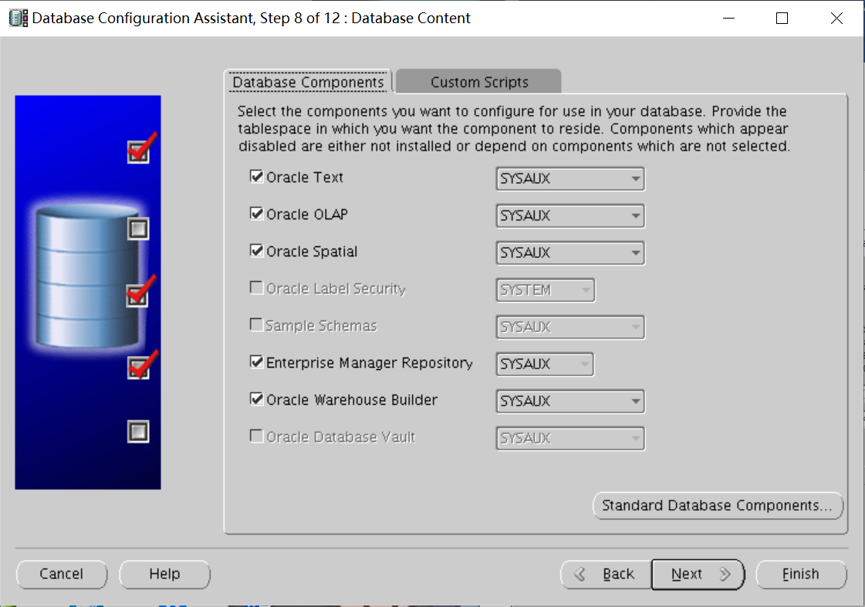
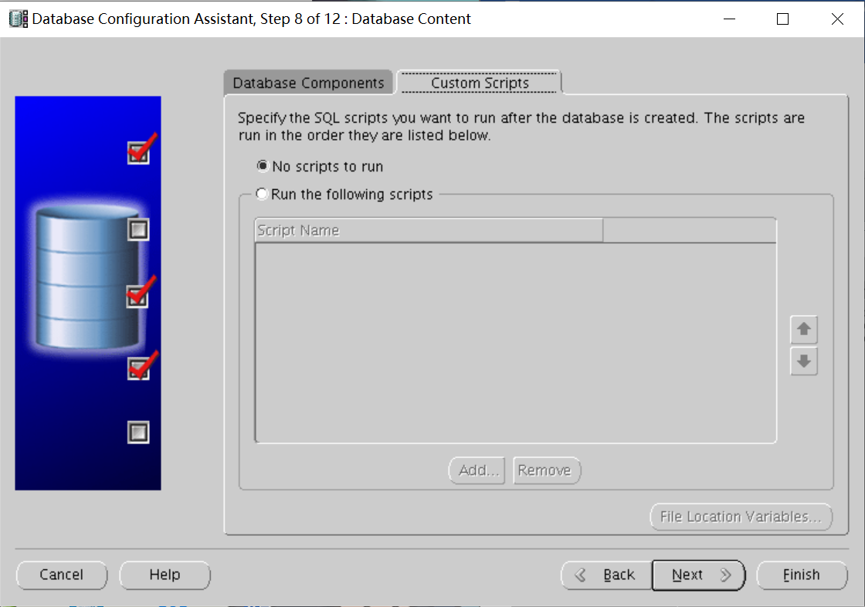
询问数据库创建后有没有SQL脚本运行,选择不运行。


oracle单机数据库搭建巨详细文档的更多相关文章
- MongoDB数据库、集合、文档的操作
MongoDB系列第一课:MongDB简介 MongoDB系列第二课:MongDB环境搭建 MongoDB系列第三课:MongDB用户管理 MongoDB系列第四课:MongoDB数据库.集合.文档的 ...
- DBImport v3.44 中文版发布:数据库数据互导及文档生成工具(IT人员必备)
前言: 距离上一个版本V3.3版本的文章发布,已经是1年10个月前的事了. 其实版本一直在更新,但也没什么大的功能更新,总体比较稳定,所以也不怎么写文介绍了. 至于工作上的事,之前有半年时间跑去学英语 ...
- 传智播客C/C++各种开发环境搭建视频工具文档免费教程
传智播客作为中国IT培训的领军品牌,一直把握技术趋势,给大家带来最新的技术分享!传智播客C/C++主流开发环境免费分享视频文档中,就有写一个helloworld程序的示范.火速前来下载吧 所谓&quo ...
- Docker最全教程之使用Node.js搭建团队技术文档站(二十三)
前言 各种编程语言均有其优势和生态,有兴趣的朋友完全可以涉猎多门语言.在平常的工作之中,也可以尝试选择相对适合的编程语言来完成相关的工作. 在团队技术文档站搭建这块,笔者尝试了许多框架,最终还是选择了 ...
- Oracle client客户端简易安装网上文档一
Oracle client客户端简易安装网上文档一-------------------------------------------------------------------------一. ...
- CM5(Cloudera Manager 5) + CDH5(Cloudera's Distribution Including Apache Hadoop 5)的安装详细文档
参考 :http://www.aboutyun.com/thread-9219-1-1.html Cloudera Manager5及CDH5在线(cloudera-manager-installer ...
- 在Linux 安装Python3.5.6详细文档!!!!
在Linux 安装Python3.5.6详细文档!!!! 1.安装相关依赖库(工具包) yum install gcc patch libffi-devel python-devel zlib-de ...
- 关于PowerDesigner导出数据库表到word文档
关于PowerDesigner导出数据库表到word文档 一.查看全部模板: powerdesigner默觉得我们提供了非常多的模版,在工具栏中选择[Report(报告)--->Report T ...
- Win10环境下,告别MarkdownPad,用Notepad++搭建编写md文档的环境
1. 为什么抛弃MarkdownPad 2 ? MarkdownPad坊间号称 Windows 环境下最好用的markdown编辑器-EXO me??? 博主入MarkdownPad 2 坑就是因为这 ...
随机推荐
- python数据类型:列表List和Set
python数据类型:列表List, Set集合 序列是Python中最基本的数据结构 序列中每个元素都分配一个数字,表示索引 列表的数据项不需要具有相同的类型 列表中的值可以重复并且有 ...
- python3多线程爬虫(第一卷)
多进程虽然使用方便,可以充分利用CPU,但是由于个进程之间是并行且各自有自己的数据存储,所以很难进行数据间的通信,需要接入第三方模块,现在我依旧用糗事百科讲解下多线程的应用,举个例子之前用4个进程同时 ...
- HDU-6312-Game
题意: 一个集合里有1到n,两个人轮流从中取数,取出一个数的同时这个数的因子也被取走.取走最后一个数者为胜.判断是否先手必胜. 思路: 一道挺有意思的博弈题.一开始在纸上列出了n为1到6的情况,发现都 ...
- Vimmer一套全语言支持的完美Vim配置——附Monaco字体
本配置轻量,强大,支持流行语言,包括现代前段框架react,jsx,vue,pug(jade)高亮和格式化,支持各种语言的自动补全.同时新增了MonacoNerd字体,可以显示文件类型logo,Mon ...
- Thymeleaf模板笔记
1.常用标签: 使用thymeleaf模板,首要在html中引入: <html xmlns:th="http://www.thymeleaf.org"> 引入css.j ...
- spring security之Remember Me
spring-security.xml配置 环境: spring版本:5.0.7.RELEASE spring-security.xml引入: http://www.springframework.o ...
- Typescript - 联合类型
原文:TypeScript基本知识点整理 零.序言 联合类型表示一个变量值可以是几种类型之一,我们可以使用 “|” 来分割每个类型: 联合类型的变量在被赋值时,会根据类型推断的规则推断出一个类型: 如 ...
- Analysis of Hello2 source code
Hello2 应用程序是一个 Web 模块,它使用 Java Servlet 技术来显示问候语和响应,使用的是 Java Servlet 技术. 该应用程序源代码在 tutorial-examples ...
- Keepalived+Haproxy搭建高可用负载均衡
Keepalived 简单的是一个路由的软件用C写的这个项目的主要目标是提供简单而强大的设施的负载均衡和高可用性对Linux系统和基于Linux的基础设施.负载均衡架构依赖于众所周知的和广泛使用的Li ...
- 方兴未艾的云计算:SoCC 2015大会
ACM 云计算研讨会(ACM Symposium on Cloud Computing, 以下简称SoCC)是由SIGMOD(Special Interest Group on Management ...
