ubuntu 18.04编译opencv3.4.3 with python3.6 cuda9.2 gdal
惭愧,之前一直没在linux下编译过opencv,也没用过纯命令行版的cmake,现在咬牙编译一次。其实感觉还凑合。
opencv官网文档还是那么烂:https://docs.opencv.org/master/d7/d9f/tutorial_linux_install.html
按这个安装,还是会缺很多选项。
只好参考好几个blog大概增加下面这些,应该就没啥问题了
比较有用的参考:https://github.com/BVLC/caffe/wiki/OpenCV-3.3-Installation-Guide-on-Ubuntu-16.04
1确保屏蔽anaconda
卡了2天,这真是个巨坑!在和caffe里才发现 https://github.com/BVLC/caffe/issues/1559
如果已经安装了anaconda,那么which python3 会显示路径是anaconda下的,连带的LD_LIBRARY等等路径,都会优先找这里,直接导致WITH_GDAL编译opencv时,libtiff.so也会找到anaconda路径里, 结果就是WITH_GDAL死活make不过(WITH_TIFF + BUILD_TIFF可以,但是没了直接的GDAL支持。)
解决办法:
sudo xed ~/.profile
确保 注释掉了 这行
#PATH="$HOME/anaconda3/bin:$PATH"
然后
sudo xed ~/.bashrc
确保最后几行 都是注释掉的
#PATH="/home/machinelearning/anaconda3/bin:$PATH"
# added by Anaconda3 installer
# export PATH="/home/machinelearning/anaconda3/bin:$PATH"
然后注销一下,确认一下python3的路径
which python3
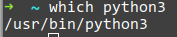
显示这样就OK了
2 Before Installation
如果不愿意细分依赖库,直接参考这里 Installation OpenCV 3.4.1 on Ubuntu 17.10
sudo apt install -y \

        x264 \

        mesa-utils \

        libgtk2.-dev \

        libxvidcore-dev \

        yasm \

        libxine2-dev \

        libgstreamer1.-dev libgstreamer-plugins-base1.-dev \

        libv4l-dev \

        libfaac-dev \

        libmp3lame-dev \

        libopencore-amrnb-dev \

        libtheora-dev \

        libvorbis-dev \

        ffmpeg \

        libpng-dev \

        libdc1394--dev \

        qt5-default \

        libtiff5-dev \

        libeigen3-dev libeigen3-doc \

        tesseract-ocr \

        tesseract-ocr-jpn \

        vtk6 \

        tcl-vtk6 \

        python-vtk6 \

        libgflags-dev \

        libleptonica-dev \

        libtesseract-dev \

        gphoto2 \

        liblapacke-dev \

        libgoogle-glog-dev \

        libprotobuf-dev \

        libprotoc-dev \

        protobuf-compiler \

        ccache \

        libgphoto2-dev \

        libavresample-dev \

        libvtk6-dev \

        libvtk6-qt-dev \

        libatlas-base-dev \

        gfortran
也可以细分一下各依赖库
图片格式和gdal
sudo apt-get install --assume-yes libgdal-dev libgtk-3-dev libdc1394-22 libdc1394-22-dev libjpeg-dev libtiff5-dev注意这里,libgdal-dev是必装的,因为编译时带着gdal编译了。但tiff比较纠结, opencv里用tiff都是4.0 而这里安装的是5(ubuntu 在14.04之后就没有libtiff4了), 在编译gdal的时候可能会报错。所以后面编译选项里要有2个和tiff有关的选项。
eigen
sudo apt-get install libeigen3-dev
opengl
如果你开发的是命令行程序并不显示任何图像,或者显示的图片很简单,那么不需要转换到 cv::ogl 下。
如果你的应用耗费了大量时间在图片的显示上,或是希望拥有高质量的界面系统,那么你可以借助 cv::ogl::Texture2D 加速图像的渲染。
如果你开发的是增强现实应用,你肯定已经拥有了自己的三维渲染模块,可以考虑与 cv::ogl::Buffer 整合。
如果你已经在使用 CUDA 模块,对于渲染的时候数据需要回传到 CPU 表示多此一举,那么你可以使用 CUDA 与 OpenGL 的协同功能去除多余的数据传输。
另一方面,如果你不是 OpenCV 的用户但是你正在开发虚拟现实应用,你可以考虑将视觉计算引入到你的系统中,实现类似 HoloLens 的设备。
文档:
sudo apt-get install doxygen
TBB及其他
sudo apt-get install --assume-yes libv4l-dev libtbb-dev libfaac-dev libmp3lame-dev libopencore-amrnb-dev libopencore-amrwb-dev libtheora-dev

sudo apt-get install --assume-yes libvorbis-dev libxvidcore-dev v4l-utils vtk6

sudo apt-get install --assume-yes liblapacke-dev libopenblas-dev libgdal-dev checkinstall
lapack
sudo apt-get install libatlas-base-devSET(Open_BLAS_INCLUDE_SEARCH_PATHS$ENV{OpenBLAS_HOME}$ENV{OpenBLAS_HOME}/include/opt/OpenBLAS/include/usr/local/include/openblas/usr/include/openblas/usr/local/include/openblas-base/usr/include/openblas-base/usr/local/include/usr/include/usr/include/x86_64-linux-gnu)SET(Open_BLAS_LIB_SEARCH_PATHS$ENV{OpenBLAS}cd$ENV{OpenBLAS}/lib$ENV{OpenBLAS_HOME}$ENV{OpenBLAS_HOME}/lib/opt/OpenBLAS/lib/usr/local/lib64/usr/local/lib/lib/openblas-base/lib64//lib//usr/lib/openblas-base/usr/lib64/usr/lib/usr/lib/x86_64-linux-gnu)
3 cmake
直接复制运行
cmake ~/opencv\
-DCMAKE_BUILD_TYPE=Release\
-DCMAKE_INSTALL_PREFIX=/usr/local\
-DOPENCV_EXTRA_MODULES_PATH=~/opencv_contrib/modules\
-DBUILD_DOCS=ON\
-DBUILD_EXAMPLES=ON\
-DWITH_TBB=ON\
-DBUILD_TIFF=ON -DWITH_TIFF=ON\
-DWITH_GDAL=ON\
-DWITH_LIBV4L=ON\
-DPYTHON_DEFAULT_EXECUTABLE=/usr/bin/python3\
-DWITH_CUDA=ON -DWITH_CUBLAS=ON -DCUDA_NVCC_FLAGS="-D_FORCE_INLINES"\
-DWITH_OPENCL=OFF\
-DWITH_VTK=OFF\
-DBUILD_opencv_python2=OFF \
-DBUILD_opencv_xfeatures2d=OFF
-- General configuration for OpenCV 4.0.0-pre =====================================
-- Version control: 3.4.3-249-g80610ca05
--
-- Extra modules:
-- Location (extra): /home/machinelearning/opencv_contrib/modules
-- Version control (extra): 3.4.3-56-g5c362968
--
-- Platform:
-- Timestamp: 2018-09-11T03:10:03Z
-- Host: Linux 4.15.0-34-generic x86_64
-- CMake: 3.12.1
-- CMake generator: Unix Makefiles
-- CMake build tool: /usr/bin/make
-- Configuration: Release
--
-- CPU/HW features:
-- Baseline: SSE SSE2 SSE3
-- requested: SSE3
-- Dispatched code generation: SSE4_1 SSE4_2 FP16 AVX AVX2 AVX512_SKX
-- requested: SSE4_1 SSE4_2 AVX FP16 AVX2 AVX512_SKX
-- SSE4_1 (4 files): + SSSE3 SSE4_1
-- SSE4_2 (2 files): + SSSE3 SSE4_1 POPCNT SSE4_2
-- FP16 (1 files): + SSSE3 SSE4_1 POPCNT SSE4_2 FP16 AVX
-- AVX (6 files): + SSSE3 SSE4_1 POPCNT SSE4_2 AVX
-- AVX2 (10 files): + SSSE3 SSE4_1 POPCNT SSE4_2 FP16 FMA3 AVX AVX2
-- AVX512_SKX (1 files): + SSSE3 SSE4_1 POPCNT SSE4_2 FP16 FMA3 AVX AVX2 AVX_512F AVX512_SKX
--
-- C/C++:
-- Built as dynamic libs?: YES
-- C++ Compiler: /usr/bin/c++ (ver 7.3.0)
-- C++ flags (Release): -fsigned-char -W -Wall -Werror=return-type -Werror=non-virtual-dtor -Werror=address -Werror=sequence-point -Wformat -Werror=format-security -Wmissing-declarations -Wundef -Winit-self -Wpointer-arith -Wshadow -Wsign-promo -Wuninitialized -Winit-self -Wsuggest-override -Wno-narrowing -Wno-delete-non-virtual-dtor -Wno-comment -Wimplicit-fallthrough=3 -Wno-strict-overflow -fdiagnostics-show-option -Wno-long-long -pthread -fomit-frame-pointer -ffunction-sections -fdata-sections -msse -msse2 -msse3 -fvisibility=hidden -fvisibility-inlines-hidden -O3 -DNDEBUG -DNDEBUG
-- C++ flags (Debug): -fsigned-char -W -Wall -Werror=return-type -Werror=non-virtual-dtor -Werror=address -Werror=sequence-point -Wformat -Werror=format-security -Wmissing-declarations -Wundef -Winit-self -Wpointer-arith -Wshadow -Wsign-promo -Wuninitialized -Winit-self -Wsuggest-override -Wno-narrowing -Wno-delete-non-virtual-dtor -Wno-comment -Wimplicit-fallthrough=3 -Wno-strict-overflow -fdiagnostics-show-option -Wno-long-long -pthread -fomit-frame-pointer -ffunction-sections -fdata-sections -msse -msse2 -msse3 -fvisibility=hidden -fvisibility-inlines-hidden -g -O0 -DDEBUG -D_DEBUG
-- C Compiler: /usr/bin/cc
-- C flags (Release): -fsigned-char -W -Wall -Werror=return-type -Werror=non-virtual-dtor -Werror=address -Werror=sequence-point -Wformat -Werror=format-security -Wmissing-declarations -Wmissing-prototypes -Wstrict-prototypes -Wundef -Winit-self -Wpointer-arith -Wshadow -Wuninitialized -Winit-self -Wno-narrowing -Wno-comment -Wimplicit-fallthrough=3 -Wno-strict-overflow -fdiagnostics-show-option -Wno-long-long -pthread -fomit-frame-pointer -ffunction-sections -fdata-sections -msse -msse2 -msse3 -fvisibility=hidden -O3 -DNDEBUG -DNDEBUG
-- C flags (Debug): -fsigned-char -W -Wall -Werror=return-type -Werror=non-virtual-dtor -Werror=address -Werror=sequence-point -Wformat -Werror=format-security -Wmissing-declarations -Wmissing-prototypes -Wstrict-prototypes -Wundef -Winit-self -Wpointer-arith -Wshadow -Wuninitialized -Winit-self -Wno-narrowing -Wno-comment -Wimplicit-fallthrough=3 -Wno-strict-overflow -fdiagnostics-show-option -Wno-long-long -pthread -fomit-frame-pointer -ffunction-sections -fdata-sections -msse -msse2 -msse3 -fvisibility=hidden -g -O0 -DDEBUG -D_DEBUG
-- Linker flags (Release):
-- Linker flags (Debug):
-- ccache: YES
-- Precompiled headers: NO
-- Extra dependencies: m pthread cudart_static -lpthread dl rt nppc nppial nppicc nppicom nppidei nppif nppig nppim nppist nppisu nppitc npps cublas cufft -L/usr/local/cuda/lib64 -L/usr/lib/x86_64-linux-gnu
-- 3rdparty dependencies:
--
-- OpenCV modules:
-- To be built: aruco bgsegm bioinspired calib3d ccalib core cudaarithm cudabgsegm cudacodec cudafeatures2d cudafilters cudaimgproc cudalegacy cudaobjdetect cudaoptflow cudastereo cudawarping cudev datasets dnn dnn_objdetect dpm face features2d flann freetype fuzzy hdf hfs highgui img_hash imgcodecs imgproc java_bindings_generator line_descriptor ml objdetect optflow phase_unwrapping photo plot python3 python_bindings_generator reg rgbd saliency shape stereo stitching structured_light superres surface_matching text tracking ts video videoio videostab ximgproc xobjdetect xphoto
-- Disabled: js python2 world xfeatures2d
-- Disabled by dependency: sfm
-- Unavailable: cnn_3dobj cvv java matlab ovis viz
-- Applications: tests perf_tests examples apps
-- Documentation: doxygen python
-- Non-free algorithms: NO
--
-- GUI:
-- GTK+: YES (ver 3.22.30)
-- GThread : YES (ver 2.56.2)
-- GtkGlExt: NO
--
-- Media I/O:
-- ZLib: /usr/lib/x86_64-linux-gnu/libz.so (ver 1.2.11)
-- JPEG: /usr/lib/x86_64-linux-gnu/libjpeg.so (ver 80)
-- WEBP: /usr/lib/x86_64-linux-gnu/libwebp.so (ver encoder: 0x020e)
-- PNG: /usr/lib/x86_64-linux-gnu/libpng.so (ver 1.6.34)
-- TIFF: build (ver 42 - 4.0.9)
-- JPEG 2000: build (ver 1.900.1)
-- OpenEXR: build (ver 1.7.1)
-- GDAL: YES (/usr/lib/libgdal.so)
-- HDR: YES
-- SUNRASTER: YES
-- PXM: YES
-- PFM: YES
--
-- Video I/O:
-- DC1394: YES (ver 2.2.5)
-- FFMPEG: YES
-- avcodec: YES (ver 57.107.100)
-- avformat: YES (ver 57.83.100)
-- avutil: YES (ver 55.78.100)
-- swscale: YES (ver 4.8.100)
-- avresample: YES (ver 3.7.0)
-- GStreamer:
-- base: YES (ver 1.14.1)
-- video: YES (ver 1.14.1)
-- app: YES (ver 1.14.1)
-- riff: YES (ver 1.14.1)
-- pbutils: YES (ver 1.14.1)
-- libv4l/libv4l2: 1.14.2 / 1.14.2
-- v4l/v4l2: linux/videodev2.h
--
-- Parallel framework: TBB (ver 2017.0 interface 9107)
--
-- Trace: YES (with Intel ITT)
--
-- Other third-party libraries:
-- Lapack: YES (/usr/lib/x86_64-linux-gnu/liblapack.so /usr/lib/x86_64-linux-gnu/libcblas.so /usr/lib/x86_64-linux-gnu/libatlas.so)
-- Eigen: YES (ver 3.3.4)
-- Custom HAL: NO
-- Protobuf: build (3.5.1)
--
-- NVIDIA CUDA: YES (ver 9.2, CUFFT CUBLAS NVCUVID)
-- NVIDIA GPU arch: 30 35 37 50 52 60 61 70
-- NVIDIA PTX archs:
--
-- Python 3:
-- Interpreter: /usr/bin/python3 (ver 3.6.5)
-- Libraries: /usr/lib/x86_64-linux-gnu/libpython3.6m.so (ver 3.6.5)
-- numpy: /usr/local/lib/python3.6/dist-packages/numpy/core/include (ver 1.15.1)
-- packages path: lib/python3.6/dist-packages
--
-- Python (for build): /usr/bin/python3
-- Pylint: /usr/local/bin/pylint (ver: 3.6.5, checks: 160)
--
-- Java:
-- ant: NO
-- JNI: NO
-- Java wrappers: NO
-- Java tests: NO
--
-- Matlab: NO
--
-- Install to: /usr/local
-- -----------------------------------------------------------------
--
-- Configuring done
-- Generating done
-- Build files have been written to: /home/machinelearning/opencv_build
如果是屏蔽了anaconda 应该就不会报错了。
基本上大部分视频,图片格式都支持这是最基本的。我用到的特性都标红了。注意tiff那行,是build,如果编译选项没有强制ON
则会是 /usr/lib/x86_64-linux-gnu/libtiff.so (ver 42 / 4.0.9) 那么make时走到gdal的时候,会报错。
参考http://answers.opencv.org/question/35642/libtiff_40-link-errors/
只要最后不是这样,如果有各种提示,比如libopencl.so怎么被hide之类的,或者python3没找到,就卸载点包。再试试,应该是干干净净的没有任何警告才对。
别忘了每次清空当前文件夹
最后就是漫长的编译过程
make -j8开8个进程并行编译!
别忘了
sudo make install
心得
当年在学校,一直在win下用cmake-gui编译opencv2.X. 和现在比起来,其实还是linux下用cli编译更舒服。
首先,安装各种包直接apt,不需要自己到处下载zip解压,安装exe
然后,其实全部复杂性都在cmake 那句话里了。在文本编辑器里编辑好,用好续行符。其实没什么难的。但是要吃透每个-D选项,确实是google一番,特别是配置出错的时候,尤其是python那一堆路径。
不耐心+恐惧感,会导致不敢去学CLI。其实无非只是心魔而已。
充分感受《unix编程艺术》:
文本化接口: cmake 命令行1行代码-> CMakeLists.txt 67k ->makefile 500k 可以根据print出来的配置信息,检查makefile是否包含了自己期望的特性。 实现的是用一行代码,若干个-D配置项,不断生成配置文件,用较少的代码去生成更多的代码。
生成原则/自动化/CLI接口: 避免手写makefile这样的配置文件,而是用cli生成它
ubuntu 18.04编译opencv3.4.3 with python3.6 cuda9.2 gdal的更多相关文章
- Ubuntu 18.04 编译 ijkplayer
Ubuntu 18.04 编译 ijkplayer 1. 配置安装源 https://mirrors.tuna.tsinghua.edu.cn/help/ubuntu 2. 配置好安装源后,安装一些组 ...
- Ubuntu 18.04编译AOSP源码
总结一下我从Ubuntu 18.04下编译成功AOSP的过程,以及遇到的坑 我的电脑配置: OS: Ubuntu 18.04 bionic Kernel: x86_64 Linux 4.18.0-17 ...
- anaconda3 安装opencv3.4.2 cuda9.2 mint19(ubuntu 18.04)
从opencv1的时代,编译这玩意就不是太轻松.之前都是在win下.2.x时代,开始用cmake GUI,选vs版本,x86 x64 各种依赖库选项,debug release,... 现在3.4了, ...
- [笔记] Ubuntu 18.04源码编译安装OpenCV 4.0流程
标准常规安装方法安装的OpenCV版本比较低,想尝鲜使用4.0版本,只好源码安装. 安装环境 OS:Ubuntu 18.04 64 bit 显卡:NVidia GTX 1080 CUDA:10.0 c ...
- ubuntu 18.04下编译最新版本的KMS
KMS:kurento媒体服务,即 kurento media server 很庞大的一个WEBRTC项目,GIT库主项目:https://github.com/Kurento 基础实现,修改了gst ...
- Ubuntu 18.04 手动编译安装 ffmpeg
ffmpeg 是一个由提供对视频.音频和其他多媒体流文件进行处理功能的库和程序构成的自由软件项目,其常被用于适用于不同格式的音频和视频的录影.转换和流处理等场合.这里记录在 Ubuntu 18.04 ...
- 加密通信软件Signal 2.92版本编译安装折腾手记(Ubuntu 18.04)
加密通信软件Signal 2.92版本编译安装折腾手记(Ubuntu 18.04) 前言 加密通信软件Signal是开源的,安全性很高,号称斯诺登也推荐大家使用.既然这么好,那必然会有不少人去尝试复制 ...
- Ubuntu 18.04 WMware 编译 AOSP android-7.1.2_r33 笔记
0 前言 问:都快2022年了,为什么还要编译 android 7.1.2 ? 答:某脱壳机特征修改或移植到其他机型(此处省略1000字...) 笔者在编译之前并没有加入专有二进制文件(后续加入了再补 ...
- 在Ubuntu 18.04上安装OpenCV 4(C ++和Python)
OpenCV于11月20日发布了OpenCV-3.4.4和OpenCV-4.0.0.这些版本中有很多错误修复和其他更改.发布重点如下: OpenCV现在是C ++ 11库,需要符合C ++ 11标准的 ...
随机推荐
- Docker MySQL5.5镜像
定制MySQL的镜像有个很大的难题:mysqld启动之前要初始化数据目录,5.5自带有空账号密码需要初始化. Dockerfile FROM centos # 拷贝需要的安装和MySQL初始脚本 CO ...
- Golang错误处理函数defer、panic、recover、errors.New介绍
在默认情况下,当发生错误(panic)后,程序就会终止运行 如果发生错误后,可以捕获错误,并通知管理人员(邮件或者短信),程序还可以继续运行,这当然无可厚非 errors.New("错误信息 ...
- eclipse maven Errors while generating javadoc on java8
With JDK 8, we are unable to get Javadoc unless your tool meets the standards of doclint. Some of it ...
- SaaS公司融资的「22条军规 」(转)
编者按:本文是SaaS教父Jason Lemkin的一篇分享.他在文章中分享了他不投资一家公司的22条理由,希望对打算融资和正在融资的你有所启发. 为何有的早期创业公司能成功融资,而有的公司融资却屡遭 ...
- 02: djangorestframework使用
1.1 djangorestframework登录.认证和权限 1.认证与权限相关模块 # -*- coding: utf-8 -*- from django.utils import six fro ...
- Android之扫描文件或文件夹
我们或许经常会遇到这种情况,明明保存了图片,但是当你打开图片时,却没有找到这张图片,手机重启之后才能看到.这是因为SD卡并没有重新挂载,图库也无法把这张图片加载进去,解决这个问题非常简单,只需要我们重 ...
- 关于sql中in 和 exists 的效率问题
在用in的地方可以使用freemark标签代替,例如: 将 <#if assistantList??&& (assistantList?size > 0)> AND ...
- Python3基础 list reverse 反转列表
Python : 3.7.0 OS : Ubuntu 18.04.1 LTS IDE : PyCharm 2018.2.4 Conda ...
- C语言goto语句的使用
不使用goto语句: 使用goto语句: 使用goto语句时需要注意以下原则:1) 不要过份地使用.比如图2中的60行就没有采用goto语句跳到程序的最后面,之所以这里不使用goto是为了阅读方便.因 ...
- Derek解读Bytom源码-孤块管理
作者:Derek 简介 Github地址:https://github.com/Bytom/bytom Gitee地址:https://gitee.com/BytomBlockchain/bytom ...