Android Launcher分析和修改7——AllApp全部应用列表(AppsCustomizeTabHost)
今天主要是分析一下Launcher里面的所有应用列表。Android4.0 Launcher的所有应用列表跟2.X比较大的区别就是多了Widget的显示。下面会详细分析Launcher里面有关所有应用列表配置和代码分析。
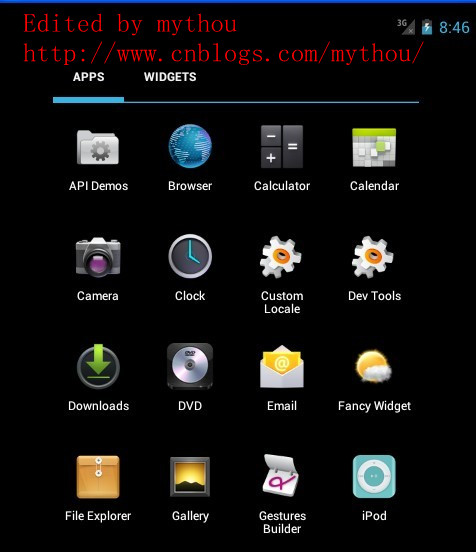
1、AllApp列表配置文件
配置AllAPP应用列表界面的配置文件是\res\Layout\apps_customize_pane.xml文件。AllAPP列表使用了一个TabHost组织了两个页面(全部应用和Widget),通过界面上面的TabHost进行切换。下面是TabHost的配置和AllAPP界面配置,我这里需要把Widget部分功能取消,因为我做的Launcher把Widget放到workspace里面实现了。
//Edited by mythou
//http://www.cnblogs.com/mythou/
<!-- 取消TabHost的显示,把TabHost设置为0dp高,避免影响all app显示 mythou -->

<com.android.launcher2.AppsCustomizeTabHost

    android:background="@android:color/transparent">

    <LinearLayout

        android:id="@+id/apps_customize_content"

        android:orientation="vertical"

        android:layout_width="match_parent"

        android:layout_height="match_parent">

        <!-- TabHost栏,配置TahHost栏的高度宽度
        我这里把TabHost取消了,因为我的Launcher需要把Widget反正workspace里面实现,
        所以全部应用列表修改成和2.X的Launcher一样 mythou-->

        <FrameLayout

            android:id="@+id/tabs_container"

            android:layout_width="0dp"

            android:layout_height="0dp"

            android:layout_marginTop="0dp"

            android:layout_gravity="center_horizontal">
       <!-- TabHost上面Widget 的按钮-->

            <com.android.launcher2.FocusOnlyTabWidget

                android:id="@android:id/tabs"

                android:layout_width="match_parent"

                android:layout_height="match_parent"

                android:layout_gravity="left"

                android:background="@android:color/transparent"

                android:tabStripEnabled="false"

                android:tabStripLeft="@null"

                android:tabStripRight="@null"

                android:divider="@null" />
       <!--TabHost 右边的Android市场的图标,不需要可以去掉-->

            <include

                android:id="@+id/market_button"

                layout="@layout/market_button"

                android:layout_width="wrap_content"

                android:layout_height="match_parent"

                android:layout_gravity="right" />

        </FrameLayout>


     <!--下面这里就是我们所有应用列表的选项和所有应用列表的显示View
        需要注意的是AppsCustomizePagedView同时支持显示所有应用列表和Widget列表 mythou-->

        <FrameLayout

            android:id="@android:id/tabcontent"

            android:layout_width="match_parent"

            android:layout_height="match_parent"

            >
       <!-- 所有应用列表是通过自定义VIewAppsCustomizePagedView显示,后面会详细分析这个View
          下面只对部分重要属性加入注释-->

            <com.android.launcher2.AppsCustomizePagedView

                android:id="@+id/apps_customize_pane_content"

                android:layout_width="match_parent"

                android:layout_height="match_parent"
         //MaxAppCellCountX 和MaxAppCellCounY指的是所有App图标排列的最大行列数。
         //一般设置为-1,表示无限制

                launcher:maxAppCellCountX="@integer/apps_customize_maxCellCountX"

                launcher:maxAppCellCountY="@integer/apps_customize_maxCellCountY"
         //pageLayoutWidthGap和pageLayoutHeightGap分别表示菜单界面与屏幕边缘的距离,
         //一般小屏幕这里设置为-1。避免边框太窄误触屏幕才需要设置。

                launcher:pageLayoutWidthGap="@dimen/apps_customize_pageLayoutWidthGap"

                launcher:pageLayoutHeightGap="@dimen/apps_customize_pageLayoutHeightGap"

                launcher:pageLayoutPaddingTop="50dp"
         //pageLayoutPaddingXXX指的是内填充,这个和系统的padding一样

                launcher:pageLayoutPaddingBottom="@dimen/apps_customize_pageLayoutPaddingBottom"

                launcher:pageLayoutPaddingLeft="@dimen/apps_customize_pageLayoutPaddingLeft"

                launcher:pageLayoutPaddingRight="@dimen/apps_customize_pageLayoutPaddingRight"
         //widgetCellWithGap和widgetCellHeightGap指的是widget列表界面各个widget之间的间隔,
         //和系统的margin属性类似

                launcher:widgetCellWidthGap="@dimen/apps_customize_widget_cell_width_gap"

                launcher:widgetCellHeightGap="@dimen/apps_customize_widget_cell_height_gap"
         //widgetCountX和WidgetCountY都是表示Widget界面每行每列显示多少Widget

                launcher:widgetCountX="@integer/apps_customize_widget_cell_count_x"

                launcher:widgetCountY="@integer/apps_customize_widget_cell_count_y"
         //提示界面的焦点

                launcher:clingFocusedX="@integer/apps_customize_cling_focused_x"

                launcher:clingFocusedY="@integer/apps_customize_cling_focused_y"

                launcher:maxGap="@dimen/workspace_max_gap" />
       <!-- 加载全部应用时的旋转动画 -->

            <FrameLayout

                android:id="@+id/animation_buffer"

                android:layout_width="match_parent"

                android:layout_height="match_parent"

                android:background="#FF000000"

                android:visibility="gone" />

       <!-- 分页符,代表多少页和当前页面-->

            <include

                android:id="@+id/paged_view_indicator"

                layout="@layout/scroll_indicator"

                android:layout_width="wrap_content"

                android:layout_height="wrap_content"

                android:layout_gravity="bottom" />

        </FrameLayout>

    </LinearLayout>

  <!--第一次进入所有应用列表的提示界面,和workspace提示界面一样-->

    <include layout="@layout/all_apps_cling"

        android:id="@+id/all_apps_cling"

        android:layout_width="match_parent"

        android:layout_height="match_parent"/>

</com.android.launcher2.AppsCustomizeTabHost>
上面已经针对TabHost的配置文件给了详细注释,这里需要说明的一点是,不管是所有应用列表还是Widget列表都是通过AppsCustomizedPagedView显示出来,也就是说这个自定义View支持两种形式显示。下面我们先对AppsCustomizeTabHost做个简单分析。
2、AppsCustomizeTabHost分析
AppsCustomizeTabHost是继承了TabHost的之类,主要是对TabHost进行扩展,增加一些功能。AppsCustomizeTabHost的代码不多,这里主要对生成AllAPP和Widget页面选项部分介绍一下。
//Edited by mythou
//http://www.cnblogs.com/mythou/
  protected void onFinishInflate()

    {

        //.......//创建所有应用列表Tab mythou

        TextView tabView;

        String label;

        label = mContext.getString(R.string.all_apps_button_label);

        tabView = (TextView) mLayoutInflater.inflate(R.layout.tab_widget_indicator, tabs, false);

        tabView.setText(label);

        tabView.setContentDescription(label);

        addTab(newTabSpec(APPS_TAB_TAG).setIndicator(tabView).setContent(contentFactory));

        //Widget的Tab页面

        label = mContext.getString(R.string.widgets_tab_label);

        tabView = (TextView) mLayoutInflater.inflate(R.layout.tab_widget_indicator, tabs, false);

        tabView.setText(label);

        tabView.setContentDescription(label);

        addTab(newTabSpec(WIDGETS_TAB_TAG).setIndicator(tabView).setContent(contentFactory));

        //设置监听器

        setOnTabChangedListener(this);

        AppsCustomizeTabKeyEventListener keyListener = new AppsCustomizeTabKeyEventListener();

        View lastTab = tabs.getChildTabViewAt(tabs.getTabCount() - );

        lastTab.setOnKeyListener(keyListener);

        //Android商店按钮

        View shopButton = findViewById(R.id.market_button);

        shopButton.setOnKeyListener(keyListener);

        // Hide the tab bar until we measure

        mTabsContainer.setAlpha(0f);

    }
onFinishInflate回调函数里面执行了创建TabHost需要的Tab View,这个函数在View加载完配置文件的时候会执行。除了创建TabHost外,还有几个函数需要注意了解。
3、Tab变化时执行onTabChanged
在TabHost切换选项的时候,会执行onTabChanged回调函数,这里执行了切换页面的操作,具体切换其实是切换AppsCustomizedPagedView类里面的切换,因为所有应用和Widget都是依靠AppsCustomizedPagedView来显示。onTabChanged里面有两个地方需要注意一下:
//Edited by mythou
//http://www.cnblogs.com/mythou/
    public void onTabChanged(String tabId)

    {

    //使用Runnable执行一个切换的动画效果,因为切换的时候会存在数据加载导致的延时问题。
    //在加载切换数据的过程中,加入动画可以增强用户体验 mythou

        post(new Runnable()

        {

            @Override

            public void run()

            {

                ArrayList<View> visiblePages = new ArrayList<View>();

                for (int i = visiblePageRange[]; i <= visiblePageRange[]; i++)

                {

                    visiblePages.add(mAppsCustomizePane.getPageAt(i));

                }

                //保证每个页面都是使用统一的动画效果

                mAnimationBuffer.scrollTo(mAppsCustomizePane.getScrollX(), );

                // mAppsCustomizePane显示子页面是使用相反的顺序,所以添加页面动画的时候,

                //也是使用相反的添加顺序

                for (int i = visiblePages.size() - ; i >= ; i--)

                {

                    View child = visiblePages.get(i);

            //增加切换动画缓存,提供下面切换动画使用

                    mAnimationBuffer.addView(child, p);

                }

                // Toggle the new content

                onTabChangedStart();

                onTabChangedEnd(type);

                //过渡动画开始

                ObjectAnimator outAnim = ObjectAnimator.ofFloat(mAnimationBuffer, "alpha", 0f);

         //。。。。。。。。

    }
onTabChanged主要是提供了一个切换页面的动画,以为切换TabHost的时候,会存在一个加载和切换数据的过程,这个过程需要消耗一定时间,所以开了一个线程来执行一个过渡动画,增强用户体验。Launcher里面很多切换操作都存在类似的操作,每个操作都伴随着一个动画效果。主要目的就是让用户觉得界面操作流畅。
4、onLauncherTransitionStart和onLauncherTransitionEnd
这两个方法是在Launcher.java类里面调用的,具体调用时机就是从workspace切换到AllAPP列表的时候,切换前会调用onLauncherTransitionStart方法,切换后也会调用onLauncherTransitionEnd。看名字我们大概也能猜出这两个方法的作用,也是提供一个过渡的动画效果。onLauncherTransitionEnd还会调用提示界面。
今天就讲到这里,下次会开始进入AppsCustomizedPagedView分析。
Launcher分析系列文章:
Android Launcher分析和修改1——Launcher默认界面配置(default_workspace)
Android Launcher分析和修改2——Icon修改、界面布局调整、壁纸设置
Android Launcher分析和修改3——Launcher启动和初始化
Android Launcher分析和修改4——初始化加载数据
Android Launcher分析和修改5——HotSeat分析
Android Launcher分析和修改6——页面滑动(PagedView)
Edited by mythou
原创博文,转载请标明出处:http://www.cnblogs.com/mythou/p/3182286.html
Android Launcher分析和修改7——AllApp全部应用列表(AppsCustomizeTabHost)的更多相关文章
- Android Launcher分析和修改8——AllAPP界面拖拽元素(PagedViewWithDraggableItems)
接着上一篇文章,继续分析AllAPP列表界面.上一篇文章分析了所有应用列表的界面构成以及如何通过配置文件修改属性.今天主要是分析PagedViewWithDraggableItems类,因为在我们分析 ...
- Android Launcher分析和修改13——实现Launcher编辑模式(1) 壁纸更换
已经很久没更新Launcher系列文章,今天不分析源码,讲讲如何在Launcher里面添加桌面设置的功能.目前很多第三方Launcher或者定制Rom都有简单易用的桌面设置功能.例如小米MIUI的La ...
- Android Launcher分析和修改9——Launcher启动APP流程
本来想分析AppsCustomizePagedView类,不过今天突然接到一个临时任务.客户反馈说机器界面的图标很难点击启动程序,经常点击了没有反应,Boss说要优先解决这问题.没办法,只能看看是怎么 ...
- Android Launcher分析和修改10——HotSeat深入进阶
前面已经写过Hotseat分析的文章,主要是讲解如何在Launcher里面配置以及修改Hotseat的参数.今天主要是讲解一下如何在Hotseat里面的Item显示名称.这个小问题昨天折腾了半天,最后 ...
- Android Launcher分析和修改11——自定义分页指示器(paged_view_indicator)
Android4.0的Launcher自带了一个简单的分页指示器,就是Hotseat上面那个线段,这个本质上是一个ImageView利用.9.png图片做,效果实在是不太美观,用测试人员的话,太丑了. ...
- Android Launcher分析和修改12——Widget列表信息收集
很久没写Launcher分析的文章,最近实在太忙.今天七夕本来是想陪女朋友逛街 ,碰巧打台风呆在家里,就继续写一篇文章.今天主要是讲一下Launcher里面的Widget列表,这方面信息比较多,今天重 ...
- Android Launcher分析和修改3——Launcher启动和初始化
前面两篇文章都是写有关Launcher配置文件的修改,代码方面涉及不多,今天开始进入Launcher代码分析. 我们开机启动Launcher,Launcher是由Activity Manager启动的 ...
- Android Launcher分析和修改4——初始化加载数据
上面一篇文章说了Launcher是如何被启动的,Launcher启动的过程主要是加载界面数据然后显示出来, 界面数据都是系统APP有关的数据,都是从Launcher的数据库读取,下面我们详细分析Lau ...
- Android Launcher分析和修改5——HotSeat分析
今天主要是分析一下Launcher里面的快捷方式导航条——HotSeat,一般我们使用手机底下都会有这个导航条,但是如果4.0的Launcher放到平板电脑里面运行,默认是没有HotSeat的,刚好我 ...
随机推荐
- centos7.2下安装Mysql笔记
centos7.2下安装Mysql笔记 安装 MySQL 适用于 CentOS 7.0 或以后版本: yum install mariadb mariadb-server 适用于 CentOS 6.8 ...
- Dart语言特性必备了解!
学习Dart语言,必须将以下的概念熟记于心: 在dart语言中,一切皆为对象.所有的对象都是一个类的实例.甚至整数.函数.null也看做是对象.所有的对象都继承于Object类 尽管Dart是强类型语 ...
- 使用tortoisegit简化命令
1. 如果希望git保存用户名和密码,后续操作都无需输入密码: git命令: git config --global credential.helper store 或者通过tortoisegit ...
- Java—集合框架详解
一.描述Java集合框架 集合,在Java语言中,将一系类的对象看成一个整体. 首先查看jdk中的Collection类的源码后会发现Collection是一个接口类,其继承了java迭代接口Iter ...
- Python学习——Python进程
python中的多线程其实并不是真正的多线程,如果想要充分地使用多核CPU的资源,在python中大部分情况需要使用多进程.Python提供了非常好用的多进程包multiprocessing,只需要定 ...
- codeforces1027F. Session in BSU
题目链接 codeforces1027F. Session in BSU 题解 二分图匹配就fst了....显然是过去的,不过tle test87估计也pp了,好坑 那么对于上面做匹配的这个二分图分情 ...
- 洛谷.1782.旅行商的背包(背包DP 单调队列)
题目链接(卡常背包) 朴素的多重背包是: \(f[i][j] = \max\{ f[i-1][j-k*v[i]]+k*w[i] \}\),复杂度 \(O(nV*\sum num_i)\) 可以发现求\ ...
- php urlencode函数 (中文字符转换为十六进制)
urlencode()函数原理就是首先把中文字符转换为十六进制,然后在每个字符前面加一个标识符%. urldecode()函数与urlencode()函数原理相反,用于解码已编码的 URL 字符串,其 ...
- CocosCreator原生平台退出游戏,暂停和继续
原生平台退出游戏,方法为:cc.director.end();官方解释:End the life of director in the next frame暂停游戏,方法: cc.director.p ...
- mybatis传入List实现批量更新的坑
原文:http://www.cnblogs.com/zzlback/p/9342329.html 今天用mybatis实现批量更新,一直报错,说我的sql语句不对,然后我还到mysql下面试了,明明没 ...