【canvas系列】canvas实现“ 简单的Amaziograph效果”--画对称图
标题很难引人入胜,先放个效果图好了

如果图片吸引不了你,那我觉得也就没啥看的了。
demo链接: https://win7killer.github.io/demo_set/html_demo/canvas/can_demo/draw_roll_2.html
*************************************************
上次“雷达图效果”文章很荣幸,被“某天头条”抓数据抓去了,不开心的是demo链接等所有链接都干掉了~~~ blabla,连个名字都木有。
想看的再看下: http://www.cnblogs.com/ufex/p/6655336.html
*************************************************
创意来源
之前看到的gif效果,为了这个文章又去找了一下。貌似是ipad的app “Amaziograph”。看起来真的很爽,很美

配上我自己画的图先:
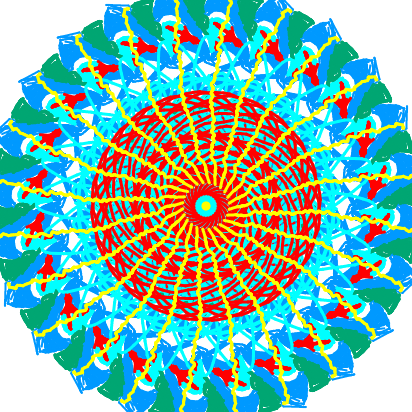
手残不会画画,各位见笑。(手机上浏览器画的哦)
DEMO讲解
1.效果分析
a.参考线坐标轴 -- 为了简单控制参考线显示隐藏,单独一个canvas来搞,也不用每次重绘
b.绘画主体 -- 绘画效果(canvas画线);对称效果(canvas旋转)
c.配置区 -- 简单dom
简单来看,很容易实现嘛
2.开搞
1> 坐标系统
其实就是画几条线,但是要均分角度。一种方法是,计算出各个点,然后从中心点发散去画线;另一种是,一边旋转canvas,一边画圆心到统一坐标的线。由于绘画是需用到canvas旋转,所以这里统一使用旋转来处理。
那么,就需要先来处理canvas旋转
 function drawRotate(deg, fn, _ctx) {

     _ctx = _ctx || ctx

     _ctx.save();

     _ctx.translate(_ctx.canvas.width / 2, _ctx.canvas.height / 2);

     _ctx.rotate(deg);

     fn && fn(_ctx);

     _ctx.restore();

 }
当然,这个是我尝试多次之后写好的方法。
1、存储ctx状态到栈,
2、移动旋转点(canvas坐标原点)到canvas中心,
3、旋转指定角度,
4、执行绘制函数fn,
5、从栈里边取回ctx的状态(包含但不仅包含 fillStyle、strokenStyle、translate等等),这里主要处理的是translate,因为我们下次用到坐标会受影响,所以要让canva坐标原点回到原来的位置。
其实这里translate还是比较抽象比较绕的。。。可能我比较迟缓
然后,是绘制参考线坐标
 function baseLine() {

     ctx_role.clearRect(0, 0, ctx_role.canvas.width, ctx_role.canvas.height);

     var deg = 360 / pieace;

     console.log(deg);

     ctx_role.lineWidth = 1;

     ctx_role.strokeStyle = 'rgba(0,0,0,.5)';

     for (var i = 0, l = pieace; i < l; i++) {

         drawRotate(i * deg / 180 * Math.PI, function(ctx_role) {

             draw({

                 bx: can_role.width / 2,

                 by: can_role.width / 2,

                 ex: can_role.width / 2 + can_role.width,

                 ey: can_role.width / 2

             }, ctx_role);

         }, ctx_role);

     }

 }
 function draw(option, _ctx) {

     _ctx = _ctx || ctx;

     _ctx.beginPath();

     _ctx.moveTo(option.bx - _ctx.canvas.width / 2, option.by - _ctx.canvas.height / 2);

     _ctx.lineTo(option.ex - _ctx.canvas.width / 2, option.ey - _ctx.canvas.height / 2);

     _ctx.stroke();

 }
这样,就绘制完成参考线。
2>绘画主体
首先处理一般的画线。跟拖拽效果类似,在move过冲中一直画线链接两个点。对拖拽不了解的可以去了解下,直接上代码
 function bindPc() {

     can.onmousedown = function(e) {

         if (e.button != 0) {

             return false;

         }

         var op = {};

         op.ex = op.bx = e.clientX - can.parentElement.offsetLeft + window.scrollX;

         op.ey = op.by = e.clientY - can.parentElement.offsetTop + window.scrollY;

         drawFn(op);

         document.onmousemove = function(e) {

             document.body.style.cursor = 'pointer';

             op.bx = op.ex;

             op.by = op.ey;

             op.ex = e.clientX - can.parentElement.offsetLeft + window.scrollX;

             op.ey = e.clientY - can.parentElement.offsetTop + window.scrollY;

             drawFn(op);

         };

         document.onmouseup = function() {

             document.body.style.cursor = 'default';

             document.onmouseup = document.onmousemove = null;

         };

     };

 }
 function drawFn(op) {

     var deg = Math.floor(360 / pieace);

     for (var i = 0, l = 360; i < l; i += deg) {

         drawRotate(i / 180 * Math.PI, function(ctx) {

             draw(op);

         });

     }

 }
需要注意,e.button 用来判断是鼠标哪个键,0是左键
这里又用到了前边的drawRotate 和 draw。
************************************
至此,应该可以画出对称的线条了。
以下就是锦上添花的事情了
************************************
增加移动端的绘制支持(惭愧,没怎么写过移动端,欢迎多指教)
 function bindWp() {

     can.addEventListener('touchstart', function(e) {

         op = can.op = {};

         op.ex = op.bx = e.touches[0].clientX - can.parentElement.offsetLeft + window.scrollX;

         op.ey = op.by = e.touches[0].clientY - can.parentElement.offsetTop + window.scrollY;

         drawFn(op);

         can.addEventListener('touchmove', touchMoveFn);

         can.addEventListener('touchend', touchEndFn);

     });

     function touchEndFn() {

         document.body.style.cursor = 'default';

         can.removeEventListener('touchmove', touchMoveFn);

         can.removeEventListener('touchend', touchEndFn);

     }

     function touchMoveFn(e) {

         op = can.op;

         document.body.style.cursor = 'pointer';

         op.bx = op.ex;

         op.by = op.ey;

         op.ex = e.touches[0].clientX - can.parentElement.offsetLeft + window.scrollX;

         op.ey = e.touches[0].clientY - can.parentElement.offsetTop + window.scrollY;

         drawFn(op);

         return false;

     }

 }
3>设置等
这里dom比较简单,就略过了。只说一项,下载canvas图片到本地
最简单的,右键保存图片到本地,但是你肯定会骂我傻,谁不知道这操作啊;那么就来稍微装X一下吧
线上代码
 function download() {

     var data = can.toDataURL('image/png', 0.8);

     var $a = document.createElement('a');

     $a.download = imgName.value || 'default.png';

     $a.target = '_blank';

     $a.href = data;

     $a.click();

 }
(写这个博客的时候,返现自己把这个方法写麻烦了,绕远了。/手动尴尬,这里直接改了)
关键点在于 a.download属性,这个是把文件下载到本地的关键哦,然后要把canvas转成base64(canvas.toDataUrl方法,不清楚的可以去去了解下,这里不再赘述)
******************************************************
最后,附上完整代码(可能会和上边的有点出如,还在调整)
<!DOCTYPE html>

<html lang="zh">

<head>

    <meta charset="UTF-8">

    <meta name="viewport" content="width=device-width, initial-scale=1.0">

    <meta http-equiv="X-UA-Compatible" content="ie=edge">

    <mtea author="win7killer@163.com"></mtea>

    <title>Document</title>

    <style>

        * {

            margin: 0;

            padding: 0;

        }

        p {

            line-height: 15px;

            font-size: 12px;

        }

        @media screen and (max-width: 768px) {

            .wrapper {

                width: auto;

                position: relative;

                overflow: hidden;

            }

        }

        @media screen and (min-width: 769px) {

            .wrapper {

                width: 600px;

                height: 600px;

                margin: 100px auto 0;

                position: relative;

                overflow: hidden;

            }

            #panel_box {

                position: fixed;

                top: 20px;

                right: 20px;

                width: 200px;

            }

        }

        canvas {

            background: #fafafa;

            display: block;

        }

        #can_role {

            background: none;

            position: absolute;

            top: 0px;

            left: 0px;

            pointer-events: none;

        }

        #panel_box {

            padding: 10px;

            margin-top: 10px;

            border: 1px solid rgba(10, 10, 10, .7);

            box-shadow: 10px 7px 10px #999;

            z-index: 100;

        }

        input {

            width: 80px;

            margin-left: 20px;

        }

        label {

            text-align: justify;

        }

    </style>

</head>

<body>

    <div class="wrapper" id="wrapper">

        <canvas id="can_role"></canvas>

        <canvas id="can"></canvas>

    </div>

    <div id="panel_box">

        <p>

            <label>画笔颜色<input id="color_val" type="color" value="#0099ff"/></label>

        </p>

        <p>

            <label>画笔宽度<input type="number" id="line_width_val" min="1" max="20" value="2"/></label>

        </p>

        <p>

            <label>扇形份数<input type="number" id="pieaceNum" min="1" max="200" value="12"/></label>

        </p>

        <p>

            <label>参考线<input type="checkbox" id="onOff" checked="checked"/></label>

        </p>

        <p class="img_name_box">

            <label>图片名称<input type="text" id="imgName" placeholder="ex:test.png"></label>

        </p>

        <p>

            <a href="javascript:;" id="save_btn" target="">下载到本地</a>

        </p>

    </div>

    <script>

        var pieace = 6;

        var ctx = can.getContext('2d');

        var ctx_role = can_role.getContext('2d');

        can.width = can.height = can_role.width = can_role.height = window.screen.width > 768 ? 600 : window.screen.width;

        ctx_role.lineJoin = ctx.lineJoin = "round";

        ctx_role.lineCap = ctx.lineCap = "round";

        function drawFn(op) {

            var deg = Math.floor(360 / pieace);

            for (var i = 0, l = 360; i < l; i += deg) {

                drawRotate(i / 180 * Math.PI, function(ctx) {

                    draw(op);

                });

            }

        }

        function draw(option, _ctx) {

            _ctx = _ctx || ctx;

            _ctx.beginPath();

            _ctx.moveTo(option.bx - _ctx.canvas.width / 2, option.by - _ctx.canvas.height / 2);

            _ctx.lineTo(option.ex - _ctx.canvas.width / 2, option.ey - _ctx.canvas.height / 2);

            _ctx.stroke();

        }

        function drawRotate(deg, fn, _ctx) {

            _ctx = _ctx || ctx

            _ctx.save();

            _ctx.translate(_ctx.canvas.width / 2, _ctx.canvas.height / 2);

            _ctx.rotate(deg);

            fn && fn(_ctx);

            _ctx.restore();

        }

        function baseLine() {

            ctx_role.clearRect(0, 0, ctx_role.canvas.width, ctx_role.canvas.height);

            var deg = 360 / pieace;

            ctx_role.lineWidth = 1;

            ctx_role.strokeStyle = 'rgba(0,0,0,.5)';

            for (var i = 0, l = pieace; i < l; i++) {

                drawRotate(i * deg / 180 * Math.PI, function(ctx_role) {

                    draw({

                        bx: can_role.width / 2,

                        by: can_role.width / 2,

                        ex: can_role.width / 2 + can_role.width,

                        ey: can_role.width / 2

                    }, ctx_role);

                }, ctx_role);

            }

        }

        function download() {

            var data = can.toDataURL('image/png', 0.8);

            var $a = document.createElement('a');

            $a.download = imgName.value || 'default.png';

            $a.target = '_blank';

            $a.href = data;

            $a.click();

            // if (typeof MouseEvent === 'function') {

            //     var evt = new MouseEvent('click', {

            //         view: window,

            //         bubbles: true,

            //         cancelable: false

            //     });

            //     $a.dispatchEvent(evt);

            // }

        }

        function bindPc() {

            can.onmousedown = function(e) {

                if (e.button != 0) {

                    return false;

                }

                var op = {};

                op.ex = op.bx = e.clientX - can.parentElement.offsetLeft + window.scrollX;

                op.ey = op.by = e.clientY - can.parentElement.offsetTop + window.scrollY;

                drawFn(op);

                document.onmousemove = function(e) {

                    document.body.style.cursor = 'pointer';

                    op.bx = op.ex;

                    op.by = op.ey;

                    op.ex = e.clientX - can.parentElement.offsetLeft + window.scrollX;

                    op.ey = e.clientY - can.parentElement.offsetTop + window.scrollY;

                    drawFn(op);

                };

                document.onmouseup = function() {

                    document.body.style.cursor = 'default';

                    document.onmouseup = document.onmousemove = null;

                };

            };

        }

        function bindWp() {

            can.addEventListener('touchstart', function(e) {

                op = can.op = {};

                op.ex = op.bx = e.touches[0].clientX - can.parentElement.offsetLeft + window.scrollX;

                op.ey = op.by = e.touches[0].clientY - can.parentElement.offsetTop + window.scrollY;

                drawFn(op);

                can.addEventListener('touchmove', touchMoveFn);

                can.addEventListener('touchend', touchEndFn);

            });

            function touchEndFn() {

                document.body.style.cursor = 'default';

                can.removeEventListener('touchmove', touchMoveFn);

                can.removeEventListener('touchend', touchEndFn);

            }

            function touchMoveFn(e) {

                op = can.op;

                document.body.style.cursor = 'pointer';

                op.bx = op.ex;

                op.by = op.ey;

                op.ex = e.touches[0].clientX - can.parentElement.offsetLeft + window.scrollX;

                op.ey = e.touches[0].clientY - can.parentElement.offsetTop + window.scrollY;

                drawFn(op);

                return false;

            }

        }

        function bindSets() {

            color_val.onchange = function() {

                ctx.strokeStyle = color_val.value;

            }

            line_width_val.onchange = function() {

                ctx.lineWidth = line_width_val.value;

            }

            pieaceNum.onchange = function() {

                ctx.clearRect(0, 0, can.width, can.height);

                reset();

            }

            onOff.onchange = function() {

                if (this.checked == true) {

                    can_role.style.display = 'block';

                } else {

                    can_role.style.display = 'none';

                }

            }

        }

        function bind() {

            bindPc();

            bindWp();

            bindSets();

            save_btn.onclick = download;

        }

        function reset() {

            pieace = pieaceNum.value;

            ctx.strokeStyle = 'rgba(100,100,100,.7)';

            baseLine();

            ctx.lineWidth = line_width_val.value;

            ctx.strokeStyle = color_val.value;

        }

        function init() {

            reset();

            bind();

        }

        init();

    </script>

</body>

</html>
**************偷偷留个名字,防抓 博客园-fe-bean***************
涉及姿势点总结
1.canvas_translate
2.canvas_rotate
3.canvas_toDataUrl
4.a.download && base64
其余的想起来再添加吧
最后,欢迎大家多提意见、交流,点赞转载那就更棒了。
再丢一张图

下期再见咯~~~
**************** 少侠留步,能看到这里的,我要给你们一个奖励 ***************
这个demo是可以在移动端玩的,意味着有电容笔的亲,可以爽啊~(个别浏览器脑残会左右来回跑~~)
没有电容笔的亲,肯定是大多数,我们一样能玩啊!!!
叫你们快速做一款电容笔(当然没那么好用)
1.找一只木质铅笔
2.削出铅笔头
3.把铅笔头斜着磨平,如图
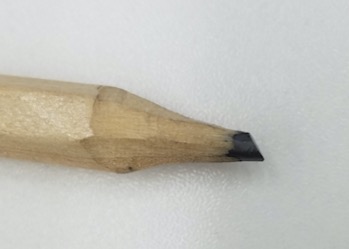
4.用磨平这一侧去电容屏上画(开始吧)
我上边那张图就是拿铅笔画的~~~
************************************
【canvas系列】canvas实现“ 简单的Amaziograph效果”--画对称图的更多相关文章
- 【canvas系列】canvas实现“ 简单的Amaziograph效果”--画对称图【强迫症福利】
标题很难引人入胜,先放个效果图好了 如果图片吸引不了你,那我觉得也就没啥看的了. demo链接: https://win7killer.github.io/demo_set/html_demo/can ...
- canvas绘制简单的霓虹灯效果
canvas简单动画分为三个步骤: 1.清除画布区域的内容: 2.重绘: 3.执行requestAnimationFrame(); 这个霓虹灯效果的demo,我没有用requestAnimationF ...
- 用canvas实现简单的下雪效果
首先新建一个html文件,将body的背景设置为天空的那种深蓝色,并创建一个canvas,canvas的操作逻辑都放在snow.js中: <!DOCTYPE html> <head& ...
- 【canvas系列】用canvas实现一个colorpicker
每个浏览器都有自己的特点,比如今天要做的colorpicker就是,一千个浏览器,一千个哈姆雷特,一千个colorpicker.今天canvas系列就用canvas做一个colorpicker. ** ...
- [js高手之路] html5 canvas系列教程 - 像素操作(反色,黑白,亮度,复古,蒙版,透明)
接着上文[js高手之路] html5 canvas系列教程 - 状态详解(save与restore),相信大家都应该玩过美颜功能,而我们今天要讲的就是canvas强大的像素处理能力,通过像素处理,实现 ...
- [js高手之路] html5 canvas系列教程 - 状态详解(save与restore)
本文内容与路径([js高手之路] html5 canvas系列教程 - 开始路径beginPath与关闭路径closePath详解)是canvas中比较重要的概念.掌握理解他们是做出复杂canvas动 ...
- 【canvas系列】用canvas实现一个colorpicker(类似PS的颜色选择器)
每个浏览器都有自己的特点,比如今天要做的colorpicker就是,一千个浏览器,一千个哈姆雷特,一千个colorpicker.今天canvas系列就用canvas做一个colorpicker. ** ...
- [js高手之路] html5 canvas系列教程 - 文本样式(strokeText,fillText,measureText,textAlign,textBaseline)
接着上文线条样式[js高手之路] html5 canvas系列教程 - 线条样式(lineWidth,lineCap,lineJoin,setLineDash)继续. canvas提供两种输出文本的方 ...
- [js高手之路] html5 canvas系列教程 - 线条样式(lineWidth,lineCap,lineJoin,setLineDash)
上文,写完弧度与贝塞尔曲线[js高手之路] html5 canvas系列教程 - arcTo(弧度与二次,三次贝塞尔曲线以及在线工具),本文主要是关于线条的样式设置 lineWidth: 设置线条的宽 ...
随机推荐
- Android Monkey压力测试介绍
monkey:通过Monkey程序模拟用户触摸屏幕.滑动Trackball. 按键等操作来对设备上的程序进行压力测试,检测程序多久的时间会发生异常. Monkey的构架 Monkey的参数 Monke ...
- 粗谈shell脚本风格
注意:此风格并非官方版本,为个人在编写和维护脚本程序时总结出来的民间版本.0. 开头:除去开头的#!/bin/bash,最前面的就是脚本描述注释了,视个人喜好而定,例如: ############## ...
- Angular2 路由问题修复 、求解
Angular2 提供了比angular1 更为强大的路由功能,但是在具体使用路由过程中,可是出现了很多路由不按照预想的方式执行的问题.为了说明今天的问题,我特地新建了一个测试工程.欢迎交流. 首先介 ...
- Android 增量更新
title: Android NDK之增量更新 1.增量更新使用到的库bsdiff和bzip2 bsdiff库是一个开源的二进制差分工具,通过对比Apk的二进制,从而进行差分包的生成. bsdiff库 ...
- Linux 下文件操作 shell
删除目录下的所有文件ls *.log | xargs rm -f当前目录所有文件大小的总和ll | awk '{sum += $5}; END {print sum/1048576}'将命令推送到后台 ...
- 【openstack N版】——块存储服务cinder
一.块存储服务介绍 1.1块存储服务通常包含以下组件 cinder-api: 接受API请求,并将其路由到"cinder-volume"执行. cinder-volume: 与块存 ...
- java中map集合的迭代
import java.util.HashMap; import java.util.Iterator; import java.util.Map; public class TestMap { pu ...
- 强大的修图app--美图秀秀
美图秀秀的强大之处 市面上有很多图形处理软件,最专业的是ps,但是ps做起来需要的专业技术很高,而美图秀秀可以说用起来并不需要很专业,操作起来非常方便,而且界面可爱.所以说美图秀秀是一款很好用的免 ...
- 3097: Hash Killer I
3097: Hash Killer I Time Limit: 5 Sec Memory Limit: 128 MBSec Special JudgeSubmit: 425 Solved: 15 ...
- 有关ospf抓包
有关ospf抓包 1.相关的路由器为这样子的: 路由器都运行了ospf: 抓包的链路为GE0/0/2 , 2.抓包图: 从图上我们可以看到,protocol info 这一栏里面出现了: hello ...