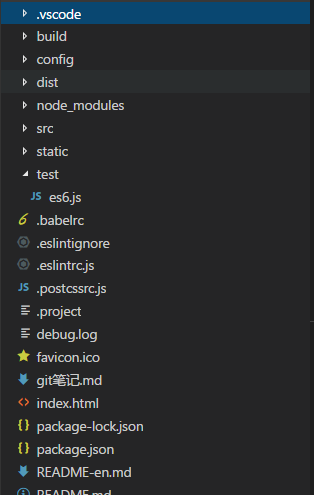
vue 一些webpack的配置详解
- 最近一直在忙着做项目 本来想养成一个经常跟新博客的习惯 , 但是实在是太难了 , 每天加班到10点多 。8点能下班都是最好的了 , 小公司真不好待呀
- 分享一下最近半年的vue心得吧
- 我的项目是在他的基础上改的
PanJiaChen/vueAdmin-template
"scripts": {

    "dev": "node build/dev-server.js",

    "build": "node build/build.js",

    "lint": "eslint --ext .js,.vue src"

}
require('./check-versions')() // 检查 Node 和 npm 版本

var config = require('../config') // 获取 config/index.js 的默认配置

/*

** 如果 Node 的环境无法判断当前是 dev / product 环境

** 使用 config.dev.env.NODE_ENV 作为当前的环境

*/

if (!process.env.NODE_ENV) process.env.NODE_ENV = JSON.parse(config.dev.env.NODE_ENV)

var path = require('path') // 使用 NodeJS 自带的文件路径工具

var express = require('express') // 使用 express

var webpack = require('webpack') // 使用 webpack

var opn = require('opn') // 一个可以强制打开浏览器并跳转到指定 url 的插件

var proxyMiddleware = require('http-proxy-middleware') // 使用 proxyTable

var webpackConfig = require('./webpack.dev.conf') // 使用 dev 环境的 webpack 配置

// default port where dev server listens for incoming traffic

/* 如果没有指定运行端口,使用 config.dev.port 作为运行端口 */

var port = process.env.PORT || config.dev.port

// Define HTTP proxies to your custom API backend

// https://github.com/chimurai/http-proxy-middleware

/* 使用 config.dev.proxyTable 的配置作为 proxyTable 的代理配置 */

var proxyTable = config.dev.proxyTable

/* 使用 express 启动一个服务 */

var app = express()

var compiler = webpack(webpackConfig) // 启动 webpack 进行编译

/* 启动 webpack-dev-middleware,将 编译后的文件暂存到内存中 */

var devMiddleware = require('webpack-dev-middleware')(compiler, {

  publicPath: webpackConfig.output.publicPath,

  stats: {

    colors: true,

    chunks: false

  }

})

/* 启动 webpack-hot-middleware,也就是我们常说的 Hot-reload */

var hotMiddleware = require('webpack-hot-middleware')(compiler)

// force page reload when html-webpack-plugin template changes

compiler.plugin('compilation', function (compilation) {

  compilation.plugin('html-webpack-plugin-after-emit', function (data, cb) {

    hotMiddleware.publish({ action: 'reload' })

    cb()

  })

})

// proxy api requests

// 将 proxyTable 中的请求配置挂在到启动的 express 服务上

Object.keys(proxyTable).forEach(function (context) {

  var options = proxyTable[context]

  if (typeof options === 'string') {

    options = { target: options }

  }

  app.use(proxyMiddleware(context, options))

})

// handle fallback for HTML5 history API

// 使用 connect-history-api-fallback 匹配资源,如果不匹配就可以重定向到指定地址

app.use(require('connect-history-api-fallback')())

// serve webpack bundle output

// 将暂存到内存中的 webpack 编译后的文件挂在到 express 服务上

app.use(devMiddleware)

// enable hot-reload and state-preserving

// compilation error display

// 将 Hot-reload 挂在到 express 服务上

app.use(hotMiddleware)

// serve pure static assets

// 拼接 static 文件夹的静态资源路径

var staticPath = path.posix.join(config.dev.assetsPublicPath, config.dev.assetsSubDirectory)

// 为静态资源提供响应服务

app.use(staticPath, express.static('./static'))

// 让我们这个 express 服务监听 port 的请求,并且将此服务作为 dev-server.js 的接口暴露

module.exports = app.listen(port, function (err) {

  if (err) {

    console.log(err)

    return

  }

  var uri = 'http://localhost:' + port

  console.log('Listening at ' + uri + '\n')

  // when env is testing, don't need open it

  // 如果不是测试环境,自动打开浏览器并跳到我们的开发地址

  if (process.env.NODE_ENV !== 'testing') {

    opn(uri)

  }

})
webpack.dev.conf.js
var config = require('../config') // 同样的使用了 config/index.js

var webpack = require('webpack') // 使用 webpack

var merge = require('webpack-merge') // 使用 webpack 配置合并插件

var utils = require('./utils') // 使用一些小工具

var baseWebpackConfig = require('./webpack.base.conf') // 加载 webpack.base.conf

/* 使用 html-webpack-plugin 插件,这个插件可以帮我们自动生成 html 并且注入到 .html 文件中 */

var HtmlWebpackPlugin = require('html-webpack-plugin')

// add hot-reload related code to entry chunks

// 将 Hol-reload 相对路径添加到 webpack.base.conf 的 对应 entry 前

Object.keys(baseWebpackConfig.entry).forEach(function (name) {

  baseWebpackConfig.entry[name] = ['./build/dev-client'].concat(baseWebpackConfig.entry[name])

})

/* 将我们 webpack.dev.conf.js 的配置和 webpack.base.conf.js 的配置合并 */

module.exports = merge(baseWebpackConfig, {

  module: {

    // 使用 styleLoaders

    loaders: utils.styleLoaders({ sourceMap: config.dev.cssSourceMap })

  },

  // eval-source-map is faster for development

  // 使用 #eval-source-map 模式作为开发工具,此配置可参考 DDFE 往期文章详细了解

  devtool: '#eval-source-map',

  plugins: [

    /* definePlugin 接收字符串插入到代码当中, 所以你需要的话可以写上 JS 的字符串 */

    new webpack.DefinePlugin({

      'process.env': config.dev.env

    }),

    // https://github.com/glenjamin/webpack-hot-middleware#installation--usage

    new webpack.optimize.OccurenceOrderPlugin(),

    /* HotModule 插件在页面进行变更的时候只会重回对应的页面模块,不会重绘整个 html 文件 */

    new webpack.HotModuleReplacementPlugin(),

    /* 使用了 NoErrorsPlugin 后页面中的报错不会阻塞,但是会在编译结束后报错 */

    new webpack.NoErrorsPlugin(),

    // https://github.com/ampedandwired/html-webpack-plugin

    /* 将 index.html 作为入口,注入 html 代码后生成 index.html文件 */

    new HtmlWebpackPlugin({

      filename: 'index.html',

      template: 'index.html',

      inject: true

    })

  ]

})
webpack.base.conf.js
var path = require('path') // 使用 NodeJS 自带的文件路径插件

var config = require('../config') // 引入 config/index.js

var utils = require('./utils') // 引入一些小工具

var projectRoot = path.resolve(__dirname, '../') // 拼接我们的工作区路径为一个绝对路径

/* 将 NodeJS 环境作为我们的编译环境 */

var env = process.env.NODE_ENV

// check env & config/index.js to decide weither to enable CSS Sourcemaps for the

// various preprocessor loaders added to vue-loader at the end of this file

/* 是否在 dev 环境下开启 cssSourceMap ,在 config/index.js 中可配置 */

var cssSourceMapDev = (env === 'development' && config.dev.cssSourceMap)

/* 是否在 production 环境下开启 cssSourceMap ,在 config/index.js 中可配置 */

var cssSourceMapProd = (env === 'production' && config.build.productionSourceMap)

/* 最终是否使用 cssSourceMap */

var useCssSourceMap = cssSourceMapDev || cssSourceMapProd

module.exports = {

  entry: {

    app: './src/main.js' // 编译文件入口

  },

  output: {

    path: config.build.assetsRoot, // 编译输出的静态资源根路径

    publicPath: process.env.NODE_ENV === 'production' ? config.build.assetsPublicPath : config.dev.assetsPublicPath, // 正式发布环境下编译输出的上线路径的根路径

    filename: '[name].js' // 编译输出的文件名

  },

  resolve: {

    // 自动补全的扩展名

    extensions: ['', '.js', '.vue'],

    // 不进行自动补全或处理的文件或者文件夹

    fallback: [path.join(__dirname, '../node_modules')],

    alias: {

      // 默认路径代理,例如 import Vue from 'vue',会自动到 'vue/dist/vue.common.js'中寻找

      'vue$': 'vue/dist/vue.common.js',

      'src': path.resolve(__dirname, '../src'),

      'assets': path.resolve(__dirname, '../src/assets'),

      'components': path.resolve(__dirname, '../src/components')

    }

  },

  resolveLoader: {

    fallback: [path.join(__dirname, '../node_modules')]

  },

  module: {

    preLoaders: [

      // 预处理的文件及使用的 loader

      {

        test: /\.vue$/,

        loader: 'eslint',

        include: projectRoot,

        exclude: /node_modules/

      },

      {

        test: /\.js$/,

        loader: 'eslint',

        include: projectRoot,

        exclude: /node_modules/

      }

    ],

    loaders: [

      // 需要处理的文件及使用的 loader

      {

        test: /\.vue$/,

        loader: 'vue'

      },

      {

        test: /\.js$/,

        loader: 'babel',

        include: projectRoot,

        exclude: /node_modules/

      },

      {

        test: /\.json$/,

        loader: 'json'

      },

      {

        test: /\.(png|jpe?g|gif|svg)(\?.*)?$/,

        loader: 'url',

        query: {

          limit: ,

          name: utils.assetsPath('img/[name].[hash:7].[ext]')

        }

      },

      {

        test: /\.(woff2?|eot|ttf|otf)(\?.*)?$/,

        loader: 'url',

        query: {

          limit: ,

          name: utils.assetsPath('fonts/[name].[hash:7].[ext]')

        }

      }

    ]

  },

  eslint: {

    // eslint 代码检查配置工具

    formatter: require('eslint-friendly-formatter')

  },

  vue: {

    // .vue 文件配置 loader 及工具 (autoprefixer)

    loaders: utils.cssLoaders({ sourceMap: useCssSourceMap }),

    postcss: [

      require('autoprefixer')({

        browsers: ['last 2 versions']

      })

    ]

  }

}
config/index.js
var path = require('path')

module.exports = {

  build: { // production 环境

    env: require('./prod.env'), // 使用 config/prod.env.js 中定义的编译环境

    index: path.resolve(__dirname, '../dist/index.html'), // 编译输入的 index.html 文件

    assetsRoot: path.resolve(__dirname, '../dist'), // 编译输出的静态资源路径

    assetsSubDirectory: 'static', // 编译输出的二级目录

    assetsPublicPath: '/', // 编译发布的根目录,可配置为资源服务器域名或 CDN 域名

    productionSourceMap: true, // 是否开启 cssSourceMap

    // Gzip off by default as many popular static hosts such as

    // Surge or Netlify already gzip all static assets for you.

    // Before setting to `true`, make sure to:

    // npm install --save-dev compression-webpack-plugin

    productionGzip: false, // 是否开启 gzip

    productionGzipExtensions: ['js', 'css'] // 需要使用 gzip 压缩的文件扩展名

  },

  dev: { // dev 环境

    env: require('./dev.env'), // 使用 config/dev.env.js 中定义的编译环境

    port: , // 运行测试页面的端口

    assetsSubDirectory: 'static', // 编译输出的二级目录

    assetsPublicPath: '/', // 编译发布的根目录,可配置为资源服务器域名或 CDN 域名

    proxyTable: {}, // 需要 proxyTable 代理的接口(可跨域)

    // CSS Sourcemaps off by default because relative paths are "buggy"

    // with this option, according to the CSS-Loader README

    // (https://github.com/webpack/css-loader#sourcemaps)

    // In our experience, they generally work as expected,

    // just be aware of this issue when enabling this option.

    cssSourceMap: false // 是否开启 cssSourceMap

  }

}
build.js
// https://github.com/shelljs/shelljs

require('./check-versions')() // 检查 Node 和 npm 版本

require('shelljs/global') // 使用了 shelljs 插件,可以让我们在 node 环境的 js 中使用 shell

env.NODE_ENV = 'production'

var path = require('path') // 不再赘述

var config = require('../config') // 加载 config.js

var ora = require('ora') // 一个很好看的 loading 插件

var webpack = require('webpack') // 加载 webpack

var webpackConfig = require('./webpack.prod.conf') // 加载 webpack.prod.conf

console.log( //  输出提示信息 ~ 提示用户请在 http 服务下查看本页面,否则为空白页

  '  Tip:\n' +

  '  Built files are meant to be served over an HTTP server.\n' +

  '  Opening index.html over file:// won\'t work.\n'

)

var spinner = ora('building for production...') // 使用 ora 打印出 loading + log

spinner.start() // 开始 loading 动画

/* 拼接编译输出文件路径 */

var assetsPath = path.join(config.build.assetsRoot, config.build.assetsSubDirectory)

/* 删除这个文件夹 (递归删除) */

rm('-rf', assetsPath)

/* 创建此文件夹 */

mkdir('-p', assetsPath)

/* 复制 static 文件夹到我们的编译输出目录 */

cp('-R', 'static/*', assetsPath)

//  开始 webpack 的编译

webpack(webpackConfig, function (err, stats) {

  // 编译成功的回调函数

  spinner.stop()

  if (err) throw err

  process.stdout.write(stats.toString({

    colors: true,

    modules: false,

    children: false,

    chunks: false,

    chunkModules: false

  }) + '\n')

})
webpack.prod.conf.js
var path = require('path') // 不再赘述

var config = require('../config') // 加载 confi.index.js

var utils = require('./utils') // 使用一些小工具

var webpack = require('webpack') // 加载 webpack

var merge = require('webpack-merge') // 加载 webpack 配置合并工具

var baseWebpackConfig = require('./webpack.base.conf') // 加载 webpack.base.conf.js

/* 一个 webpack 扩展,可以提取一些代码并且将它们和文件分离开 */

/* 如果我们想将 webpack 打包成一个文件 css js 分离开,那我们需要这个插件 */

var ExtractTextPlugin = require('extract-text-webpack-plugin')

/* 一个可以插入 html 并且创建新的 .html 文件的插件 */

var HtmlWebpackPlugin = require('html-webpack-plugin')

var env = config.build.env

/* 合并 webpack.base.conf.js */

var webpackConfig = merge(baseWebpackConfig, {

  module: {

    /* 使用的 loader */

    loaders: utils.styleLoaders({ sourceMap: config.build.productionSourceMap, extract: true })

  },

  /* 是否使用 #source-map 开发工具,更多信息可以查看 DDFE 往期文章 */

  devtool: config.build.productionSourceMap ? '#source-map' : false,

  output: {

    /* 编译输出目录 */

    path: config.build.assetsRoot,

    /* 编译输出文件名 */

    filename: utils.assetsPath('js/[name].[chunkhash].js'), // 我们可以在 hash 后加 :6 决定使用几位 hash 值

    // 没有指定输出名的文件输出的文件名

    chunkFilename: utils.assetsPath('js/[id].[chunkhash].js')

  },

  vue: {

    /* 编译 .vue 文件时使用的 loader */

    loaders: utils.cssLoaders({

      sourceMap: config.build.productionSourceMap,

      extract: true

    })

  },

  plugins: [

    /* 使用的插件 */

    // http://vuejs.github.io/vue-loader/en/workflow/production.html

    /* definePlugin 接收字符串插入到代码当中, 所以你需要的话可以写上 JS 的字符串 */

    new webpack.DefinePlugin({

      'process.env': env

    }),

    /* 压缩 js (同样可以压缩 css) */

    new webpack.optimize.UglifyJsPlugin({

      compress: {

        warnings: false

      }

    }),

    new webpack.optimize.OccurrenceOrderPlugin(),

    // extract css into its own file

    /* 将 css 文件分离出来 */

    new ExtractTextPlugin(utils.assetsPath('css/[name].[contenthash].css')),

    // generate dist index.html with correct asset hash for caching.

    // you can customize output by editing /index.html

    // see https://github.com/ampedandwired/html-webpack-plugin

    /* 输入输出的 .html 文件 */

    new HtmlWebpackPlugin({

      filename: config.build.index,

      template: 'index.html',

      inject: true, // 是否注入 html

      minify: { // 压缩的方式

        removeComments: true,

        collapseWhitespace: true,

        removeAttributeQuotes: true

        // more options:

        // https://github.com/kangax/html-minifier#options-quick-reference

      },

      // necessary to consistently work with multiple chunks via CommonsChunkPlugin

      chunksSortMode: 'dependency'

    }),

    // split vendor js into its own file

    /* 没有指定输出文件名的文件输出的静态文件名 */

    new webpack.optimize.CommonsChunkPlugin({

      name: 'vendor',

      minChunks: function (module, count) {

        // any required modules inside node_modules are extracted to vendor

        return (

          module.resource &&

          /\.js$/.test(module.resource) &&

          module.resource.indexOf(

            path.join(__dirname, '../node_modules')

          ) ===

        )

      }

    }),

    // extract webpack runtime and module manifest to its own file in order to

    // prevent vendor hash from being updated whenever app bundle is updated

    /* 没有指定输出文件名的文件输出的静态文件名 */

    new webpack.optimize.CommonsChunkPlugin({

      name: 'manifest',

      chunks: ['vendor']

    })

  ]

})

/* 开启 gzip 的情况下使用下方的配置 */

if (config.build.productionGzip) {

  /* 加载 compression-webpack-plugin 插件 */

  var CompressionWebpackPlugin = require('compression-webpack-plugin')

  /* 向webpackconfig.plugins中加入下方的插件 */

  webpackConfig.plugins.push(

    /* 使用 compression-webpack-plugin 插件进行压缩 */

    new CompressionWebpackPlugin({

      asset: '[path].gz[query]',

      algorithm: 'gzip',

      test: new RegExp(

        '\\.(' +

        config.build.productionGzipExtensions.join('|') +

        ')$'

      ),

      threshold: ,

      minRatio: 0.8

    })

  )

}

module.exports = webpackConfig
vue 一些webpack的配置详解的更多相关文章
- cli中webpack的配置详解
一.前言 vue-cli是构建vue单页应用的脚手架,输入一串指定的命令行从而自动生成vue.js+wepack的项目模板.这其中webpack发挥了很大的作用,它使得我们的代码模块化,引入一些插件帮 ...
- vue-cli 中的 webpack 配置详解
本篇文章主要介绍了 vue-cli 2.8.2 中的 webpack 配置详解, 做个学习笔记 版本 vue-cli 2.8.1 (终端通过 vue -V 可查看) vue 2.2.2 webpack ...
- webpack配置详解
webpack配置详解 先点个赞吧,再挨个点下面的连接,觉得不值这个赞的回来骂我啊. Webpack傻瓜式指南(一) Webpack傻瓜指南(二)开发和部署技巧 Webpack傻瓜式指南 原生的官网详 ...
- webpack学习(五)配置详解
配置详解 //使用插件html-webpack-plugin打包合并html //使用插件extract-text-webpack-plugin打包独立的css //使用UglifyJsPlugin压 ...
- npm安装vue详细教程(图片详解)
npm安装vue详细教程(图片详解) 一.总结 一句话总结:整个安装流程照着教程来,注意系统环境变量的配置,注意一下npm的本地仓库和缓存位置 教程 系统环境变量 仓库 缓存 1.什么情况下最适合用n ...
- vue-cli3.0配置详解
这次给大家带来vue-cli3.0配置详解,使用vue-cli3.0配置的注意事项有哪些,下面就是实战案例,一起来看一下. 新建项目 1 2 3 4 5 6 7 8 # 安装 npm install ...
- [js高手之路]深入浅出webpack系列2-配置文件webpack.config.js详解
接着上文,重新在webpack文件夹下面新建一个项目文件夹demo2,然后用npm init --yes初始化项目的package.json配置文件,然后安装webpack( npm install ...
- [js高手之路]深入浅出webpack教程系列3-配置文件webpack.config.js详解(下)
本文继续接着上文,继续写下webpack.config.js的其他配置用法. 一.把两个文件打包成一个,entry怎么配置? 在上文中的webpack.dev.config.js中,用数组配置entr ...
- webpack4配置详解之常用插件分享
前言 继上一次webpack的基础配置分享之后,本次将分享一些工作中项目常用的配置插件.也会包含一些自己了解过觉得不错的插件,如有分析不到位的,欢迎纠错,嗯,这些东西文档都有,大佬可绕过. Wepac ...
随机推荐
- PythonNET网络编程1
# PythonNET 网络编程 ISO(国际标准化组织) 制定了 OSI(Open System Interconnectio),意为开放式系统互联.国际标准化组织(ISO)制定了OSI模型,该模型 ...
- Day3:集合
一.集合的定义及特性 1.集合的特性 1.1 去重,把一个列表变成集合,就自动去重了 1.2 关系测试,测试两组数据之间的交集.差集等关系 #!/usr/bin/env python # -* ...
- u-boot分析1:Nandflash、Norflash启动
了解u-boot之前首先了解下Bootloader,简单说Bootloader就是一段小程序,它在系统上电时开始运行,初始化硬件设备,准备好软件环境,最后调用操作系统内核. u-boot全称:Univ ...
- [Docker] Create Docker Volumes for Persistent Storage
Docker containers are stateless by default. In order to persist filesystem changes, you must use doc ...
- /bin/bash^M: bad interpreter: 没有那个文件或文件夹
执行脚本时出现了这样一个错误,打开之后并没有找到所谓的^M,查了之后才知道原来是文件格式的问题,也就是linux和windows之间的不全然兼容... 详细细节无论,假设验证: vim test.sh ...
- hdu 4406 费用流
这题问题就是当前时刻究竟选择哪门课程,易知选择是和分数有关的,而且是一个变化的权值,所以能够用拆点的方式,把从基础分到100分都拆成点.但若这样拆点的话,跑费用流时就必须保证顺序.这样就麻烦了..观察 ...
- 选择标识符(identifier)
整数通常是标识列最好的选择,因为它们很快并且可以使用auto_increment:千万不要使用enum和set类型作为标识列:尽量避免使用字符串类型作为标识列,因为他们很消耗空间,并且通常比数字类型慢 ...
- 【23.48%】【codeforces 723C】Polycarp at the Radio
time limit per test2 seconds memory limit per test256 megabytes inputstandard input outputstandard o ...
- [SCSS] Write Custom Functions with the SCSS @function Directive
Writing SCSS @functions is similar to writing functions in other programming languages; they can acc ...
- ios开发之Quartz2D 四:画饼图
#import "PieView.h" @implementation PieView - (void)drawRect:(CGRect)rect { // Drawing cod ...