照着官网来安装openstack pike之neutron安装
neutron组件安装分为控制节点和计算节点,还是先从控制节点安装
1、前提条件,数据库为nova创建库和账户密码来连接数据库
# mysql -u root -p

MariaDB [(none)]> CREATE DATABASE neutron;

MariaDB [(none)]> GRANT ALL PRIVILEGES ON neutron.* TO 'neutron'@'localhost' IDENTIFIED BY 'neutron';

MariaDB [(none)]> GRANT ALL PRIVILEGES ON neutron.* TO 'neutron'@'%' IDENTIFIED BY 'neutron';
2、向keystone验明身份
# source admin-openrc
3、创建neutron用户:
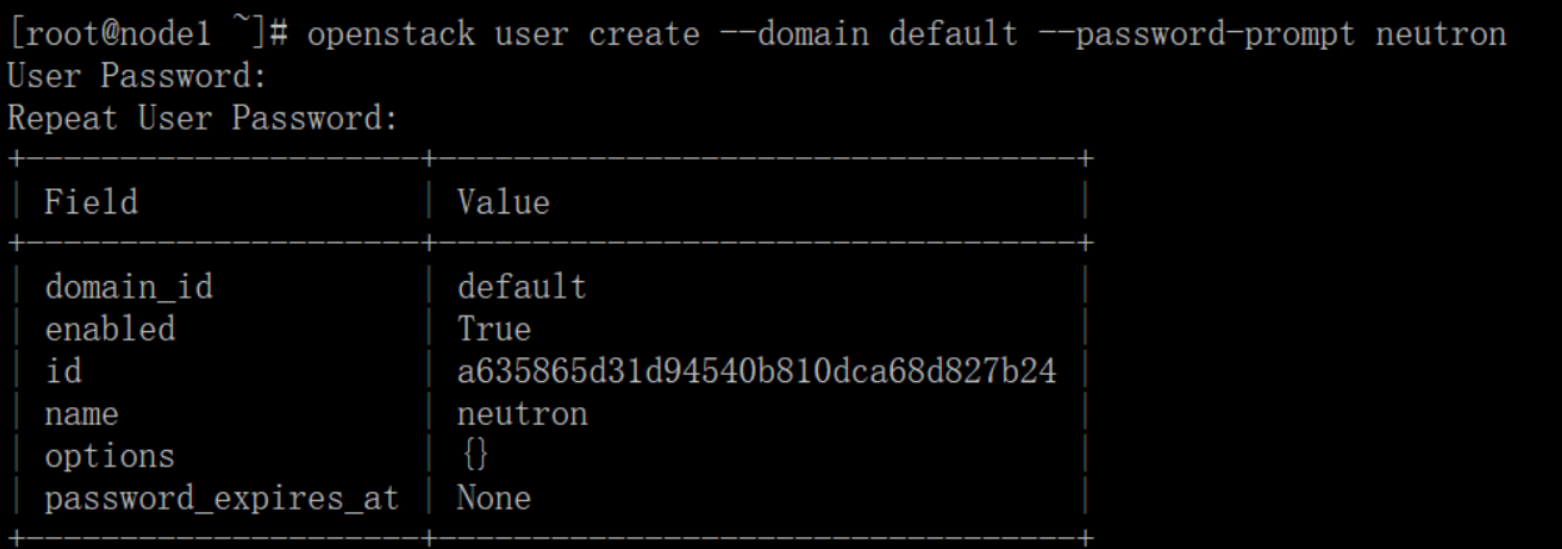
# openstack user create --domain default --password-prompt neutron

    设定密码:neutron

# openstack role add --project service --user neutron admin
# openstack service create --name neutron --description "OpenStack Networking" network

# openstack endpoint create --region RegionOne network public http://192.168.101.10:9696

# openstack endpoint create --region RegionOne network internal http://192.168.101.10:9696

# openstack endpoint create --region RegionOne network admin http://192.168.101.10:9696
# yum install openstack-neutron openstack-neutron-ml2 openstack-neutron-linuxbridge ebtables
[database]

connection = mysql+pymysql://neutron:neutron@192.168.101.10/neutron

[DEFAULT]

core_plugin = ml2

service_plugins =

transport_url = rabbit://openstack:openstack@192.168.101.10

auth_strategy = keystone

notify_nova_on_port_status_changes = true

notify_nova_on_port_data_changes = true

    启用ml2插件并disable additional plug-ins

[keystone_authtoken]

auth_uri = http://192.168.101.10:5000

auth_url = http://192.168.101.10:35357

memcached_servers = 192.168.101.10:

auth_type = password

project_domain_name = default

user_domain_name = default

project_name = service

username = neutron

password = neutron

[nova]

auth_url = http://192.168.101.10:35357

auth_type = password

project_domain_name = default

user_domain_name = default

region_name = RegionOne

project_name = service

username = nova

password = nova

[oslo_concurrency]

lock_path = /var/lib/neutron/tmp
[ml2]

type_drivers = flat,vlan

tenant_network_types =            取消self-service networks

mechanism_drivers = linuxbridge      启用Linux bridge mechanism

extension_drivers = port_security     启用the port security extension driver

[ml2_type_flat]

flat_networks = provider

[securitygroup]

enable_ipset = true
[linux_bridge]

physical_interface_mappings = provider:PROVIDER_INTERFACE_NAME

    Replace PROVIDER_INTERFACE_NAME with the name of the underlying provider physical network interface(底层提供商物理网络接口的名称也就是ens33)

node1的底层物理网卡设备为ens33,所以这里设置为这个

[vxlan]

enable_vxlan = false

[securitygroup]

enable_security_group = true

firewall_driver = neutron.agent.linux.iptables_firewall.IptablesFirewallDriver
[DEFAULT]

interface_driver = linuxbridge

dhcp_driver = neutron.agent.linux.dhcp.Dnsmasq

enable_isolated_metadata = true
# vim /etc/neutron/neutron.conf

# vim /etc/neutron/plugins/ml2/ml2_conf.ini

# vim /etc/neutron/plugins/ml2/linuxbridge_agent.ini

# vim /etc/neutron/dhcp_agent.ini
[DEFAULT]

nova_metadata_ip = 192.168.101.10

metadata_proxy_shared_secret = METADATA_SECRET

    (使用neutron或者matadata或者其他都可以,保持和下面一直,这是自定义的密钥),这里采用neutron,Replace METADATA_SECRET with a suitable secret for the metadata proxy.
[neutron]

url = http://192.168.101.10:9696

auth_url = http://192.168.101.10:35357

auth_type = password

project_domain_name = default

user_domain_name = default

region_name = RegionOne

project_name = service

username = neutron

password = neutron

service_metadata_proxy = true

metadata_proxy_shared_secret = METADATA_SECRET(使用neutron或者matadata都可以,保持和上面一直),由于上面设置的neutron,这里也是neutron
# ln -s /etc/neutron/plugins/ml2/ml2_conf.ini /etc/neutron/plugin.ini
# su -s /bin/sh -c "neutron-db-manage --config-file /etc/neutron/neutron.conf --config-file /etc/neutron/plugins/ml2/ml2_conf.ini upgrade head" neutron


# systemctl restart openstack-nova-api.service
# systemctl enable neutron-server.service  neutron-linuxbridge-agent.service neutron-dhcp-agent.service neutron-metadata-agent.service

# systemctl start neutron-server.service neutron-linuxbridge-agent.service neutron-dhcp-agent.service neutron-metadata-agent.service
# yum install openstack-neutron-linuxbridge ebtables ipset
[DEFAULT]

transport_url = rabbit://openstack:openstack@192.168.101.10

auth_strategy = keystone

[keystone_authtoken]

auth_uri = http://192.168.101.10:5000

auth_url = http://192.168.101.10:35357

memcached_servers = 192.168.101.10:

auth_type = password

project_domain_name = default

user_domain_name = default

project_name = service

username = neutron

password = neutron

[oslo_concurrency]

lock_path = /var/lib/neutron/tmp
[linux_bridge]

physical_interface_mappings = provider:PROVIDER_INTERFACE_NAME

    Replace PROVIDER_INTERFACE_NAME with the name of the underlying provider physical network interface.(底层提供商物理网络接口的名称也就是ens33)node2的底层物理网卡设备为ens33,所以这里设置为这个
[vxlan]

enable_vxlan = false

[securitygroup]

enable_security_group = true

firewall_driver = neutron.agent.linux.iptables_firewall.IptablesFirewallDriver
[neutron]

url = http://192.168.101.10:9696

auth_url = http://192.168.101.10:35357

auth_type = password

project_domain_name = default

user_domain_name = default

region_name = RegionOne

project_name = service

username = neutron

password = neutron
# systemctl restart openstack-nova-compute.service
# systemctl enable neutron-linuxbridge-agent.service

# systemctl start neutron-linuxbridge-agent.service
# source admin-openrc

    List loaded extensions to verify successful launch of the neutron-server process:

# openstack extension list --network
# openstack network agent list

/etc/neutron/neutron.conf

/etc/neutron/plugins/ml2/ml2_conf.ini

/etc/neutron/plugins/ml2/linuxbridge_agent.ini

/etc/neutron/dhcp_agent.ini

/etc/neutron/metadata_agent.ini

/etc/nova/nova.conf
/etc/neutron/neutron.conf

/etc/neutron/plugins/ml2/linuxbridge_agent.ini

/etc/nova/nova.conf
照着官网来安装openstack pike之neutron安装的更多相关文章
- 照着官网来安装openstack pike之nova安装
nova组件安装分为控制节点和计算节点,还是先从控制节点安装 1.前提条件,数据库为nova创建库和账户密码来连接数据库 # mysql -u root -p MariaDB [(none)]> ...
- 照着官网来安装openstack pike之keystone安装
openstack基础环境安装完成后,现在开启安装keystone服务(在控制节点上执行下面所有操作) 1.为keystone创建数据库 mysql -u root -p MariaDB [(none ...
- 照着官网来安装openstack pike之glance安装
镜像服务image service(glance)的安装还是在控制节点上进行: 1.前提条件,数据库为glance创建库和账户密码来连接数据库 # mysql -u root -p MariaDB [ ...
- 照着官网来安装openstack pike之创建并启动instance
有了之前组件(keystone.glance.nova.neutron)的安装后,那么就可以在命令行创建并启动instance了 照着官网来安装openstack pike之environment设置 ...
- openstack pike 单机 一键安装 shell
#openstack pike 单机 centos 一键安装 shell #openstack pike 集群高可用 安装部署 汇总 http://www.cnblogs.com/elvi/p/7 ...
- 照着官网来安装openstack pike之environment设置
安装openstack前的准备环境: 两个centos7系统的环境:192.168.101.10 node1,192.168.101.11 node2 控制节点node1,计算节点node2 1.统一 ...
- 照着官网来安装openstack pike之安装dashboard
上文提到了利用命令行下使用openstack的命令来创建虚拟机,这里选择安装dashboard来安装基于web界面的openstack平台 利用dashboard界面来创建虚拟机 dashboard这 ...
- Devstack 安装OpenStack Pike版本(单机环境)
问题背景 最近在研究OpenStack的时候,需要对其源代码进行调试,公司服务器上部署的OpenStack环境又不能随意的进行折腾,为了研究的持续性和方便性,就决定再自己的虚拟机上面使用Devstac ...
- CentOS7安装OpenStack(Rocky版)-06.安装Neutron网络服务(控制节点)
上一章介绍了独立的nova计算节点的安装方法,本章分享openstack的网络服务neutron的安装配制方法 ------------------- 完美的分割线 ----------------- ...
随机推荐
- 『SharePoint 2010』Sharepoint 2010 Form 身份认证的实现(基于SQL)
1:创建一个基于身份认证的应用程序(具体参见上篇基于AD) SQL-MembershipProvider 成员SQL-RoleManager 角色 2:修改管理中心,我们创建的应用程序,还有Web服务 ...
- mysql支持跨表删除多条记录
在Mysql4.0之后,mysql开始支持跨表delete. Mysql可以在一个sql语句中同时删除多表记录,也可以根据多个表之间的关系来删除某一个表中的记录. 假定我们有两张表:Product表和 ...
- 基于k8s的promethus监控
没有监控 就没有眼睛. 除了k8s的基本监控外(pod运行状况.占用内存.cpu).为了对微服务项目中的(1)各种参数线程池.QPS.RT.业务指标(2)系统负载.thread.mem.class.t ...
- 修改mysql root的秘密
修改mysql root的秘密 ');
- web安全之xss攻击
xss攻击的全称是Cross-Site Scripting (XSS)攻击,是一种注入式攻击.基本的做法是把恶意代码注入到目标网站.由于浏览器在打开目标网站的时候并不知道哪些脚本是恶意的,所以浏览器会 ...
- Spark源码分析 – Shuffle
参考详细探究Spark的shuffle实现, 写的很清楚, 当前设计的来龙去脉 Hadoop Hadoop的思路是, 在mapper端每次当memory buffer中的数据快满的时候, 先将memo ...
- 该死的Kafka,远程连接Kafka超时以及解决办法
关于消息的发布与订阅,之前一直使用的是activeMQ基于JMS的消息队列进行操作的,最近听说有一个更高效的消息的发布与订阅技术,就是Kafka. 关于kafka的介绍,在这里就不做过多讲解了,因为我 ...
- Java-多线程基本
Java-多线程基本 一 相关的概念 进程:是一个正在执行中的程序 每个进程都有一个执行的顺序,该顺序是一个执行路径,或者叫一个控制单元 线程:就是进程中的一个独立的控制单元,线程在控制着进程的执行 ...
- python web框架 django 添加环境变量
C:\Users\Administrator.QH-20170325TNQR\AppData\Local\Programs\Python\Python36\Scripts把环境变量加上 可以在本地执行 ...
- Linux环境下NodeJS的安装配置(HelloWorld)
Linux环境下NodeJS的安装配置(HelloWorld) 最简单的环境安装,测试helloworld.给初学者!! 安装脚本,请仔细阅读逐行执行: #!/bin/bash #检查是否已经安装 r ...
