Elasticsearch官方安装
Installationedit
Elasticsearch requires at least Java 8. Specifically as of this writing, it is recommended that you use the Oracle JDK version 1.8.0_131. Java installation varies from platform to platform so we won’t go into those details here. Oracle’s recommended installation documentation can be found on Oracle’s website. Suffice to say, before you install Elasticsearch, please check your Java version first by running (and then install/upgrade accordingly if needed):
java -version

echo $JAVA_HOME
Once we have Java set up, we can then download and run Elasticsearch. The binaries are available from www.elastic.co/downloads along with all the releases that have been made in the past. For each release, you have a choice among a zip or tar archive, a DEB or RPM package, or a Windows MSI installation package.
Installation example with taredit
For simplicity, let’s use the tar file.
Let’s download the Elasticsearch 5.6.4 tar as follows:
curl -L -O https://artifacts.elastic.co/downloads/elasticsearch/elasticsearch-5.6.4.tar.gz
Then extract it as follows:
tar -xvf elasticsearch-5.6.4.tar.gz
It will then create a bunch of files and folders in your current directory. We then go into the bin directory as follows:
cd elasticsearch-5.6.4/bin
And now we are ready to start our node and single cluster:
./elasticsearch
Installation with Homebrewedit
On macOS, Elasticsearch can also be installed via Homebrew:
brew install elasticsearch
Installation example with MSI Windows Installeredit
For Windows users, we recommend using the MSI Installer package. The package contains a graphical user interface (GUI) that guides you through the installation process.
First, download the Elasticsearch 5.6.4 MSI fromhttps://artifacts.elastic.co/downloads/elasticsearch/elasticsearch-5.6.4.msi.
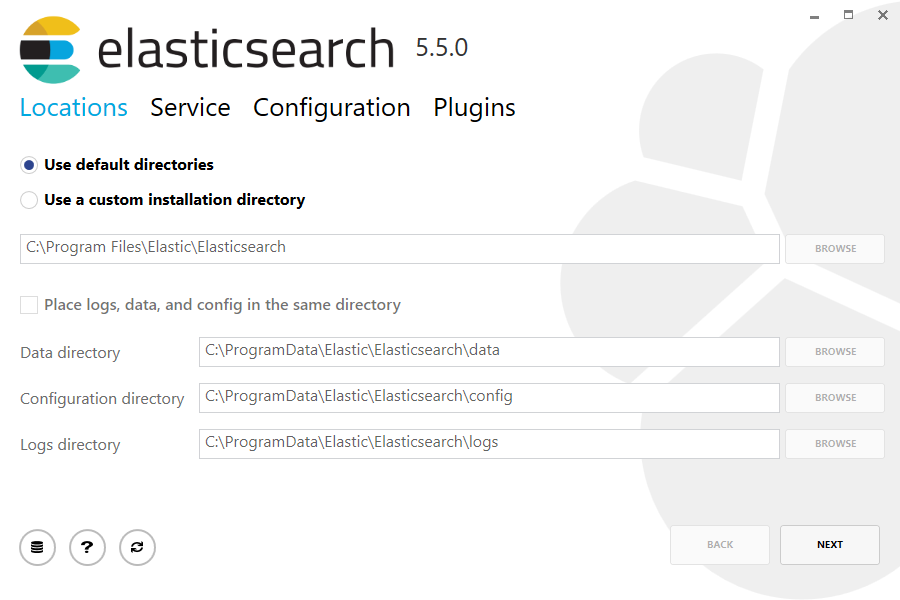
Then double-click the downloaded file to launch the GUI. Within the first screen, select the deployment directories:
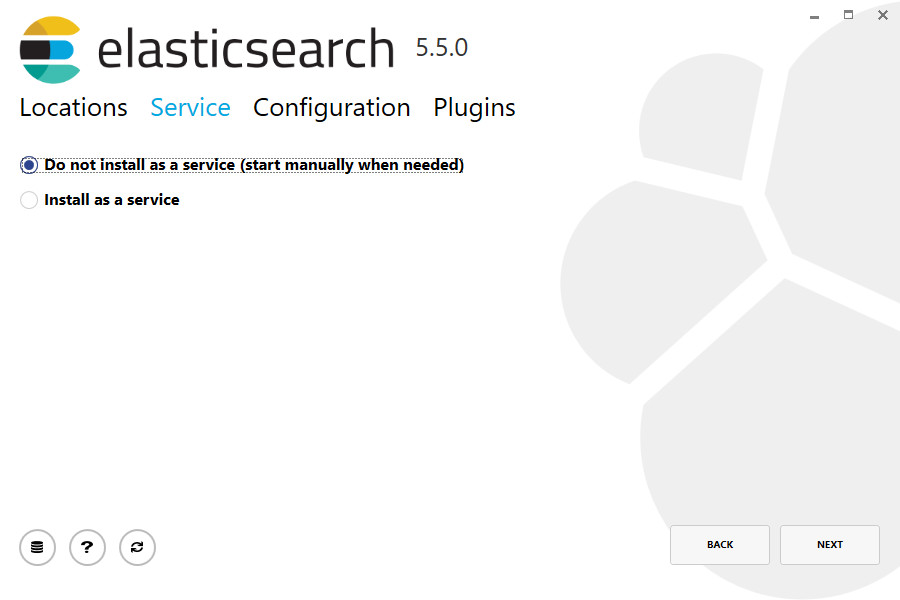
Then select whether to install as a service or start Elasticsearch manually as needed. To align with the tar example, choose not to install as a service:
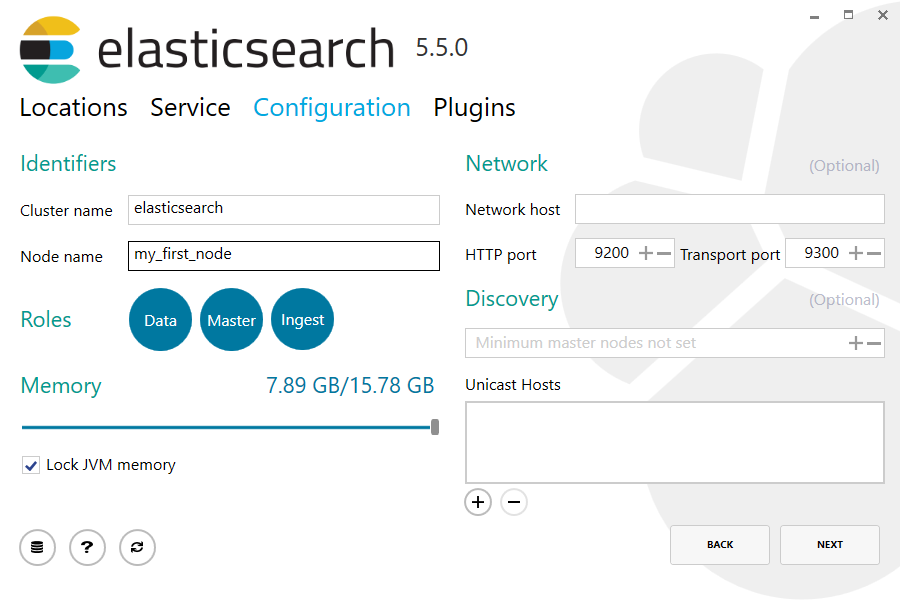
For configuration, simply leave the default values:
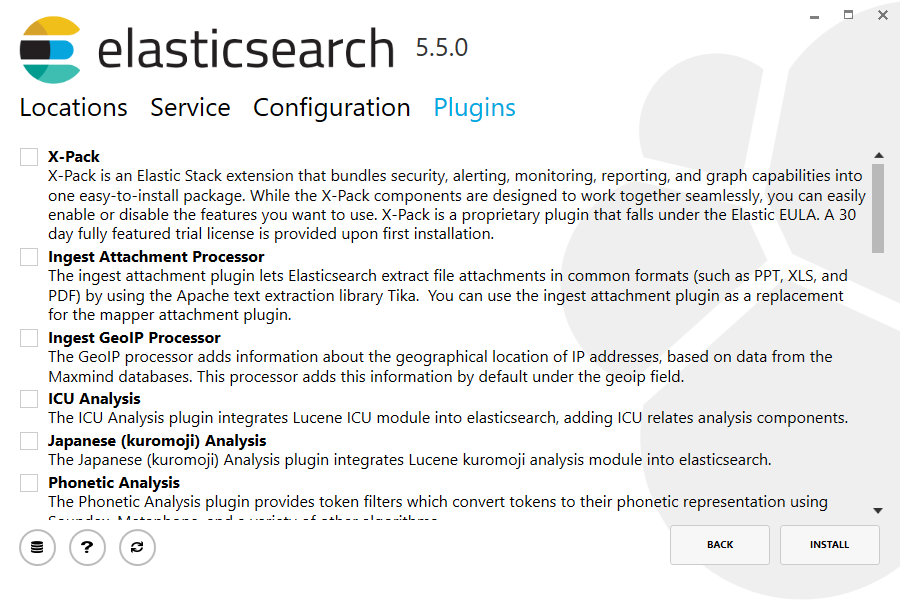
Again, to align with the tar example, uncheck all plugins to not install any plugins:
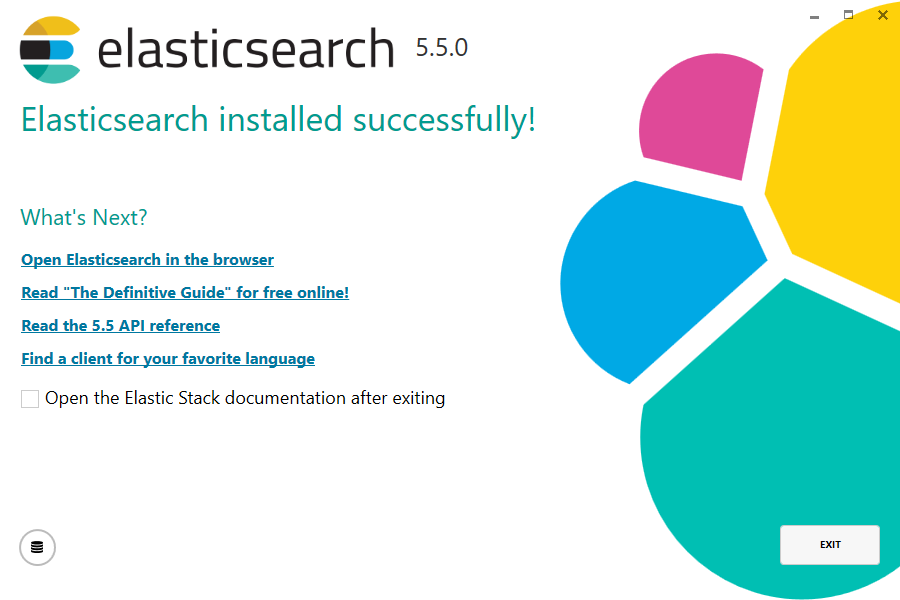
After clicking the install button, Elasticsearch will be installed:
By default, Elasticsearch will be installed at %PROGRAMFILES%\Elastic\Elasticsearch. Navigate here and go into the bin directory as follows:
with Command Prompt:
cd %PROGRAMFILES%\Elastic\Elasticsearch\bin
with PowerShell:
cd $env:PROGRAMFILES\Elastic\Elasticsearch\bin
And now we are ready to start our node and single cluster:
.\elasticsearch.exe
Successfully running nodeedit
If everything goes well with installation, you should see a bunch of messages that look like below:
[2016-09-16T14:17:51,251][INFO ][o.e.n.Node               ] [] initializing ...

[2016-09-16T14:17:51,329][INFO ][o.e.e.NodeEnvironment    ] [6-bjhwl] using [1] data paths, mounts [[/ (/dev/sda1)]], net usable_space [317.7gb], net total_space [453.6gb], spins? [no], types [ext4]

[2016-09-16T14:17:51,330][INFO ][o.e.e.NodeEnvironment    ] [6-bjhwl] heap size [1.9gb], compressed ordinary object pointers [true]

[2016-09-16T14:17:51,333][INFO ][o.e.n.Node               ] [6-bjhwl] node name [6-bjhwl] derived from node ID; set [node.name] to override

[2016-09-16T14:17:51,334][INFO ][o.e.n.Node               ] [6-bjhwl] version[5.6.4], pid[21261], build[f5daa16/2016-09-16T09:12:24.346Z], OS[Linux/4.4.0-36-generic/amd64], JVM[Oracle Corporation/Java HotSpot(TM) 64-Bit Server VM/1.8.0_60/25.60-b23]

[2016-09-16T14:17:51,967][INFO ][o.e.p.PluginsService     ] [6-bjhwl] loaded module [aggs-matrix-stats]

[2016-09-16T14:17:51,967][INFO ][o.e.p.PluginsService     ] [6-bjhwl] loaded module [ingest-common]

[2016-09-16T14:17:51,967][INFO ][o.e.p.PluginsService     ] [6-bjhwl] loaded module [lang-expression]

[2016-09-16T14:17:51,967][INFO ][o.e.p.PluginsService     ] [6-bjhwl] loaded module [lang-groovy]

[2016-09-16T14:17:51,967][INFO ][o.e.p.PluginsService     ] [6-bjhwl] loaded module [lang-mustache]

[2016-09-16T14:17:51,967][INFO ][o.e.p.PluginsService     ] [6-bjhwl] loaded module [lang-painless]

[2016-09-16T14:17:51,967][INFO ][o.e.p.PluginsService     ] [6-bjhwl] loaded module [percolator]

[2016-09-16T14:17:51,968][INFO ][o.e.p.PluginsService     ] [6-bjhwl] loaded module [reindex]

[2016-09-16T14:17:51,968][INFO ][o.e.p.PluginsService     ] [6-bjhwl] loaded module [transport-netty3]

[2016-09-16T14:17:51,968][INFO ][o.e.p.PluginsService     ] [6-bjhwl] loaded module [transport-netty4]

[2016-09-16T14:17:51,968][INFO ][o.e.p.PluginsService     ] [6-bjhwl] loaded plugin [mapper-murmur3]

[2016-09-16T14:17:53,521][INFO ][o.e.n.Node               ] [6-bjhwl] initialized

[2016-09-16T14:17:53,521][INFO ][o.e.n.Node               ] [6-bjhwl] starting ...

[2016-09-16T14:17:53,671][INFO ][o.e.t.TransportService   ] [6-bjhwl] publish_address {192.168.8.112:9300}, bound_addresses {{192.168.8.112:9300}

[2016-09-16T14:17:53,676][WARN ][o.e.b.BootstrapCheck     ] [6-bjhwl] max virtual memory areas vm.max_map_count [65530] likely too low, increase to at least [262144]

[2016-09-16T14:17:56,731][INFO ][o.e.h.HttpServer         ] [6-bjhwl] publish_address {192.168.8.112:9200}, bound_addresses {[::1]:9200}, {192.168.8.112:9200}

[2016-09-16T14:17:56,732][INFO ][o.e.g.GatewayService     ] [6-bjhwl] recovered [0] indices into cluster_state

[2016-09-16T14:17:56,748][INFO ][o.e.n.Node               ] [6-bjhwl] started
Without going too much into detail, we can see that our node named "6-bjhwl" (which will be a different set of characters in your case) has started and elected itself as a master in a single cluster. Don’t worry yet at the moment what master means. The main thing that is important here is that we have started one node within one cluster.
As mentioned previously, we can override either the cluster or node name. This can be done from the command line when starting Elasticsearch as follows:
./elasticsearch -Ecluster.name=my_cluster_name -Enode.name=my_node_name
Also note the line marked http with information about the HTTP address (192.168.8.112) and port (9200) that our node is reachable from. By default, Elasticsearch uses port 9200 to provide access to its REST API. This port is configurable if necessary.
Elasticsearch官方安装的更多相关文章
- ElasticSearch的安装
一.安装javaSE环境(已配java环境变量的请直接跳过) 1.从Java JDK 官网下载适合自己的jdk版本.(我自己用的jdk1.7) 2.安装jdk后,配置java环境变量(ps:比较喜欢简 ...
- elasticsearch 的安装配置与spring boot的整合应用
linux上的elasticsearch安装 一.下载elasticsearch 直接进入elasticsearch的官网,下载最新的安装包:https://www.elastic.co/downlo ...
- Elasticsearch 使用-安装
Elasticsearch 使用-安装 官方网站 https://www.elastic.co/cn/elasticsearch/ 什么是 Elasticsearch? Elasticsearch 是 ...
- 如何在Elasticsearch中安装中文分词器(IK+pinyin)
如果直接使用Elasticsearch的朋友在处理中文内容的搜索时,肯定会遇到很尴尬的问题--中文词语被分成了一个一个的汉字,当用Kibana作图的时候,按照term来分组,结果一个汉字被分成了一组. ...
- elasticsearch rpm 安装
参考:http://www.elasticsearch.org/guide/en/elasticsearch/reference/current/setup-repositories.html Dow ...
- Linux初学 - Elasticsearch环境安装
下载 https://www.elastic.co/downloads/elasticsearch 安装 rpm -ivh 也可以双击rpm包安装 修改elastaticsearch host配置 修 ...
- centos 6.7下 elasticsearch的安装
1.下载elasticsearch的安装包,用ftp上传到linux系统下目录中,如在当前用户root的目录下新建目录elasticsearch,放入安装包 不要忘了添加执行权限 chmod +x * ...
- Windows 7 SP1 x64 旗舰版 微软官方安装U盘的制作
[ 本主题由 中山艹泥喵 于 2013-08-20 23:14:33 设为精华1,原因:不错~ ] 最后由 风中枯萎 于 2015-12-15 17:44:15 修改 安装Windows 7操作系统主 ...
- 转:ElasticSearch的安装和相关插件的安装
原文来自于:http://blog.csdn.net/whxaing2011/article/details/18237733 本文主要介绍如下内容: 1.ElasticSearch ...
随机推荐
- emacs 简记
简介 Emacs作为神的编辑器,不用介绍了吧,说点感受. 用了一段时间了,总体感觉其实Emacs是很简单的,甚至比vim还简单,因为在X环境下,打开后可以就像记事本一样使用.但是,使用Emacs的人一 ...
- selenium3 踩坑--move_to_element()报错
问题:selenium3 使用move_to_element()报错,报错信息如下图所示: 网上没有找到合适的解决办法,回退到稳定的selenium2可以解决. pip install seleniu ...
- Hive总结(四)hive安装记录
本篇为安装篇较简单: 前提: 1: 安装了hadoop-1.0.4(1.0.3也能够)正常执行 2:安装了hbase-0.94.3, 正常执行 接下来,安装Hive,基于已经安装好的hadoop.过程 ...
- doT.js具体使用介绍
官网: http://olado.github.iodoT.js具体使用介绍 用法: {{= }} for interpolation {{ }} for evaluation {{~ }} for ...
- NDK以及C语言基础语法(二)
一.字符串类:(属于类类型) -String (在C++中才有) 使用之前必学引入String 类型: 引入String头文件(系统的头文件): #include <string> p ...
- 【BZOJ4568】[Scoi2016]幸运数字 倍增+线性基
[BZOJ4568][Scoi2016]幸运数字 Description A 国共有 n 座城市,这些城市由 n-1 条道路相连,使得任意两座城市可以互达,且路径唯一.每座城市都有一个幸运数字,以纪念 ...
- js闭包实际用途
闭包例:防止双击 在线商店的购物车里,为防止“多重购买”,需要防止按钮被双击. 下面用“jQuery + 闭包”来实现这一功能. HTML <form name="frm" ...
- 原型模式 private static Map<String,Prototype> map = new HashMap<String,Prototype>();
public class PrototypeManager { /** * 用来记录原型的编号和原型实例的对应关系 */ private static Map<String,Prototype& ...
- 洛谷 2868 [USACO07DEC]观光奶牛Sightseeing Cows
题目戳这里 一句话题意 L个点,P条有向边,求图中最大比率环(权值(Fun)与长度(Tim)的比率最大的环). Solution 巨说这是0/1分数规划. 话说 0/1分数规划 是真的难,但貌似有一些 ...
- [2018-10-17]宁波dotnet社区(NBDNC)第一次问卷关于dotnet技术栈的小调查
最近(2018年10月7日至10月17日),为配合确定下一次社区线下活动主题,做了一次宁波dotnet社区(NBDNC)的本地dotnet技术栈调研,设计了一份问卷,在此做一次记录. 导出的问卷统计结 ...