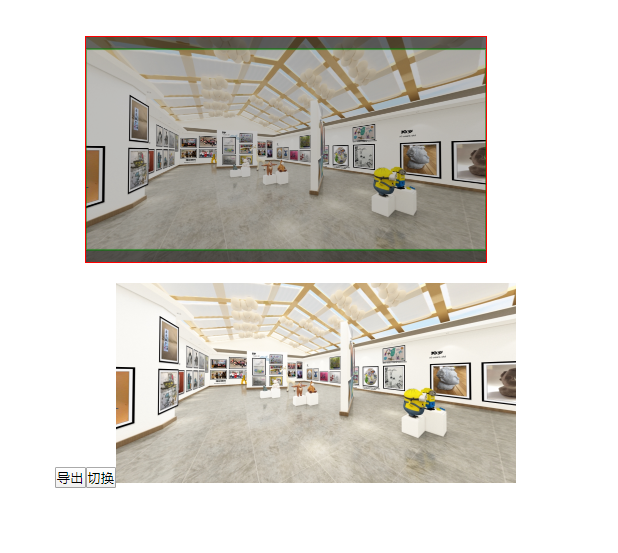
撸一个 vue 的截图组件,按比例截取
- <template>
- <div class="clip-img" :style="imgStyle">
- <img :src="url" alt="" crossOrigin="anonymous" :style="imgStyle">
- <canvas ref="canvas" :style="imgStyle" @mousedown="onmousedown" @mousemove="onmousemove"></canvas>
- </div>
- </template>
- <script>
- export default {
- name:"clip-image",
- props:{
- max:{ // 缩放基准宽度或高度
- type:Number,
- default:400
- }
- },
- data(){
- return {
- img:null,
- url:null,
- imgInfo: null, // 压缩前的信息
- imgCInfo:null, // 压缩后的信息
- clipInfo:null, // 压缩前的信息
- clipCinfo:null, // 压缩后的信息
- ctx:null, // 画板
- pos:{x:0,y:0},
- lock: "", // 锁住一个方向
- boundary:null
- }
- },
- computed:{
- imgStyle(){
- let imgCInfo = this.imgCInfo;
- if(imgCInfo){
- return {
- width: `${imgCInfo.w}px`,
- height: `${imgCInfo.h}px`
- }
- }
- return {height:"0px",height:"0px",display:"none"};
- }
- },
- async mounted(){
- this.clear();
- this.ctx = this.$refs.canvas.getContext("2d");
- window.addEventListener("mouseup",this.onmouseup);
- },
- methods:{
- init(src,bound){
- this.setSrc(src)
- this.setClip(bound);
- },
- // 外部调用
- async setSrc(src){
- let img = await this.loadImage(src,{crossOrigin:"anonymous"});
- this.img = img;
- this.setImg(img);
- },
- clear(){
- let obj = {
- img:null,
- url:null,
- imgInfo: null, // 压缩前的信息
- imgCInfo:null, // 压缩后的信息
- clipInfo:null, // 压缩前的信息
- clipCinfo:null, // 压缩后的信息
- ctx:null, // 画板
- pos:{x:0,y:0},
- lock: "", // 锁住一个方向
- boundary:null
- }
- for(let i in obj){
- this[i] = obj[i];
- }
- },
- loadImage(url,attrs){
- this.url = url;
- let img = new Image();
- img.src = url;
- attrs = attrs || {};
- for(let i in attrs){
- img[i] = attrs[i];
- }
- return new Promise((resolve,reject)=>{
- img.onload = function(){
- resolve(img);
- };
- img.onerror = reject;
- });
- },
- setImg(img){
- this.img = img;
- this.imgInfo = {
- w:img.width,
- h:img.height
- };
- // 压缩图的比例
- let w,h,scale;
- if(img.width > img.height){
- w = this.max;
- scale = w/img.width;
- h = scale*img.height;
- }else{
- h = this.max;
- scale = (h/img.height);
- w = scale * img.width;
- }
- this.imgCInfo = {
- w,
- h,
- scale
- };
- let canvas = this.$refs.canvas;
- canvas.width = w;
- canvas.height = h;
- this.setClip();
- },
- setClip(clipInfo){
- if(clipInfo){
- this.clipInfo = {
- w:clipInfo.width,
- h:clipInfo.height
- };
- }
- if(this.imgCInfo && this.clipInfo){
- this.compressClip(this.imgCInfo,this.clipInfo);
- this.fill();
- }
- },
- compressClip(imgCInfo,clipInfo){
- // 压缩缩放
- let w,h,scale;
- let imgR = imgCInfo.w/imgCInfo.h;
- let clipR = clipInfo.w / clipInfo.h;
- if(imgR > clipR){
- // 图片的宽度偏大
- h = imgCInfo.h;
- scale = h/clipInfo.h;
- w = scale * clipInfo.w;
- this.lock = "h";
- }else{
- // 图片的宽度偏小
- w = imgCInfo.w;
- scale = w/clipInfo.w;
- h = scale * clipInfo.h;
- this.lock = "w";
- }
- this.clipCinfo = {
- w,
- h,
- scale
- }
- this.boundary = {
- w:this.imgCInfo.w - this.clipCinfo.w,
- h:this.imgCInfo.h - this.clipCinfo.h
- };
- this.pos = {
- x:0,
- y:0
- };
- },
- onmouseup(){
- this.mouse = null;
- },
- onmousedown(e){
- this.mouse = {
- x:e.offsetX,
- y:e.offsetY
- }
- },
- onmousemove(e){
- if(this.mouse){
- let x = e.offsetX - this.mouse.x ;
- let y = e.offsetY - this.mouse.y;
- if(this.lock == "h"){
- x = this.pos.x + x;
- if(x < 0){
- x = 0;
- }else if(x > this.boundary.w){
- x = this.boundary.w
- }
- this.pos.x = x;
- }else{
- y = this.pos.y + y;
- if(y < 0){
- y = 0;
- }else if(y > this.boundary.h){
- y = this.boundary.h
- }
- this.pos.y = y;
- }
- this.mouse = {
- x:e.offsetX,
- y:e.offsetY
- }
- this.fill();
- }
- },
- fill(){
- let {w,h} = this.clipCinfo;
- let {x,y} = this.pos;
- let clipctx = this.ctx;
- let imgCInfo = this.imgCInfo;
- clipctx.clearRect(0, 0, imgCInfo.w, imgCInfo.h);
- clipctx.beginPath();
- clipctx.fillStyle = 'rgba(0,0,0,0.6)';
- clipctx.strokeStyle = "green";
- //遮罩层
- clipctx.globalCompositeOperation = "source-over";
- clipctx.fillRect(0, 0, imgCInfo.w, imgCInfo.h);
- //画框
- clipctx.globalCompositeOperation = 'destination-out';
- clipctx.fillRect(x, y, w, h);
- //描边
- clipctx.globalCompositeOperation = "source-over";
- clipctx.moveTo(x, y);
- clipctx.lineTo(x + w, y);
- clipctx.lineTo(x + w, y + h);
- clipctx.lineTo(x, y + h);
- clipctx.lineTo(x, y);
- clipctx.stroke();
- clipctx.closePath();
- },
- exportBase(){
- // 导出图片 base64
- let pos = this.pos;
- let scale = this.imgCInfo.scale;
- let sx = pos.x / scale;
- let sy = pos.y / scale;
- let swidth = parseInt(this.clipCinfo.w / scale);
- let sheight = parseInt(this.clipCinfo.h / scale);
- let canvas = document.createElement("canvas");
- canvas.width = swidth;
- canvas.height = sheight;
- let ctx = canvas.getContext("2d");
- ctx.drawImage(this.img,sx,sy,this.imgInfo.w,this.imgInfo.h,0,0,this.imgInfo.w,this.imgInfo.h);
- return canvas.toDataURL("image/png");
- },
- dataURLtoFile(b64Data,filename){
- filename = filename || "test.png";
- let mime = "image/png";
- var bstr = atob(b64Data.replace(/^data:image\/(png|jpeg|jpg);base64,/, ''));
- var n = bstr.length;
- var u8arr = new Uint8Array(n);
- while(n--){
- u8arr[n] = bstr.charCodeAt(n);
- }
- // 转换成file对象
- return new File([u8arr], filename, {type:mime});
- // 转换成成blob对象
- // return new Blob([u8arr],{type:mime});
- // return blob;
- }
- },
- destroyed(){
- window.removeEventListener("mouseup",this.onmouseup);
- }
- }
- </script>
- <style lang="scss" scoped>
- .clip-img{
- border: 1px solid red;
- margin: 20px auto;
- position: relative;
- height: 0;
- width: 0;
- overflow: hidden;
- canvas{
- position: absolute;
- left: 0;
- top: 0;
- z-index: 1;
- cursor: move;
- }
- img{
- position: relative;
- z-index: 0;
- }
- }
- </style>
使用:
- <template>
- <div class="clip-img">
- <clipImage ref="clipImage"></clipImage>
- <button @click="getImg">导出</button> <button @click="slide">切换</button>
- <img :src="src" v-if="src" alt="" class="result">
- </div>
- </template>
- <script>
- import clipImage from "@/components/clip-image.vue";
- export default {
- name:"clip-image",
- data(){
- return {
- src:""
- }
- },
- components:{
- clipImage
- },
- mounted(){
- // setSrc
- this.$refs.clipImage.init("xxx",{width:400,height:200});
- },
- methods:{
- getImg(){
- this.src = this.$refs.clipImage.exportBase();
- console.log("截图成功")
- },
- slide(){
- this.$refs.clipImage.setSrc("xxx");
- }
- }
- }
- </script>
- <style lang="scss" scoped>
- .clip-img{
- .result{
- max-width: 400px;
- }
- }
- </style>
撸一个 vue 的截图组件,按比例截取的更多相关文章
- 手把手从零开始---封装一个vue视频播放器组件
现在,在网页上播放视频已经越来越流行,但是网上的资料鱼龙混杂,很难找到自己想要的,今天小编就自己的亲身开发体验,手把手从零开始---封装一个vue视频播放器组件. 作为一个老道的前端搬砖师,怎么可能会 ...
- 纯手工撸一个vue框架
前言 vue create 真的很方便,但是很多人欠缺的是手动撸一遍.有些人离开脚手架都不会开发了. Vue最简单的结构 步骤 搭建最基本的结构 打开空文件夹,通过 npm init 命令生成pack ...
- 从零开始徒手撸一个vue的toast弹窗组件
相信普通的vue组件大家都会写,定义 -> 引入 -> 注册 -> 使用,行云流水,一气呵成,但是如果我们今天是要自定义一个弹窗组件呢? 首先,我们来分析一下弹窗组件的特性(需求): ...
- VUE -- 如何快速的写出一个Vue的icon组件?
伴随着Vue的诞生,它似乎就被人寄予厚望,不仅仅是因为其轻量级的MVVM设计方式,而且其实现了组件化开发模式,所以越来越多的人会拿Vue和AngularJS.React Native做比较.具体关于它 ...
- 基于iview 封装一个vue 表格分页组件
iview 是一个支持中大型项目的后台管理系统ui组件库,相对于一个后台管理系统的表格来说分页十分常见的 iview是一个基于vue的ui组件库,其中的iview-admin是一个已经为我们搭好的后天 ...
- 手把手教你实现一个 Vue 进度条组件!
最近在个人的项目中,想对页面之间跳转的过程进行优化,想到了很多文档或 npm 等都用到的页面跳转进度条,于是便想自己去实现一个,特此记录. 来看下 npm 搜索组件时候的效果: so 下面咱们一起动手 ...
- 撸一个vue的双向绑定
1.前言 说起双向绑定可能大家都会说:Vue内部通过Object.defineProperty方法属性拦截的方式,把data对象里每个数据的读写转化成getter/setter,当数据变化时通知视图更 ...
- 一个vue的日历组件
说明: 1.基于element-ui开发的vue日历组件. 地址 更新: 1.增加value-format指定返回值的格式2.增加头部插槽自定义头部 <ele-calendar > < ...
- 来吧,自己动手撸一个分布式ID生成器组件
在经过了众多轮的面试之后,小林终于进入到了一家互联网公司的基础架构组,小林目前在公司有使用到架构组研究到分布式id生成器,前一阵子大概看了下其内部的实现,发现还是存在一些架构设计不合理之处.但是又由于 ...
随机推荐
- Java对象为啥要实现Serializable接口
Serializable接口概述 Serializable是java.io包中定义的.用于实现Java类的序列化操作而提供的一个语义级别的接口.Serializable序列化接口没有任何方法或者字段, ...
- Linux永久挂载新的硬盘
1. 查看设备挂载的情况 fdisk -l 2. 查看数据盘是否格式化 lsblk -f 3. 如果没有,格式化硬盘 sudo mkfs.xfs /dev/vdb 4. 创建挂载点,例如 mkdir ...
- shell脚本将gbk文件转化为utf-8
使用注意项: 原来文件格式gbk的,否则可能出现utf-8转utf-8乱码. #!/bin/bash function gbk2utf(){ file="$1" echo &quo ...
- [转]linux 下 使用 c / c++ 调用curl库 做通信开发
example: 1. http://curl.haxx.se/libcurl/c/example.html 2. http://www.libcurl.org/book: 1. http:/ ...
- openresty开发系列1--网关API架构及选型
微服务架构在项目中的应用越来越多,我们知道在微服务架构风格中,一个大应用被拆分成为了多个小的服务系统提供出来,这些小的系统他们可以自成体系,也就是说这些小系统可以拥有自己的数据库,框架甚至语言等,这些 ...
- Spark ML 中 VectorIndexer, StringIndexer等用法(转载)
VectorIndexer 主要作用:提高决策树或随机森林等ML方法的分类效果.VectorIndexer是对数据集特征向量中的类别(离散值)特征(index categorical features ...
- HBase在特征工程中的应用
前言HBase是一款分布式的NoSQL DB,可以轻松扩展存储和读写能力. 主要特性有: 按某精确的key获取对应的value(Get) 通过前缀匹配一段相邻的数据(Scan) 多版本 动态列 服务端 ...
- Microsoft VBScript 运行时错误 错误 800a005e 无效使用 Null: Replace
查看数据库 表的字段里面是否有空的字段. where 字段名 is null
- Oracle中RAISE异常
转: Oracle中RAISE异常 由三种方式抛出异常 1. 通过PL/SQL运行时引擎 2. 使用RAISE语句 3. 调用RAISE_APPLICATION_ERROR存储过程 当数据库或PL/S ...
- iOS 控制输入框的字数?(textFliedView,textFlied等)
//控制输入框的字数 - (void)textViewDidChange:(UITextView *)textView { NSInteger number = [textView.text leng ...