SpringCloudConfig相关配置简介、使用、整合Eureka
目的:
1、SpringCloud Config简介
2、Config Server基本使用
3、Config Client基本使用
4、Config整合Eureka
5、Config配置搜索路径
SpringCloud Config简介
SpringCloud Config为微服务架构中的微服务提供集中化的外部配置支持,配置服务器为各个不同微服务应用的所有环境提供了一个中心化的外部配置。
SpringCloud Config分为服务端和客户端两部分。
服务端也称为分布式配置中心,它是一个独立的微服务应用,用来连接配置服务器并为客户端提供获取配置信息,加密/解密信息等访问接口。
客户端则是通过指定的配置中心来管理应用资源,以及与业务相关的配置内容,并在启动的时候从配置中心获取和加载配置信息,配置服务器默认采用git来存储配置信息,这样就有助于对环境配置进行版本管理,并且可以通过git客户端工具来方便的管理和访问配置内容。
用途:
集中管理配置文件。
不同环境不同配置,动态化的配置更新,分环境部署比如dev/test/prod/beta/release。
运行期间动态调整配置,不再需要在每个服务部署的机器上编写配置文件,服务会向配置中心。
统一拉取配置自己的信息。
当配置发生变动时,服务不需要重启即可感知到配置的变化并应用新的配置。
将配置信息以REST就接口的形式暴露。
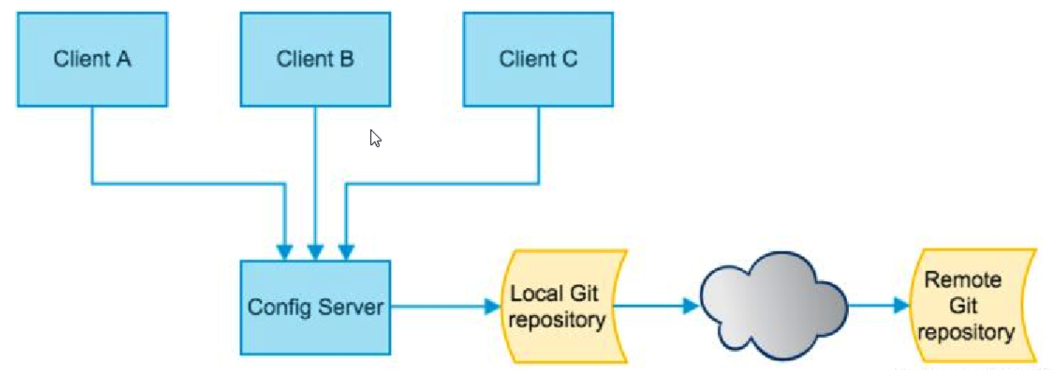
Config Server端主要和Git/SVN服务器
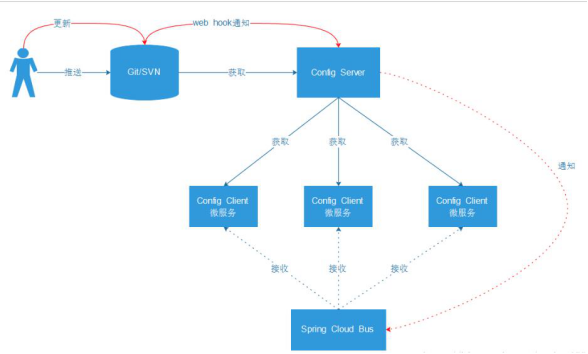
通俗点,就是统一管理配置,包括方便切换环境配置,以及修改配置无需动代码,省心省力;
如果用上SpringCloud Bus,能实现无需重启,自动感知配置变化以及应用新配置;
Config Server基本使用
首先第一步,要搞个 configServer来联通远程GIT仓库,来读取远程配置;
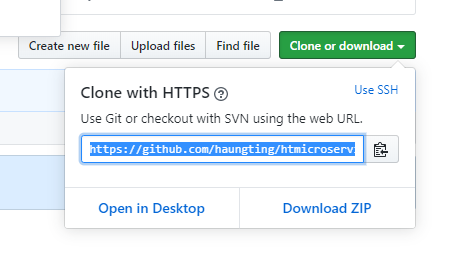
这里GIT仓库,我们一般选用GitHub https://github.com/,或者码云 https://gitee.com/
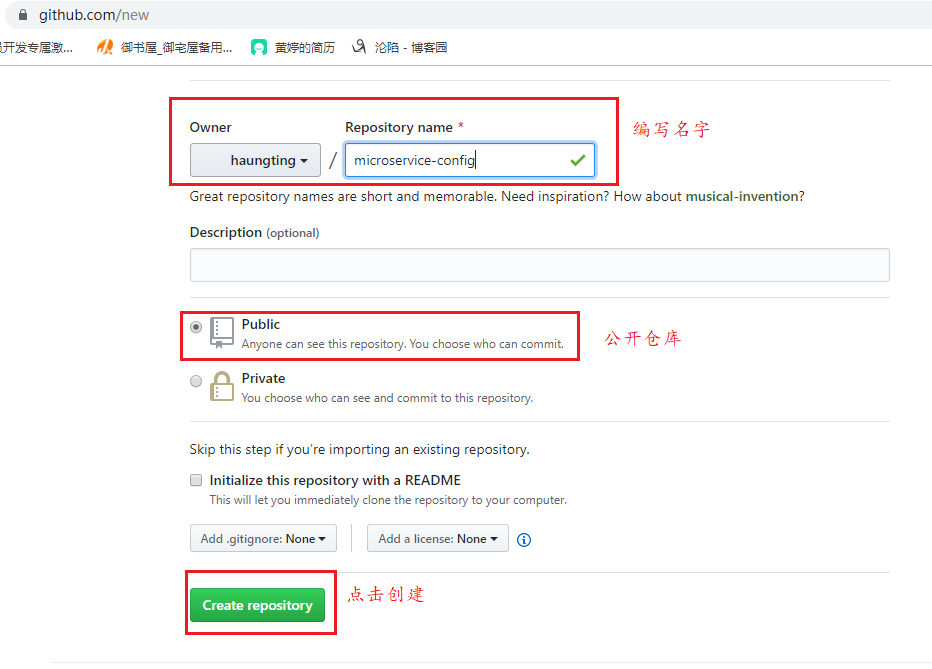
我们这里用GitHub演示(github官网:https://github.com/)
关于github在window系统中使用可以查看博客https://www.cnblogs.com/huangting/p/11684508.html
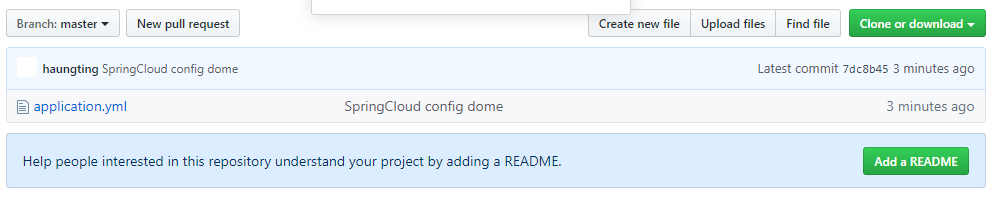
建个仓库 microservice-config 然后 Git下载本地
把仓库克隆到本地仓库以后把项目中的application.yml文件复制进去在push到github仓库中,测试yml文件可否上传到github
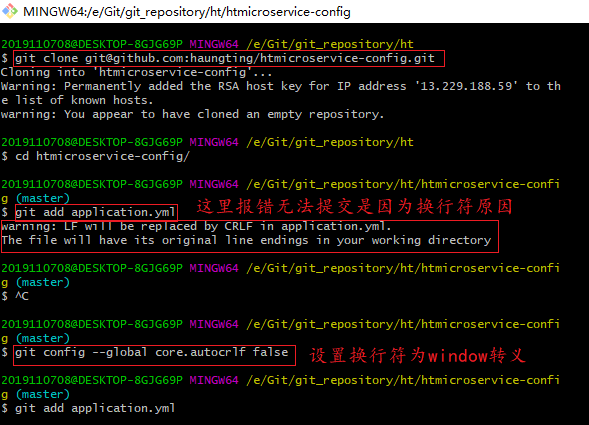
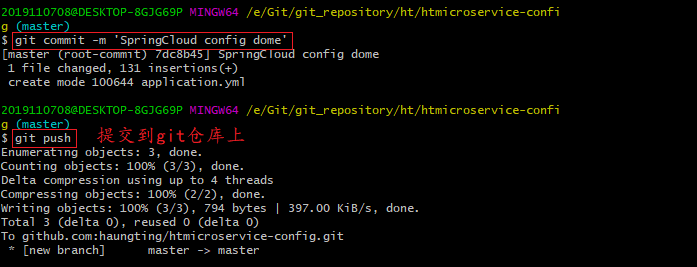
其中出现的window转义问题解决可看我上篇博客:https://www.cnblogs.com/huangting/p/11945774.html
成功。那么我们来玩一下Springcloudserver和github仓库的配置文件交互
首先在ideaul中创建一个Springboot工程,microservice-config-server-4001
然后在pom中添加一个依赖:
<?xml version="1.0" encoding="UTF-8"?>

<project xmlns="http://maven.apache.org/POM/4.0.0" xmlns:xsi="http://www.w3.org/2001/XMLSchema-instance"

         xsi:schemaLocation="http://maven.apache.org/POM/4.0.0 https://maven.apache.org/xsd/maven-4.0.0.xsd">

    <modelVersion>4.0.0</modelVersion>

    <parent>

        <groupId>com.ht</groupId>

        <artifactId>htSpringCloud</artifactId>

        <version>1.0-SNAPSHOT</version>

    </parent>

    <artifactId>microservice-config-server-4001</artifactId>

    <properties>

        <java.version>1.8</java.version>

    </properties>

    <dependencies>

        <dependency>

            <groupId>org.springframework.boot</groupId>

            <artifactId>spring-boot-starter</artifactId>

        </dependency>

        <dependency>

            <groupId>org.springframework.boot</groupId>

            <artifactId>spring-boot-starter-test</artifactId>

            <scope>test</scope>

            <exclusions>

                <exclusion>

                    <groupId>org.junit.vintage</groupId>

                    <artifactId>junit-vintage-engine</artifactId>

                </exclusion>

            </exclusions>

        </dependency>

        <dependency>

            <groupId>org.springframework.cloud</groupId>

            <artifactId>spring-cloud-config-server</artifactId>

        </dependency>

    </dependencies>

    <build>

        <plugins>

            <plugin>

                <groupId>org.springframework.boot</groupId>

                <artifactId>spring-boot-maven-plugin</artifactId>

            </plugin>

        </plugins>

    </build>

</project>
在启动类ConfigServerApplication_4001中添加注释@EnableConfigServer
package com.ht.microserviceconfigserver4001;

import org.springframework.boot.SpringApplication;

import org.springframework.boot.autoconfigure.SpringBootApplication;

import org.springframework.cloud.config.server.EnableConfigServer;

@EnableConfigServer

@SpringBootApplication

public class MicroserviceConfigServer4001Application {

    public static void main(String[] args) {

        SpringApplication.run(MicroserviceConfigServer4001Application.class, args);

    }

}
然后配置yml文件,给它添加一段集合git的url (记住访问git的http地址而不是ssh地址)
server:

  port:

spring:

  application:

    name:  microservice-config

  cloud:

    config:

      server:

        git:

          uri: https://github.com/haungting/htmicroservice-config.git
//从git你的仓库里面复制下来的http地址,url变化因人而异,这样git才可以请求
单单是这样还不行,我们还要配置本地映射:
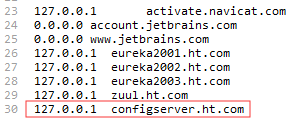
找到本机C:\Windows\System32\drivers\etc 地址下的host文件
加以下配置:
127.0.0.1 configserver.ht.com
然后我们请求:http://configserver.ht.com:4001/application-xxx.yml
返回结果了正确的文本结果;

请求路径,也有相应的匹配规则:
The HTTP service has resources in the form:
|
详细可参考:https://www.cnblogs.com/hellxz/p/9306507.html
Config Client基本使用
这里我们需要建立Client端去调用server端,然后实现client端获取远程git配置信息
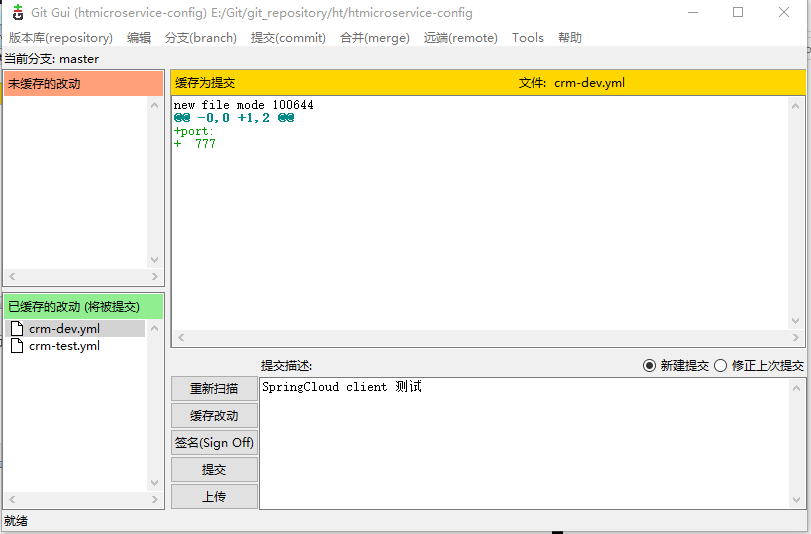
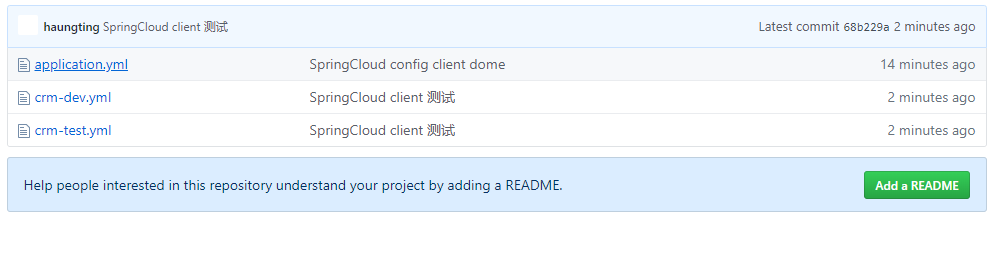
因为测试需要所以我们提交三个配置文件到远程git库
application.yml:
active: dev 这里设置获取的文件名
---

spring:

  profiles:

    active: dev

---

spring:

  profiles: dev

port:

---

spring:

  profiles: test

port:
crm-dev.yml:
port:
crm-test.yml:
port:
然后我们新建一个springboot工程 microservice-config-client-5001
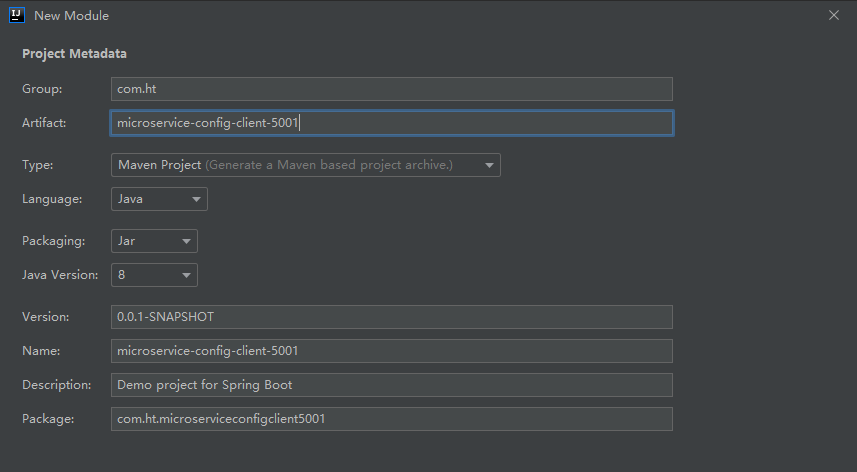
给项目pom文件中添加依赖并且修改父id:
<parent>

        <groupId>com.ht</groupId>

        <artifactId>htSpringCloud</artifactId>

        <version>1.0-SNAPSHOT</version>

    </parent>

<dependency>

    <groupId>org.springframework.cloud</groupId>

    <artifactId>spring-cloud-starter-config</artifactId>

</dependency>

<dependency>

    <groupId>org.springframework.boot</groupId>

    <artifactId>spring-boot-starter-tomcat</artifactId>

</dependency>

<dependency>

    <groupId>org.springframework.boot</groupId>

    <artifactId>spring-boot-starter-web</artifactId>

</dependency>
因为git在读取配置文件的之后最先读取bootstrap.yml,并且bootstrap.yml中存放的都是项目中通用不改变的配置,
我们项目启动的时候,要调用server config端,获取配置信息
所以这里要bootstrap.yml配置文件
spring:

  application:

    name: application-dev

  cloud:

    config:

      name: crm  //做拼接的,所以必须要和git上面的文件开头名一样

      uri: http://configserver.ht.com:4001

      profile: test //这里去设置获取的端口文件名,根据上面的文件这里默认获取test那么端口就是888

      label: master

      fail-fast: true
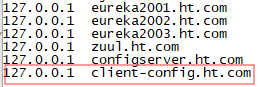
这里给git配置了请求那么也需要配置本地映射否则无法访问:
找到本机C:\Windows\System32\drivers\etc 地址下的host文件添加配置:
127.0.0.1 client-config.ht.com
我们再来添加一个动态获取git仓库里面存放端口的文件类
ConfigClientController
package com.ht.microserviceconfigclient5001.controller; import org.springframework.beans.factory.annotation.Value;
import org.springframework.web.bind.annotation.GetMapping;
import org.springframework.web.bind.annotation.RestController; /**
* 这个类可以根据git中yml文件配置更换去动态获取端口
*/
@RestController
public class ConfigClientController { @Value("${port}")
private String port; @GetMapping("/getPort")
public String getPort() {
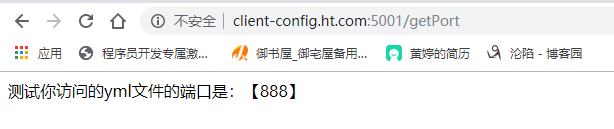
return "测试你访问的yml文件的端口是:【"+port+"】";
} }
启动类不需要添加注释这里就不贴代码了
先启动4001,在启动5001
然后页面访问:
http://client-config.ht.com:5001/getPort
因为项目中bootstrap.yml文件中获取test文件中的端口所以获取的是888
根据上面push到git仓库的文件进行访问测试调用端口
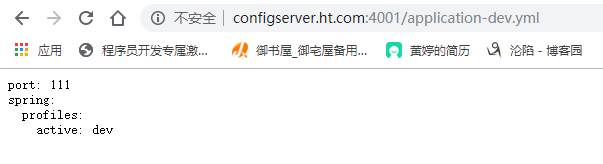
http://configserver.ht.com:4001/application-dev.yml
通过git仓库中application.yml文件去调用dev文件的端口
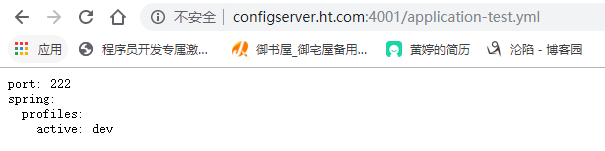
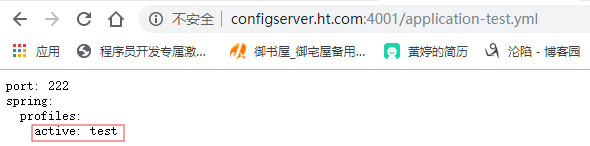
http://configserver.ht.com:4001/application-test.yml
通过git仓库中application.yml文件去调用dev文件的端口
我们进去git仓库中去修改active获取的文件为test
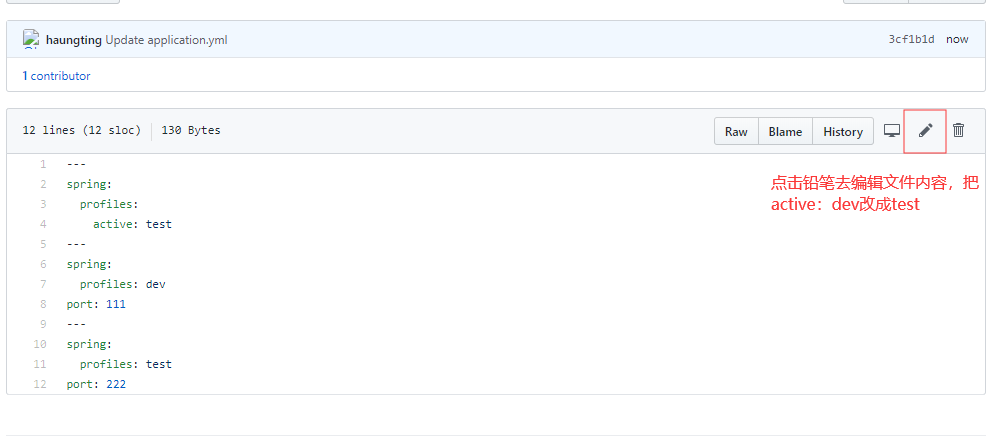
然后在去访问
很显然active环境变成test
Config整合Eureka
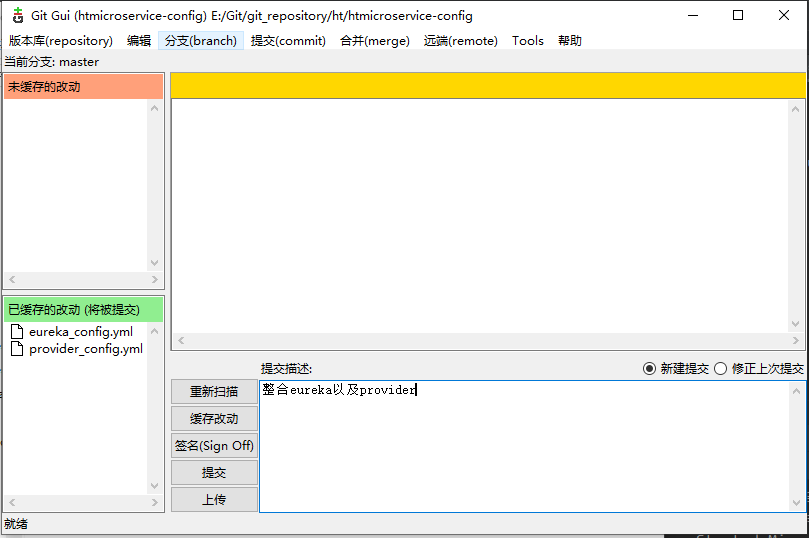
eureka整合config以及服务器提供者整合config
首先是eureka整合config
我们先搞个配置文件到git
spring:

  profiles:

    active:

    - dev

---

server:

  port: 2004

  context-path: /

spring:

  profiles: dev

eureka:

  instance:

    hostname: localhost

  client:

    register-with-eureka: false

    fetch-registry: false

    service-url:

      defaultZone: http://${eureka.instance.hostname}:${server.port}/eureka/

---

server:

  port: 2005

  context-path: /

spring:

  profiles: test

eureka:

  instance:

    hostname: localhost

  client:

    register-with-eureka: false

    fetch-registry: false

    service-url:

      defaultZone: http://${eureka.instance.hostname}:${server.port}/eureka/
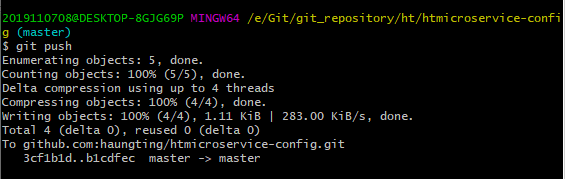
然后在push到仓库中去
新建Springboot工程:microservice-eureka-server-config-2004
添加pom.xml:
<dependency>

    <groupId>org.springframework.cloud</groupId>

    <artifactId>spring-cloud-starter-config</artifactId>

</dependency>

<dependency>

    <groupId>org.springframework.cloud</groupId>

    <artifactId>spring-cloud-starter-eureka-server</artifactId>

</dependency>
bootstrap.yml
spring:

  application:

    name: microservice-eureka-server-config

  cloud:

    config:

      name: eureka_config

      uri: http://configserver.ht.com:4001  # 配置configserver地址

      profile: dev  # 级别

      label: master  # 分支 git中 默认master
application.yml
spring:

  application:

    name: microservice-eureka-server-config
启动类:
package com.ht.microserviceeurekaserverconfig2004;

import org.springframework.boot.SpringApplication;

import org.springframework.boot.autoconfigure.SpringBootApplication;

import org.springframework.cloud.netflix.eureka.server.EnableEurekaServer;

@SpringBootApplication

@EnableEurekaServer

public class MicroserviceEurekaServerConfig2004Application {

    public static void main(String[] args) {

        SpringApplication.run(MicroserviceEurekaServerConfig2004Application.class, args);

    }

}
先启动 microservice-config-server-4001
再启动 microservice-eureka-server-config-2004
测试连接
http://eureka2001.ht.com:2004/

说明成功读取远程Git配置,然后eureka启动OK
然后我们把服务提供者和config整合,把服务提供者注册到eureka;
我们搞个配置provider_config.yml,push到远程GIT;
spring:

  profiles:

    active: dev

---

server:

  port: 1007

  context-path: /

# 数据源配置

spring:

  profiles: dev

  application:

    name: microservice-student

  datasource:

    type: com.alibaba.druid.pool.DruidDataSource

    driver-class-name: com.mysql.jdbc.Driver

    url: jdbc:mysql://localhost:3306/test?useUnicode=true&characterEncoding=utf8

    username: root

    password: root

  jpa:

    hibernate:

      ddl-auto: update

    show-sql: true

eureka:

  instance:

    hostname: localhost

    appname: microservice-student

    instance-id: microservice-student:1007

    prefer-ip-address: true

  client:

    service-url:

      defaultZone: http://localhost:2004/eureka

info:

  groupId: com.ht.htSpringCloud

  artifactId: microservice-student-provider-config-1007

  version: 1.0-SNAPSHOT

  userName: http://ht.com

  phone: 123456

---

server:

  port: 1008

  context-path: /

# 数据源配置

spring:

  profiles: test

  application:

    name: microservice-student

  datasource:

    type: com.alibaba.druid.pool.DruidDataSource

    driver-class-name: com.mysql.jdbc.Driver

    url: jdbc:mysql://localhost:3306/test?useUnicode=true&characterEncoding=utf8

    username: root

    password: root

  jpa:

    hibernate:

      ddl-auto: update

    show-sql: true

eureka:

  instance:

    hostname: localhost

    appname: microservice-student

    instance-id: microservice-student:1008

    prefer-ip-address: true

  client:

    service-url:

      defaultZone: http://localhost:2004/eureka

info:

  groupId: com.ht.htSpringCloud

  artifactId: microservice-student-provider-config-1008

  version: 1.0-SNAPSHOT

  userName: http://ht.com

  phone: 123456
新建module:microservice-student-provider-config-1004
pom.xml:
<?xml version="1.0" encoding="UTF-8"?>

<project xmlns="http://maven.apache.org/POM/4.0.0" xmlns:xsi="http://www.w3.org/2001/XMLSchema-instance"

         xsi:schemaLocation="http://maven.apache.org/POM/4.0.0 https://maven.apache.org/xsd/maven-4.0.0.xsd">

    <modelVersion>4.0.0</modelVersion>

    <parent>

        <groupId>com.ht</groupId>

        <artifactId>htSpringCloud</artifactId>

        <version>1.0-SNAPSHOT</version>

    </parent>

    <artifactId>microservice-student-provider-config</artifactId>

    <properties>

        <java.version>1.8</java.version>

    </properties>

    <dependencies>

        <dependency>

            <groupId>org.springframework.boot</groupId>

            <artifactId>spring-boot-starter-web</artifactId>

        </dependency>

        <dependency>

            <groupId>org.springframework.boot</groupId>

            <artifactId>spring-boot-starter-test</artifactId>

            <scope>test</scope>

        </dependency>

        <dependency>

            <groupId>org.springframework.boot</groupId>

            <artifactId>spring-boot-starter-data-jpa</artifactId>

        </dependency>

        <dependency>

            <groupId>mysql</groupId>

            <artifactId>mysql-connector-java</artifactId>

        </dependency>

        <dependency>

            <groupId>org.springframework.boot</groupId>

            <artifactId>spring-boot-starter-tomcat</artifactId>

        </dependency>

        <dependency>

            <groupId>com.alibaba</groupId>

            <artifactId>druid-spring-boot-starter</artifactId>

        </dependency>

        <!--  修改后立即生效,热部署  -->

        <dependency>

            <groupId>org.springframework</groupId>

            <artifactId>springloaded</artifactId>

        </dependency>

        <dependency>

            <groupId>org.springframework.boot</groupId>

            <artifactId>spring-boot-devtools</artifactId>

        </dependency>

        <dependency>

            <groupId>com.ht</groupId>

            <artifactId>microservice-common</artifactId>

            <version>1.0-SNAPSHOT</version>

            <scope>compile</scope>

        </dependency>

        <!--添加注册中心Eureka相关配置-->

        <dependency>

            <groupId>org.springframework.cloud</groupId>

            <artifactId>spring-cloud-starter-eureka</artifactId>

        </dependency>

        <!-- actuator监控引入 -->

        <dependency>

            <groupId>org.springframework.boot</groupId>

            <artifactId>spring-boot-starter-actuator</artifactId>

        </dependency>

        <dependency>

            <groupId>org.springframework.cloud</groupId>

            <artifactId>spring-cloud-starter-config</artifactId>

        </dependency>

    </dependencies>

    <build>

        <plugins>

            <plugin>

                <groupId>org.springframework.boot</groupId>

                <artifactId>spring-boot-maven-plugin</artifactId>

            </plugin>

        </plugins>

    </build>

</project>
bootstrap.yml:
spring:

  application:

    name: microservice-student-provider-config

  cloud:

    config:

      name: provider_config

      uri: http://configserver.ht.com:4001  # 配置configserver地址

      profile: dev  # 级别

      label: master  # 分支 git中 默认master
application.yml
spring:

  application:

    name: microservice-student-provider-config
其他文件和原先的服务提供者一样
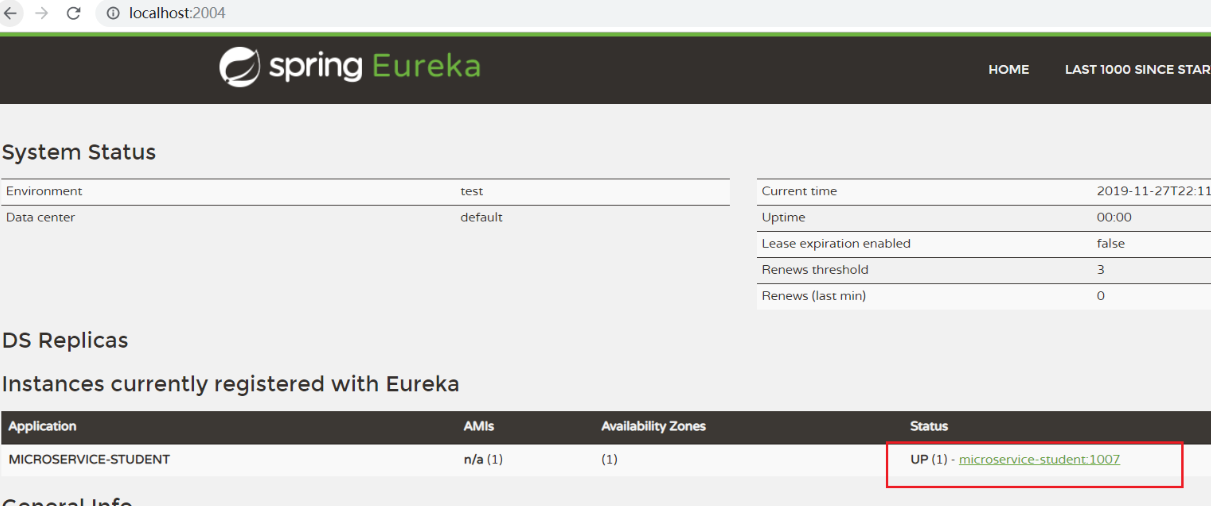
说明成功注册到服务注册中心了
Config配置搜索路径
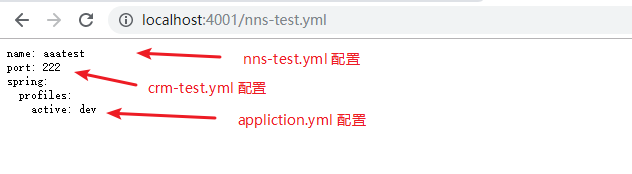
我们所有的GIT远程端配置文件都是跟目录的,所有请求默认都是根目录,但是有时候,项目很多,配置文件需要根据子目录来划分,这时候,就需要来配置搜索路径了;比如aaa项目的配置文件放aaa目录下,bbb项目的配置文件放bbb目录下,不配置的话 是找不到的那些配置文件的,我们需要配置search-paths属性实现;
microservice-config-server-4001 configserver端 加个配置
server:

  port: 4001

spring:

  application:

    name:  microservice-config

  cloud:

    config:

      server:

        git:

          uri: https://github.com/haungting/htmicroservice-config.git

          search-paths: aaa,bbb
搞2个目录aaa,bbb 里面分别放3个配置文件 nns1.yml,nns2.yml
根据github的application.yml文件去写就行啦,差不多就这样
spring:

  profiles:

    active: dev

---

spring:

  profiles: dev

name: aaadev

---

spring:

  profiles: test

name: aaatest
然后push到远程仓库git
启动:microservice-config-server-4001
在浏览器中输入:http://configserver.ht.com:4001/nns2-test.yml或者http://localhost:4001/nns-test.yml
谢谢观看!!
SpringCloudConfig相关配置简介、使用、整合Eureka的更多相关文章
- 【AndroidStudio】关于SVN的相关配置简介
AndroidStudio 的SVN 安装和使用方法与我以前用的其他IDE 都有很大差别,感觉特麻烦,网上相关资料很少,貌似现在 Git 比较流行,之前有用过 github 但是他只能是开源项目免费, ...
- springboot配置server相关配置&整合模板引擎Freemarker、thymeleaf&thymeleaf基本用法&thymeleaf 获取项目路径 contextPath 与取session中信息
1.Springboot配置server相关配置(包括默认tomcat的相关配置) 下面的配置也都是模板,需要的时候在application.properties配置即可 ############## ...
- Spring学习笔记(二)——Spring相关配置&属性注入&Junit整合
一.Spring的相关配置 1.1 Bean元素 class属性:被管理对象的完整类名 name属性:给Bean起个名字,能重复,能使用特殊字符.后来属性 id属性:给Bean起个名字,不能重复,不能 ...
- SpringCloud系列十:SpringCloudConfig 高级配置(密钥加密处理(JCE)、KeyStore 加密处理、SpringCloudConfig 高可用机制、SpringCloudBus 服务总线)
1.概念:SpringCloudConfig 高级配置 2.具体内容 在 SpringCloudConfig 之中考虑到所有配置文件都暴露在远程仓库之中的安全性问题,所以提供有安全访问的处理机制,这样 ...
- SpringCloud系列九:SpringCloudConfig 基础配置(SpringCloudConfig 的基本概念、配置 SpringCloudConfig 服务端、抓取配置文件信息、客户端使用 SpringCloudConfig 进行配置、单仓库目录匹配、应用仓库自动选择、仓库匹配模式)
1.概念:SpringCloudConfig 基础配置 2.具体内容 通过名词就可以发现,SpringCloudConfig 核心作用一定就在于进行配置文件的管理上.也就是说为了更好的进行所有微服务的 ...
- Spring cloud系列教程第十篇- Spring cloud整合Eureka总结篇
Spring cloud系列教程第十篇- Spring cloud整合Eureka总结篇 本文主要内容: 1:spring cloud整合Eureka总结 本文是由凯哥(凯哥Java:kagejava ...
- 一起学ASP.NET Core 2.0学习笔记(二): ef core2.0 及mysql provider 、Fluent API相关配置及迁移
不得不说微软的技术迭代还是很快的,上了微软的船就得跟着她走下去,前文一起学ASP.NET Core 2.0学习笔记(一): CentOS下 .net core2 sdk nginx.superviso ...
- Ribbon整合Eureka组件,以实现负载均衡
1整体框架的说明 在本案例的框架里,我们将配置一个Eureka服务器,搭建三个提供相同服务的Eureka服务提供者,同时在Eureka服务调用者里引入Ribbon组件,这样,当有多个url向服务调用者 ...
- Centos7中网络及设备相关配置
centos7中,不再赞成使用ifconfig工具,取而代之的是nmcli工具,服务管理也是以systemctl工具取代了service,这些之前版本的工具虽然在centos7中还可以继续使用,只是出 ...
随机推荐
- Codevs 1358 棋盘游戏(状压DP)
1358 棋盘游戏 时间限制: 1 s 空间限制: 64000 KB 题目等级 : 大师 Master 题目描述 Description 这个游戏在一个有10*10个格子的棋盘上进行,初始时棋子位于左 ...
- 【luoguP2371】 [国家集训队]墨墨的等式
题目链接 考虑将所有的\(a_1x_1+a_2x_2+--+a_nx_n=B\)对\(a_1\)取模,那么所有可达到的B就分为了\(0\)~\(a_1-1\)类 如果对\(a_1\)取模为\(k\)的 ...
- 【NOIP2017模拟测试(10-28)】平衡树
平衡树解题报告 Description 小D最近又在种树,可是他的种树技巧还是很差,种出的树都长的歪七扭八,为了让树变得平衡一些,小D决定从树上删掉一条边,然后再加上一条边,使得到的仍然是一棵树并且这 ...
- 前端如何搭建vue UI组件库/封装插件(从零到有)
需求 因之前是做外包项目居多,经常用到相同的组件,之前的办法是在一个项目中写一个组件,其他项目直接将compents下的组件复制,粘贴到项目中使用,缺点是维护起来,改一个项目,其他项目也需要修改,所以 ...
- 你对SQA的职责和工作活动(如软件度量)的理解?
SQA就是独立于软件开发的项目组,通过对软件开发过程的监控,来保证软件的开发流程按照指定的CMM规程(如果有相应的CMM规程),对于不符合项及时提出建议和改进方案,必要时可以向高层经理汇报以求问题的解 ...
- mysql的动态表名
create EVENT createMtpulseTable ON SCHEDULE every 1 month STARTS CURRENT_TIMESTAMP DO CALL pro_creat ...
- ICEM-三棱锥的一种画法
原视频下载地址:https://pan.baidu.com/s/1c4BAqy 密码: nqb4
- [BUAA软工]Alpha阶段事后分析
设想和目标 虽然我们是从零开始的一个自定义项目,但语音Coding助手从一开始的设计与目标就很明确:加入语音接口使其能在shell端实现命令语音实现以及编辑运行脚本,设计前端编辑器并将后端shell与 ...
- 关于java nio的channel读写的一个困惑
这里提的需求基本都是IM的,IM的解决方案是怎么样的? 网上的需求: 1. 某一用户发了一条信息, 需要服务器反回一个信息(这种最简单) 2. 某一用户发了一条信息,需要服务器广播给所有客户端 3. ...
- mysql索引原理及优化(四)
聚簇索引和非聚簇索引 分析了MySQL的索引结构的实现原理,然后我们来看看具体的存储引擎怎么实现索引结构的,MySQL中最常见的两种存储引擎分别是MyISAM和InnoDB,分别实现了非聚簇索引和聚簇 ...