基于OpenGL编写一个简易的2D渲染框架-04 绘制图片
阅读文章前需要了解的知识,纹理:https://learnopengl-cn.github.io/01%20Getting%20started/06%20Textures/
过程简述:利用 FreeImage 库加载图像数据,再创建 OpenGL 纹理,通过 Canvas2D 画布绘制,最后又 Renderer 渲染器渲染
本来想用 soil 库加载图像数据的,虽然方便,但是加载有些格式的图像文件时会出现一些问题。最后,改用 FreeImage 库来加载图像了。
添加 FreeImage 库到工程
解压 FreeImage.rar 文件后得到三个文件

将其分别拷贝到 debug文件夹、External 文件夹、Lib 文件夹中,再链接上 lib 库。
绘制图片
创建一个纹理结构,储存纹理索引、大小以及纹理坐标
    struct DLL_export Texture

    {

        Rect size;

        Vec2 texcoords[];

        GLuint texture;

    };
创建一个纹理管理器类 TextureManager,用于创建和管理纹理。
利用 FreeImage 库加载纹理
    Texture* TexrureManager::createTexture(const char* filename)

    {

        GLuint texture = -;

        std::string fullName = PathHelper::fullPath(filename);

        unsigned char* image_data = nullptr;

        FIBITMAP* bmp = nullptr;

        /* 初始化 FreeImage */

        FreeImage_Initialise(TRUE);

        /* 获取图像文件类型 */

        FREE_IMAGE_FORMAT fif = FIF_UNKNOWN;

        fif = FreeImage_GetFileType(fullName.c_str());

        if ( fif == FIF_UNKNOWN ) {

            fif = FreeImage_GetFIFFromFilename(fullName.c_str());

        }

        /* 加载所支持图像类型的图像 */

        if ( (fif != FIF_UNKNOWN) && FreeImage_FIFSupportsReading(fif) ) {

            bmp = FreeImage_Load(fif, fullName.c_str(), JPEG_DEFAULT);

        }

        if ( !bmp ) return nullptr;

        int w = FreeImage_GetWidth(bmp);

        int h = FreeImage_GetHeight(bmp);

        int pixel_count = w * h;

        int byte_per_pixel = FreeImage_GetLine(bmp) / w;

        image_data = ( unsigned char* ) malloc(sizeof( unsigned char ) * pixel_count * );

        unsigned char* bits = FreeImage_GetBits(bmp);

        int current_pixel = ;

        if ( byte_per_pixel ==  ) {

            for ( int i = ; i < pixel_count; i++ ) {

                image_data[i *  + ] = bits[current_pixel++];

                image_data[i *  + ] = bits[current_pixel++];

                image_data[i *  + ] = bits[current_pixel++];

                image_data[i *  + ] = bits[current_pixel++];

            }

        }

        else {

            for ( int i = ; i < pixel_count; i++ ) {

                image_data[i *  + ] = bits[current_pixel++];

                image_data[i *  + ] = bits[current_pixel++];

                image_data[i *  + ] = bits[current_pixel++];

                image_data[i *  + ] = ;

            }

        }

        if ( bmp ) FreeImage_Unload(bmp);

        FreeImage_DeInitialise();

        glGenTextures(, &texture);

        glBindTexture(GL_TEXTURE_2D, texture);

        /* 设置纹理选项 */

        glTexParameteri(GL_TEXTURE_2D, GL_TEXTURE_WRAP_S, GL_CLAMP_TO_EDGE);

        glTexParameteri(GL_TEXTURE_2D, GL_TEXTURE_WRAP_T, GL_CLAMP_TO_EDGE);

        glTexParameteri(GL_TEXTURE_2D, GL_TEXTURE_MIN_FILTER, GL_LINEAR);

        glTexParameteri(GL_TEXTURE_2D, GL_TEXTURE_MAG_FILTER, GL_LINEAR);

        glTexImage2D(GL_TEXTURE_2D, , GL_RGBA, w, h, , GL_RGBA, GL_UNSIGNED_BYTE, image_data);

        glBindTexture(GL_TEXTURE_2D, );

        free(image_data);

        Texture* tex = new Texture();

        tex->texture = texture;

        tex->size.set(, , w, h);

        tex->texcoords[].set(, );

        tex->texcoords[].set(, );

        tex->texcoords[].set(, );

        tex->texcoords[].set(, );

        return tex;

    }
在函数中,使用 FreeImage 库加载纹理数据,然后创建 OpenGL 2D纹理,将创建的纹理保存到 Texture 结构中,并设置了纹理坐标。
在 Canvas2D 中绘制纹理
    void Canvas2D::drawTexture(int x, int y, Texture* texture, Color& color)

    {

        int w = texture->size.w;

        int h = texture->size.h;

        this->resizeVector(, );

        vPositions[].set(x + , y + , );

        vPositions[].set(x + , y + h, );

        vPositions[].set(x + w, y + h, );

        vPositions[].set(x + w, y + , );

        vIndices[] = ;

        vIndices[] = ;

        vIndices[] = ;

        vIndices[] = ;

        vIndices[] = ;

        vIndices[] = ;

        static RenderUnit unit;

        unit.pPositions = &vPositions[];

        unit.nPositionCount = ;

        unit.pTexcoords = texture->texcoords;

        unit.pIndices = &vIndices[];

        unit.nIndexCount = ;

        unit.color = color;

        unit.texture = texture;

        unit.renderType = RENDER_TYPE_TEXTURE;

        pRenderer->pushRenderUnit(unit);

    }
函数很简单,设置了顶点数据并填充了 RenderUnit,再传到 渲染器中渲染。与绘制几何图形相比,多了纹理坐标,并把渲染类型设置为 渲染纹理。
渲染器 Renderer 渲染纹理
添加成员
std::map<Texture*, VertexData*> textureDatas;
每张纹理都有其相应的顶点数据,这样可以把多张相同纹理的顶点数据放到一个缓冲区中渲染,保证了渲染多张相同纹理时只使用使用一个 DrawCall(调用 函数 glDrawElements 进行绘制的次数),提高渲染效率。
在 pushRenderUnit 函数中
        else if ( unit.renderType == RENDER_TYPE_TEXTURE ) {

            auto it = textureDatas.find(unit.texture);

            if ( it == textureDatas.end() ) {

                vertexData = new VertexData();

                vertexData->bHasTexcoord = true;

                vertexData->renderType = RENDER_TYPE_TEXTURE;

                textureDatas.insert(std::make_pair(unit.texture, vertexData));

            }

            else {

                vertexData = it->second;

            }

        }
索引出纹理对应的 VertexData,然后填充数据。最后的渲染函数中添加填充纹理坐标代码
        /* 设置纹理 */

        if ( vertexData->bHasTexcoord ) {

            glBindBuffer(GL_ARRAY_BUFFER, texcoordBuffer);

            glBufferData(GL_ARRAY_BUFFER, sizeof( Vec2 ) * vertexData->nPositionCount, &vertexData->texcoords[], GL_DYNAMIC_DRAW);

            glActiveTexture(GL_TEXTURE0);

            glBindTexture(GL_TEXTURE_2D, texrure);

            glUniform1i(glGetUniformLocation(shaderProgram, "defaulteTexture"), );

        }
为了能够渲染纹理需要更改着色程序
顶点着色器
#version  core

layout(location = ) in vec3 Position;

layout(location = ) in vec2 Texcoord;

layout(location = ) in vec4 Color;

out vec2 texcoord;

out vec4 color;

uniform int bRenderTexture;

void main()

{

    gl_Position = vec4(Position, 1.0f);

    color = Color;

    if( bRenderTexture !=  ){

        texcoord = Texcoord;

    }

}
片段着色器
#version  core

out vec4 Color;

in vec2 texcoord;

in vec4 color;

uniform sampler2D defaultTexture;

uniform int bRenderTexture;

void main()

{

    if( bRenderTexture !=  ){

        Color = texture(defaultTexture, texcoord) * color * color.w;

    }

    else{

        Color = color;

    }

}
为了开启 Alpha 效果,设置OpenGL 的混合状态
        glEnable(GL_BLEND);

        glBlendFunc(GL_SRC_ALPHA, GL_ONE_MINUS_SRC_ALPHA);
在主函数中添加绘制图像的代码
    Texture* texture = TexrureManager::instance()->getTexture("image.png");

    Texture* texture1 = TexrureManager::instance()->getTexture("image.jpg");
            canvas.drawTexture(, , texture1, Color(, , , ));

            canvas.drawTexture(, , texture, Color(, , , 0.8));
程序的运行结果
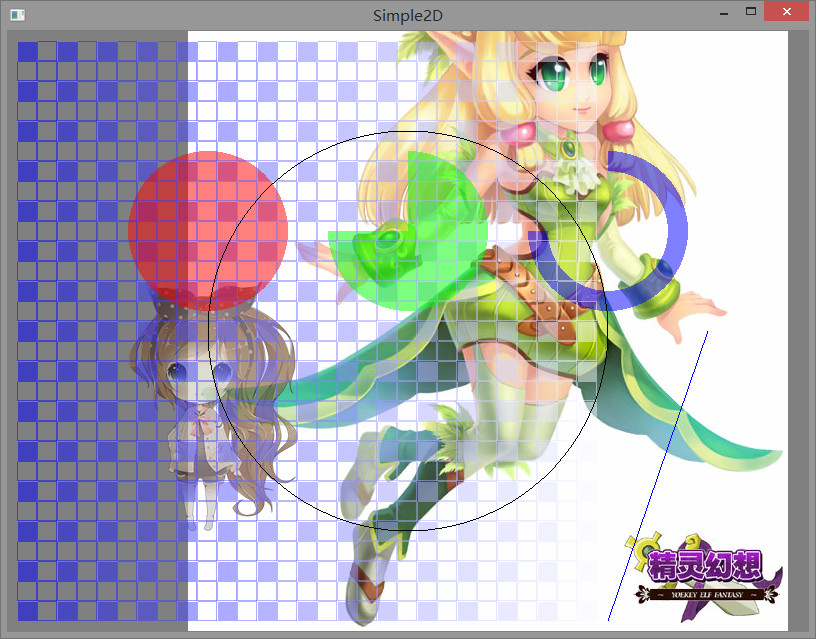
这里绘制了 png 和 jpg 格式的图像
源码下载:http://pan.baidu.com/s/1skOmP21
基于OpenGL编写一个简易的2D渲染框架-04 绘制图片的更多相关文章
- 基于OpenGL编写一个简易的2D渲染框架-05 渲染文本
阅读文章前需要了解的知识:文本渲染 https://learnopengl-cn.github.io/06%20In%20Practice/02%20Text%20Rendering/ 简要步骤: 获 ...
- 基于OpenGL编写一个简易的2D渲染框架-06 编写一个粒子系统
在这篇文章中,我将详细说明如何编写一个简易的粒子系统. 粒子系统可以模拟许多效果,下图便是这次的粒子系统的显示效果.为了方便演示,就弄成了一个动图. 图中,同时显示了 7 种不同粒子效果,看上去效果挺 ...
- 基于OpenGL编写一个简易的2D渲染框架-01 创建窗口
最近正在学习OpenGL,我认为学习的最快方法就是做一个小项目了. 如果对OpenGL感兴趣的话,这里推荐一个很好的学习网站 https://learnopengl-cn.github.io/ 我用的 ...
- 基于OpenGL编写一个简易的2D渲染框架-03 渲染基本几何图形
阅读文章前需要了解的知识,你好,三角形:https://learnopengl-cn.github.io/01%20Getting%20started/04%20Hello%20Triangle/ 要 ...
- 基于OpenGL编写一个简易的2D渲染框架-02 搭建OpenGL环境
由于没有使用GLFW库,接下来得费一番功夫. 阅读这篇文章前请看一下这个网页:https://learnopengl-cn.github.io/01%20Getting%20started/02%20 ...
- 基于OpenGL编写一个简易的2D渲染框架-08 重构渲染器-整体架构
事实上,前面编写的渲染器 Renderer 非常简陋,虽然能够进行一些简单的渲染,但是它并不能满足我们的要求. 当渲染粒子系统时,需要开启混合模式,但渲染其他顶点时却不需要开启混合模式.所以同时渲染粒 ...
- 基于OpenGL编写一个简易的2D渲染框架-09 重构渲染器-Shader
Shader 只是进行一些简单的封装,主要功能: 1.编译着色程序 2.绑定 Uniform 数据 3.根据着色程序的顶点属性传递顶点数据到 GPU 着色程序的编译 GLuint Shader::cr ...
- 基于OpenGL编写一个简易的2D渲染框架-11 重构渲染器-Renderer
假如要渲染一个纯色矩形在窗口上,应该怎么做? 先确定顶点的格式,一个顶点应该包含位置信息 vec3 以及颜色信息 vec4,所以顶点的结构体定义可以这样: struct Vertex { Vec3 p ...
- 基于OpenGL编写一个简易的2D渲染框架-10 重构渲染器-Pass
Pass,渲染通路,一个渲染通路指的是一次像素处理和一次顶点处理,也就是指的是一次绘制.简单来说就是顶点数据在渲染管线中走一遍最后绘制. 渲染粒子系统的粒子时,需要开启 OpenGL 的混合模式,并使 ...
随机推荐
- 转 微软发布TX(LINQ To Logs And Traces)
作者 Roopesh Shenoy ,译者 马德奎 发布于 一月 09, 2014 | 微软开源技术公司于近日发布了Tx,这是一个开源项目,可以使用日志/跟踪文件辅助调试,以及创建实时监控和告警系统. ...
- 一个5.0/3.3V双向通讯的电路
来自群友 西江月-梧州 的分享 硬件程工-深圳福永(79993868) 17:06:33 当3.3V高时二极管阳极为3.3V,阴极接了10K上拉为5V,二极管的压降为反向,此时二极管不导通. 硬件程工 ...
- JSP 执行流程
一.jsp执行流程 1. 发送请求 ,请求访问jsp文件. 2. 服务器(Tomcat)提供的jsp parser 解析器解将jsp转化为java文件. jsp本质上是一个servlet. 3.ser ...
- Asp.Net Core MVC框架内置过滤器
第一部分.MVC框架内置过滤器 下图展示了Asp.Net Core MVC框架默认实现的过滤器的执行顺序: Authorization Filters:身份验证过滤器,处在整个过滤器通道的最顶层.对应 ...
- 转转转!!java基础一些静态代码块等知识点
一.代码块: 构造代码块------类中方法的外面:每次调用构造方法都执行: 静态代码块------类中方法的外面,括号前加上static:只执行一次,随着类的加载而执行: static代码块.构造代 ...
- SpringMVC中session的使用
SpringMVC中仍然可以使用传统方式使用session /** * 使用session - 传统方式 */ @RequestMapping("/hello13.action") ...
- [UE4]C++中extern关键字浅谈
变量声明和变量是有区别的 extern int i; //只是声明i而非定义i int j; //声明而且还定义了j 任何一个显式初始化的声明都将成为定义,而不管有没有extern,extern语句一 ...
- Immunity Debugger学习笔记
图1::Immunity主界面 注意事项:最下方的PyCommands窗格既可以执行调试命令也可以执行python脚步文件. 1.PyCommands学习 在 Immunity 中执行 Python ...
- 第3章 文件I/O(2)_文件I/O系统调用及文件描述符
2. 文件I/O系统调用及文件描述符 2.1 文件I/O系统调用 (1)主要函数 函数 功能 函数 功能 open() 打开文件 read() 读取文件 creat() 创建文件 write() 写入 ...
- 第3课 进化后的 const分析
1. C语言中的const (1)const修饰的变量是只读的,使得变量具有只读属性,但本质还是变量.所以不是真正的常量,它只是告诉编译器该变量不能出现在赋值符号的左边. (2)const修饰的局部 ...