Android中Dialog对话框
布局文件xml:
 <LinearLayout xmlns:android="http://schemas.android.com/apk/res/android"

     xmlns:tools="http://schemas.android.com/tools"

     android:layout_width="match_parent"

     android:layout_height="match_parent"

     android:orientation="vertical"

     android:paddingBottom="@dimen/activity_vertical_margin"

     android:paddingLeft="@dimen/activity_horizontal_margin"

     android:paddingRight="@dimen/activity_horizontal_margin"

     android:paddingTop="@dimen/activity_vertical_margin"

     tools:context=".DialogActivity" >

     <Button

         android:id="@+id/plainDialog"

         android:layout_width="match_parent"

         android:layout_height="wrap_content"

         android:text="普通Dialog" />

     <Button

         android:id="@+id/plainDialogEvent"

         android:layout_width="match_parent"

         android:layout_height="wrap_content"

         android:text="Dialog按钮事件集中处理" />

     <Button

         android:id="@+id/inputDialog"

         android:layout_width="match_parent"

         android:layout_height="wrap_content"

         android:text="请输入框" />

     <Button

         android:id="@+id/listDialog"

         android:layout_width="match_parent"

         android:layout_height="wrap_content"

         android:text="列表对话框" />

     <Button

         android:id="@+id/radioDialog"

         android:layout_width="match_parent"

         android:layout_height="wrap_content"

         android:text="单选对话框" />

     <Button

         android:id="@+id/checkboxDialog"

         android:layout_width="match_parent"

         android:layout_height="wrap_content"

         android:text="多选对话框" />

     <Button

         android:id="@+id/diyDialog"

         android:layout_width="match_parent"

         android:layout_height="wrap_content"

         android:text="自定义布局对话框" />

 </LinearLayout>
Activity文件:
普通的dialog:
 private void plainDialogDemo() {

         Button plainBtn = (Button) findViewById(R.id.plainDialog);

         plainBtn.setOnClickListener(new OnClickListener() {

             public void onClick(View v) {

                 new AlertDialog.Builder(DialogActivity.this)

                         .setTitle("删除")

                         .setMessage("确定删除指定数据")

                         .setPositiveButton("确定",

                                 new DialogInterface.OnClickListener() {

                                     @Override

                                     public void onClick(DialogInterface dialog,

                                             int which) {

                                         Toast.makeText(getApplicationContext(),

                                                 "确定了", Toast.LENGTH_SHORT)

                                                 .show();

                                     }

                                 })

                         .setNegativeButton("取消",

                                 new DialogInterface.OnClickListener() {

                                     @Override

                                     public void onClick(DialogInterface dialog,

                                             int which) {

                                     }

                                 }).setCancelable(false).show();

             }

         });

     }
效果如下: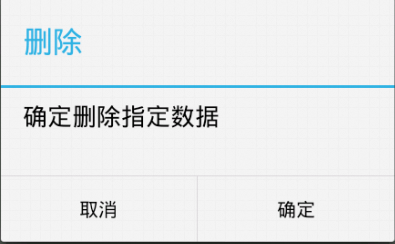
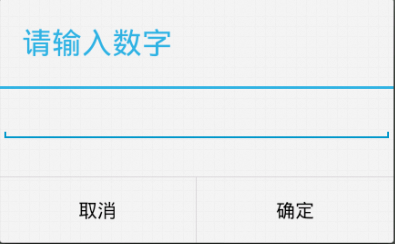
输入文本框的dialog:
 private void inputDialog() {

         Button inputBtn = (Button) findViewById(R.id.inputDialog);

         inputBtn.setOnClickListener(new OnClickListener() {

             @Override

             public void onClick(View v) {

                 // TODO Auto-generated method stub

                 final EditText et = new EditText(DialogActivity.this);

                 new AlertDialog.Builder(DialogActivity.this)

                         .setTitle("请输入数字")

                         .setView(et)

                         .setPositiveButton("确定",

                                 new DialogInterface.OnClickListener() {

                                     @Override

                                     public void onClick(DialogInterface dialog,

                                             int which) {

                                         // TODO Auto-generated method stub

                                         Toast.makeText(getApplicationContext(),

                                                 et.getText(),

                                                 Toast.LENGTH_SHORT).show();

                                     }

                                 }).setNegativeButton("取消", null)

                         .setCancelable(false).show();

             }

         });

     }
效果如下:
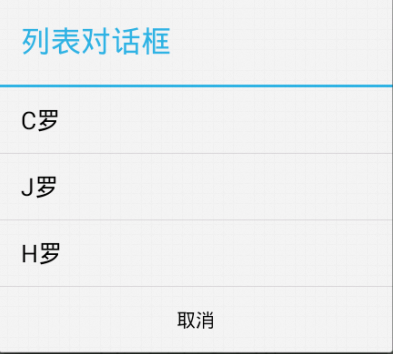
列表dialog:
private void listDialogDemo() {

        Button listBtn = (Button) findViewById(R.id.listDialog);

        listBtn.setOnClickListener(new OnClickListener() {

            @Override

            public void onClick(View v) {

                final String[] names = { "C罗", "J罗", "H罗" };

                new AlertDialog.Builder(DialogActivity.this).setTitle("列表对话框")

                        .setItems(names, new DialogInterface.OnClickListener() {

                            @Override

                            public void onClick(DialogInterface dialog,

                                    int which) {

                                Toast.makeText(DialogActivity.this,

                                        names[which], Toast.LENGTH_SHORT)

                                        .show();

                            }

                        }).setNegativeButton("取消", null).show();

            }

        });

    }
效果如下:
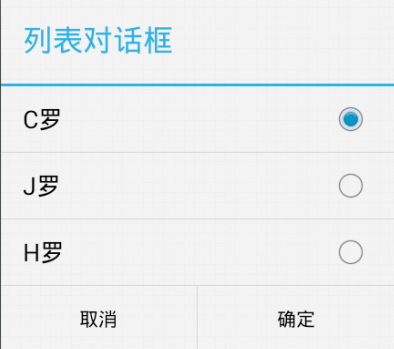
单选dialog:
 private void radioDialogDemo() {

         Button radioButton = (Button) findViewById(R.id.radioDialog);

         radioButton.setOnClickListener(new OnClickListener() {

             @Override

             public void onClick(View v) {

                 final String[] names = { "C罗", "J罗", "H罗" };

                 new AlertDialog.Builder(DialogActivity.this)

                         .setTitle("列表对话框")

                         .setSingleChoiceItems(names, 0,

                                 new DialogInterface.OnClickListener() {

                                     @Override

                                     public void onClick(DialogInterface dialog,

                                             int which) {

                                         selecteName = names[which];

                                     }

                                 })

                         .setPositiveButton("确定",

                                 new DialogInterface.OnClickListener() {

                                     @Override

                                     public void onClick(DialogInterface dialog,

                                             int which) {

                                         Toast.makeText(DialogActivity.this,

                                                 selecteName, Toast.LENGTH_SHORT)

                                                 .show();

                                     }

                                 }).setNegativeButton("取消", null).show();

             }

         });

     }
效果如下:
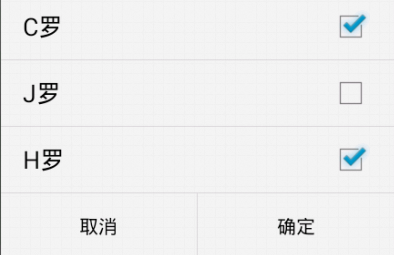
多选dialog:
 private void checkDialogDemo() {

         Button checkBtn = (Button) findViewById(R.id.checkboxDialog);

         checkBtn.setOnClickListener(new OnClickListener() {

             @Override

             public void onClick(View v) {

                 final String[] names = { "C罗", "J罗", "H罗" };

                 final boolean[] selected = new boolean[] { true, false, true };

                 new AlertDialog.Builder(DialogActivity.this)

                         .setMultiChoiceItems(

                                 names,

                                 selected,

                                 new DialogInterface.OnMultiChoiceClickListener() {

                                     @Override

                                     public void onClick(DialogInterface dialog,

                                             int which, boolean isChecked) {

                                     }

                                 })

                         .setPositiveButton("确定",

                                 new DialogInterface.OnClickListener() {

                                     @Override

                                     public void onClick(DialogInterface dialog,

                                             int which) {

                                         StringBuilder sb = new StringBuilder(

                                                 "你选择了:");

                                         for (int i = 0; i < names.length; i++) {

                                             if (selected[i]) {

                                                 sb.append(names[i]);

                                             }

                                         }

                                         Toast.makeText(DialogActivity.this,

                                                 sb.toString(), 1).show();

                                     }

                                 }).setNegativeButton("取消", null).show();

             }

         });

     }
效果如下:
自定义dialog:
 private void customDialogDemo() {

         final AlertDialog dlg = new AlertDialog.Builder(this).create();

         dlg.show();

         Window window = dlg.getWindow();

         window.setContentView(R.layout.diylayout);

         ImageButton ok = (ImageButton) window.findViewById(R.id.btnok);

         ok.setOnClickListener(new View.OnClickListener() {

             @Override

             public void onClick(View v) {

                 Toast.makeText(getApplicationContext(), "关闭了",

                         Toast.LENGTH_SHORT).show();

                 dlg.dismiss();

             }

         });

     }
自定义布局:
 <?xml version="1.0" encoding="utf-8"?>

 <RelativeLayout xmlns:android="http://schemas.android.com/apk/res/android"

     android:layout_width="match_parent"

     android:layout_height="match_parent" >

     <ImageView

         android:id="@+id/dialogimg"

         android:layout_width="wrap_content"

         android:layout_height="wrap_content"

         android:layout_centerInParent="true"

         android:src="@drawable/dialog_bg" />

     <TextView

         android:layout_width="wrap_content"

         android:layout_height="wrap_content"

         android:layout_alignLeft="@id/dialogimg"

         android:layout_alignTop="@id/dialogimg"

         android:layout_marginLeft="50dp"

         android:layout_marginTop="60dp"

         android:text="自定义的dialog" />

     <ImageButton

         android:id="@+id/btnok"

         android:layout_width="30dp"

         android:layout_height="30dp"

         android:layout_alignRight="@id/dialogimg"

         android:layout_alignTop="@id/dialogimg"

         android:layout_marginRight="15dp"

         android:layout_marginTop="15dp"

         android:background="@drawable/close_dialog" />

 </RelativeLayout>
效果如下:

Android中Dialog对话框的更多相关文章
- Android中Dialog对话框的调用及监听
Android中经常会需要在Android界面上弹出一些对话框提示用户,比如App的退出的时候都会有各种框来挽留你的心,支付宝的时候输入密码的密码框,非常常见及其实用的功能,类似于JS中的alter, ...
- android从Dialog对话框中取得文本文字
android中Dialog对话框获取文本文字,只需要使用editor的getText方法就可以获得,示例如下:final EditText et = new EditText(this); et.s ...
- Android中Dialog
在Android中,Dialog是一个非常重要的UI, 它可以方便的给用户提示,用最简洁的方式向用户展示信息, 以下的图片是Dialog的一个整体架构,通过它,可以总体对Dialog有一个很清晰的认识 ...
- Android中的对话框AlertDialog使用技巧合集-转载
Android中的对话框AlertDialog使用技巧合集 文章来自:http://blog.csdn.net/blue6626/article/details/6641105 今天我用自 ...
- Android 中Dialog的使用
本文是参考ProAndroid的第10章Working with Dialogs的内容,在合适的地方添加了作者自己的一些见解最终成文. Android 中的对话框是一个展示在当前窗口上的小一号的窗口, ...
- [原]MFC中DIALOG(对话框)程序响应加速键(快捷键)
[原]MFC中DIALOG(对话框)程序响应加速键(快捷键) 2014-8-6阅读266 评论0 新建一个对话框程序,项目名为Test,删除默认确定,取消和静态文本框控件.添加一个按钮,Caption ...
- android中常见对话框之一AlertDialog
在Android应用中,有多种对话框:Dialog.AlertDialog.ProgressDialog.时间.日期等对话框. (1)Dialog类,是一切对话框的基类,需要注意的是,Dialog类虽 ...
- Android中Dialog的使用
上一篇博文讲到对话框popWindow的使用,这篇博文主要解说Dialog的使用. 1.什么是Dialog? Dialog就是对话框的一种方式! 在Android开发中.我们常常会须要在Android ...
- Android自定义 Dialog 对话框
Android自定义Dialoghttp://www.cnblogs.com/and_he/archive/2011/09/16/2178716.html Android使用自定义AlertDialo ...
随机推荐
- Android布局(一)layout_gravity 属性和 gravity属性的区别
安卓中的 layout_gravity 属性和 gravity属性 有啥区别? LinearLayout有两个非常相似的属性: android:gravity与android:layout_gravi ...
- C#识别图片上的数字
通过Emgu实现对图片上的数字进行识别. 前期步骤: 1.下载Emgu安装文件,我的版本是2.4.2.1777.3.0版本则实现对中文的支持. 2.安装后需填写环境变量,环境变量Path值后加入Emg ...
- 清除float常用方法(:after和clear:both)
参考网址:http://jingyan.baidu.com/article/c74d60006bea410f6a595d17.html .clearfix:after{ .....} 和 .clea ...
- SSR服务端一键安装脚本
支持新协议混淆,SSR服务端一键安装脚本 Shadowsocks-R 是项目 shadowsocks 的增强版,用于方便地产生各种协议接口.实现为在原来的协议外套一层编码和解码接口,不但可以伪装成 ...
- Android 动画小知识点
<?xml version="1.0" encoding="utf-8"?> <translate xmlns:android="h ...
- 运维人员:走好你的IT运维路
转自 http://os.51cto.com/art/201303/387120.htm 现阶段,大多数运维人员只是处于被动低效率手工救火的状态,企业对其重视程度不高,导致部分运维人员对自己的 ...
- JavaScript学习笔记(一)对象和属性
对象属性的使用 JavaScript中的所有变量都可以当做对象使用,除了null和undefined. false.toString(); // 'false' [1, 2, 3].toString( ...
- makefile死磕笔记
开始我会插播一段我如何学习makefile的废话,如果不想听的话,请直接跳到我的makefile教程. 首先得先说明学习makefile真是一个痛苦的过程,尤其是用干巴巴的看书来学习的过程,简直可以用 ...
- 论山寨手机与Android联姻 【6】MTK手机的基带芯片
MTK的硬件技术的核心,在于它的基带芯片.为了降低成本,同时缩减手机主板的面积,基带芯片中除了CPU以外,还集成了很多外设控制器.Feature Phone的功能,基本上取决于基带芯片所支持的外设功能 ...
- 面向连接的socket数据处理过程以及非阻塞connect问题
对于面向连接的socket类型(SOCK_STREAM,SOCK_SEQPACKET)在读写数据之前必须建立连接,首先服务器端socket必须在一个客户端知道的地址进行监听,也就是创建socket之后 ...