win7实现tensorflow中的物体识别
实现条件:
1.win7
2.python
3.运行所需要的库:matplotlib、lxml、pillow、Cython
具体参考:https://github.com/tensorflow/models/blob/master/research/object_detection/g3doc/installation.md
4.object_detection包,下载地址:https://github.com/tensorflow/models
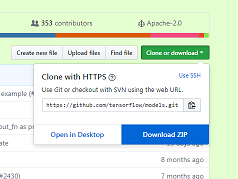
下载后解压 object_detection的位置在research文件夹中
5.编译好的protos文件,object_detection中的文件没有编译,编译好的文件下载地址:https://github.com/1529591487/Object-Detection
直接替换object_detection中的protos文件夹即可。
代码:
1.
import numpy as np

import os

import six.moves.urllib as urllib

import sys

import tarfile

import tensorflow as tf

import zipfile

from collections import defaultdict

from io import StringIO

from matplotlib import pyplot as plt

from PIL import Image

# 这里改成你下载的object_detection包的位置

sys.path.append(r"E:\学习资料\人工智能\models-master\research")

from object_detection.utils import ops as utils_ops

if tf.__version__ < '1.4.0':

  raise ImportError('Please upgrade your tensorflow installation to v1.4.* or later!')
2.
%matplotlib inline
3.
from object_detection.utils import label_map_util

from object_detection.utils import visualization_utils as vis_util
这里会有警告,但是不影响,如果要去掉警告的话,将models-master\research\object_detection\utils\visualization_utils.py 文件中的第26行改成
matplotlib.use('Agg',warn=False, force=True)
4.
# What model to download.

MODEL_NAME = 'ssd_mobilenet_v1_coco_2017_11_17'

MODEL_FILE = MODEL_NAME + '.tar.gz'

DOWNLOAD_BASE = 'http://download.tensorflow.org/models/object_detection/'

# Path to frozen detection graph. This is the actual model that is used for the object detection.

PATH_TO_CKPT = MODEL_NAME + '/frozen_inference_graph.pb'

# 这里的路径也需要修改

PATH_TO_LABELS = os.path.join(r'E:\学习资料\人工智能\models-master\research\object_detection\data', 'mscoco_label_map.pbtxt')

NUM_CLASSES = 90
5.
opener = urllib.request.URLopener()

opener.retrieve(DOWNLOAD_BASE + MODEL_FILE, MODEL_FILE)

tar_file = tarfile.open(MODEL_FILE)

for file in tar_file.getmembers():

  file_name = os.path.basename(file.name)

  if 'frozen_inference_graph.pb' in file_name:

    tar_file.extract(file, os.getcwd())
6.
detection_graph = tf.Graph()

with detection_graph.as_default():

  od_graph_def = tf.GraphDef()

  with tf.gfile.GFile(PATH_TO_CKPT, 'rb') as fid:

    serialized_graph = fid.read()

    od_graph_def.ParseFromString(serialized_graph)

    tf.import_graph_def(od_graph_def, name='')
7.
label_map = label_map_util.load_labelmap(PATH_TO_LABELS)

categories = label_map_util.convert_label_map_to_categories(label_map, max_num_classes=NUM_CLASSES, use_display_name=True)

category_index = label_map_util.create_category_index(categories)
8.
def load_image_into_numpy_array(image):

  (im_width, im_height) = image.size

  return np.array(image.getdata()).reshape(

      (im_height, im_width, 3)).astype(np.uint8)
9.
def run_inference_for_single_image(image, graph):

  with graph.as_default():

    with tf.Session() as sess:

      # Get handles to input and output tensors

      ops = tf.get_default_graph().get_operations()

      all_tensor_names = {output.name for op in ops for output in op.outputs}

      tensor_dict = {}

      for key in [

          'num_detections', 'detection_boxes', 'detection_scores',

          'detection_classes', 'detection_masks'

      ]:

        tensor_name = key + ':0'

        if tensor_name in all_tensor_names:

          tensor_dict[key] = tf.get_default_graph().get_tensor_by_name(

              tensor_name)

      if 'detection_masks' in tensor_dict:

        # The following processing is only for single image

        detection_boxes = tf.squeeze(tensor_dict['detection_boxes'], [0])

        detection_masks = tf.squeeze(tensor_dict['detection_masks'], [0])

        # Reframe is required to translate mask from box coordinates to image coordinates and fit the image size.

        real_num_detection = tf.cast(tensor_dict['num_detections'][0], tf.int32)

        detection_boxes = tf.slice(detection_boxes, [0, 0], [real_num_detection, -1])

        detection_masks = tf.slice(detection_masks, [0, 0, 0], [real_num_detection, -1, -1])

        detection_masks_reframed = utils_ops.reframe_box_masks_to_image_masks(

            detection_masks, detection_boxes, image.shape[0], image.shape[1])

        detection_masks_reframed = tf.cast(

            tf.greater(detection_masks_reframed, 0.5), tf.uint8)

        # Follow the convention by adding back the batch dimension

        tensor_dict['detection_masks'] = tf.expand_dims(

            detection_masks_reframed, 0)

      image_tensor = tf.get_default_graph().get_tensor_by_name('image_tensor:0')

      # Run inference

      output_dict = sess.run(tensor_dict,

                             feed_dict={image_tensor: np.expand_dims(image, 0)})

      # all outputs are float32 numpy arrays, so convert types as appropriate

      output_dict['num_detections'] = int(output_dict['num_detections'][0])

      output_dict['detection_classes'] = output_dict[

          'detection_classes'][0].astype(np.uint8)

      output_dict['detection_boxes'] = output_dict['detection_boxes'][0]

      output_dict['detection_scores'] = output_dict['detection_scores'][0]

      if 'detection_masks' in output_dict:

        output_dict['detection_masks'] = output_dict['detection_masks'][0]

  return output_dict
10.
IMAGE_SIZE = (36, 24)

#这里设置图片路径

mydir=r'E:\学习资料\人工智能\models-master\research\object_detection\test_images'

# mydir = 'G:\壁纸'

for filename in os.listdir(mydir):

    if os.path.splitext(filename)[1] == '.jpg':

        filepath=os.path.join(mydir, filename)

        print(filepath)

        image = Image.open(filepath)

  # the array based representation of the image will be used later in order to prepare the

  # result image with boxes and labels on it.

        image_np = load_image_into_numpy_array(image)

  # Expand dimensions since the model expects images to have shape: [1, None, None, 3]

        image_np_expanded = np.expand_dims(image_np, axis=0)

  # Actual detection.

        output_dict = run_inference_for_single_image(image_np, detection_graph)

  # Visualization of the results of a detection.

        vis_util.visualize_boxes_and_labels_on_image_array(

            image_np,

            output_dict['detection_boxes'],

            output_dict['detection_classes'],

            output_dict['detection_scores'],

            category_index,

            instance_masks=output_dict.get('detection_masks'),

            use_normalized_coordinates=True,

            line_thickness=8)

        fig1 = plt.gcf()

        plt.figure(figsize=IMAGE_SIZE)

        plt.imshow(image_np)
运行结果:

代码参考:https://github.com/tensorflow/models/blob/master/research/object_detection/object_detection_tutorial.ipynb
有些图片识别会失败,目前还没搞清楚,欢迎大家交流
win7实现tensorflow中的物体识别的更多相关文章
- 谷歌开源的TensorFlow Object Detection API视频物体识别系统实现教程
视频中的物体识别 摘要 物体识别(Object Recognition)在计算机视觉领域里指的是在一张图像或一组视频序列中找到给定的物体.本文主要是利用谷歌开源TensorFlow Object De ...
- 使用TensorFlow识别照片中的物体
1.环境ubuntu14.04.5 安装TensorFlow 官方文档:https://www.tensorflow.org/install/install_linux sudo pip instal ...
- Tensorflow object detection API 搭建物体识别模型(四)
四.模型测试 1)下载文件 在已经阅读并且实践过前3篇文章的情况下,读者会有一些文件夹.因为每个读者的实际操作不同,则文件夹中的内容不同.为了保持本篇文章的独立性,制作了可以独立运行的文件夹目标检测. ...
- Tensorflow object detection API 搭建物体识别模型(三)
三.模型训练 1)错误一: 在桌面的目标检测文件夹中打开cmd,即在路径中输入cmd后按Enter键运行.在cmd中运行命令: python /your_path/models-master/rese ...
- Tensorflow object detection API 搭建物体识别模型(一)
一.开发环境 1)python3.5 2)tensorflow1.12.0 3)Tensorflow object detection API :https://github.com/tensorfl ...
- Tensorflow object detection API 搭建物体识别模型(二)
二.数据准备 1)下载图片 图片来源于ImageNet中的鲤鱼分类,下载地址:https://pan.baidu.com/s/1Ry0ywIXVInGxeHi3uu608g 提取码: wib3 在桌面 ...
- 谷歌开源的TensorFlow Object Detection API视频物体识别系统实现(一)[超详细教程] ubuntu16.04版本
谷歌宣布开源其内部使用的 TensorFlow Object Detection API 物体识别系统.本教程针对ubuntu16.04系统,快速搭建环境以及实现视频物体识别系统功能. 本节首先介绍安 ...
- 对于谷歌开源的TensorFlow Object Detection API视频物体识别系统实现教程
本教程针对Windows10实现谷歌近期公布的TensorFlow Object Detection API视频物体识别系统,其他平台也可借鉴. 本教程将网络上相关资料筛选整合(文末附上参考资料链接) ...
- 谷歌开源的TensorFlow Object Detection API视频物体识别系统实现(二)[超详细教程] ubuntu16.04版本
本节对应谷歌开源Tensorflow Object Detection API物体识别系统 Quick Start步骤(一): Quick Start: Jupyter notebook for of ...
随机推荐
- Git 回滚 Master
RenGuoQiang@PC-RENGUOQIANG MINGW64 /d/zgg/zgg-crm (master) $ git reset --hard 194e2cc8eec88743cc8978 ...
- ratingBar 星级评分条
<?xml version="1.0" encoding="utf-8"?> <LinearLayout xmlns:android=&quo ...
- shell编程系列14--文本处理三剑客之awk的概述及常用方法总结
shell编程系列14--文本处理三剑客之awk的概述及常用方法总结 awk是一个文本处理工具,通常用于处理数据并生成结果报告 awk的命名是它的创始人 Alfred Aho.Peter Weinbe ...
- Cocoa Framework中GB2312与UTF16编码之间的相互转换
代码如下: NSString *orgStr = @"你好,世界!"; NSStringEncoding enc = CFStringConvertEncodingToNSStri ...
- django 中单独执行py文件修改用户名
Python文件代码 import os import django # 在environ字典里设置默认Django环境,'xxxx.settings'指Django项目的配置文件 os.enviro ...
- Python - Django - 静态文件相关
静态文件的路径设置在 settings.py 中 如果该路径发生更改的话,html 中相关路径也要进行修改 CSS: <link href="/static/dashboard.css ...
- CentOS7使用yum安装RabbitMQ
转自:https://jingyan.baidu.com/article/456c463b16f3820a583144a1.html 登录名:admin 密码:admin 1. 如果安装后web界 ...
- 第七章 云原生生态的基石 Kubernetes
7.1 Kubernetes架构 K8s的核心组件: etcd: 协同存储,负责保存整个集群的状态. API:资源操作的唯一入口. controller manager: 维护集群的状态,执行故障检测 ...
- CF1197D Yet Another Subarray Problem
思路: 使用动态规划,在经典的最大子段和解法基础上进行扩展.dp[i][j]表示以第i个数为结尾,并且长度模m等于j的所有子段的最大cost. 实现: #include <bits/stdc++ ...
- Django 操作已经存在的数据库
反向操作数据库 何为反向操作.即是数据库在项目之前已经存在,不需要新建表,操作已经存在的表 # 进入站点目录下执行 python manage.py inspectdb #可以看到settings中连 ...