小工具:天气查询 Vs自定义设置 DevGridControl中GridView排序问题 小工具:火车票查询 小工具:邮件发送 小工具:截图&简单图像处理
小工具:天气查询
开发一个天气查询的工具主要由两步构成,一是数据的获取,二是数据的展示。
一、数据获取
数据获取又可以分为使用其它公司提供的API和手动抓取其它网站数据。
1. 某公司提供的API
可以从阿里云的云市场中查找,可以找到免费的API,并且提供不同语言的示例,实在不会还可以向客服咨询...
回想当初使用A公司提供的API,使用B公司的APPCODE,还理直气壮的去问A的客服“我照你们示例写的为什么还调用失败”???
2.其它网站数据抓取
抓取数据源网站为中央气象台(http://www.nmc.gov.cn)。利用抓包工具,分析得出获取实时天气需要用到以下几个接口(以查询天津天气为例):

1)省及直辖市信息(http://www.nmc.gov.cn/f/rest/province)
GET http://www.nmc.gov.cn/f/rest/province HTTP/1.1
Host: www.nmc.gov.cn
User-Agent: Mozilla/5.0 (Windows NT 10.0; Win64; x64; rv:57.0) Gecko/20100101 Firefox/57.0
Accept: application/json, text/javascript, */*; q=0.01
Accept-Language: zh-CN,zh;q=0.8,zh-TW;q=0.7,zh-HK;q=0.5,en-US;q=0.3,en;q=0.2
Accept-Encoding: gzip, deflate
Referer: http://www.nmc.gov.cn/publish/forecast/ATJ/tian-jin.html
X-Requested-With: XMLHttpRequest
Cookie:UM_distinctid=1608c818855d7-08ea6f54050ee3-4c322e7d-100200-1608c818856e4; CNZZDATA1254743953=65764743-1514184268-https%253A%252F%252Fwww.baidu.com%252F%7C1514184060; followcity=54511%2C58367%2C59493%2C57516%2C58321%2C57679%2C58847%2C59287%2C58238
DNT: 1
Connection: keep-alive
Cache-Control: max-age=0
返回内容为:
[
  {
    "code": "ABJ",
    "name": "北京市",
    "url": "/publish/forecast/ABJ.html"
  },
  {
    "code": "ATJ",
    "name": "天津市",
    "url": "/publish/forecast/ATJ.html"
  },
  {
    "code": "AHE",
    "name": "河北省",
    "url": "/publish/forecast/AHE.html"
  },
  {
    "code": "ASX",
    "name": "山西省",
    "url": "/publish/forecast/ASX.html"
  },
  {
    "code": "ANM",
    "name": "内蒙古自治区",
    "url": "/publish/forecast/ANM.html"
  },
  {
    "code": "ALN",
    "name": "辽宁省",
    "url": "/publish/forecast/ALN.html"
  },
  {
    "code": "AJL",
    "name": "吉林省",
    "url": "/publish/forecast/AJL.html"
  },
  {
    "code": "AHL",
    "name": "黑龙江省",
    "url": "/publish/forecast/AHL.html"
  },
  {
    "code": "ASH",
    "name": "上海市",
    "url": "/publish/forecast/ASH.html"
  },
  {
    "code": "AJS",
    "name": "江苏省",
    "url": "/publish/forecast/AJS.html"
  },
  {
    "code": "AZJ",
    "name": "浙江省",
    "url": "/publish/forecast/AZJ.html"
  },
  {
    "code": "AAH",
    "name": "安徽省",
    "url": "/publish/forecast/AAH.html"
  },
  {
    "code": "AFJ",
    "name": "福建省",
    "url": "/publish/forecast/AFJ.html"
  },
  {
    "code": "AJX",
    "name": "江西省",
    "url": "/publish/forecast/AJX.html"
  },
  {
    "code": "ASD",
    "name": "山东省",
    "url": "/publish/forecast/ASD.html"
  },
  {
    "code": "AHA",
    "name": "河南省",
    "url": "/publish/forecast/AHA.html"
  },
  {
    "code": "AHB",
    "name": "湖北省",
    "url": "/publish/forecast/AHB.html"
  },
  {
    "code": "AHN",
    "name": "湖南省",
    "url": "/publish/forecast/AHN.html"
  },
  {
    "code": "AGD",
    "name": "广东省",
    "url": "/publish/forecast/AGD.html"
  },
  {
    "code": "AGX",
    "name": "广西壮族自治区",
    "url": "/publish/forecast/AGX.html"
  },
  {
    "code": "AHI",
    "name": "海南省",
    "url": "/publish/forecast/AHI.html"
  },
  {
    "code": "ACQ",
    "name": "重庆市",
    "url": "/publish/forecast/ACQ.html"
  },
  {
    "code": "ASC",
    "name": "四川省",
    "url": "/publish/forecast/ASC.html"
  },
  {
    "code": "AGZ",
    "name": "贵州省",
    "url": "/publish/forecast/AGZ.html"
  },
  {
    "code": "AYN",
    "name": "云南省",
    "url": "/publish/forecast/AYN.html"
  },
  {
    "code": "AXZ",
    "name": "西藏自治区",
    "url": "/publish/forecast/AXZ.html"
  },
  {
    "code": "ASN",
    "name": "陕西省",
    "url": "/publish/forecast/ASN.html"
  },
  {
    "code": "AGS",
    "name": "甘肃省",
    "url": "/publish/forecast/AGS.html"
  },
  {
    "code": "AQH",
    "name": "青海省",
    "url": "/publish/forecast/AQH.html"
  },
  {
    "code": "ANX",
    "name": "宁夏回族自治区",
    "url": "/publish/forecast/ANX.html"
  },
  {
    "code": "AXJ",
    "name": "新疆维吾尔自治区",
    "url": "/publish/forecast/AXJ.html"
  },
  {
    "code": "AXG",
    "name": "香港特别行政区",
    "url": "/publish/forecast/AXG.html"
  },
  {
    "code": "AAM",
    "name": "澳门特别行政区",
    "url": "/publish/forecast/AAM.html"
  },
  {
    "code": "ATW",
    "name": "台湾省",
    "url": "/publish/forecast/ATW.html"
  }
]
2)区县信息(http://www.nmc.gov.cn/f/rest/province/ATJ)
//根据所选省或直辖市生成区县信息查询接口
GET http://www.nmc.gov.cn/f/rest/province/ATJ HTTP/1.1
Host: www.nmc.gov.cn
User-Agent: Mozilla/5.0 (Windows NT 10.0; Win64; x64; rv:57.0) Gecko/20100101 Firefox/57.0
Accept: application/json, text/javascript, */*; q=0.01
Accept-Language: zh-CN,zh;q=0.8,zh-TW;q=0.7,zh-HK;q=0.5,en-US;q=0.3,en;q=0.2
Accept-Encoding: gzip, deflate
Referer: http://www.nmc.gov.cn/publish/forecast/ATJ/tian-jin.html
X-Requested-With: XMLHttpRequest
Cookie:UM_distinctid=1608c818855d7-08ea6f54050ee3-4c322e7d-100200-1608c818856e4; CNZZDATA1254743953=65764743-1514184268-https%253A%252F%252Fwww.baidu.com%252F%7C1514184060; followcity=54511%2C58367%2C59493%2C57516%2C58321%2C57679%2C58847%2C59287%2C58238
DNT: 1
Connection: keep-alive
Cache-Control: max-age=0

返回内容为:
[
  {
    "url": "/publish/forecast/ATJ/xi-qing.html",
    "code": "54527",
    "city": "西青",
    "province": "天津市"
  },
  {
    "url": "/publish/forecast/ATJ/bin-hai-xin-qu.html",
    "code": "54623",
    "city": "滨海新区",
    "province": "天津市"
  },
  {
    "url": "/publish/forecast/ATJ/bao-di.html",
    "code": "54525",
    "city": "宝坻",
    "province": "天津市"
  },
  {
    "url": "/publish/forecast/ATJ/bei-chen.html",
    "code": "54528",
    "city": "北辰",
    "province": "天津市"
  },
  {
    "url": "/publish/forecast/ATJ/da-gang.html",
    "code": "54645",
    "city": "大港",
    "province": "天津市"
  },
  {
    "url": "/publish/forecast/ATJ/dong-li.html",
    "code": "54526",
    "city": "东丽",
    "province": "天津市"
  },
  {
    "url": "/publish/forecast/ATJ/han-gu.html",
    "code": "54530",
    "city": "汉沽",
    "province": "天津市"
  },
  {
    "url": "/publish/forecast/ATJ/ji-xian.html",
    "code": "54428",
    "city": "蓟县",
    "province": "天津市"
  },
  {
    "url": "/publish/forecast/ATJ/jin-nan.html",
    "code": "54622",
    "city": "津南",
    "province": "天津市"
  },
  {
    "url": "/publish/forecast/ATJ/jing-hai.html",
    "code": "54619",
    "city": "静海",
    "province": "天津市"
  },
  {
    "url": "/publish/forecast/ATJ/ning-he.html",
    "code": "54529",
    "city": "宁河",
    "province": "天津市"
  },
  {
    "url": "/publish/forecast/ATJ/tian-jin.html",
    "code": "54517",
    "city": "天津",
    "province": "天津市"
  },
  {
    "url": "/publish/forecast/ATJ/wu-qing.html",
    "code": "54523",
    "city": "武清",
    "province": "天津市"
  }
]
3)某城市当前天气查询(http://www.nmc.gov.cn/f/rest/real/54517)
GET http://www.nmc.gov.cn/f/rest/real/54517?_=1514185989171 HTTP/1.1
Host: www.nmc.gov.cn
User-Agent: Mozilla/5.0 (Windows NT 10.0; Win64; x64; rv:57.0) Gecko/20100101 Firefox/57.0
Accept: application/json, text/javascript, */*; q=0.01
Accept-Language: zh-CN,zh;q=0.8,zh-TW;q=0.7,zh-HK;q=0.5,en-US;q=0.3,en;q=0.2
Accept-Encoding: gzip, deflate
Referer: http://www.nmc.gov.cn/publish/forecast/ATJ/tian-jin.html
X-Requested-With: XMLHttpRequest
Cookie:UM_distinctid=1608c818855d7-08ea6f54050ee3-4c322e7d-100200-1608c818856e4; CNZZDATA1254743953=65764743-1514184268-https%253A%252F%252Fwww.baidu.com%252F%7C1514184060; followcity=54511%2C58367%2C59493%2C57516%2C58321%2C57679%2C58847%2C59287%2C58238
DNT: 1
Connection: keep-alive

返回内容为:
{
"station":

    {

    "url":"/publish/forecast/ATJ/tian-jin.html",

    "code":"54517",

    "city":"天津",

    "province":"天津市"

    },

"publish_time":"2017-12-25 15:05",
"weather":

    {

      "temperature":5.4,  //气温 ℃
       "airpressure":1023.0, //气压
      "humidity":15.0, //湿度 %
      "rain":0.0,  //降水量 mm

    "rcomfort":43,

    "icomfort":-2,

    "info":"晴",

    "img":"0",

      "feelst":6.7//体感温度 ℃

    },

"wind":

    {

    "direct":"西南风",

    "power":"微风",

      "speed":2.8 m/s

    },

"warn":

    {

    "alert":"2017年12月25日14时天津市发布海上大风蓝色预警",

    "pic":"http://image.nmc.cn/static/site/nmc/themes/basic/alarm/p.png",

    "province":"天津市",

    "city":"9999",

    "url":"/f/alarm/12000041600000_20171225145105.html",

    "issuecontent":"天津海洋中心气象台于2017年12月25日14时43分发布海上大风蓝色预警信号:预计今天后半夜到明天白天,渤海西部中部海面将有东到东北风7级,阵风8级,请有关单位和人员作好防范准备。",

    "fmeans":"9999"
    }
}
接口分析完毕,接下来就是利用代码获取数据的过程,以获取省及直辖市数据为例,代码如下所示:
        /// <summary>
        /// 获取省及直辖市
        /// </summary>
        public List<ProvinceModel> GetProvinceData(ref string errorMsg)
        {
            string strResult = string.Empty;
            try
            {
                #region HttpWebRequest
                HttpWebRequest request = (HttpWebRequest)HttpWebRequest.Create("http://www.nmc.gov.cn/f/rest/province");
                string cookie = "UM_distinctid=1608c818855d7-08ea6f54050ee3-4c322e7d-100200-1608c818856e4; CNZZDATA1254743953=65764743-1514184268-https%253A%252F%252Fwww.baidu.com%252F%7C1514184060; followcity=54511%2C58367%2C59493%2C57516%2C58321%2C57679%2C58847%2C59287%2C58238";
                string referer = "http://www.nmc.gov.cn/publish/forecast/ATJ/tian-jin.html";
                HttpWebRequestHelper.HttpWebRequestConfig(request, cookie, referer);
                #endregion

                using (WebResponse response = request.GetResponse())
                {
                    Stream respStream = response.GetResponseStream();
                    bool isNeedDeCompress = response.Headers.ToString().Contains("Content-Encoding: gzip");
                    if (isNeedDeCompress)
                        respStream = new GZipStream(respStream, CompressionMode.Decompress);
                    StreamReader reader = new StreamReader(respStream, Encoding.UTF8);
                    strResult = reader.ReadToEnd();
                    List<ProvinceModel> lstModel = JsonConvert.DeserializeObject<List<ProvinceModel>>(strResult);
                    response.Close();
                    return lstModel;
                }
            }
            catch (Exception ex)
            {
                errorMsg = ex.Message;
            }
            return null;
        }
      //其中HttpWebRequestHelper.HttpWebRequestConfig()是对请求头的一些设置。
二、数据展示
数据得到之后,先是模仿原网站的样式用WPF简单的实现了一版,运行图如下:
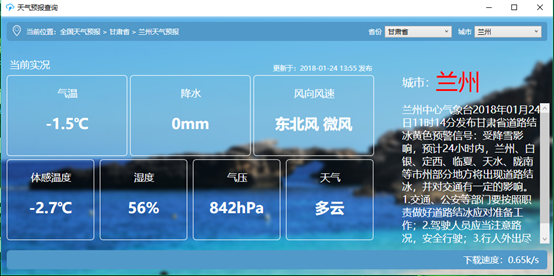
最近工作不忙,感觉好久没搞WebForm,所以就又简单的做了下面这个:

http://www.weather.com.cn/weather/101010100.shtml
用这个数据。
Vs自定义设置
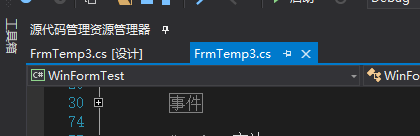
1.固定选项卡独立行显示设置
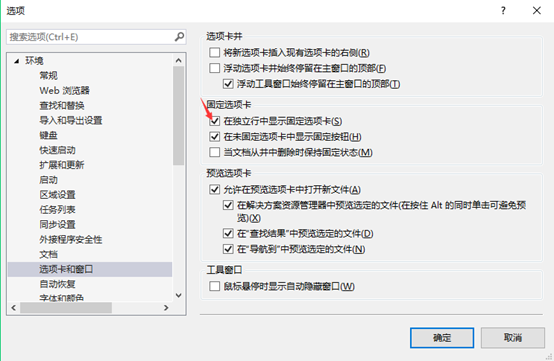
效果如下
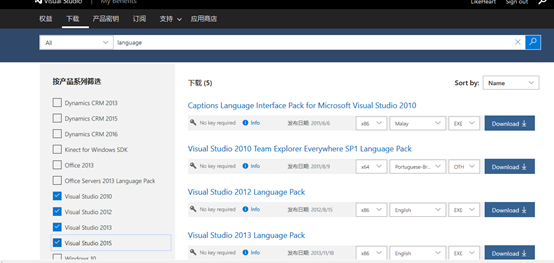
2.语言设置
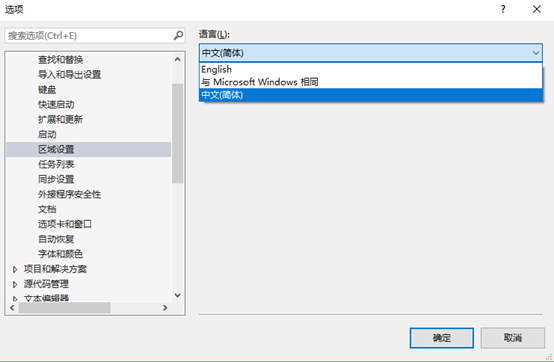
可以从官网寻找所需版本语言包
https://my.visualstudio.com/downloads
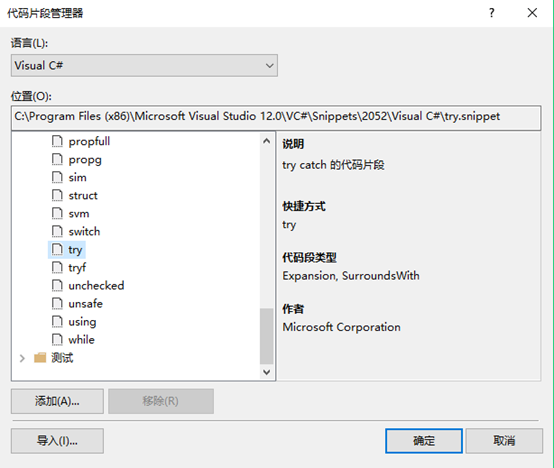
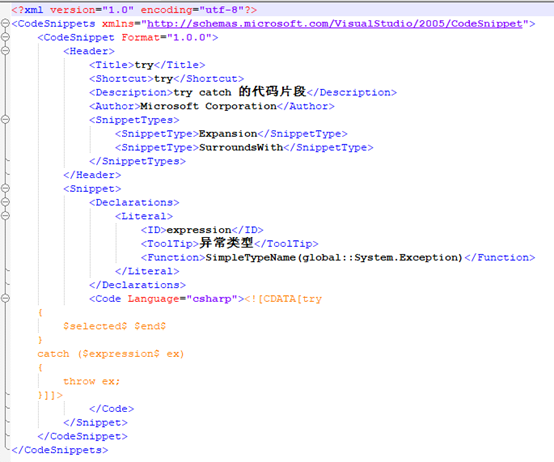
3.代码段设置
可以对现有的进行一些改造,更适合你自己的习惯,或者添加自己的代码段。
4.代码模板
修改一些现有的模板,可以规范我们的代码,减少一点点的重复性工作。
以C#中WinForm举例
新增一个Windows窗体后,生成以下的代码模板
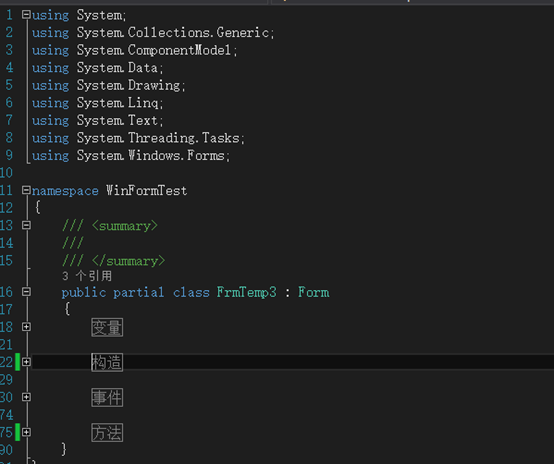
实现方法:
文件路径:C:\Program Files (x86)\Microsoft Visual Studio 12.0\Common7\IDE\ItemTemplatesCache\CSharp\Windows Forms\2052\Form
 1 using System;
 2 using System.Collections.Generic;
 3 using System.ComponentModel;
 4 using System.Data;
 5 using System.Drawing;
 6 $if$ ($targetframeworkversion$ >= 3.5)using System.Linq;
 7 $endif$using System.Text;
 8 $if$ ($targetframeworkversion$ >= 4.5)using System.Threading.Tasks;
 9 $endif$using System.Windows.Forms;
10
11 namespace $rootnamespace$
12 {
13     /// <summary>
14     ///
15     /// </summary>
16     public partial class $safeitemrootname$: Form
17     {
18         #region 变量
19
20         #endregion
21
22         #region 构造
23         public $safeitemrootname$()
24         {
25             InitializeComponent();
26             Load += $safeitemrootname$_Load;
27         }
28         #endregion
29
30         #region 事件
31
32         #region 窗体加载事件
33         /// <summary>
34         /// 窗体加载事件
35         /// </summary>
36         /// <param name="sender"></param>
37         /// <param name="e"></param>
38         void $safeitemrootname$_Load(object sender, EventArgs e)
39         {
40
41         }
42         #endregion
43
44         #endregion
45
46         #region 方法
47
48         #endregion
49     }
50 }
知识点:
1)ItemTemplates与ItemTemplatesCache的区别在于,如果您设置了ItemTemplates下的模板,需要在VS命令行中运行devenv /setup 命令 ,以Itemtemplates模板生成ItemTemplatesCache的模板,也就是说ItemTemplatesCache模板的设置会被原始的Itemtemplates模板还原。
2)1033和2052是LCID(Locale ID,区域性标识符),1033 表示英语(美国),2052表示简体中文。
DevGridControl中GridView排序问题
在对表格数据源为字符串类型的列排序时,为了实现按照值大小进行排序,需要进行以下处理:
gridColumn1.SortMode = DevExpress.XtraGrid.ColumnSortMode.Custom;
然后在事件CustomColumnSort中实现
        void gdv_CustomColumnSort(object sender, DevExpress.XtraGrid.Views.Base.CustomColumnSortEventArgs e)
        {
            if (e.Column != null && e.Value1 != null && e.Value2 != null)
            {
                string value1 = e.Value1.ToString();
                string value2 = e.Value2.ToString();
                int result = Comparer.Default.Compare
                    (ConvertToDecimal(value1, e.SortOrder), ConvertToDecimal(value2, e.SortOrder));
                e.Result = result;
                e.Handled = true;
            }
        }

        private decimal ConvertToDecimal(string input, DevExpress.Data.ColumnSortOrder sortOrder)
        {
            decimal result = 0;
            if (string.IsNullOrWhiteSpace(input) || input.Equals("**") || input.Equals("--"))
                result = sortOrder == DevExpress.Data.ColumnSortOrder.Ascending ? 9999 : -9999;
            else
                decimal.TryParse(input, out result);
            return result;
        }
gridColumn1.SortMode = DevExpress.XtraGrid.ColumnSortMode.Value;
小工具:火车票查询
今天又到了抢火车票的时候,反正是每次抢票都是傻眼。于是写个小工具帮助自己查询火车票,如果有票的话给自己发个邮件提示购买。
一、准备工作

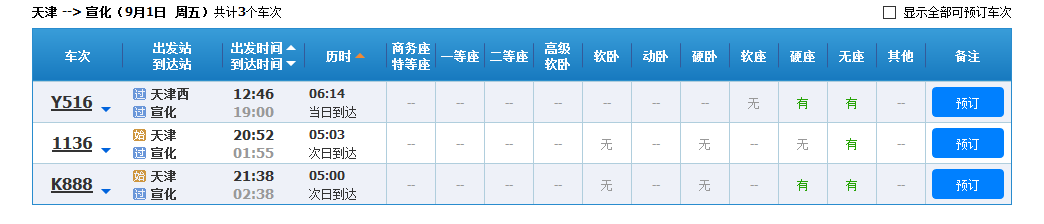
利用firebug等工具,我们可以获取到当我们单击查询时调用的Get请求。
- leftTicketDTO.from_station=TJP 出发站
- leftTicketDTO.to_station=XHP 到达站
- leftTicketDTO.train_date=2017-09-01 出发日期
- purpose_codes=ADULT 乘车人类型
接下来我们要对返回的json进行分析,返回的json如下:
{
  "validateMessagesShowId": "_validatorMessage",
  "status": true,
  "httpstatus": 200,
  "data": {
    "result": [
      "oSIL3O3WIe6kfzF42Zlz%2B%2BsPFUuDm4BbNP13vXPnMnwSVXDgZ03onlMGao1RqJYjWimJDOiBa9Xm%0A59BctbygQhG6xM5mfTPPb9dLuvYg43VQYKGBpYzHere%2B4diEqyOfA64i6OcUFpe8ZJ4ccCEiQK7d%0AsFWdn6qDxY5PDQ2zG%2BCCNeAG216PdgO%2Fv%2F0PIrQTTK%2FTft8oZIxGT9VYlkHeh3TUUdxenyGAts4J%0AJ278LrM%3D|预订|260000Y5160F|Y516|VVP|ZMP|TXP|XHP|12:46|19:00|06:14|Y|rC9CEREwzGPqGayEjfr9YPwYtGX%2B45X6aKXyL0VaY0Bauu4t|20170901|3|P2|11|19|0|0|||||无||有|||有|||||101020|112",
      "wIpyiHG7PkQUnuOjE7gTxQAW39ihKOVttmAMx1lyhE10OyzjXjCe0EzyOsu28FOvw0Yc6CZF4CAQ%0AhR6L%2BAgyc6ca%2FYubiLZ4HuKw%2B0XmN5Us9fmA%2FajP3P%2FZgSoacqyPHPXEhWZ8pfGWSkmLMRNpisgd%0A48kWkp8rhjVIDljoncMagr6t5il3t5FaP8otqcN4ZtnTL1KfslpZt%2B2gxw7GwNFZH0QGTq2uoIuu%0AnYTSCB11w3Ok|预订|25000011360J|1136|TJP|WXC|TJP|XHP|20:52|01:55|05:03|Y|ZhbR6hnByAgL1ejqxJ1AIYiWcW2q08ZgO%2Bfk6UjtmX5mYLHGGlNBCiPVZDc%3D|20170901|3|P2|01|04|0|0||||无|||有||无|无|||||10401030|1413",
      "yG8TT6qCWjH0Aa2LVzxfCFGHf2q0syxOx7RfcXmsbFNyfq2VlWOS3q0oODd5tWAY2I5ddZfSBvnl%0A1GT%2BQCpZAhTPSLyRfDKCvwNMykAFe%2BuRULRPxd1WsQ57uIWepqDtElMcpGR8m7HB6KTnlzXXL9te%0AkumIJNMRMtA0ukPZto5G3sOGSSHgmQdcAxRmRdCVBFEsS9dNprjSQBwy%2BsxXq7KfAovJcemtY%2B3H%0AC7Kx4hnW5HXZ|预订|250000K8880H|K888|TJP|XNO|TJP|XHP|21:38|02:38|05:00|Y|uwEONiPztkLymI5okpF%2FJhWo7bzZA1zPcjbuofQXIXLCubD2gxSlXoz8nI8%3D|20170901|3|PB|01|04|0|0||||无|||有||无|有|||||10401030|1413"
    ],
    "flag": "1",
    "map": {
      "TXP": "天津西",
      "XHP": "宣化",
      "TJP": "天津"
    }
  },
  "messages": [],
  "validateMessages": {}
}
网页显示:
- oSIL3O3WIe6kfzF42Zlz%2B%2BsPFUuDm4BbNP13vXPnMnwSVXDgZ03onlMGao1RqJYjWimJDOiBa9Xm%0A59BctbygQhG6xM5mfTPPb9dLuvYg43VQYKGBpYzHere%2B4diEqyOfA64i6OcUFpe8ZJ4ccCEiQK7d%0AsFWdn6qDxY5PDQ2zG%2BCCNeAG216PdgO%2Fv%2F0PIrQTTK%2FTft8oZIxGT9VYlkHeh3TUUdxenyGAts4J%0AJ278LrM%3D| 作为之后预订车票的参数使用
- 预订|
- 260000Y5160F|
- Y516| 车次
- VVP| 始发站
- ZMP| 终点站
- TXP| 出发站
- XHP| 到达站
- 12:46| 出发时间
- 19:00| 到达时间
- 06:14| 历时
- Y| 是否有票 N:无票 Y:有票
- rC9CEREwzGPqGayEjfr9YPwYtGX%2B45X6aKXyL0VaY0Bauu4t| 未知内容
- 20170901| 未知内容
- 3| 未知内容
- P2| 未知内容
- 11| 出发站站序
- 19| 到达站站序
- 0| 未知内容
- 0| 未知内容
- | 未知内容
- | 未知内容
- | 未知内容
- | 软卧
- 无| 软座
- | 未知内容
- 有| 无座
- | 硬卧
- | 未知内容
- 有| 硬座
- | 二等座
- | 一等座
- | 商务座
- | 未知内容
- 101020| 未知内容
- 112 未知内容
好了我们的准备工作差不多就这样了。
二、编写代码
现在的任务就是数据的获取,代码如下:
        /// <summary>
        /// 车票查询数据获取
        /// </summary>
        /// <param name="goTime">出行日期</param>
        /// <param name="fromStationCode">出发站编码</param>
        /// <param name="toStationCode">到达站编码</param>
        /// <param name="errorMsg">错误消息</param>
        /// <returns></returns>
        public TicketSearchJson GetSearchTicketData(DateTime goTime, string fromStationCode, string toStationCode, ref string errorMsg)
        {
            string srcString = string.Empty;
            try
            {
                using (WebClient client = new WebClient())
                {
                    string url = string.Format("https://kyfw.12306.cn/otn/leftTicket/query?leftTicketDTO.train_date={0}&leftTicketDTO.from_station={1}&leftTicketDTO.to_station={2}&purpose_codes=ADULT",
                        goTime.ToString("yyyy-MM-dd"), fromStationCode, toStationCode);
                    Uri uri = new Uri(url);
                    ServicePointManager.ServerCertificateValidationCallback = ValidateServerCertificate;
                    byte[] responseData = client.DownloadData(uri);
                    srcString = Encoding.UTF8.GetString(responseData);
                    TicketSearchJson ticketSearch = JsonConvert.DeserializeObject<TicketSearchJson>(srcString);
                    return ticketSearch;
                }
            }
            catch (Exception ex)
            {
                errorMsg = ex.Message;
                return null;
            }
        }

        /// <summary>
        /// 服务器证书回调方法
        /// </summary>
        /// <param name="sender"></param>
        /// <param name="certificate"></param>
        /// <param name="chain"></param>
        /// <param name="sslPolicyErrors"></param>
        /// <returns></returns>
        private bool ValidateServerCertificate(object sender, X509Certificate certificate, X509Chain chain, SslPolicyErrors sslPolicyErrors)
        {
            return true;
        }
邮件发送功能可见这篇博客:小工具:邮件发送
三、运行截图
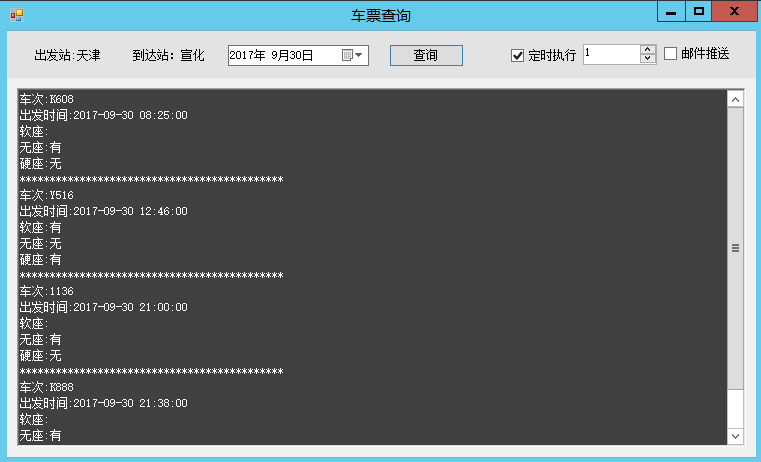
切勿过于频繁调用接口!!!
程序下载:https://pan.baidu.com/s/1hrC2CPQ
四、更新
2018.1.2 获取数据后解析乱码问题
分析后得知 响应数据经过压缩:Content-Encoding: gzip
解决方法(加粗代码):
 1     public TicketSearchJson GetSearchTicketData_WebRequest(DateTime goTime, string fromStationCode, string toStationCode, ref string errorMsg)
 2         {
 3             string srcString = string.Empty;
 4             if (string.IsNullOrEmpty(fromStationCode) || string.IsNullOrEmpty(toStationCode)) { errorMsg = "出发站编码、到达站编码不能为空"; return null; }
 5             if (fromStationCode == toStationCode) { errorMsg = "出发站和到达站不能相同!"; return null; }
 6             try
 7             {
 8                 string url = string.Empty;
 9                 try
10                 {
11                     url = string.Format(System.Configuration.ConfigurationManager.AppSettings["Url"].ToString(),
12                        goTime.ToString("yyyy-MM-dd"), fromStationCode, toStationCode);
13                 }
14                 catch { LogHelper.WriteErrorLog("读取url失败!"); }
15                 Uri uri = new Uri(url);
16                 HttpWebRequest request = (HttpWebRequest)WebRequest.Create(uri);
17                 string cookie = string.Empty;
18                 try { cookie = CreateCookie(fromStationCode, toStationCode); }
19                 catch { LogHelper.WriteInfoLog("读取Cookie失败!"); errorMsg = "读取Cookie失败!"; }
20                 HttpWebRequestHelper.SetRequestHeader(request, "kyfw.12306.cn", cookie);
21                 ServicePointManager.ServerCertificateValidationCallback = ValidateServerCertificate;
22                 WebResponse response = request.GetResponse();
23                 Stream respStream = response.GetResponseStream();
24                 //如果响应头中包含Content-Encoding: gzip 数据需要解压缩
25                 bool isNeedDeCompress = response.Headers.ToString().Contains("Content-Encoding: gzip");
26                 if (isNeedDeCompress)
27                     respStream = new GZipStream(respStream, CompressionMode.Decompress);
28                 using (StreamReader reader = new StreamReader(respStream, Encoding.UTF8))
29                 {
30                     srcString = reader.ReadToEnd();
31                     if (srcString.Contains("!DOCTYPE html"))
32                     {
33                         errorMsg = "网络可能存在问题,请您重试一下!";
34                         return null;
35                     }
36                 }
37                 TicketSearchJson ticketSearch = JsonConvert.DeserializeObject<TicketSearchJson>(srcString);
38                 return ticketSearch;
39             }
40             catch (Exception ex)
41             {
42                 errorMsg = ex.Message;
43                 LogHelper.WriteErrorLog("数据获取异常:" + ex.Message);
44                 return null;
45             }
46         }
小工具:邮件发送
一、准备工作
1.要想编写一个发送邮件的小工具,首先得了解以下内容:
- 收件人:这封邮件的接收人,邮件发送者沟通交流的对象。
- 抄送:这封邮件的接收人,邮件发送者希望被抄送者了解邮件内容。
- 密件抄送:这封邮件的接收人,与抄送的唯一区别就是它能够让各个收件人无法查看到这封邮件同时还发送给了哪些人。
- 邮件主题:简述邮件内容。
- 文本内容:邮件的主要内容。
- 附件:与电子邮件附在一起传送至对方邮箱的文件。
- 发件人:邮件的发送者。
2.其次是准备好一个邮箱,我们得对邮箱做一些设置。
本次采用163邮箱,因为用到了smtp协议,所以得保证这个邮箱的smtp服务是开启的。具体操作从以下文档得到http://help.163.com/09/1223/14/5R7P6CJ600753VB8.html。
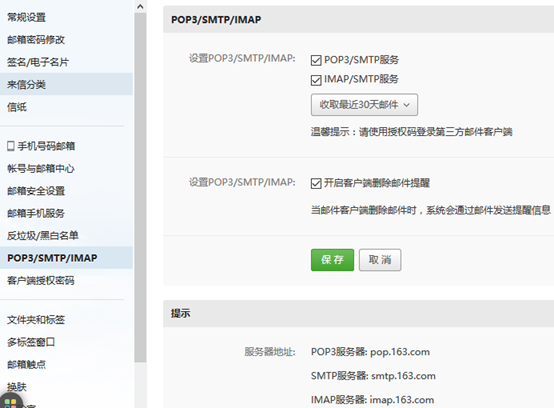
3.除此之外,我们还需开通一个客户端授权密码:

到此我们的准备工作告一段落。
二、编写代码
1.初始化一个邮件类并进行相应赋值
 1         /// <summary>
 2         /// 邮件信息
 3         /// </summary>
 4         /// <returns></returns>
 5         private System.Net.Mail.MailMessage MailInfo()
 6         {
 7             System.Net.Mail.MailMessage message = new System.Net.Mail.MailMessage();
 8             //收件人
 9             message.To.Add("xxxxxx@qq.com");
10             //抄送
11             message.CC.Add("xxxxxxx@qq.com");
12             //密件抄送
13             message.Bcc.Add("xxxxxxxx@qq.com");
14             message.Subject = "邮件主题";
15             message.Body = "这里是邮件正文";
16             message.BodyEncoding = Encoding.UTF8;
17             message.Attachments.Add(new System.Net.Mail.Attachment("附件.txt"));
18             //优先级
19             message.Priority = System.Net.Mail.MailPriority.High;
20             //发件人
21             message.From = new System.Net.Mail.MailAddress("xxxxxxxx@qq.com");
22             return message;
23         }
2.发送邮件
 1         /// <summary>
 2         /// 发送邮件
 3         /// </summary>
 4         private void SmtpSend()
 5         {
 6             System.Net.Mail.SmtpClient client = new System.Net.Mail.SmtpClient();
 7             client.Host = "smtp.163.com";
 8             client.Port = 25;
 9             client.Credentials = new System.Net.NetworkCredential("xxxxxxxx@qq.com", "password");
10             client.EnableSsl = true;
11             client.DeliveryFormat = System.Net.Mail.SmtpDeliveryFormat.SevenBit;
12             client.DeliveryMethod = System.Net.Mail.SmtpDeliveryMethod.Network;
13             client.Send(MailInfo());
14         }
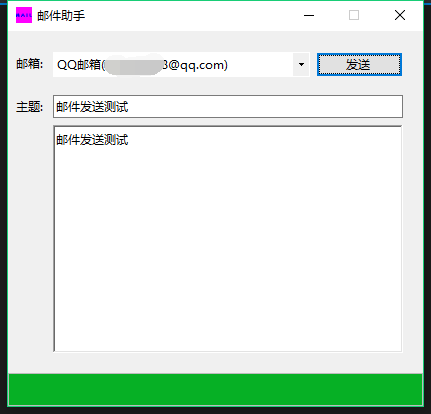
三、半成品运行截图
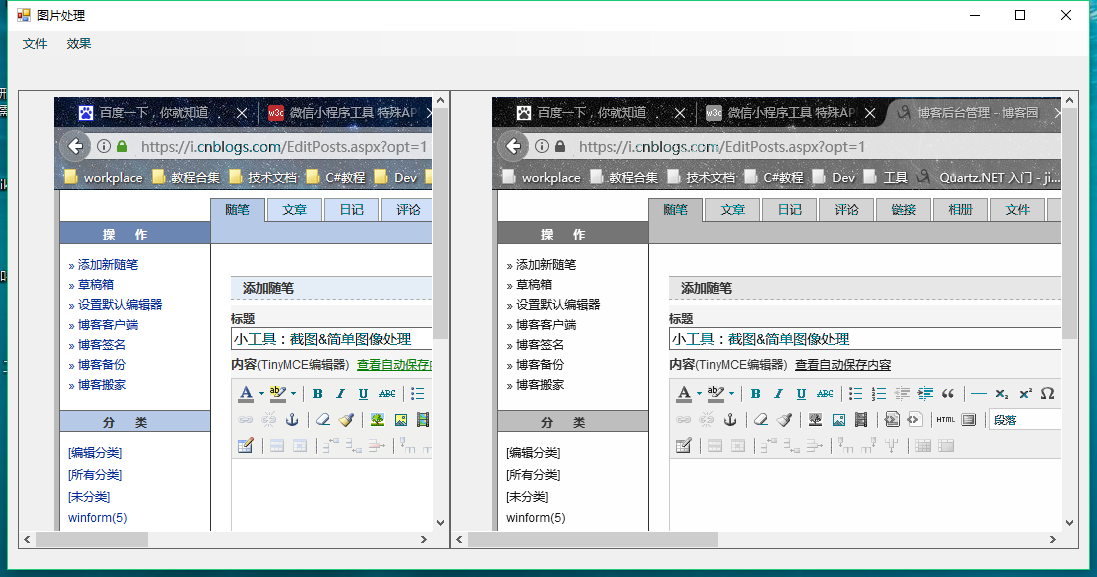
小工具:截图&简单图像处理
一、程序运行截图
二、获取屏幕截图的方法
首先知道我们可以通过Screen.PrimaryScreen.Bounds获取到当前整个屏幕,再利用Bitmap和Graphics就可以得到整个屏幕的图片了。
Screen.PrimaryScreen.WorkingArea这个获得是不包含任务栏的屏幕
获取屏幕代码如下所示:
1 /// <summary>
2 /// 获取屏幕图片
3 /// </summary>
4 private void GetScreenImage()
5 {
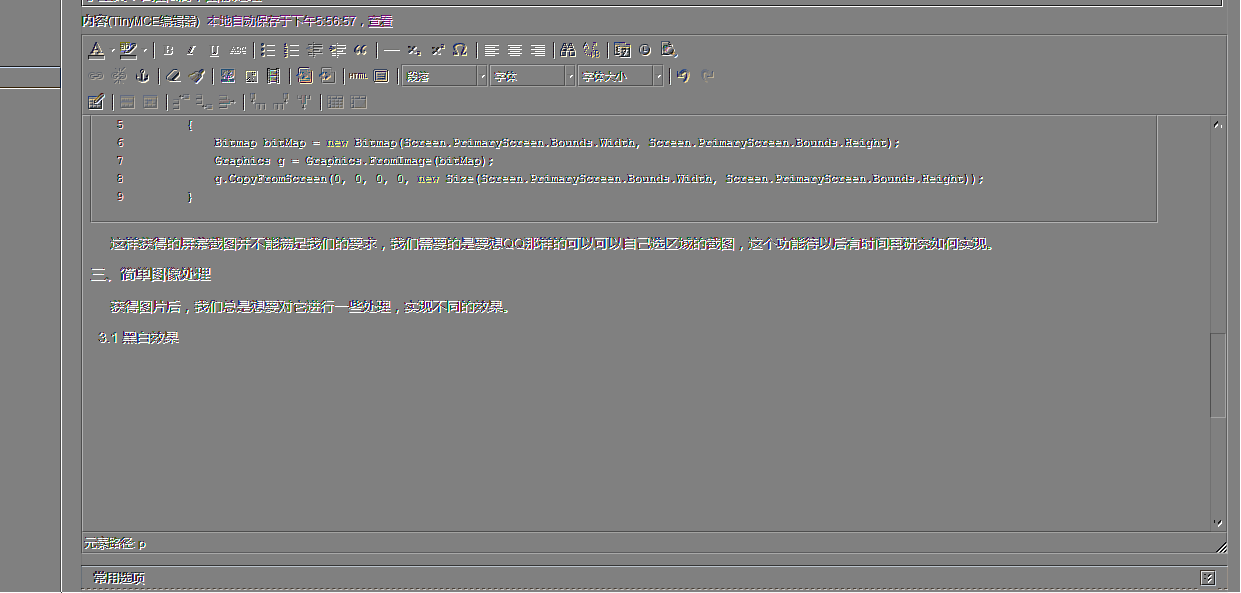
6 Bitmap bitMap = new Bitmap(Screen.PrimaryScreen.Bounds.Width, Screen.PrimaryScreen.Bounds.Height);
7 Graphics g = Graphics.FromImage(bitMap);
8 g.CopyFromScreen(0, 0, 0, 0, new Size(Screen.PrimaryScreen.Bounds.Width, Screen.PrimaryScreen.Bounds.Height));
9 }
这样获得的屏幕截图并不能满足我们的要求,我们需要的是要想QQ那样的可以可以自己选区域的截图,这个功能待以后有时间再研究如何实现。
三、简单图像处理
获得图片后,我们总是想要对它进行一些处理,实现不同的效果。为了实现一些效果,我们需要对图片的每个像素进行修改。
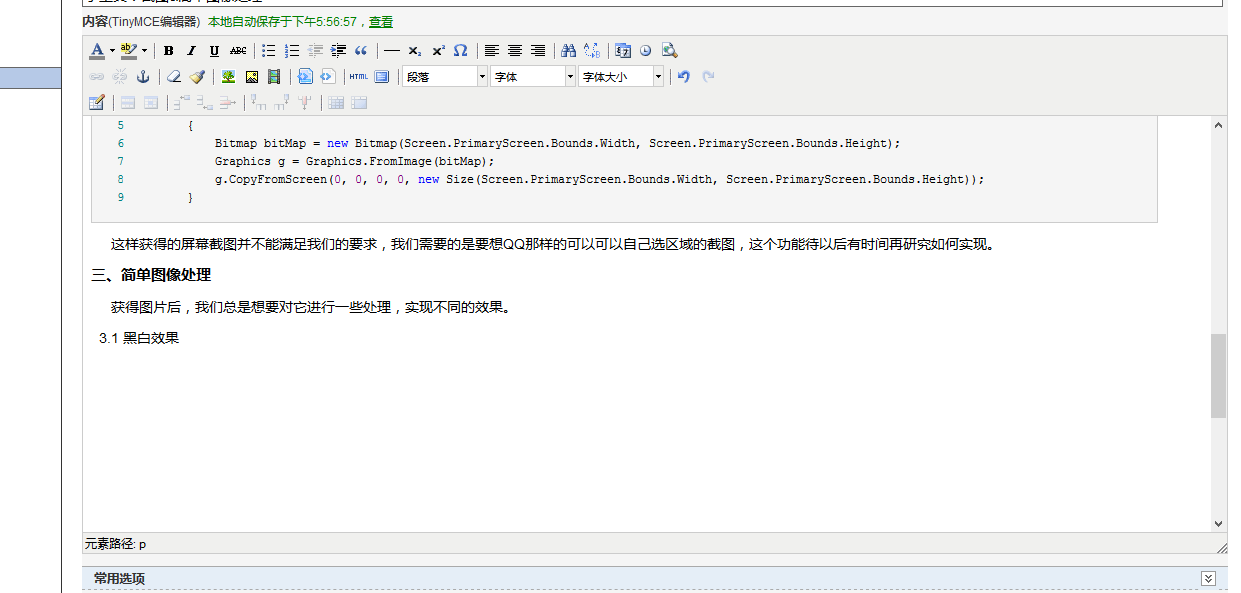
3.1 黑白效果
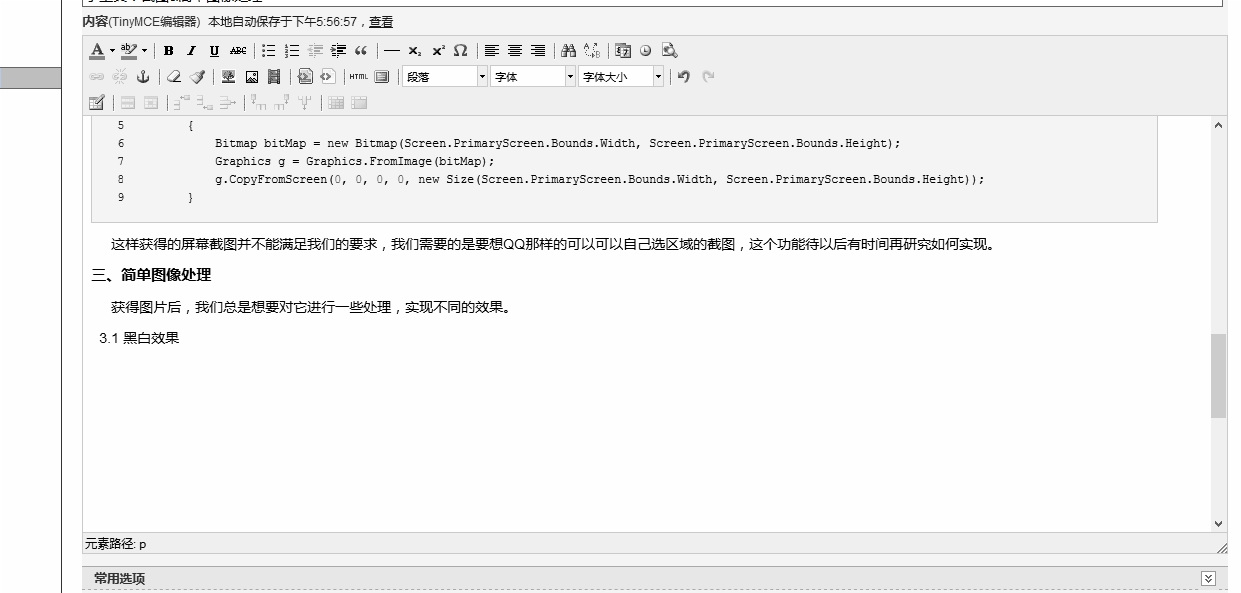
实现方法:
 1         /// <summary>
 2         /// 黑白效果
 3         /// </summary>
 4         public Bitmap ImgBlackWhite(Bitmap bitmap)
 5         {
 6             for (int i = 1; i < bitmap.Width; i++)
 7             {
 8                 for (int j = 1; j < bitmap.Height; j++)
 9                 {
10                     Color pixel = bitmap.GetPixel(i, j);
11                     int avg = GetBWNum(pixel, EnumUtil.Calculate.加权算法);
12                     int r = avg;
13                     int g = avg;
14                     int b = avg;
15                     bitmap.SetPixel(i, j, Color.FromArgb(r, g, b));
16                 }
17             }
18             return bitmap;
19         }
20
21         /// <summary>
22         /// 黑白效果算法
23         /// </summary>
24         /// <param name="pixel"></param>
25         /// <param name="calcul"></param>
26         /// <returns></returns>
27         private int GetBWNum(Color pixel, EnumUtil.Calculate calcul)
28         {
29             int result = 0;
30             switch (calcul)
31             {
32                 case EnumUtil.Calculate.加权算法:
33                     result = ((int)(0.7 * pixel.R) + (int)(0.2 * pixel.G) + (int)(0.1 * pixel.B));
34                     break;
35                 case EnumUtil.Calculate.平均值:
36                     result = (pixel.R + pixel.G + pixel.B) / 3;
37                     break;
38                 case EnumUtil.Calculate.最大值:
39                     result = pixel.R > pixel.G ? pixel.R : pixel.G;
40                     result = result > pixel.B ? result : pixel.B;
41                     break;
42             }
43             return result;
44         }
3.2 负片效果
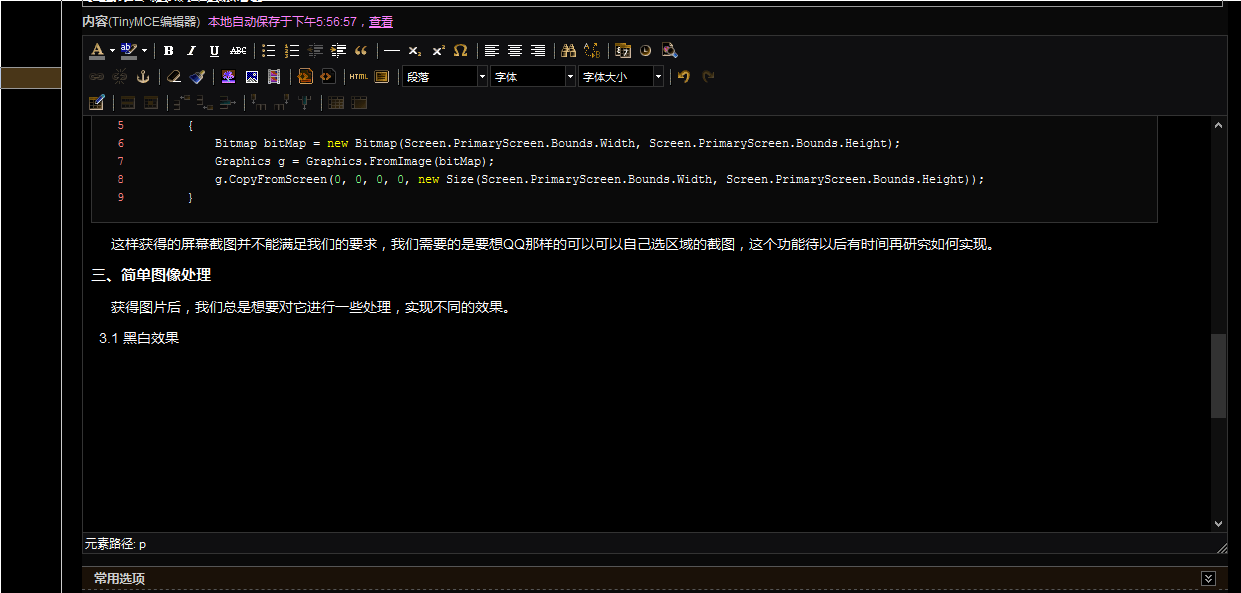
实现方法:
 1         /// <summary>
 2         /// 负片效果
 3         /// </summary>
 4         public Bitmap ImgNagative(Bitmap bitmap)
 5         {
 6             for (int i = 1; i < bitmap.Width; i++)
 7             {
 8                 for (int j = 1; j < bitmap.Height; j++)
 9                 {
10                     Color c = bitmap.GetPixel(i, j);
11
12                     int r = 255 - c.R;
13                     int g = 255 - c.G;
14                     int b = 255 - c.B;
15                     bitmap.SetPixel(i, j, Color.FromArgb(r, g, b));
16                 }
17             }
18             return bitmap;
19         }
3.3 浮雕效果
实现方法:
 1         /// <summary>
 2         /// 浮雕效果
 3         /// </summary>
 4         public Bitmap ImgCameo(Bitmap bitmap, EnumUtil.ImageStyle style)
 5         {
 6             Color pixel, pixel2;
 7
 8             for (int i = 0; i < bitmap.Width - 1; i++)
 9             {
10                 for (int j = 0; j < bitmap.Height - 1; j++)
11                 {
12                     pixel = bitmap.GetPixel(i, j);
13                     pixel2 = bitmap.GetPixel(i + 1, j + 1);
14                     bitmap.SetPixel(i, j, ImgCameoCalcul(pixel, pixel2, style));
15                 }
16             }
17             return bitmap;
18         }
19
20         /// <summary>
21         /// 浮雕算法
22         /// </summary>
23         /// <param name="pixel"></param>
24         /// <param name="pixel2"></param>
25         /// <param name="style"></param>
26         /// <returns></returns>
27         private Color ImgCameoCalcul(Color pixel, Color pixel2, EnumUtil.ImageStyle style)
28         {
29             Color cResult;
30             int r = 0, g = 0, b = 0;
31             switch (style)
32             {
33                 case EnumUtil.ImageStyle.浮雕阴刻:
34                     r = Math.Abs(pixel.R - pixel2.R + 128) > 255 ? 255 : Math.Abs(pixel.R - pixel2.R + 128);
35                     g = Math.Abs(pixel.G - pixel2.G + 128) > 255 ? 255 : Math.Abs(pixel.G - pixel2.G + 128);
36                     b = Math.Abs(pixel.B - pixel2.B + 128) > 255 ? 255 : Math.Abs(pixel.B - pixel2.B + 128);
37                     break;
38                 case EnumUtil.ImageStyle.浮雕阳刻:
39                     r = Math.Abs(pixel2.R - pixel.R + 128) > 255 ? 255 : Math.Abs(pixel2.R - pixel.R + 128);
40                     g = Math.Abs(pixel2.G - pixel.G + 128) > 255 ? 255 : Math.Abs(pixel2.G - pixel.G + 128);
41                     b = Math.Abs(pixel2.B - pixel.B + 128) > 255 ? 255 : Math.Abs(pixel2.B - pixel.B + 128);
42                     break;
43             }
44             cResult = Color.FromArgb(r, g, b);
45             return cResult;
46         }
小工具:天气查询 Vs自定义设置 DevGridControl中GridView排序问题 小工具:火车票查询 小工具:邮件发送 小工具:截图&简单图像处理的更多相关文章
- DevGridControl中GridView排序问题
在对表格数据源为字符串类型的列排序时,为了实现按照值大小进行排序,需要进行以下处理: 先设置该列SortMode属性为自定义属性 gridColumn1.SortMode = DevExpress.X ...
- 小工具:截图&简单图像处理
一.程序运行截图 二.获取屏幕截图的方法 首先知道我们可以通过Screen.PrimaryScreen.Bounds获取到当前整个屏幕,再利用Bitmap和Graphics就可以得到整个屏幕的图片了. ...
- 邮件发送小demo
//send email public static bool SendEmail() { //实例化发件人地址 MailAddress from = new MailAddress("aa ...
- 利用百度API Store接口进行火车票查询
火车票查询 项目源码下载链接: Github:https://github.com/VincentWYJ/TrainTicketQuery 博客文件:http://files.cnblogs.com/ ...
- 微信小程序--火车票查询
微信小程序--火车票查询 写在最前面 微信小程序自九月份推出内测资格以来,经历了舆论热潮到现在看似冷清,但并不意味着大家不那么关注或者不关注了.我想不管是否有内测资格,只要是感兴趣的开发者已经进入潜心 ...
- plsql很好用的自定义设置【转载】
本文是转载的,目的是方便自已随时可以查看.转载地址:http://blog.itpub.net/24496241/viewspace-740917/ 目的:方便自已随时可以查看 1.格式化SQL语句在 ...
- 【微信小程序项目实践总结】30分钟从陌生到熟悉 web app 、native app、hybrid app比较 30分钟ES6从陌生到熟悉 【原创】浅谈内存泄露 HTML5 五子棋 - JS/Canvas 游戏 meta 详解,html5 meta 标签日常设置 C#中回滚TransactionScope的使用方法和原理
[微信小程序项目实践总结]30分钟从陌生到熟悉 前言 我们之前对小程序做了基本学习: 1. 微信小程序开发07-列表页面怎么做 2. 微信小程序开发06-一个业务页面的完成 3. 微信小程序开发05- ...
- 微信小程序学习笔记四 自定义组件
1. 自定义组件 类似Vue或react中的自定义组件 小程序允许我们使用自定义组件的方式来构建页面 1.1 创建自定义组件 类似于页面, 一个自定义组件由json wxml wxss js 4个文件 ...
- Python 实现火车票查询工具
注意:由于 12306 的接口经常变化,课程内容可能很快过期,如果遇到接口问题,需要根据最新的接口对代码进行适当修改才可以完成实验. 一.实验简介 当你想查询一下火车票信息的时候,你还在上 12306 ...
随机推荐
- CAD交互绘制圆弧(com接口)
在CAD设计时,需要绘制圆弧,用户可以在图面点圆弧起点,圆弧上的一点和圆弧的终点,这样就绘制出圆弧. 主要用到函数说明: _DMxDrawX::DrawArc2 由圆弧上的三点绘制一个圆弧.详细说明如 ...
- CAD使用SetxDataString写数据(com接口)
主要用到函数说明: MxDrawEntity::SetxDataString 写一个字符串扩展数据,详细说明如下: 参数 说明 [in] BSTR val 字符串值 szAppName 扩展数据名称 ...
- MySQL系列(一)--数据类型
如何选择优化的数据类型: 1.通常更小的更好 相同级别的数据类型,选择占据空间更小的数据类型.更小的数据类型通常更快,因为占用更少的磁盘.内存和CPU缓存,处理时需要的 CPU周期也更少,但是要确保需 ...
- IDEA常见问题
IDEA常见问提解决 一:拉取git代码认证失败(无法重新输入账户和密码) git config --system --unset credential.helper 二:取消新建文件自动添加到S ...
- js 给url添加时间戳 解决浏览器缓存
//解决浏览器缓存 function timestamp(url){ // var getTimestamp=Math.random(); var getTimestamp=new Dat ...
- VINS-Mono论文笔记(未完)
这是整篇论文的架构,下面针对每一部分进行自己的详细理解.(数学公式的问题没在博客里面解决,都是论文中的截图,尽可能美观==) 一.测量预处理部分(MEASUREMENT PREPROCESSING) ...
- 关于Map的遍历
想起之前有人问过我这个,那就顺手写一下Map的遍历 Map<Integer, String> map = new HashMap<Integer, String>(); map ...
- Linux忘记root密码,密码找回,图片展示
忘记root密码 CentOS 7参考地址如下:https://www.baidu.com/s?wd=CentOS7+%E6%89%BE%E5%9B%9Eroot%E5%AF%86%E7%A0%81& ...
- Python之爬虫-段子网
Python之爬虫-段子网 https://ishuo.cn #!/usr/bin/env python # -*- coding:utf-8 -*- import re import request ...
- 正则表达式 整理(\w \s \d 点 贪婪匹配 非贪婪匹配 * + ? {} | [] ^ $ \b 单词边界 分组、re.findall()、re.split()、re.search()、re.match()、re.compile()、re.sub())
re.findall 匹配到正则表达式的字符,匹配到的每个字符存入一个列表,返回一个匹配到的所有字符列表 一. 匹配单个字符 import re # \w 匹配所有字母.数字.下划线 re.find ...