ionic访问odoo 11接口
在架设完毕odoo 11的网站之后,第一次面临手机app该如何访问后台网站的问题,是不是模式类似asp.net mvc 那样的模式,或者还存在其他的访问方法,带着这个疑问与困惑,开始的我的研究学习之路。通过研究,初步得出一个结论,那就是实用odoo11作为后台的数据提供者,和以前的具体操作方式多一种不同的方式。
1.第一种方式,是需要在后台写controller的模式,这样自己配制路由,再去访问model类提供的方法,这种方式还没有去试验测试。
2.第二种方法,不需要自己再去写controller类,而是利用odoo框架自带的机制,前端需要做的是提供model类名method方法,以及相关参数,这种接口的方式最大化的利用了框架自身的机制,有点量身定做的感觉,同时还可以做到对外部访问者一定的保密。
下面开始具体的OdooJsonRpc类的整理。
定义类的基本成员,这个大部分参数是根据框架的情况设定的
    private jsonRpcID: number = ;

    private headers: Headers;

    private odoo_server: string;

    private http_auth: string;

    private list = "/web/database/list";

    private get_list = "/web/database/get_list";

    private jsonrpc = "/jsonrpc";

    constructor(private http: Http, private utils: Utils) {

        this.http = http;

    }
设置相关成员参数的方法,比如网站地址,授权信息等
    public init(configs: any) {

        this.odoo_server = configs.odoo_server;

        this.http_auth = configs.http_auth || null;

    }

    public setOdooServer(odoo_server: string) {

        this.odoo_server = odoo_server;

    }

    public setHttpAuth(http_auth: string) {

        this.http_auth = http_auth;

    }
接下来是设置请求后台参数时的格式,这里最大的好处是结合框架,动态的传递需要的参数,这里是整理成json的格式
   /**

     * Builds a request for odoo server

     * @param url Odoo Server URL

     * @param params Object

     */

    private buildRequest(url: String, params: any) {

        this.jsonRpcID += ;

        return JSON.stringify({

            jsonrpc: "2.0",

            method: "call",

            id: this.jsonRpcID,

            params: params,

        });

    }
接下来是相对高一级别的请求方法,这里整合url地址和参数为json样式,所有访问后台的方法都要调用这个方法,很关键的一个基本方法。
    /**

     * Sends a JSON request to the odoo server

     * @param url Url of odoo

     * @param params Object

     */

    public sendRequest(url: string, params: Object): Promise<any> {

        let options = this.buildRequest(url, params);

        this.headers = new Headers({

            'Content-Type': 'application/json; charset=utf-8',

        });

        let result = this.http.post(this.odoo_server + url, options, { headers: this.headers })

            .toPromise()

        return result;

    }
下面的一些方法是对上面请求的一个具体的应用,同时也是app在登录后台中必须的一些系统方法。
    /**

     * Gets the server info

     */

    public getServerInfo() {

        return this.sendRequest("/web/webclient/version_info", {});

    }

    /**

     * Gets the session info

     */

    public getSessionInfo() {

        return this.sendRequest("/web/session/get_session_info", {});

    }

    /**

     * Gets the Odoo Server Version Number

     */

    public getServerVersionNumber(): Promise<number> {

        return this.getServerInfo().then((res: any): Promise<number> => {

            return new Promise<number>((resolve) => {

                resolve(JSON.parse(res._body)["result"]["server_version_info"][]);

            });

        });

    }

    /**

     * Get the database list

     */

    public getDbList(): Promise<string> {

        let dbParams = {

            context: {}

        }

        return this.getServerVersionNumber().then((data: number) => {

            if (data <= ) {

                return this.sendRequest(this.get_list, dbParams);

            } else if (data == ) {

                return this.sendRequest(this.jsonrpc, dbParams);

            } else {

                return this.sendRequest(this.list, dbParams);

            }

        })

    }

    /**

     * Returns all modules that are installed in your database

     */

    public modules(): Promise<string> {

        let params = {

            context: {}

        }

        return this.sendRequest("/web/session/modules", params)

    }

    /**

     * Login to the database

     * @param db Database name of odoo

     * @param login Username

     * @param password password

     */

    public login(db: string, login: string, password: string) {

        let params = {

            db: db,

            login: login,

            password: password,

            base_location: this.odoo_server,

            context: {}

        };

        return this.sendRequest("/web/session/authenticate", params)

    }

    /**

     * Check whether the session is live or not

     */

    public check(): Promise<string> {

        let params = {

            context: this.getContext()

        }

        return this.sendRequest("/web/session/check", params)

    }

    /**

     * Destroy the session

     */

    public destroy() {

        let params = {

            context: {}

        }

        return this.sendRequest("/web/session/destroy", params)

    }
以上是手机app访问后台网站,登录过程的体现,按这些基本上是可以测试app能否调用后台odoo的接口了。
这一步我们需要写一个Page类,测试登录的过程。首先是定义一些参数,比如http,https协议的选择,还有我们前面OdooJsonRpc类的依赖注入
  private listForProtocol: Array<{ protocol: string}> = []

  public perfectUrl: boolean = false

  public odooUrl

  public selectedProtocol

  private dbList: Array<{ dbName: string }> = []

  private selectedDatabase

  private email

  private password

  constructor(public navCtrl: NavController,

    private alert: AlertController, public navParams: NavParams,

    private odooRpc: OdooJsonRpc, private loadingCtrl: LoadingController,

    private utils: Utils) {

    this.listForProtocol.push({ protocol: "http"})

    this.listForProtocol.push({ protocol: "https"})

  }
第二步,手机端检查url网站的正确性并从后台获取数据库的列表信息,这里开始正式进入于后台的交互 ,此步骤成功基本上意味着接口接近成功。注意我注释掉了红色的部分。如果访问成果,设置了参数perfectUrl为真,也即登录相关界面可以显示出来。
  public checkUrl() {

    this.utils.presentLoading("Please Wait")

    this.odooRpc.init({

      odoo_server: this.selectedProtocol + "://" + this.odooUrl

      //http_auth: 'username:password' // optional

    })

    this.odooRpc.getDbList().then((dbList: any) => {

      this.perfectUrl = true

      this.utils.dismissLoading()

      this.fillData(dbList)

    }).catch((err: any) => {

      this.utils.presentAlert("Error", "You Entered a wrong Odoo URL", [{

        text: "Ok"

      }])

      this.utils.dismissLoading()

    });

  }

  public fillData(res: any) {

    let body = JSON.parse(res._body)

    let json = body['result'];

    this.dbList.length = ;

    for (var key in json) {

      this.dbList.push({ dbName: json[key] });

    }

  }
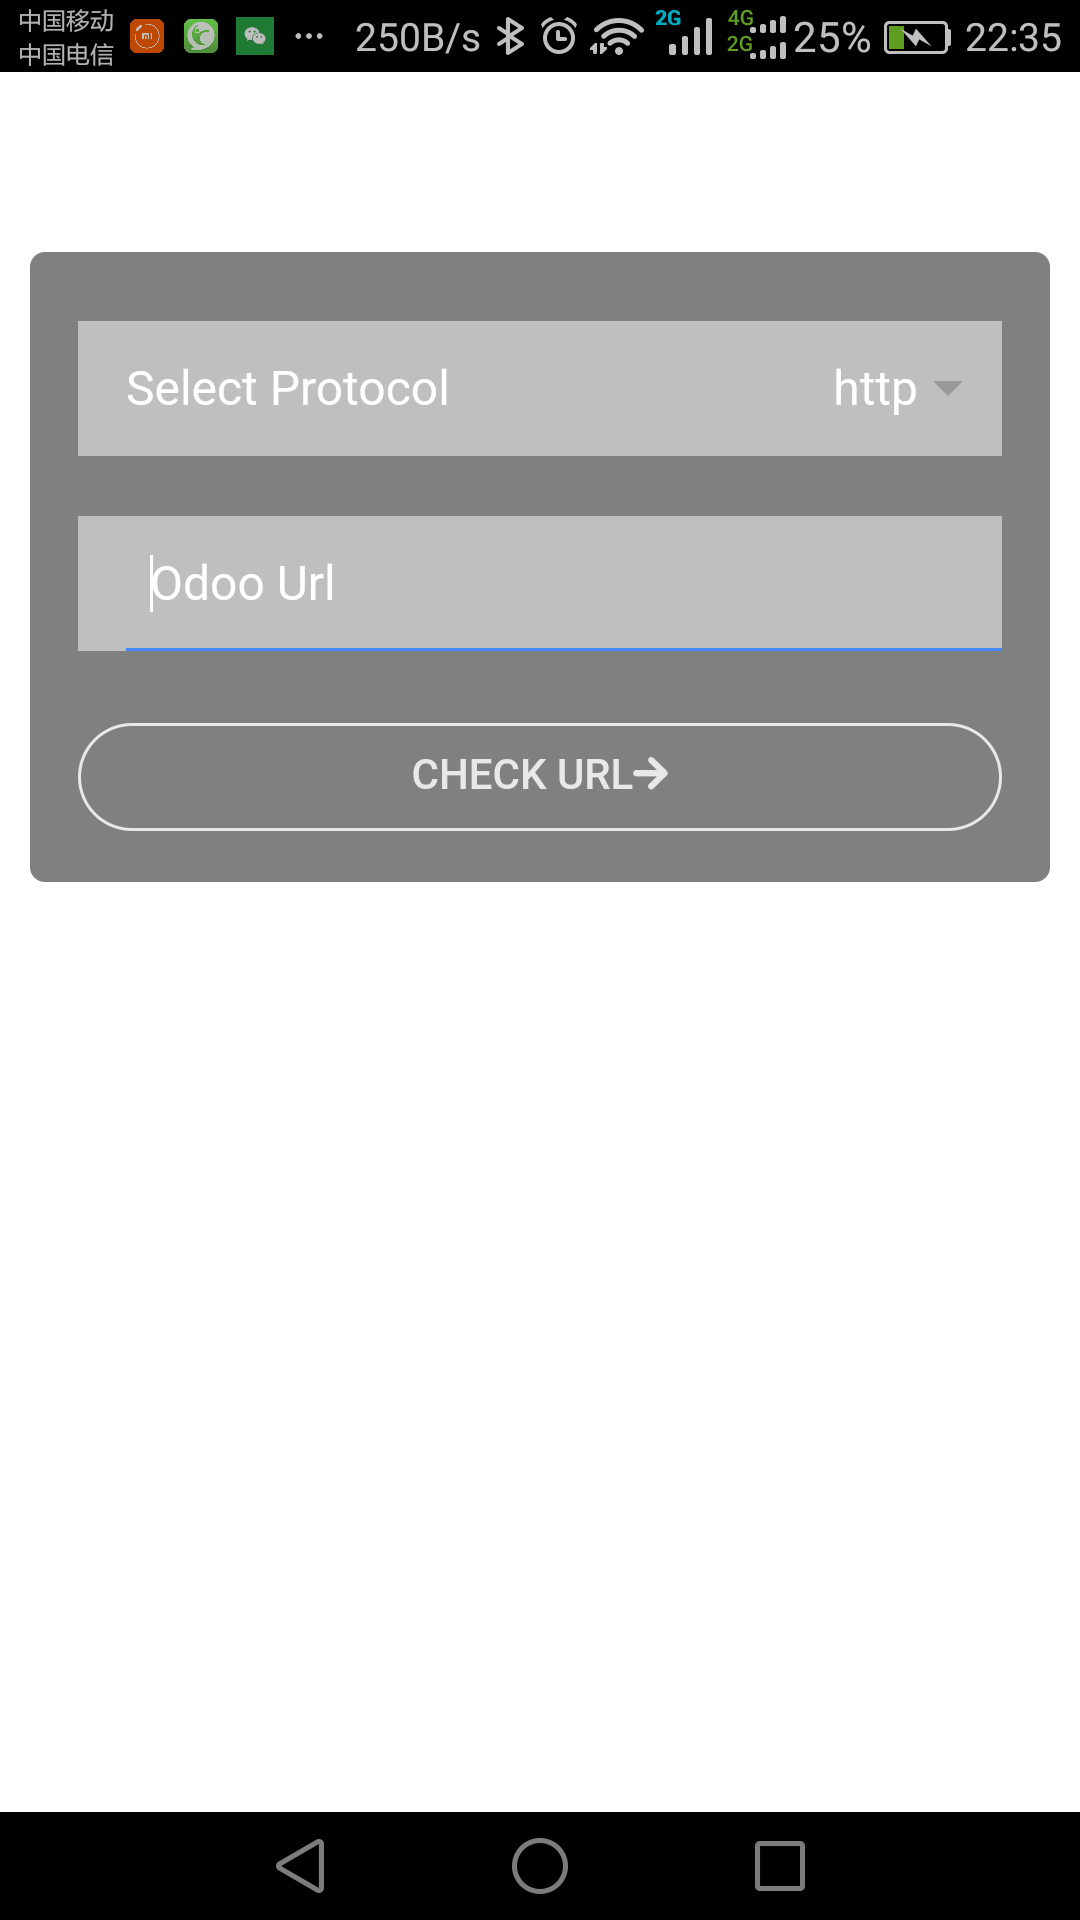
执行之前的界面如下

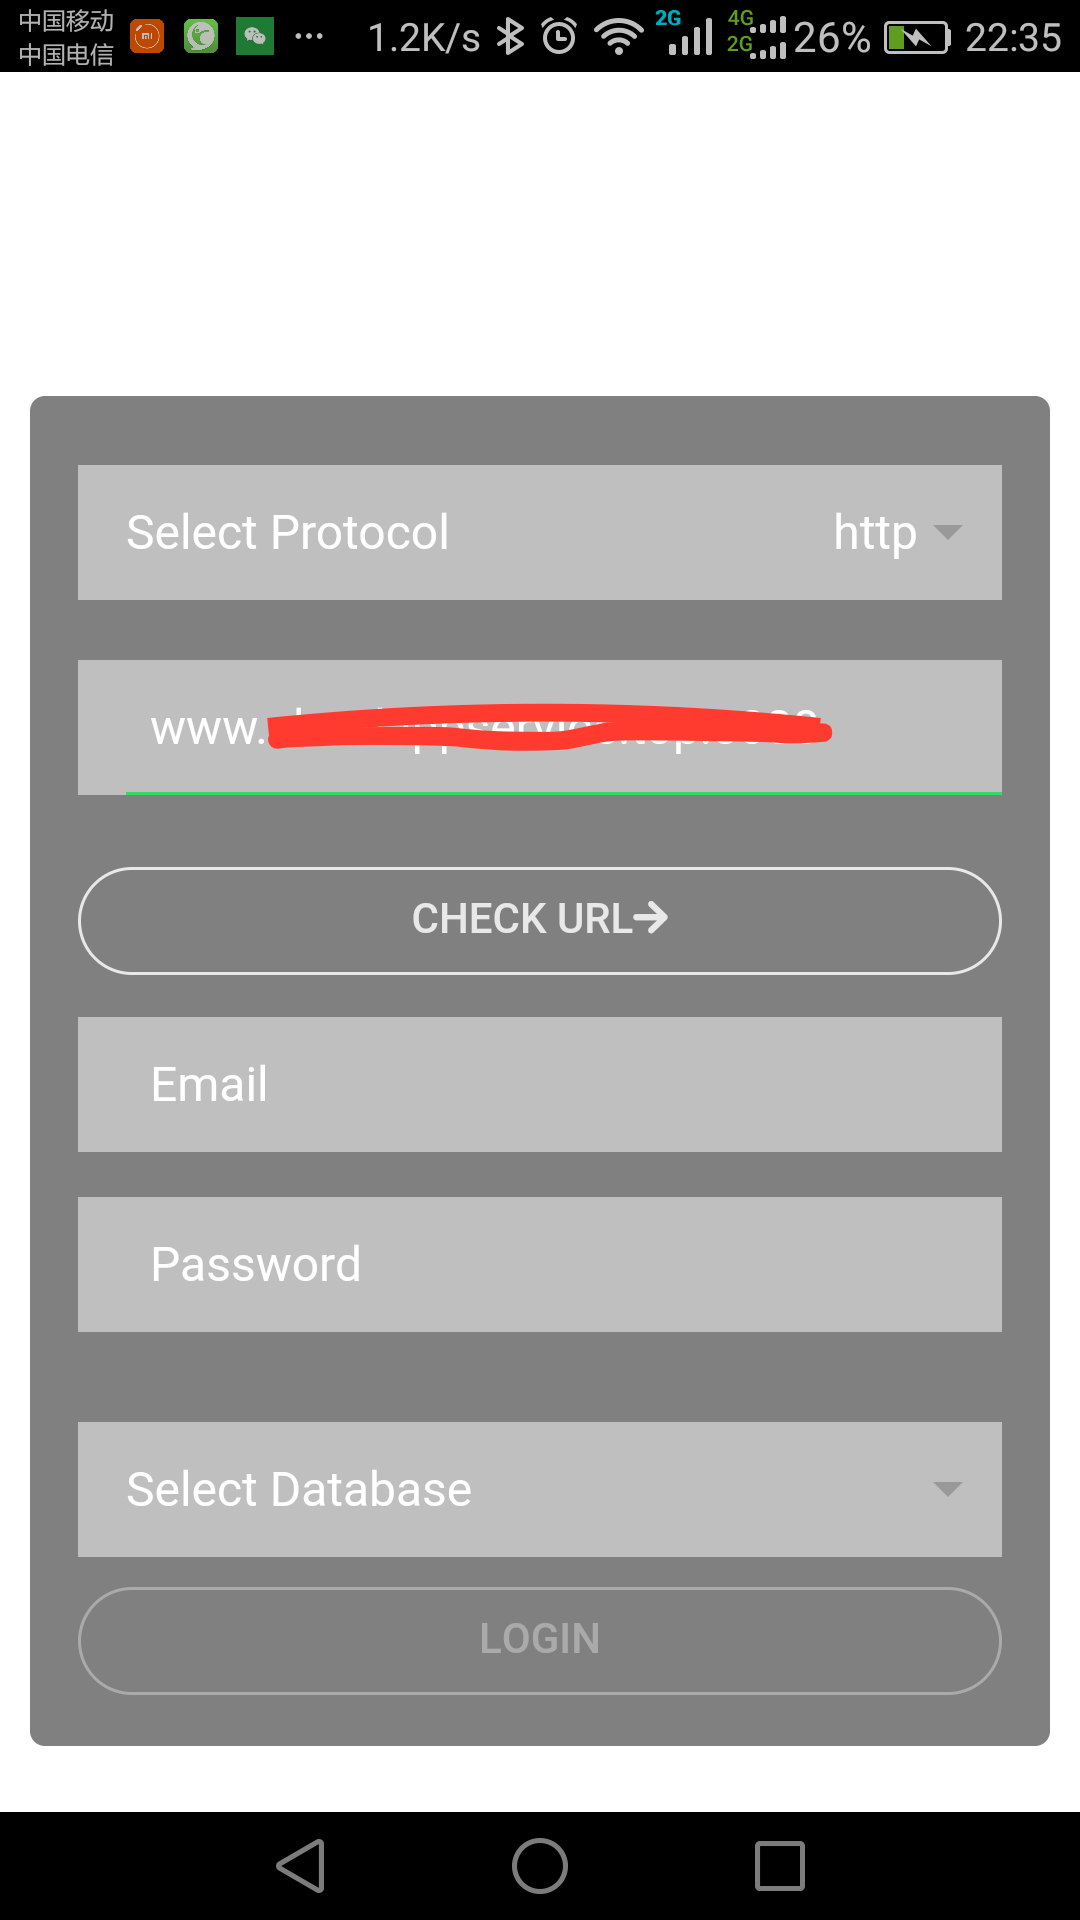
输入网站地址之后,正确执行后的界面,显示出了输入账号和密码数据库的选择

经过打包成apk的格式,在手机上测试成功通过,也就意味着ionic访问 odoo11网站接口初步成功。下一步就是研究如何访问网站具体业务的接口问题。在结束之前,放张ionic在浏览器测试不成功的截图,记得一定要打包再测试。

参考项目:https://github.com/mtfaroks/Odoo-JsonRpc-with-ionic3.x
ionic访问odoo 11接口的更多相关文章
- ionic 访问odoo11之具体业务类api接口
在前面测试通过odoo登录的功能,这次的问题重点是如何访问后台具体的业务类的接口呢?这次就以我们在odoo中安装的lunch模块为例,目标是获取lunch.alert的数据,如下图 具体过程接上次文章 ...
- Odoo(OpenERP)开发实践:通过XML-RPC接口访问Odoo数据库
Odoo(OpenERP)服务器支持通过XML-RPC接口访问.操作数据库,基于此可实现与其他系统的交互与集成. 本文是使用Java通过XMLRPC接口操作Odoo数据库的简单示例.本例引用的jar包 ...
- 使用.Net访问Office编程接口(PIA和IA的区别)
在这篇文章里面,我将向大家介绍如何在.Net中访问Office所公开的编程接口.其实,不管是使用哪种具体的技术来针对Office进行开发(比如VSTO,或者用C#编写一个Office Add-in,或 ...
- express搭建后端请求路由,前端进行访问对应的接口 后端解决跨域
代码在 ==>E:\nodes实战\myserve\testserve 1 express搭建后端请求路由,前端进行访问对应的接口 1) 创建项目目录 express 项目名 -e 然后按照提示 ...
- Winform混合式开发框架访问Web API接口的处理
在我的混合式开发框架里面,集成了WebAPI的访问,这种访问方式不仅可以实现简便的数据交换,而且可以在多种平台上进行接入,如Winform程序.Web网站.移动端APP等多种接入方式,Web API的 ...
- Windows Server 2012 R2下通过80端口访问Odoo ERP
背景 Odoo 9.0系统,安装于Windows Server 2012R2,同时与IIS并存.Odoo自带web服务器,使用端口8069.因客户需要用80端口访问,因此需要进一步设置,且8069端口 ...
- 基于Oracle OCI的数据访问C语言接口ORADBI .
基于Oracle OCI的数据访问C语言接口ORADBI cheungmine@gmail.com Mar. 22, 2008 ORADBI是我在Oracle OCI(Oracle 调用接口)基础 ...
- (办公)访问其他系统接口httpClient,异步访问
访问其他系统接口httpClient,但是都是同步的,同步意味当前线程是阻塞的,只有本次请求完成后才能进行下一次请求;异步意味着所有的请求可以同时塞入缓冲区,不阻塞当前的线程; httpClient请 ...
- 数据访问层的接口IBaseDAL
using System; using System.Collections; using System.Data; using System.Data.Common; using System.Co ...
随机推荐
- 安卓开发_浅谈DatePicker(日期选择器)
DatePicker继承自FrameLayout类,日期选择控件的主要功能是向用户提供包含年.月.日的日期数据并允许用户对其修改.如果要捕获用户修改日期选择控件中的数据事件,需要为DatePicker ...
- [20180317]12c TABLE ACCESS BY INDEX ROWID BATCHED3.txt
[20180317]12c TABLE ACCESS BY INDEX ROWID BATCHED3.txt --//简单探究12c TABLE ACCESS BY INDEX ROWID BATCH ...
- IP负载均衡
推荐一篇关于LVS的好文: https://www.cnblogs.com/gaoxu387/p/7941381.html 一.原博主要内容: 1.概述 IP负载均衡:四层负载,是基于IP+端口的负载 ...
- [HDFS_add_3] HDFS 机架感知
0. 说明 HDFS 副本存放策略 && 配置机架感知 1. HDFS 的副本存放策略 HDFS 的副本存放策略是将一个副本存放在本地机架节点上,另外两个副本放在不同机架的不同节点上 ...
- 【PAT】B1066 图像过滤(15 分)
注意输出是占三位,其他的挺水 #include<stdio.h> #include<algorithm> using namespace std; int main(){ in ...
- rls与rlsd
服务器端的程序一般有如下几个过程,首先是bind,然后再是listen,最后是accept.再往后就是客户端与服务器连接后的各种操作了. 相比之下,客户端的程序就比较简单了,只需先获得sock_id, ...
- February 4th, 2018 Week 6th Sunday
Hope clouds observation. 心怀希望会蒙蔽双眼,影响判断. Almost every of us thinks we would be the master of our liv ...
- 17秋 软件工程 第六次作业 Beta冲刺 Scrum5
17秋 软件工程 第六次作业 Beta冲刺 Scrum5 各个成员冲刺期间完成的任务 世强:完成APP端相册.部员管理.手势签到模块: 陈翔:完成Scrum博客.总结博客,完成超级管理员前后端对接: ...
- Beta冲刺(5/5)(麻瓜制造者)
今日已完成 邓弘立:完成了图书馆新功能 符天愉:完成管理员用户查询,删除商品/需求以及注销功能 江郑:进行后台管理员的web开发 刘双玉:修改了商品搜索中数据返回类型不对的错误,添加了图书馆查询接口 ...
- golang的json序列化问题
首先看一段代码: package main import ( "encoding/json" "fmt" ) type Result struct { //st ...
