angularjs ui-view多视口多层嵌套路由配置
最近研究了一下ui-view多层嵌套,整理了一下
1.最简单的ui-view用法
html部分:
<ul class="nav navbar-nav">

    <li ui-sref-active="active"><a ui-sref="home">首页</a></li>

    <li ui-sref-active="active"><a ui-sref="news">新闻</a></li>

    <li ui-sref-active="active"><a ui-sref="center">个人中心</a></li>

</ul>

<div class="wrap" ui-view></div>
路由配置:
var app = angular.module('myApp',["ui.router"]);

app.config(["$stateProvider","$urlRouterProvider",  function ($stateProvider,$urlRouterProvider) {

    $stateProvider

        .state("home", {

            url: '/home',

            templateUrl:'template/home.html',

            controller:'homeCtrl'

        })

        .state("news", {

            url: '/news',

            templateUrl:'template/news.html',

            controller:'newsCtrl'

        })

        .state("details",{

            url:'/news/details',

            templateUrl:'template/newsDetails.html',

            controller:'detailsCtrl'

        })

        .state("center", {

            url: '/center',

            templateUrl:'template/setCenter.html',

            controller:'centerCtrl'

        });

    $urlRouterProvider.otherwise('/home');

}]);
2.多视口
html部分:
<ul class="nav navbar-nav">

    <li ui-sref-active="active"><a ui-sref="home">首页</a></li>

    <li ui-sref-active="active"><a ui-sref="home.news">新闻</a></li>

    <li ui-sref-active="active"><a ui-sref="home.center">个人中心</a></li>

</ul>

<div class="warp">

    <div class="main" ui-view="home"></div>

    <div class="left" ui-view="left"></div>

    <div class="right" ui-view="right"></div>

</div>
路由配置:
var app = angular.module('myApp',["ui.router","ui.bootstrap"]);

app.config(["$stateProvider","$urlRouterProvider",  function ($stateProvider,$urlRouterProvider) {

    $stateProvider

        .state("home", {

            url: '/home',

            views:{

                'home':{template:"<div class='body' ui-view='body'></div><div class='footer' ui-view='footer'></div>"},

                'left':{template:"<span>left</span>"},

                'right':{template:"<span>right</span>"},

                'body@home':{templateUrl:'template_views/home.html'},

                'footer@home':{template:"<span>首页底部</span>"}

            }

        })

        .state('home.news',{

            url:'/news',

            views:{

                'body@home':{templateUrl:'template_views/news.html'},

                'footer@home':{template:"<span>新闻底部</span>"}

            }

        })

        .state('home.newsDetails',{

            url:"/news/details/:id",

            views:{

                'body@home':{

                    template:"<span>新闻详情</span>",

                    controller:function ($stateParams) {

                        alert('id:'+ $stateParams.id);

                    }

                },

                'footer@home':{template:"<span>新闻详情底部</span>"}

            }

        })

        .state('home.center',{

            url:'/center',

            views:{

               'body@home':{templateUrl:'template_views/setCenter.html'},

                'footer@home':{template:"<span>个人中心底部</span>"}

            }

        });

    $urlRouterProvider.otherwise('/home');

}]);
这里需要注意的是路由传参,这里把news.html内容贴出来
<uib-tabset active="activeJustified" justified="true">

    <uib-tab index="0" heading="推荐">

        <div style="width: 100%;height: 500px;background-color:pink;">

            <span class="mouseHand btn" ui-sref="home.newsDetails({id:1})">Justified content</span>

        </div>

    </uib-tab>

    <uib-tab index="1" heading="热点">

        <div style="width: 100%;height: 500px;background-color:#b9def0;" ui-sref="home.newsDetails({id:2})">Short Labeled Justified content</div>

    </uib-tab>

    <uib-tab index="2" heading="股票">

        <div style="width: 100%;height: 500px;background-color:darkcyan;" ui-sref="home.newsDetails({id:3})">Long Labeled Justified content</div>

    </uib-tab>

</uib-tabset>
ui-sref="home.newsDetails({id:1})"这样跳转的时候就把id传给了新闻详情;在新闻详情的控制器里就可以通过$stateParams.id得到传过来的id

3.多层ui-view嵌套
写了一个小demo,首先看一下结构
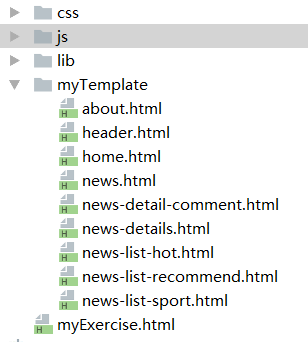
myExercise.html代码:
<!DOCTYPE html>

<html lang="en" ng-app="myApp">

<head>

    <meta charset="UTF-8">

    <script src="lib/angular.js"></script>

    <script src="lib/angular-ui-router.js"></script>

    <script src="lib/jquery-1.12.3.js"></script>

    <script src="lib/bootstrap.js"></script>

    <script src="lib/ocLazyLoad-master/dist/ocLazyLoad.js"></script>

    <script src="js/myConfig.js"></script>

    <script src="js/contentCtrl.js"></script>

    <link rel="stylesheet" href="lib/bootstrap.css">

    <link rel="stylesheet" href="css/base.css">

    <title>ui-view三层嵌套</title>

</head>

<body>

<div ui-view class="wrap"></div>

</body>

</html>
ocLazyLoad.js是用来分步加载js,css等文件的,后面可以再路由配置里看到具体用法,有了这个对于项目初次加载的速度有很大提升,但是不需要的这里也可以不必引入;

js文件夹结构

前两个控制器都是空的,没写什么逻辑就不展示了,先看一下myConfig.js,路由配置(多层嵌套精髓都在这里啦):
var app = angular.module('myApp',["ui.router","oc.lazyLoad"]);

app.config(function ($stateProvider,$locationProvider, $urlRouterProvider,$ocLazyLoadProvider) {

    $stateProvider

        .state('content',{

            url: '/',

            views:{

                "":{

                    template: '<div ui-view="header"></div><div ui-view="body"></div>',

                    controller:'contentCtrl'

                },

                "header@content":{templateUrl: 'myTemplate/header.html'}

            }

        })

        .state('content.home',{

            url:'home',

            views:{

                "body@content":{

                    templateUrl:'myTemplate/home.html',

                    controller:'homeCtrl'

                }

            },

            resolve:{

                deps: ['$ocLazyLoad', function($ocLazyLoad) {

                    // you can lazy load files for an existing module

                    return $ocLazyLoad.load([

                        'js/homeCtrl.js',

                        'css/home.css'

                    ]);

                }]

            }

        })

        .state('content.news',{

            url:'news',

            views:{

                "body@content":{template:'<div ui-view></div>'}

            }

        })

        .state('content.news.list',{

            url:'/list',

            templateUrl:'myTemplate/news.html'

        })

        .state('content.news.list.recommend',{

            url:'/recommend',

            templateUrl:'myTemplate/news-list-recommend.html'

        })

        .state('content.news.list.hot',{

            url:'/hot',

            templateUrl:'myTemplate/news-list-hot.html'

        })

        .state('content.news.list.sport',{

            url:'/sport',

            templateUrl:'myTemplate/news-list-sport.html'

        })

        .state('content.news.details',{

            url:'/details/:type/:id',

            templateUrl:'myTemplate/news-details.html',

            controller:'newsDetailCtrl',

            resolve:{

                deps: ['$ocLazyLoad', function($ocLazyLoad) {

                    // you can lazy load files for an existing module

                    return $ocLazyLoad.load([

                        'js/newsDetailCtrl.js',

                        'css/newsDetail.css'

                    ]);

                }]

            }

        })

        .state('content.news.details.comment',{

            url:'/details/comment',

            templateUrl:'myTemplate/news-detail-comment.html'

        })

        .state('content.about',{

            url:'about',

            views:{

                "body@content":{templateUrl:'myTemplate/about.html'}

            }

        });

    $urlRouterProvider.otherwise('home');

});
结合路由配置,看一下template模板代码:
首先是header.html
<ul class="nav nav-tabs">

    <li role="presentation" class="active" ui-sref-active="active"><a ui-sref="content.home">Home</a></li>

    <li role="presentation" ui-sref-active="active"><a  ui-sref="content.news.list.recommend">News</a></li>

    <li role="presentation" ui-sref-active="active"><a  ui-sref="content.about">About</a></li>

</ul>
news.html
<ul class="nav nav-tabs">

    <li role="presentation" class="active" ui-sref-active="active"><a ui-sref="content.news.list.recommend">推荐</a></li>

    <li role="presentation" ui-sref-active="active"><a  ui-sref="content.news.list.hot">热门</a></li>

    <li role="presentation" ui-sref-active="active"><a  ui-sref="content.news.list.sport">体育</a></li>

</ul>

<div ui-view></div>
news-details.html
<span>{{type}}:新闻详情</span>

<a ui-sref=".comment">查看评论</a>

<div ui-view></div>
<!--news-list-recommend.html-->

<div>

    推荐列表

    <a  ui-sref="^.^.details({type:'recommend',id:2})">点击查看新闻详情,通过相对路径跳转</a>

</div>

<!--news-list-hot.html-->

<div>

    热门列表

    <a  ui-sref="content.news.details({type:'hot',id:5})">点击查看新闻详情,通过绝对路径跳转</a>

</div>

<!--news-list-sport.html-->

<div>

    体育列表

    <a  ui-sref="content.news.details({type:'sport',id:7})">点击查看新闻详情</a>

</div>
模板就展示这几个了,其它的都是随便写的text文字了,随便写点东西就行,到这里就差不多完成了.
接下来展示一下newsDeatilCtrl.js
angular.module('myApp').controller('newsDetailCtrl',['$scope','$stateParams',function ($scope,$stateParams) {

    $scope.type = $stateParams.type;

}]);
这里通过$stateParams来接收路由跳转传过来的参数。
好啦,到这里就大功告成了。
angularjs ui-view多视口多层嵌套路由配置的更多相关文章
- 使用ui-route实现多层嵌套路由
一.预期实现效果: https://liyuan-meng.github.io/uiRouter-app/index.html (项目地址:https://github.com/liyuan-meng ...
- VUE router-view 页面布局 (嵌套路由+命名视图)
嵌套路由 实际生活中的应用界面,通常由多层嵌套的组件组合而成.同样地,URL 中各段动态路径也按某种结构对应嵌套的各层组件,例如: /user/foo/profile /user/foo/posts ...
- vue嵌套路由总结
嵌套路由就是在一个被路由过来的页面下可以继续使用路由,嵌套也就是路由中的路由的意思. 比如在vue中,我们如果不使用嵌套路由,那么只有一个<router-view>,但是如果使用,那么在一 ...
- vue路由-动态路由和嵌套路由
一.动态路由 我们经常需要把某种模式匹配到的所有路由,全都映射到同个组件.例如,我们有一个 User 组件,对于所有 ID 各不相同的用户,都要使用这个组件来渲染.那么,我们可以在 vue-route ...
- vue嵌套路由 && 404重定向
第一部分: vue嵌套路由 嵌套路由是什么? 嵌套路由就是在一个被路由过来的页面下可以继续使用路由,嵌套也就是路由中的路由的意思. 比如在vue中,我们如果不使用嵌套路由,那么只有一个<rou ...
- vue嵌套路由与404重定向实现方法分析
第一部分: vue嵌套路由 嵌套路由是什么? 嵌套路由就是在一个被路由过来的页面下可以继续使用路由,嵌套也就是路由中的路由的意思. 比如在vue中,我们如果不使用嵌套路由,那么只有一个<rout ...
- 07. vue-router嵌套路由
嵌套路由用法 1.嵌套路由功能分析 点击父级路由链接显示模板内容 模板内容中又有子级路由链接 点击子级路由链接显示子级模板内容 2.父路由组件模板 父级路由链接 父组件路由填充位 <p> ...
- AngularJS 的嵌套路由 UI-Router
AngularJS 的嵌套路由 UI-Router 本篇文章翻译自:https://scotch.io/tutorials/angular-routing-using-ui-router 演示网站请查 ...
- AngularJS ui-router (嵌套路由)
http://www.oschina.net/translate/angularjs-ui-router-nested-routes AngularJS ui-router (嵌套路由) 英文原文:A ...
随机推荐
- Android多媒体整体架构图
Android多媒体整体架构图 MediaPlayer框架图 Camera框架图 SoundRecorder框架图 VideoCamera框架图 OpenCore与Skia ALSA Audio框架图 ...
- 使用SecureCRT的SFTP传输文件
使用SecureCRT的SFTP传输文件 使用 FileZilla 上传项目更新,因为软件缓存没处理好,三个文件花了三个小时~~ 找一种缓存干扰最小的方式上传文件. 1.在使用 SecureCRT 连 ...
- Java Web之Servlet中response、request乱码问题解决
Java Web之Servlet中response.request乱码问题解决 一.request请求参数出现的乱码问题 get请求: get请求的参数是在url后面提交过来的,也就是在请求行中, ...
- 3. Decision Tree
1. 算法流程 一般的,一颗决策树包含一个根结点.若干内部结点和若干叶结点:叶节点对应于决策结果,其他每个结点则对应于一个属性测试结果:每个结点包含的样本集合根据属性测试的结果被划分到子结点中:根结点 ...
- iOS-UIScrollView内容复用【实现两个试图的复用】
前言 这里说的内容复用,是指添加到 ScrollView 里面的试图是同一个模型:比如,我需要在 ScrollView 上添加100个 xkView(其他封装好的VC.UIView),每次滑动 Scr ...
- DIV+CSS 按比例等分
div { display: inline-block; /* 如需支持IE8以下版本,用浮动来做 */ width: calc(100% / 3.09); /* 此处运用了一个css3的表达式,将d ...
- zabbix 自动发现 相关
zabbix自动发现,是zabbix精髓所在. 生产中,一台服务器上可能会存在多个监控实例,比如:A服务器2个,B服务器4个, C服务器1个.单单靠套模板来完成监控,做法那太糟糕了.比如小明有100台 ...
- if嵌套语句 shell脚本实例 测试是否闰年
在 if 语句里面,你可以使用另外一个 if 语句.只要你能逻辑管理 你就可以使用多层嵌套. 以下是一个测试闰年的例子: #!/bin/bash # This script will test if ...
- 3DES在Android、Ios 和Java 平台的加密解密
DES简介: DES全称为Data Encryption Standard,即数据加密标准,是一种使用密钥加密的块算法, 算法的入口参数有三个:Key.Data.Mode. K ...
- implements和extends的区别
extends可以理解为全盘继承了父类的功能 implements可以理解为为这个类附加一些额外的功能 举个例子,Animal是一个父类,cat,dog,bird,insect都extends了Ani ...