mongodb的学习-3-在Mac上的安装配置
1.使用homebrew安装:
brew install mongodb
查看安装好的版本:
mongo --version
MongoDB shell version v3.6.4

git version: d0181a711f7e7f39e60b5aeb1dc7097bf6ae5856

OpenSSL version: OpenSSL 1.0.2o   Mar

allocator: system

modules: none

build environment:

    distarch: x86_64

    target_arch: x86_64
2.然后创建数据文件:
1)进入根目录
cd /
2)创建目录(-p是创建多个文件目录使用的参数)
mkdir -p /data/db
3)设置权限,并输入用户密码
首先使用ls -l先查看权限:
drwxr-xr-x root wheel data
然后进行权限的更改(-R表示对目录进行递归操作,就是data目录下的子文件也设置该权限):
sudo chmod -R /data
变为:
drwxrwxrwx root wheel data
3.实现开机自启动
1)设置plist文件
userdeMacBook-Pro:~ user$ which mongod

/usr/local/bin/mongod
然后找到上面的mongod执行文件,右键-显示简介,可以得到该执行文件的原始位置,用来得到安装的mongodb的目录:
/usr/local/Cellar/mongodb/3.6./bin/mongod
然后来到/usr/local/Cellar/mongodb/3.6.4/目录下可以看见homebrew.mxcl.mongodb.plist文件:
<?xml version="1.0" encoding="UTF-8"?>

<!DOCTYPE plist PUBLIC "-//Apple//DTD PLIST 1.0//EN" "http://www.apple.com/DTDs/PropertyList-1.0.dtd">

<plist version="1.0">

<dict>

  <key>Label</key>

  <string>homebrew.mxcl.mongodb</string>

  <key>ProgramArguments</key>

  <array>

    <string>/usr/local/opt/mongodb/bin/mongod</string>

    <string>--config</string>

    <string>/usr/local/etc/mongod.conf</string>

  </array>

  <key>RunAtLoad</key>

  <true/>

  <key>KeepAlive</key>

  <false/>

  <key>WorkingDirectory</key>

  <string>/usr/local</string>

  <key>StandardErrorPath</key>

  <string>/usr/local/var/log/mongodb/output.log</string>

  <key>StandardOutPath</key>

  <string>/usr/local/var/log/mongodb/output.log</string>

  <key>HardResourceLimits</key>

  <dict>

    <key>NumberOfFiles</key>

    <integer></integer>

  </dict>

  <key>SoftResourceLimits</key>

  <dict>

    <key>NumberOfFiles</key>

    <integer></integer>

  </dict>

</dict>

</plist>
修改部分:
  <key>Label</key>

  <string>mongodb</string>   //改

  <key>ProgramArguments</key>

  <array>

    <string>/usr/local/Cellar/mongodb/3.6./bin/mongod</string> //改

  </array>
并修改文件名为mongodb.plist,然后将其复制到:
userdeMacBook-Pro:~ user$ cp mongodb.plist /Library/LaunchDaemons/

cp: /Library/LaunchDaemons/mongodb.plist: Permission denied

userdeMacBook-Pro:~ user$ sudo cp mongodb.plist /Library/LaunchDaemons/

Password:
该文件所在位置为:
/Library/LaunchDaemons/mongodb.plist
⚠️该目录与~/Library/LaunchDaemons/和/System/Library/LaunchDaemons/是不同的
Launch
| 文件名 | 启动类型 |
|---|---|
| LaunchDaemons | 用户未登陆前就启动的服务(守护进程) |
| LaunchAgents | 用户登陆后启动的服务(守护进程) |
文件路径
/System/Library/?目录是存放Apple自己开发的软件/Library/?目录是系统管理员存放的第三方软件~/Library/?目录是用户自己存放的第三方软件
提示:由于mongod可执行文件是第三方软件,所以放到~/Library目录或者/Library/?目录,当然在这里我存放到了系统管理员存放的第三方软件。?可以是LaunchDaemons或者LaunchAgents。
2)启动服务
启动服务(这样以后你一开机,mongodb的服务器就打开了)
userdeMacBook-Pro:~ user$ sudo launchctl load -w /Library/LaunchDaemons/mongodb.plist

Password:
然后启动,但是会有一些警告:
userdeMacBook-Pro:~ user$ mongo

MongoDB shell version v3.6.4

connecting to: mongodb://127.0.0.1:27017

MongoDB server version: 3.6.

Server has startup warnings:

--30T11::36.449+ I CONTROL  [initandlisten]

--30T11::36.449+ I CONTROL  [initandlisten] ** WARNING: Access control is not enabled for the database.

--30T11::36.449+ I CONTROL  [initandlisten] **          Read and write access to data and configuration is unrestricted.

--30T11::36.450+ I CONTROL  [initandlisten] ** WARNING: You are running this process as the root user, which is not recommended.

--30T11::36.450+ I CONTROL  [initandlisten]

--30T11::36.450+ I CONTROL  [initandlisten] ** WARNING: This server is bound to localhost.

--30T11::36.450+ I CONTROL  [initandlisten] **          Remote systems will be unable to connect to this server.

--30T11::36.450+ I CONTROL  [initandlisten] **          Start the server with --bind_ip <address> to specify which IP

--30T11::36.450+ I CONTROL  [initandlisten] **          addresses it should serve responses from, or with --bind_ip_all to

--30T11::36.450+ I CONTROL  [initandlisten] **          bind to all interfaces. If this behavior is desired, start the

--30T11::36.450+ I CONTROL  [initandlisten] **          server with --bind_ip 127.0.0.1 to disable this warning.

--30T11::36.450+ I CONTROL  [initandlisten]

>
之前在homebrew.mxcl.mongodb.plist文件的ProgramArguments部署中删掉了内容:
    <string>--config</string>

    <string>/usr/local/etc/mongod.conf</string>
/usr/local/etc/mongod.conf文件内容为,一部分内容与警告是符合的:
systemLog:

  destination: file

  path: /usr/local/var/log/mongodb/mongo.log

  logAppend: true

storage:

  dbPath: /usr/local/var/mongodb 改为/data/db

net:

  bindIp: 127.0.0.1
将这个部署放回mongodb.plist文件,然后关闭服务,开启服务
然后再运行mongo,可见错误少了一些
Server has startup warnings:

--30T14::34.231+ I CONTROL  [initandlisten]

--30T14::34.231+ I CONTROL  [initandlisten] ** WARNING: Access control is not enabled for the database.

--30T14::34.231+ I CONTROL  [initandlisten] **          Read and write access to data and configuration is unrestricted.

--30T14::34.231+ I CONTROL  [initandlisten] ** WARNING: You are running this process as the root user, which is not recommended.

--30T14::34.231+ I CONTROL  [initandlisten]
解决办法就是在mongod.conf上添加:
security:

    authorization: enabled

    javascriptEnabled: true

setParameter:

    enableLocalhostAuthBypass: true

    authenticationMechanisms: SCRAM-SHA-
更多详细的内容可以看https://www.jianshu.com/p/f9f1454f251f
然后关闭再开启服务,运行,就不再有错误了:
userdeMacBook-Pro:~ user$ mongo

MongoDB shell version v3.6.4

connecting to: mongodb://127.0.0.1:27017

MongoDB server version: 3.6.

>
关闭服务
sudo launchctl unload -w /Library/LaunchDaemons/mongodb.plist
如果你关闭了服务,再访问mongo时,返回:
userdeMacBook-Pro:~ user$ mongo
MongoDB shell version v3.6.4

connecting to: mongodb://127.0.0.1:27017

--30T11::41.753+ W NETWORK  [thread1] Failed to connect to 127.0.0.1:, in(checking socket for error after poll), reason: Connection refused

--30T11::41.760+ E QUERY    [thread1] Error: couldn't connect to server 127.0.0.1:27017, connection attempt failed :

connect@src/mongo/shell/mongo.js::

@(connect)::

exception: connect failed
4.
当然你也可以不用使用上面的开机自启动,可以自己使用mongodb来配置服务器并打开
但是这个时候我们运行mongod去开启服务器时,出现了问题:
2018-11-30T15:03:31.081+0800 E STORAGE  [initandlisten] WiredTiger error (13) [1543561411:81460][1401:0x1188695c0], file:WiredTiger.wt, connection: /data/db/WiredTiger.turtle: handle-open: open: Permission denied

2018-11-30T15:05:52.154+0800 E STORAGE  [initandlisten] WiredTiger error (13) [1543561552:154095][1402:0x1196205c0], file:WiredTiger.wt, connection: /data/db/WiredTiger.turtle: handle-open: open: Permission denied
可以看出来是这两个文件的权限问题,然后去查看:
userdeMacBook-Pro:db user$ ls -l

total 696

-rwxrwxrwx  1 root     wheel     48  4 27  2018 WiredTiger

-rwxrwxrwx  1 root     wheel     21  4 27  2018 WiredTiger.lock

-rw-------  1 root     wheel   1069 11 30 14:55 WiredTiger.turtle

-rwxrwxrwx  1 root     wheel  45056 11 30 14:55 WiredTiger.wt
进行更改,当然,在运行一遍sudo chmod -R 777 /data也行:
userdeMacBook-Pro:db user$ sudo chmod -R 777 ./WiredTiger.turtle

Password:

userdeMacBook-Pro:db user$ sudo chmod -R 777 ./WiredTigerLAS.wt
再运行就成功了:

这时候跟之前一样有警告信息,解决
1)
--30T15::24.360+ I CONTROL  [initandlisten] ** WARNING: This server is bound to localhost.

--30T15::24.360+ I CONTROL  [initandlisten] **          Remote systems will be unable to connect to this server.

--30T15::24.360+ I CONTROL  [initandlisten] **          Start the server with --bind_ip <address> to specify which IP

--30T15::24.360+ I CONTROL  [initandlisten] **          addresses it should serve responses from, or with --bind_ip_all to

--30T15::24.360+ I CONTROL  [initandlisten] **          bind to all interfaces. If this behavior is desired, start the

--30T15::24.360+ I CONTROL  [initandlisten] **          server with --bind_ip 127.0.0.1 to disable this warning.
解决-添加--bind_ip 127.0.0.1:
userdeMBP:~ user$ mongod --bind_ip 127.0.0.1
2)WARNING: soft rlimits too low. Number of files is 256, should be at least 10
userdeMBP:test-sequelize user$ ulimit -a

core file size          (blocks, -c)

data seg size           (kbytes, -d) unlimited

file size               (blocks, -f) unlimited

max locked memory       (kbytes, -l) unlimited

max memory size         (kbytes, -m) unlimited

open files                      (-n)

pipe size            ( bytes, -p)

stack size              (kbytes, -s)

cpu time               (seconds, -t) unlimited

max user processes              (-u)

virtual memory          (kbytes, -v) unlimited
更改:
userdeMBP:test-sequelize user$ ulimit -n

userdeMBP:test-sequelize user$ ulimit -a

core file size          (blocks, -c)

data seg size           (kbytes, -d) unlimited

file size               (blocks, -f) unlimited

max locked memory       (kbytes, -l) unlimited

max memory size         (kbytes, -m) unlimited

open files                      (-n)

pipe size            ( bytes, -p)

stack size              (kbytes, -s)

cpu time               (seconds, -t) unlimited

max user processes              (-u)

virtual memory          (kbytes, -v) unlimited
3)WARNING: Access control is not enabled for the database.
首先开启访问控制(--auth)
当然,你要现在没有开启访问控制时进行用户的添加:
这样就创建好一个超级管理员用户,创建全局用户或者超级用户,需要在MongoDB的admin数据库中创建(在其他库也可以创建,但是没有该角色功能)
重启mongod进程后:
mongod --auth --bind_ip 127.0.0.1
接下来做一下权限的验证:
userdeMBP:~ user$ mongo

MongoDB shell version v3.6.4

connecting to: mongodb://127.0.0.1:27017

MongoDB server version: 3.6.

> show dbs

--30T16::13.704+ E QUERY    [thread1] Error: listDatabases failed:{

    "ok" : ,

    "errmsg" : "not authorized on admin to execute command { listDatabases: 1.0, $db: \"admin\" }",

    "code" : ,

    "codeName" : "Unauthorized"

} :
可见不能直接操作了
测试之前添加的用户:
> use admin
switched to db admin
> show dbs
--30T16::00.963+ E QUERY [thread1] Error: listDatabases failed:{
"ok" : ,
"errmsg" : "not authorized on admin to execute command { listDatabases: 1.0, $db: \"admin\" }",
"code" : ,
"codeName" : "Unauthorized"
} :
_getErrorWithCode@src/mongo/shell/utils.js::
Mongo.prototype.getDBs@src/mongo/shell/mongo.js::
shellHelper.show@src/mongo/shell/utils.js::
shellHelper@src/mongo/shell/utils.js::
@(shellhelp2)::
> db.auth('user','user')
Error: Authentication failed. > use test
switched to db test
> show dbs
--30T16::59.639+ E QUERY [thread1] Error: listDatabases failed:{
"ok" : ,
"errmsg" : "not authorized on admin to execute command { listDatabases: 1.0, $db: \"admin\" }",
"code" : ,
"codeName" : "Unauthorized"
} :
_getErrorWithCode@src/mongo/shell/utils.js::
Mongo.prototype.getDBs@src/mongo/shell/mongo.js::
shellHelper.show@src/mongo/shell/utils.js::
shellHelper@src/mongo/shell/utils.js::
@(shellhelp2)::
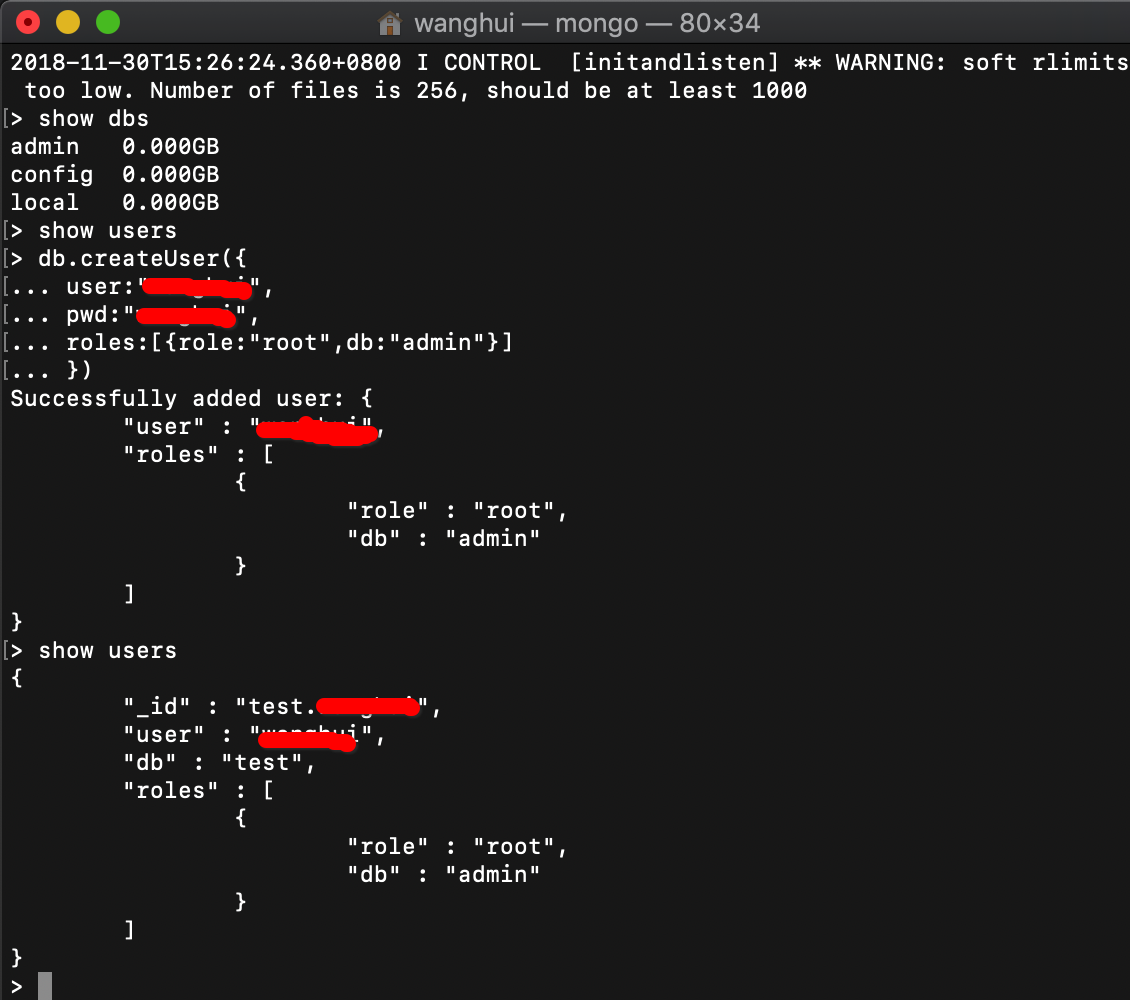
> db.auth('user','user') > show dbs
admin .000GB
config .000GB
local .000GB
>
⚠️:这里admin数据库没能成功认证用户的原因是我上面生成用户的时候忘记进入admin数据库了,所以其实生成出来的用户是test数据库的,但是大家大概知道这个意思即可
MongoDB数据库的用户权限控制权限还是比较多的,有系统自带的,已经定义好的角色,也可以自己定义角色权限,需要根据业务需要进行权限分配:
自带角色的说明(一般内置的角色基本上就可以满足生产环境需求了):
https://docs.mongodb.org/manual/core/security-built-in-roles/
用户自行定义角色的说明:
https://docs.mongodb.org/manual/core/security-user-defined-roles/
用户管理配置的说明
https://docs.mongodb.org/manual/reference/method/#user-management-methods
mongodb的学习-3-在Mac上的安装配置的更多相关文章
- Mac上Hive安装配置
Mac上Hive安装配置 1.安装 下载hive,地址:http://mirror.bit.edu.cn/apache/hive/ 之前我配置了集群,tjt01.tjt02.tjt03,这里hive安 ...
- MySql在Mac上的安装配置
一.下载安装 官网下载社区版dmg安装文件: https://dev.mysql.com/downloads/mysql/ 1.执行安装文件,按步骤完成安装. 2.安装完成后终端输入: mysql - ...
- 一点MongoDB的基础及mongodb在mac上的安装
最近发现维持写博客的习惯还是挺困难的,尤其对我来说,计划好的事过了好长时间才想到要去做. 这段时间一直在熟悉MongoDB,首先我是参考的这一篇:8天学通MongoDB 原博主写得非常好,我这里就 ...
- 《从0到1学习Flink》—— Mac 上搭建 Flink 1.6.0 环境并构建运行简单程序入门
准备工作 1.安装查看 Java 的版本号,推荐使用 Java 8. 安装 Flink 2.在 Mac OS X 上安装 Flink 是非常方便的.推荐通过 homebrew 来安装. brew in ...
- Android Studio中mac上面的安装
Android Studio中mac上面的安装 学习了:https://blog.csdn.net/xianrenli38/article/details/79347170 http://www.an ...
- Infer 在 Mac 上的安装和环境配置
Infer 在 Mac 上的安装和环境配置 Infer 介绍 Infer 是一个静态分析工具.Infer 可以分析 Objective-C, Java 或者 C 代码,报告潜在的问题. 任何人都可以使 ...
- Mac上Node环境配置
公司配备Mac笔记本,以前没用过mac开发项目,一开始依然是从node官网下载安装包,后来领导说最好是用brew安装软件,这样比较方便,安装和卸载,只要在命令行输入相应的 install 和 unin ...
- 【JMeter4.0学习(二)】之搭建openLDAP在windows8.1上的安装配置以及JMeter对LDAP服务器的性能测试脚本开发
目录: 概述 安装测试环境 安装过程 配置启动 配置搭建OpenLDAP 给数据库添加数据 测试查询刚刚插入的数据 客户端介绍 JMeter建立一个扩展LDAP服务器的性能测试脚本开发 附:LDAP学 ...
- Mac上刚安装的WebStorm或PHPStorm遇到SVN版本太旧的问题
Mac上刚安装的WebStorm或PHPStorm遇到SVN版本太旧的问题: URL: svn: E155021: This client is too old to work with the wo ...
- Mac上利用VScode配置c/c++开发环境
Mac上利用VScode配置c/c++开发环境 哭辽,Typora里面最好不要插入表情,不然保存会闪退 首先你要有一个vscode 在扩展里面下载c/c++ 第一步 ⬆+com+p 打开命令模式:选择 ...
随机推荐
- Android - 单例模式线程安全
https://blog.csdn.net/Mars_idea/article/details/80724404 https://blog.csdn.net/cselmu9/article/detai ...
- 用struct模块解决tcp的粘包问题
服务器端程序 import struct import socket sk = socket.socket() sk.bind(('127.0.0.1',9000)) sk.listen() conn ...
- ios移动端禁止双指缩放功能
在实际开发中,我们禁止缩放的实现方式: 1.meta设置: <meta name="viewport" content="width=device-width,h ...
- How to download a CRX file from the Chrome web store
如何从 谷歌浏览器商店 离线下载 谷歌浏览器扩展 Simply copying the Chrome store extension url to the following website: htt ...
- 为什么选用 React 创建混合型移动应用?
[编者按]本文作者为 14islands 联合创始人.创新 Web 开发者 David Lindkvist,主要介绍有关混合型应用搭建的方方面面.文章系国内 ITOM 管理平台 OneAPM 编译呈现 ...
- LeetCode 题解之Find Peak Element
1.题目描述 2.题目分析 在数组的首尾各加入INT_MIN ,然后遍历数组. 3.代码 int findPeakElement(vector<int>& nums) { ) ; ...
- linux 自启动 ,让生活更美好!!
systemctl enable svnserve.service systemctl enable iptables.service systemctl enable firewalld.servi ...
- GBK与UTF-8编码错误转换后,无法再正确恢复
字符集错误转换导致的问题 UTF-8格式编码的字节流,按GBK字符集转换为字符串,会出现乱码,这很正常.但将其重新转为字节流,再用UTF-8字符集转为字符串,还是乱码.这就让我产生了疑惑,虽然使用错误 ...
- docker 的简单使用
运行一个ubuntu容器 咱们要在cenots7操作系统下,以docker下载一个ubuntu image文件,然后以image启动容器 docker pull ubuntu 或者指定版本:docke ...
- asp.net MVC4 框架揭秘 读书笔记系列2
1.2 MVC 变体 MVC 是一种Pattern 另外一种说法是ParaDigm 范例 模式和范例的区别在于前者可以应用到具体的应用上,而后者则仅仅提供一些指导方针 1.2.1 MVP Model ...