SpringBoot--- Shiro(拦截,认证)、Thymeleaf(模板引擎)
SpringBoot--- Shiro(拦截,认证)、Thymeleaf(模板引擎)
环境
IDEA :2020.1
SpringBoot: 2.3.3
Java : 8
版本依赖:
shiro-spring : 1.6.0
准备 :环境搭建
导入依赖
   <!-- https://mvnrepository.com/artifact/org.apache.shiro/shiro-spring -->

        <dependency>

            <groupId>org.apache.shiro</groupId>

            <artifactId>shiro-spring</artifactId>

            <version>1.6.0</version>

        </dependency>

        <!--       thymeleaf-->

        <dependency>

            <groupId>org.thymeleaf</groupId>

            <artifactId>thymeleaf-spring5</artifactId>

        </dependency>

        <dependency>

            <groupId>org.thymeleaf.extras</groupId>

            <artifactId>thymeleaf-extras-java8time</artifactId>

        </dependency>
spring与Shiro 的整合包,模板引擎用的是 Thymeleaf。
编写 Controller 类
@Controller

public class HelloController {

    @RequestMapping({"/","/index"})

    public String index(Model model){

        model.addAttribute("msg","Hello Shiro");

        return "welcome";

    }

    @RequestMapping("/level1/{id}")

    public String toLevel1(@PathVariable("id") int id){

        return "pages/level1/" + id;

    }

    @RequestMapping("/level2/{id}")

    public String toLevel2(@PathVariable("id") int id){

        return "pages/level2/" + id;

    }

    @RequestMapping("/level3/{id}")

    public String toLevel3(@PathVariable("id") int id){

        return "pages/level3/" + id;

    }

}
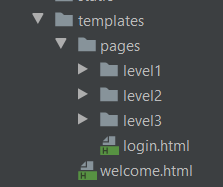
页面素材
采用之前整合 SpringSecurity 时候使用的HTML 页面。(提醒一下,注意导入支持 Thymeleaf 语法的命名空间)需要素材请联系我。
配置类
自定义 Realm,用于认证,授权(未完整)。
public class UserRealm  extends AuthorizingRealm {

    @Override

    protected AuthorizationInfo doGetAuthorizationInfo(PrincipalCollection principalCollection) {

        System.out.println("执行了授权===>doGetAuthorizationInfo");

        return null;

    }

    @Override

    protected AuthenticationInfo doGetAuthenticationInfo(AuthenticationToken authenticationToken) throws AuthenticationException {

        System.out.println("执行了认证===>doGetAuthoricationInfo");

        return null;

    }

}
Shiro 配置类(基本框架)
@Configuration

public class ShiroConfig {

    //3、ShiroFilterFactoryBean

    @Bean

    public ShiroFilterFactoryBean getfilterFactoryBean(

            @Qualifier("securityManager") DefaultWebSecurityManager manager){

        ShiroFilterFactoryBean bean = new ShiroFilterFactoryBean();

        //配置SecurityManager

        bean.setSecurityManager(manager);

        return bean;

    }

    //2、DefaultWebSecurityManager

    @Bean(name = "securityManager")

    public DefaultWebSecurityManager getsecurityManager(@Qualifier("userRealm") UserRealm userRealm){

        DefaultWebSecurityManager manager = new DefaultWebSecurityManager();

        //关联 UserRealm

        manager.setRealm(userRealm);

        return manager;

    }

    //1、创建 realm 类,需要创建 UserRealm 继承 AuthorizingRealm 并重写方法

    @Bean(name = "userRealm")

    public UserRealm realm(){

        return new UserRealm();

    }

}
启动测试,程序是否正常。
1、拦截
拦截本质是通过过滤器,拦截器实现的。
Shiro 采用 ShiroFilterFactoryBean 配置 一个HashMap 来实现。在配置之前我们需要了解配置的含义。
权限过滤器及配置释义
anon:例子/admins/*=anon 没有参数,表示可以匿名使用。*
authc:例如/admins/user/*=authc表示*需要认证(登录)*才能使用,没有参数*
roles(角色):例子/admins/user/=roles[admin],参数可以写多个,多个时必须加上引号,并且参数之间用逗号分割,当有多个参数时,例如admins/user/=roles["admin,guest"],每个参数通过才算通过,相当于hasAllRoles()方法。
perms(权限):例子/admins/user/=perms[user:add:*],参数可以写多个,多个时必须加上引号,并且参数之间用逗号分割,例如/admins/user/=perms["user:add:,user:modify:"],当有多个参数时必须每个参数都通过才通过,想当于isPermitedAll()方法。
rest:例子/admins/user/=rest[user],根据请求的方法,相当于/admins/user/=perms[user:method] ,其中method为post,get,delete等。
port:例子/admins/user/**=port[8081],当请求的url的端口不是8081是跳转到schemal://serverName:8081?queryString,其中schmal是协议http或https等,serverName是你访问的host,8081是url配置里port的端口,queryString
是你访问的url里的?后面的参数。
authcBasic:例如/admins/user/**=authcBasic没有参数表示httpBasic认证
ssl:例子/admins/user/**=ssl没有参数,表示安全的url请求,协议为https
user:例如/admins/user/**=user没有参数表示必须存在用户(使用了cookies session保存了用户),当登入操作时不做检查
配置过滤并测试
在 ShiroFilterFactoryBean 的 setFilterChainDefinitionMap 配置过滤规则。同时配置登录页面,未登录访问相关 authc 级别页面将跳转到登录页面。
    //3、ShiroFilterFactoryBean

    @Bean

    public ShiroFilterFactoryBean getfilterFactoryBean(

            @Qualifier("securityManager") DefaultWebSecurityManager manager){

        ShiroFilterFactoryBean bean = new ShiroFilterFactoryBean();

        //配置SecurityManager

        bean.setSecurityManager(manager);

        Map<String, String> filterMap = new LinkedHashMap<>();

        filterMap.put("/level*/**","authc");

        //配置过滤规则

        bean.setFilterChainDefinitionMap(filterMap);

        return bean;

    }
暂时不配置登录页面,这是下一个章节的内容,启动访问,并点击访问需要登录的资源。
Shiro 竟然还 “贴心” 地准备用JSP ,别说了,看见 JSP就头疼,学校里还教了这个.....(这里多说一句,别死磕JSP了,后端的学学JSTL表达式就行。)
2、认证
Shiro 配置类
结合前面的配置,在 Shiro 配置类 的 ShiroFilterFactoryBean 配置登录的url
 //配置登录url

        bean.setLoginUrl("/log/toLogin");
配置 Controller 类
@Controller
@RequestMapping("/log")
public class LogController {
@RequestMapping("/toLogin")
public String toLogin(){
return "/pages/login";
}
@RequestMapping("/doLogin")
public String login(String username , String password , Model model){
//获取当前用户
Subject subject = SecurityUtils.getSubject();
//生成令牌
UsernamePasswordToken token = new UsernamePasswordToken(username , password);
try{
//用令牌尝试登录,失败会抛出异常
subject.login(token);
//成功则返回主页
return "welcome";
}catch ( UnknownAccountException e){ //捕捉抛出用户名错误
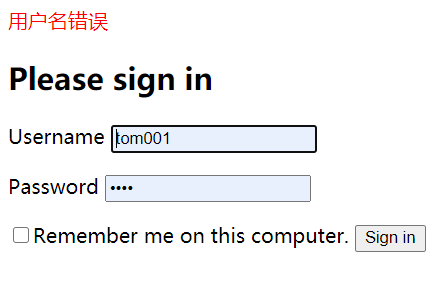
model.addAttribute("msg","用户名错误");
return "/pages/login";
}catch (IncorrectCredentialsException e){//捕捉抛出密码错误
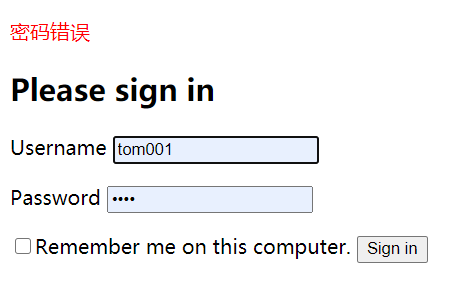
model.addAttribute("msg","密码错误");
return "/pages/login";
}
}
}
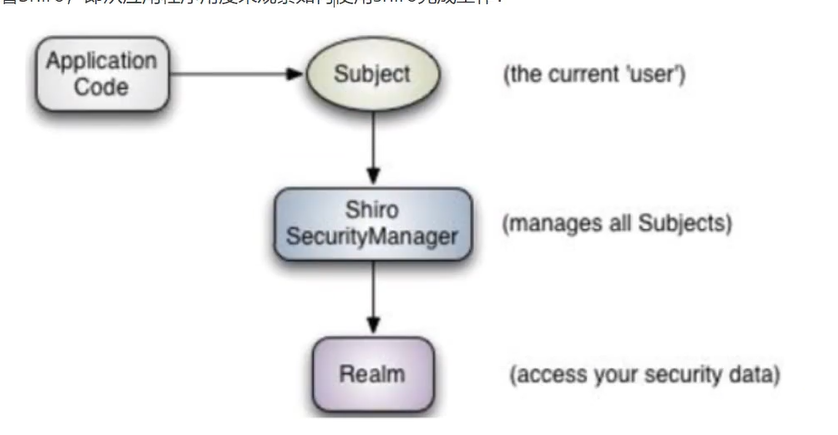
这里说一下, url 为 /doLogin 的方法,这里用到了一个 Shiro 的核心对象 Subject ,表示当前用户,后面将用于登录。
这里非常神奇,不需要任何传参,直接通过 SecurityUtils.getSubject() 获取 Subject 。这一点有点难以理解。不过确实是可以获取的,可以理解为是 Shiro 为我们将这些联系了起来。
生成令牌,我们回到 UserRealm 类 的 doGetAuthenticationInfo 方法。
@Override

    protected AuthenticationInfo doGetAuthenticationInfo(

        AuthenticationToken authenticationToken) throws AuthenticationException {
有一个参数 AuthenticationToken ,它的类型是 认证令牌,查看源码,发现是一个接口。
那就来看他的实现类。

最后一个是用户名密码令牌,查看源码,它的构造方法,可以用来生成一个用于身份认证的令牌。
/**

     * Constructs a new UsernamePasswordToken encapsulating the username and password submitted

     * during an authentication attempt, with a <tt>null</tt> {@link #getHost() host} and a

     * <tt>rememberMe</tt> default of <tt>false</tt>.

     *

     * @param username the username submitted for authentication

     * @param password the password character array submitted for authentication

     */

    public UsernamePasswordToken(final String username, final char[] password) {

        this(username, password, false, null);

    }
回到我们的登录方法,我们可以用页面传递过来的username ,password 生成一个 UsernamePasswordToken 令牌。
之后就是用令牌登录,失败就捕获一些异常,返回一些提示信息到页面。
这里还剩下一个问题,我们作为开发者怎么让 Shiro 知道正确的用户名和密码,这里回到了 UserRealm 类 的 doGetAuthenticationInfo 方法进行配置,这里采用明文用户名和密码配置,后面整合 Mybatis 将结合数据库获取。
    @Override

    protected AuthenticationInfo doGetAuthenticationInfo(AuthenticationToken authenticationToken) throws AuthenticationException {

        System.out.println("执行了认证===>doGetAuthoricationInfo");

		//明文配置用户名和密码

        String username = "tom001";

        String password = "1234";

		//获取令牌

        UsernamePasswordToken userToken =(UsernamePasswordToken) authenticationToken;

        //验证用户名

        if (!userToken.getUsername().equals(username)){

            return null;

        }

	//验证密码交由 Shiro 完成

        return new SimpleAuthenticationInfo(username,password,"");

    }
这里的获取令牌,与之前的生成令牌呼应了。具体对象传递是由 Shiro 完成的。
验证用户名不通过,返回 null 将会由之前登录方法捕获到异常,再做相应处理。
密码不由我们进行处理,可以说是非常安全了。
注意返回值,需要的只是一个接口,我们可以返回它的实现类。
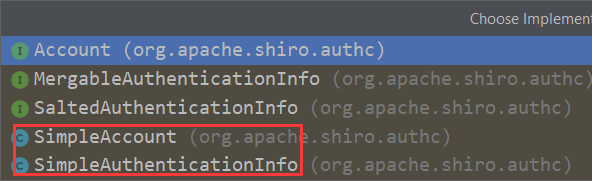
图中两个都是可以使用的,都可以用于认证。
它的构造函数,查看源码
 /**

     * Constructor that takes in a single 'primary' principal of the account and its corresponding credentials,

     * associated with the specified realm.

     * <p/>

     * This is a convenience constructor and will construct a {@link PrincipalCollection PrincipalCollection} based

     * on the {@code principal} and {@code realmName} argument.

     *

     * @param principal   the 'primary' principal associated with the specified realm.

     * @param credentials the credentials that verify the given principal.

     * @param realmName   the realm from where the principal and credentials were acquired.

     */

    public SimpleAuthenticationInfo(Object principal, Object credentials, String realmName) {

        this.principals = new SimplePrincipalCollection(principal, realmName);

        this.credentials = credentials;

    }
其中,principal,credentials ,可以通俗地理解为 用户名,密码,最常见的组合也是用户名和密码。
测试
如有疑问,还可以查看官网给出的十分钟快速入门。https://shiro.apache.org/10-minute-tutorial.html
SpringBoot--- Shiro(拦截,认证)、Thymeleaf(模板引擎)的更多相关文章
- SpringBoot入门篇--使用Thymeleaf模板引擎进行页面的渲染
在做WEB开发的时候,我们不可避免的就是在前端页面之间进行跳转,中间进行数据的查询等等操作.我们在使用SpringBoot之前包括我在内其实大部分都是用的是JSP页面,可以说使用的已经很熟悉.但是我们 ...
- SpringBoot静态资源访问+拦截器+Thymeleaf模板引擎实现简单登陆
在此记录一下这十几天的学习情况,卡在模板引擎这里已经是四天了. 对Springboot的配置有一个比较深刻的认识,在此和大家分享一下初学者入门Spring Boot的注意事项,如果是初学SpringB ...
- JavaEE开发之SpringBoot整合MyBatis以及Thymeleaf模板引擎
上篇博客我们聊了<JavaEE开发之SpringBoot工程的创建.运行与配置>,从上篇博客的内容我们不难看出SpringBoot的便捷.本篇博客我们继续在上篇博客的基础上来看一下Spri ...
- SpringBoot项目的前端+thymeleaf模板引擎
SpringBoot项目创建之后,后台的框架是SpringMVC.但前端的resource和template目录都是空的.这个时候需要创建前台页面. 习惯上,我们会创建JSP,但是,SpringBoo ...
- springboot笔记06——使用Thymeleaf模板引擎
前言 Springboot 推荐使用Thymeleaf做视图层.Thymeleaf支持 html 原型,然后在 html 标签里增加额外的属性来达到模板+数据的展示方式.浏览器解释 html 时会忽略 ...
- (二)SpringBoot基础篇- 静态资源的访问及Thymeleaf模板引擎的使用
一.描述 在应用系统开发的过程中,不可避免的需要使用静态资源(浏览器看的懂,他可以有变量,例:HTML页面,css样式文件,文本,属性文件,图片等): 并且SpringBoot内置了Thymeleaf ...
- (二)SpringBoot2.0基础篇- 静态资源的访问及Thymeleaf模板引擎的使用
一.描述 在应用系统开发的过程中,不可避免的需要使用静态资源(浏览器看的懂,他可以有变量,例:HTML页面,css样式文件,文本,属性文件,图片等): 并且SpringBoot内置了Thymeleaf ...
- 【Springboot】Springboot整合Thymeleaf模板引擎
Thymeleaf Thymeleaf是跟Velocity.FreeMarker类似的模板引擎,它可以完全替代JSP,相较与其他的模板引擎,它主要有以下几个特点: 1. Thymeleaf在有网络和无 ...
- SpringBoot使用thymeleaf模板引擎
(1).添加pom依赖 <dependency> <groupId>org.springframework.boot</groupId> <artifactI ...
随机推荐
- EF批量插入太慢?那是你的姿势不对
大概所有的程序员应该都接触过批量插入的场景,我也相信任何的程序员都能写出可正常运行的批量插入的代码.但怎样实现一个高效.快速插入的批量插入功能呢? 由于每个人的工作履历,工作年限的不同,在实现这样的一 ...
- BUUCTF-web HappyCTFd (CVE-2020-7245)
在 CTFd v2.0.0 - v2.2.2 的注册过程中,如果在CTFd的用户名和emails可用,则可以使攻击者接管任意账号. 进入题目,进行注册.查看用户可以看到admin账号,利用漏洞获取ad ...
- Dockerfile镜像优化,减小镜像
前言镜像的优化注意几条: 选择最精简的基础镜像减少镜像的层数清理镜像构建的中间产物注意优化网络请求尽量去用构建缓存使用多阶段构建镜像接下来我们以rhel7镜像构建容器,并在容器中安装nginx的源码包 ...
- CSRF与XSS攻击的原理与防范
CSRF 1.概念与原理 CSRF,跨站请求伪造,攻击方伪装用户身份发送请求从而窃取信息或者破坏系统.例如: 用户访问A网站登陆并生成了cookie,再访问B网站,如果A网站存在CSRF漏洞,此时B网 ...
- SpringBoot2 整合MinIO中间件,实现文件便捷管理
本文源码:GitHub·点这里 || GitEE·点这里 一.MinIO简介 1.基础描述 MinIO是一个开源的对象存储服务.适合于存储大容量非结构化的数据,例如图片.视频.日志文件.备份数据和容器 ...
- MacOS下Lucene学习
学于黑马和传智播客联合做的教学项目 感谢 黑马官网 传智播客官网 微信搜索"艺术行者",关注并回复关键词"lucene"获取视频和教程资料! b站在线视频 全文 ...
- numpy巩固
导包 import numpy as np 创建二维数组 x = np.matrix([[1,2,3],[4,5,6]]) 创建一维数组 y = np.matrix([1,2,3,4,5,6]) x ...
- bzoj 2225 [Spoj 2371]Another Longest Increasing
这道题 连续上升的三元组 且已经按照第一维排好序了. 直接上CDQ分治即可 当然也是可以2-Dtree解决这个 问题 但是感觉nlog^2 比nsqrt(n)要快一些.. 算是复习一发CDQ分治吧 也 ...
- 从别人的代码中学习golang系列--03
这篇博客还是整理从https://github.com/LyricTian/gin-admin 这个项目中学习的golang相关知识. 作者在项目中使用了 github.com/casbin/casb ...
- Git科普文,Git基本原理&各种骚操作
Git简单介绍 Git是一个分布式版本控制软件,最初由Linus Torvalds创作,于2005年以GPL发布.最初目的是为更好地管理Linux内核开发而设计. Git工作流程以及各个区域 Work ...