20175314 实验四 Android开发基础
20175314 实验四 Android开发基础
一、实验报告封面
课程:Java程序设计 班级:1753班 姓名:薛勐 学号:20175314
指导教师:娄嘉鹏 实验日期:2019年5月17日
实验时间:15:35 - 17:15 实验序号:四
实验名称: Andorid程序设计
二、实验内容
- 基于Android Studio开发简单的Android应用并部署测试;
- 了解Android、组件、布局管理器的使用;
- 掌握Android中事件处理机制。
三、实验步骤
(一)Android Stuidio的安装测试
- 参考《Java和Android开发学习指南(第二版)(EPUBIT,Java for Android 2nd)》第二十四章:
- 参考http://www.cnblogs.com/rocedu/p/6371315.html#SECANDROID,安装 Android Stuidio
- 完成Hello World, 要求修改res目录中的内容,Hello World后要显示自己的学号,自己学号前后一名同学的学号,提交代码运行截图和码云Git链接,截图没有学号要扣分
- 学习Android Stuidio调试应用程序
- 步骤:
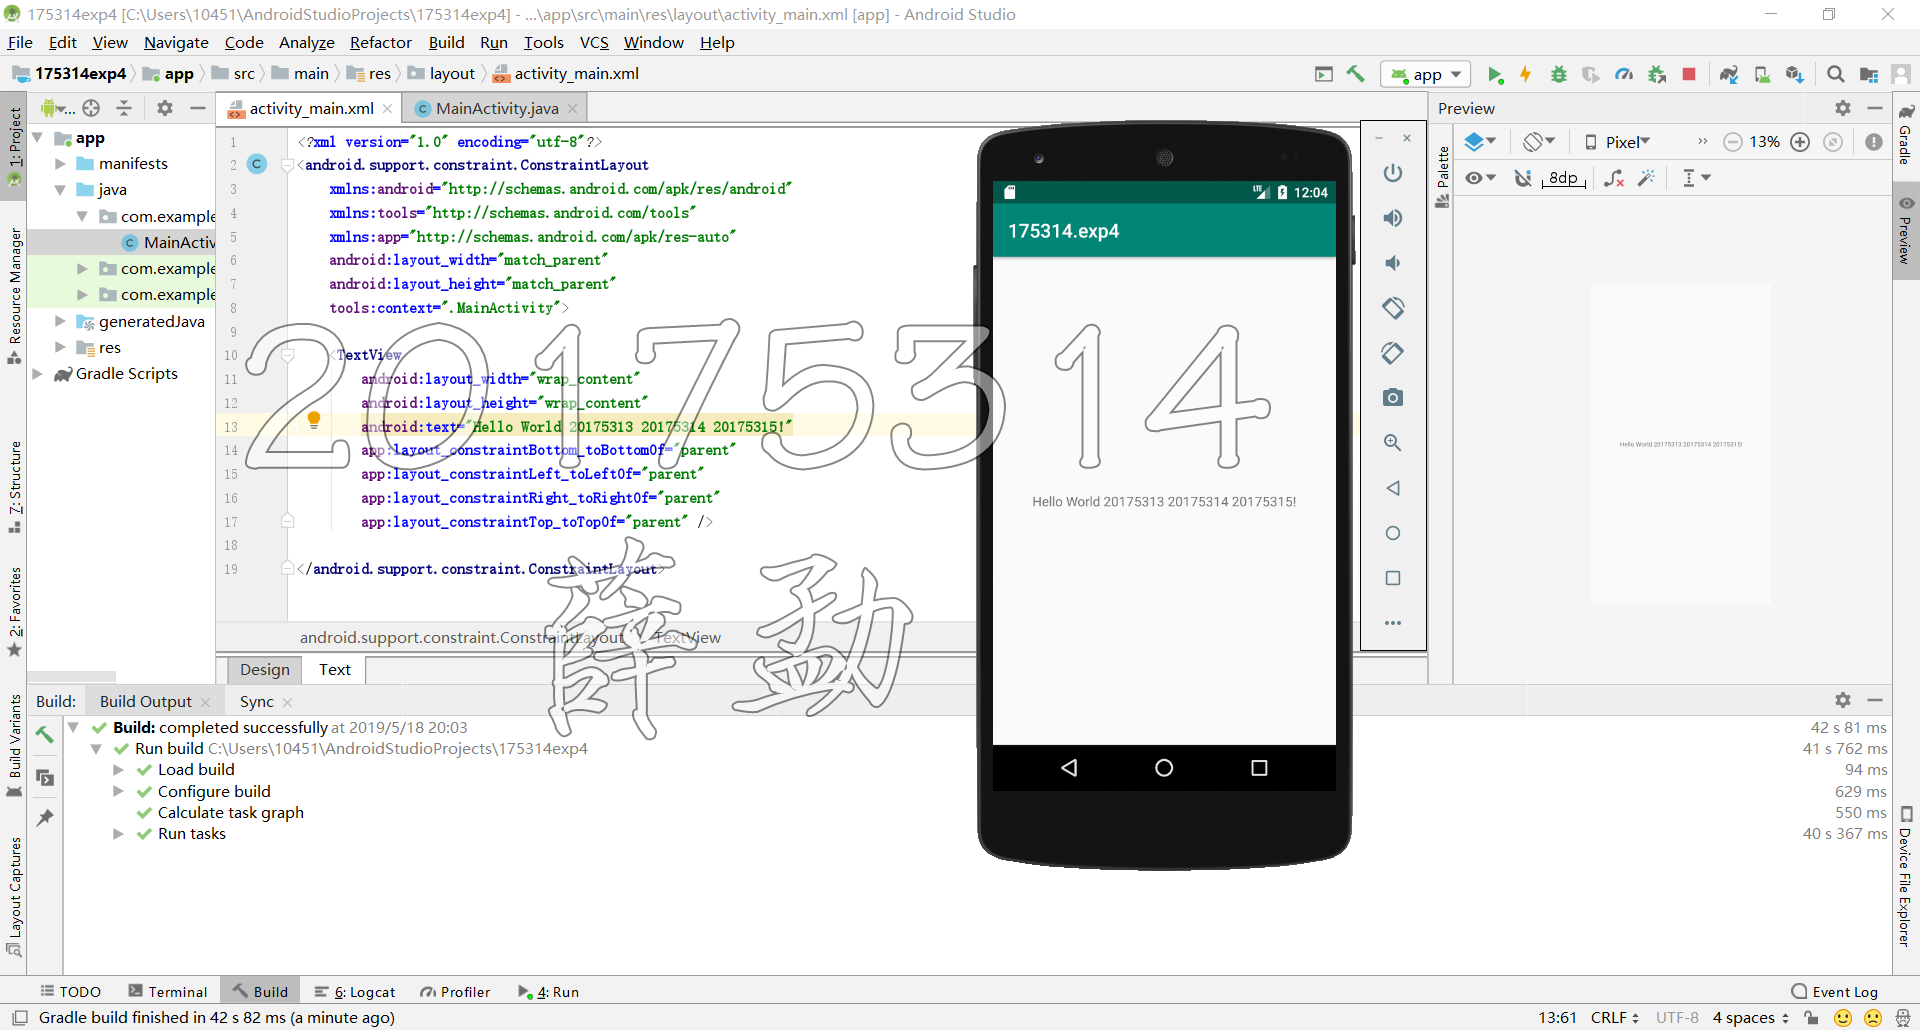
1.将布局文件activity_main.xml中的android:text="Hello World!"改为android:text="Hello World20175314!"
2.配置虚拟安卓机:
activity_main.xml
<?xml version="1.0" encoding="utf-8"?>

<android.support.constraint.ConstraintLayout

    xmlns:android="http://schemas.android.com/apk/res/android"

    xmlns:tools="http://schemas.android.com/tools"

    xmlns:app="http://schemas.android.com/apk/res-auto"

    android:layout_width="match_parent"

    android:layout_height="match_parent"

    tools:context=".MainActivity">

    <TextView

        android:layout_width="wrap_content"

        android:layout_height="wrap_content"

        android:text="Hello World 20175313 20175314 20175315!"

        app:layout_constraintBottom_toBottomOf="parent"

        app:layout_constraintLeft_toLeftOf="parent"

        app:layout_constraintRight_toRightOf="parent"

        app:layout_constraintTop_toTopOf="parent" />

</android.support.constraint.ConstraintLayout>
- 运行结果:
(二)Activity测试
- 参考《Java和Android开发学习指南(第二版)(EPUBIT,Java for Android 2nd)》第二十五章:
- 构建项目,运行教材相关代码
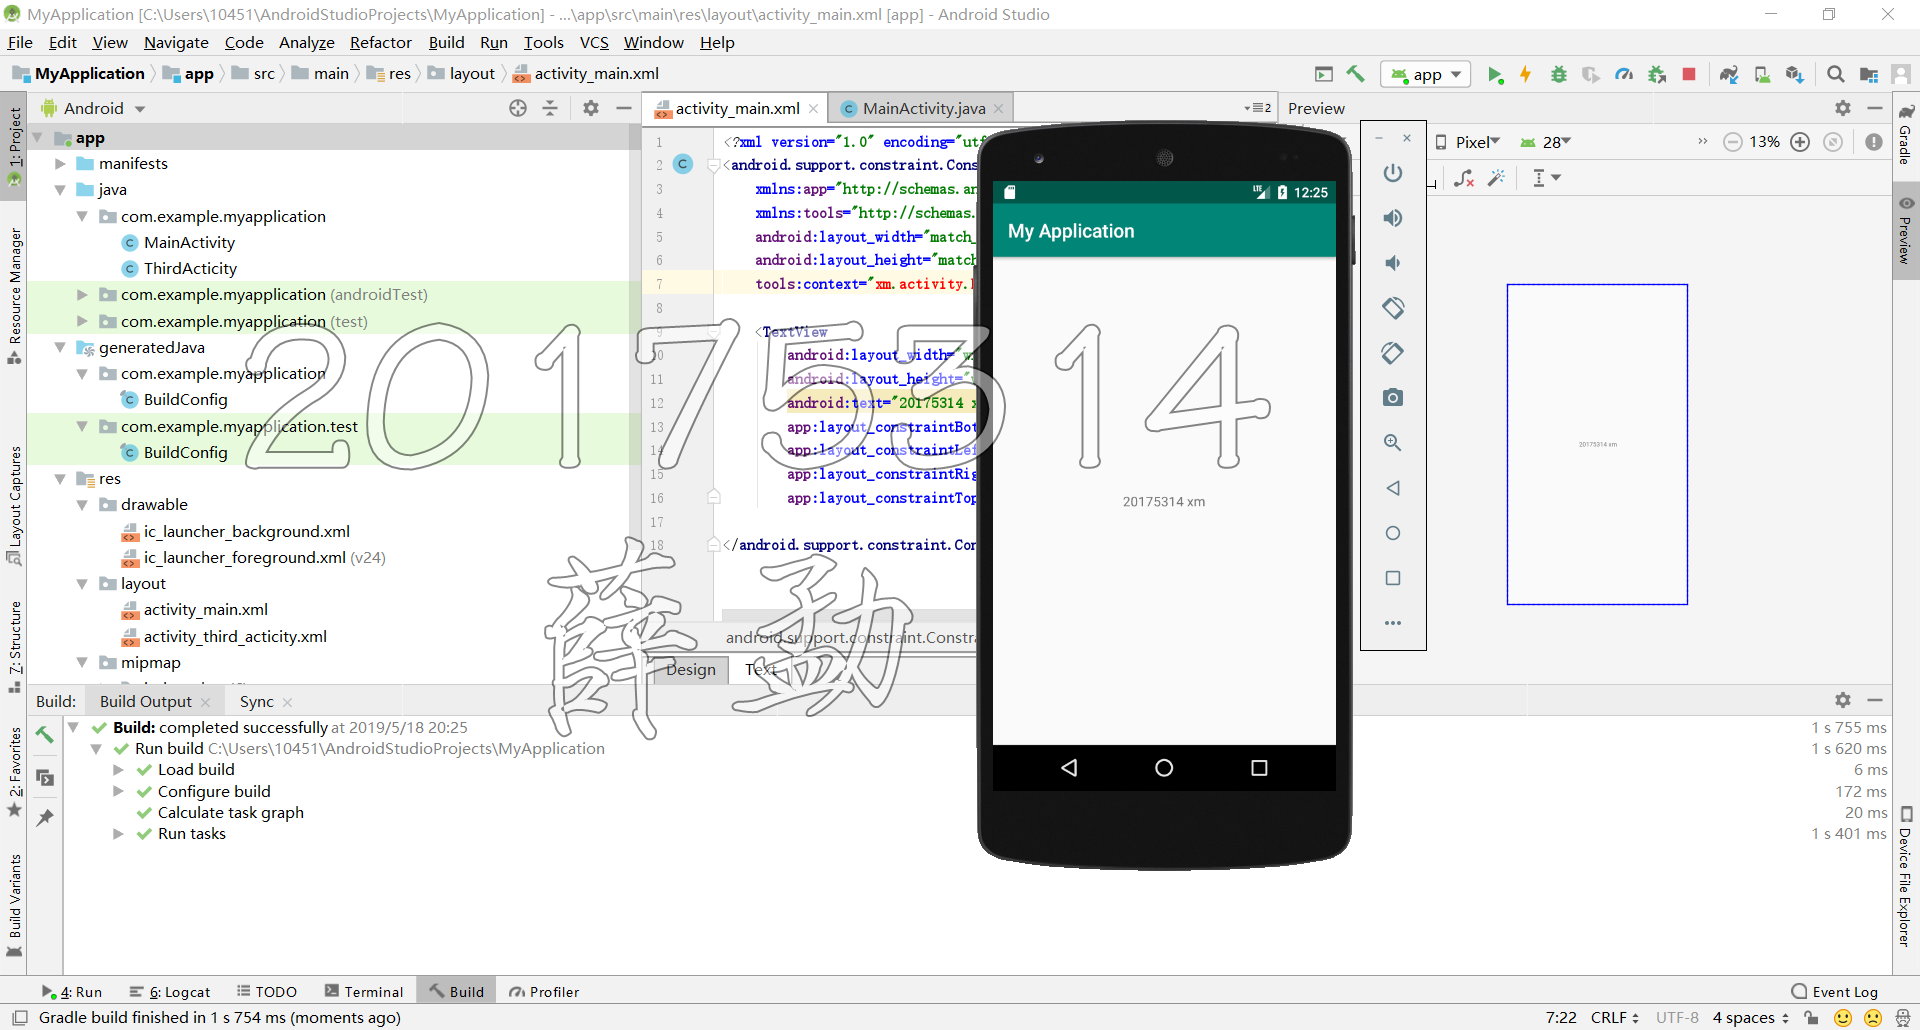
- 创建 ThirdActivity, 在ThirdActivity中显示自己的学号,修改代码让MainActivity启动ThirdActivity
- 提交代码运行截图和码云Git链接,截图要有学号水印,否则会扣分
- 步骤:
file->new->Activity->empty Activity创建ThirdActicity
MainActivity.java
package com.example.secondactivitydemo;

import android.support.v7.app.AppCompatActivity;

import android.os.Bundle;

import android.content.Intent;

import android.support.v7.app.AppCompatActivity;

import android.os.Bundle;

public class MainActivity extends AppCompatActivity {

    @Override

    protected void onCreate(Bundle savedInstanceState) {

        super.onCreate(savedInstanceState);

        Intent intent = new Intent(this,ThirdActivity.class);

        startActivity(intent);

    }

}
activity_main.xml
<?xml version="1.0" encoding="utf-8"?>

<android.support.constraint.ConstraintLayout xmlns:android="http://schemas.android.com/apk/res/android"

    xmlns:app="http://schemas.android.com/apk/res-auto"

    xmlns:tools="http://schemas.android.com/tools"

    android:layout_width="match_parent"

    android:layout_height="match_parent"

    tools:context="xm.activity.MainActivity">

    <TextView

        android:layout_width="wrap_content"

        android:layout_height="wrap_content"

        android:text="20175314 xm"

        app:layout_constraintBottom_toBottomOf="parent"

        app:layout_constraintLeft_toLeftOf="parent"

        app:layout_constraintRight_toRightOf="parent"

        app:layout_constraintTop_toTopOf="parent" />

</android.support.constraint.ConstraintLayout>
activity_third.xml
<?xml version="1.0" encoding="utf-8"?>

<android.support.constraint.ConstraintLayout xmlns:android="http://schemas.android.com/apk/res/android"

    xmlns:tools="http://schemas.android.com/tools"

    android:layout_width="match_parent"

    android:layout_height="match_parent">

    <TextView

        android:layout_width="144dp"

        android:layout_height="26dp"

        android:text="20175314xm"

        tools:ignore="MissingConstraints"

        tools:layout_editor_absoluteX="109dp"

        tools:layout_editor_absoluteY="242dp" />

</android.support.constraint.ConstraintLayout>
- 运行结果:
(三)UI测试
- 参考《Java和Android开发学习指南(第二版)(EPUBIT,Java for Android 2nd)》第二十六章:
- 构建项目,运行教材相关代码
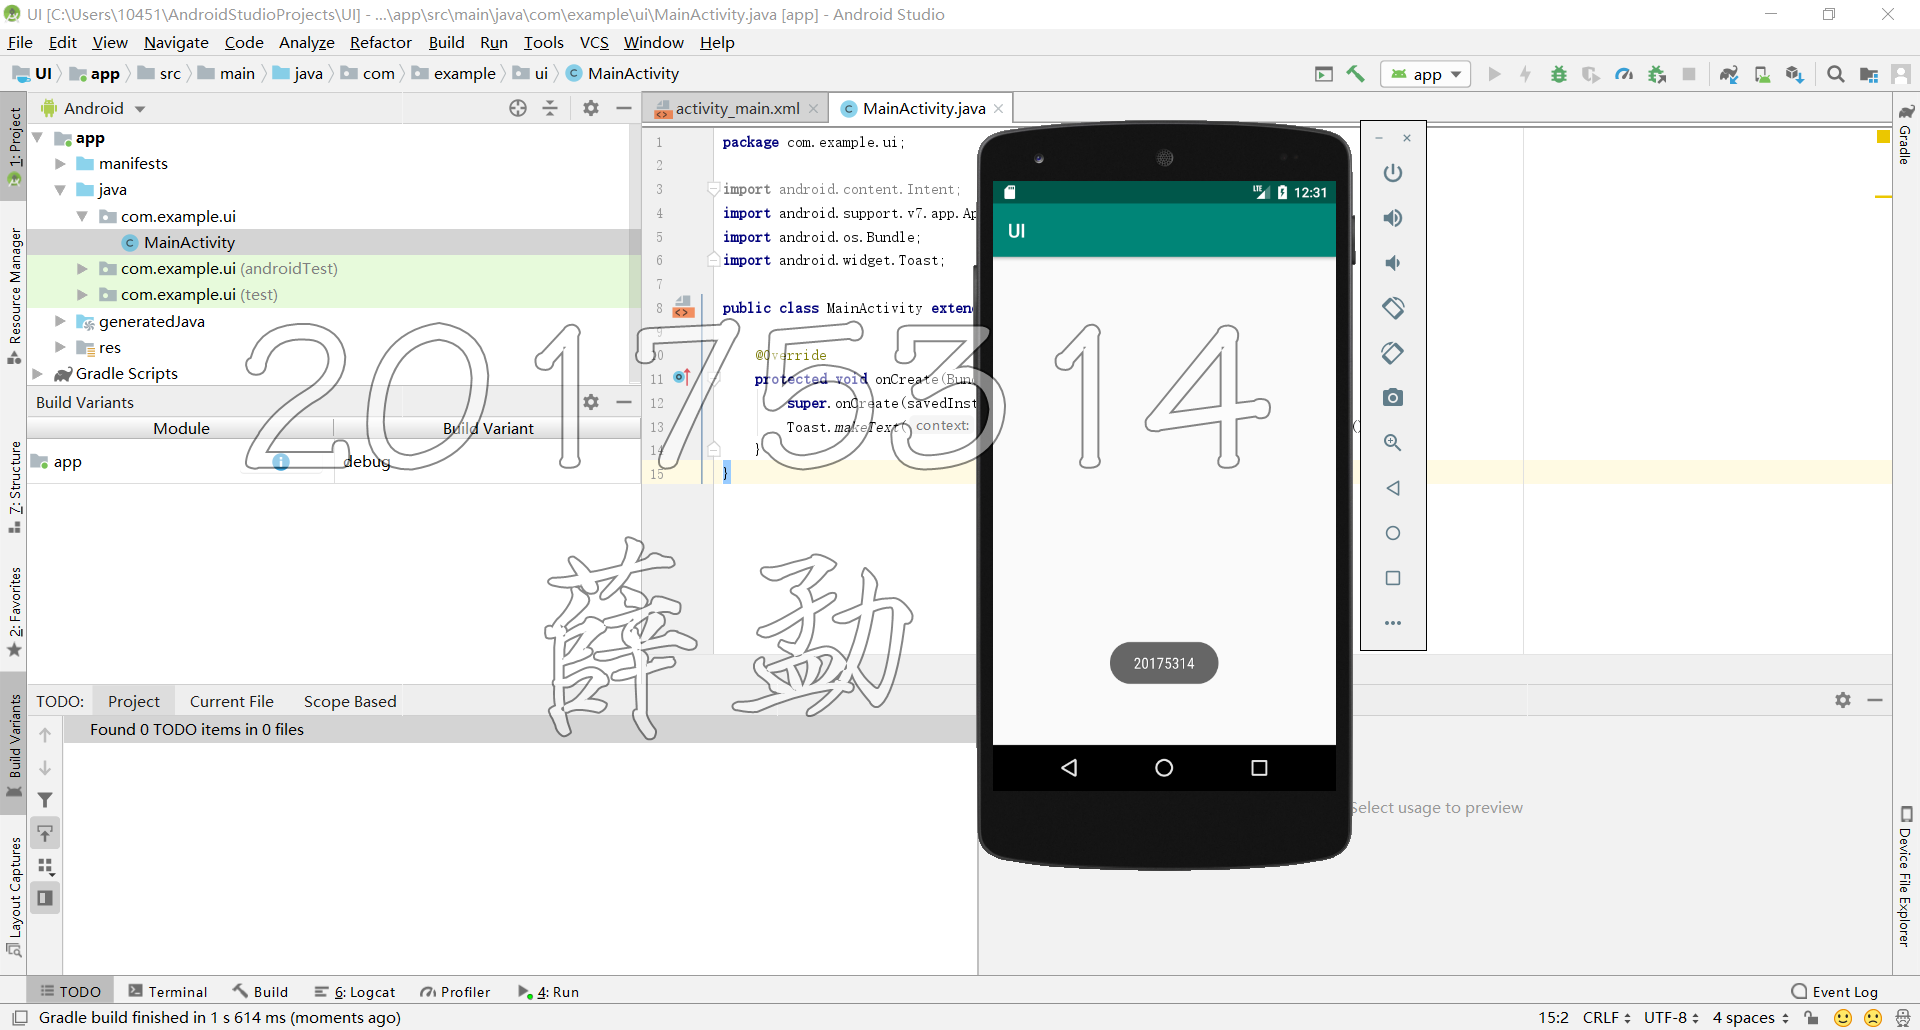
- 修改代码让Toast消息中显示自己的学号信息
- 提交代码运行截图和码云Git链接,截图要有学号水印,否则会扣分
Main_Activity.java
package com.example.ui;

import android.content.Intent;

import android.support.v7.app.AppCompatActivity;

import android.os.Bundle;

import android.widget.Toast;

public class MainActivity extends AppCompatActivity {

    @Override

    protected void onCreate(Bundle savedInstanceState) {

        super.onCreate(savedInstanceState);

        Toast.makeText(this,"20175314",Toast.LENGTH_LONG).show();

    }

}
activity_main.xml
<?xml version="1.0" encoding="utf-8"?>

<android.support.constraint.ConstraintLayout xmlns:android="http://schemas.android.com/apk/res/android"

    xmlns:app="http://schemas.android.com/apk/res-auto"

    xmlns:tools="http://schemas.android.com/tools"

    android:layout_width="match_parent"

    android:layout_height="match_parent"

    tools:context="xm.ui.MainActivity">

    <TextView

        android:layout_width="wrap_content"

        android:layout_height="wrap_content"

        android:text="20175314"

        app:layout_constraintBottom_toBottomOf="parent"

        app:layout_constraintLeft_toLeftOf="parent"

        app:layout_constraintRight_toRightOf="parent"

        app:layout_constraintTop_toTopOf="parent" />

</android.support.constraint.ConstraintLayout>
- 运行结果:
(四)布局测试
- 参考《Java和Android开发学习指南(第二版)(EPUBIT,Java for Android 2nd)》第二十七章:
- 构建项目,运行教材相关代码
- 修改布局让P290页的界面与教材不同
- 提交代码运行截图和码云Git链接,截图要有学号水印,否则会扣分
MainActivity.java
package com.example.layoutdemo;

import android.app.Activity;

import android.os.Bundle;

import android.view.Menu;

import android.view.MenuItem;

public class MainActivity extends Activity {

    @Override

    protected void onCreate(Bundle savedInstanceState) {

        super.onCreate(savedInstanceState);

        setContentView(R.layout.linear_layout1);

    }

    @Override

    public boolean onCreateOptionsMenu(Menu menu) {

        // Inflate the menu; this adds items to the action bar if it is present.

        getMenuInflater().inflate(R.menu.menu_main, menu);

        return true;

    }

    @Override

    public boolean onOptionsItemSelected(MenuItem item) {

        // Handle action bar item clicks here. The action bar will

        // automatically handle clicks on the Home/Up button, so long

        // as you specify a parent activity in AndroidManifest.xml.

        int id = item.getItemId();

        //noinspection SimplifiableIfStatement

        if (id == R.id.action_settings) {

            return true;

        }

        return super.onOptionsItemSelected(item);

    }

}
frame_layout1.xml
<FrameLayout xmlns:android="http://schemas.android.com/apk/res/android"

    xmlns:tools="http://schemas.android.com/tools"

    android:orientation="horizontal"

    android:layout_width="match_parent"

    android:layout_height="match_parent">

    <Button

        android:layout_width="wrap_content"

        android:layout_height="wrap_content"

        android:layout_gravity="center"

        android:text="20175314" />

    <ImageButton

        android:layout_width="wrap_content"

        android:layout_height="wrap_content"

        android:layout_gravity="bottom"

        android:alpha="0.35"

        android:src="@android:drawable/btn_star_big_on" />

</FrameLayout>
grid_layout1.xml
<GridLayout xmlns:android="http://schemas.android.com/apk/res/android"

    android:layout_width="wrap_content"

    android:layout_height="wrap_content"

    android:layout_gravity="center"

    android:columnCount="3"

    >

	<!-- 1st row, spanning 3 columns -->

    <TextView

        android:layout_width="wrap_content"

        android:layout_height="wrap_content"

        android:text="Enter your name"

        android:layout_columnSpan="3"

        android:textSize="26sp"

        />

   	<!-- 2nd row -->

	<TextView android:text="First Name"/>

	<EditText

	    android:id="@+id/firstName"

	    android:layout_width="200dp"

	    android:layout_columnSpan="2"/>

	<!-- 3rd row -->

	<TextView android:text="Last Name"/>

	<EditText

	    android:id="@+id/lastName"

	    android:layout_width="200dp"

	    android:layout_columnSpan="2"/>

	<!-- 4th row, spanning 3 columns -->

    <Button

        android:layout_width="wrap_content"

        android:layout_height="wrap_content"

        android:layout_column="2"

        android:layout_gravity="right"

        android:text="Submit"/>

</GridLayout>
linear_layout1.xml
<LinearLayout xmlns:android="http://schemas.android.com/apk/res/android"

xmlns:tools="http://schemas.android.com/tools"

android:orientation="horizontal"

android:layout_width="match_parent"

android:layout_height="match_parent">

<ImageButton

    android:src="@android:drawable/btn_star_big_on"

    android:layout_width="wrap_content"

    android:layout_height="wrap_content"/>

<TextView

    android:layout_width="wrap_content"

    android:layout_height="wrap_content"

    android:text="@string/hello_world" />

<Button

    android:layout_width="wrap_content"

    android:layout_height="wrap_content"

    android:text="Button1" />

</LinearLayout>
linear_layout2.xml
<LinearLayout xmlns:android="http://schemas.android.com/apk/res/android"

    xmlns:tools="http://schemas.android.com/tools"

    android:orientation="vertical"

    android:layout_width="match_parent"

    android:layout_height="match_parent">

    <ImageButton

        android:src="@android:drawable/btn_star_big_on"

        android:layout_gravity="center"

        android:layout_width="wrap_content"

        android:layout_height="wrap_content"/>

    <TextView

        android:layout_gravity="center"

        android:layout_width="wrap_content"

        android:layout_height="wrap_content"

        android:layout_marginLeft="15dp"

        android:text="@string/hello_world"/>

    <Button android:text="Button1"

        android:layout_gravity="center"

        android:layout_width="wrap_content"

        android:layout_height="wrap_content"/>

</LinearLayout>
linear_layout3.xml
<LinearLayout xmlns:android="http://schemas.android.com/apk/res/android"

    xmlns:tools="http://schemas.android.com/tools"

    android:orientation="vertical"

    android:layout_width="match_parent"

    android:layout_height="match_parent"

    android:gravity="bottom">

    <ImageButton

        android:src="@android:drawable/btn_star_big_on"

        android:layout_gravity="center"

        android:layout_width="wrap_content"

        android:layout_height="wrap_content"/>

    <TextView

        android:layout_gravity="center"

        android:layout_width="wrap_content"

        android:layout_height="wrap_content"

        android:layout_marginLeft="15dp"

        android:text="@string/hello_world"/>

    <Button android:text="Button1"

        android:layout_gravity="center"

        android:layout_width="wrap_content"

        android:layout_height="wrap_content"/>

</LinearLayout>
relative_layout1.xml
<RelativeLayout xmlns:android="http://schemas.android.com/apk/res/android"

    xmlns:tools="http://schemas.android.com/tools"

    android:layout_width="match_parent"

    android:layout_height="match_parent"

    android:paddingLeft="2dp"

    android:paddingRight="2dp">

    <Button

        android:id="@+id/cancelButton"

        android:layout_width="wrap_content"

        android:layout_height="wrap_content"

        android:text="Cancel" />

    <Button

        android:id="@+id/saveButton"

        android:layout_width="wrap_content"

        android:layout_height="wrap_content"

        android:layout_toRightOf="@id/cancelButton"

        android:text="Save" />

	<ImageView

        android:layout_width="150dp"

        android:layout_height="150dp"

        android:layout_marginTop="230dp"

        android:padding="4dp"

        android:layout_below="@id/cancelButton"

        android:layout_centerHorizontal="true"

        android:src="@android:drawable/ic_btn_speak_now"

	/>

    <LinearLayout

        android:id="@+id/filter_button_container"

        android:layout_width="match_parent"

        android:layout_height="wrap_content"

        android:layout_alignParentBottom="true"

        android:gravity="center|bottom"

	    android:background="@android:color/white"

        android:orientation="horizontal" >

        <Button

            android:id="@+id/filterButton"

            android:layout_width="wrap_content"

            android:layout_height="fill_parent"

            android:text="Filter" />

        <Button

            android:id="@+id/shareButton"

            android:layout_width="wrap_content"

            android:layout_height="fill_parent"

            android:text="Share" />

        <Button

            android:id="@+id/deleteButton"

            android:layout_width="wrap_content"

            android:layout_height="fill_parent"

            android:text="Delete" />

    </LinearLayout>

</RelativeLayout>
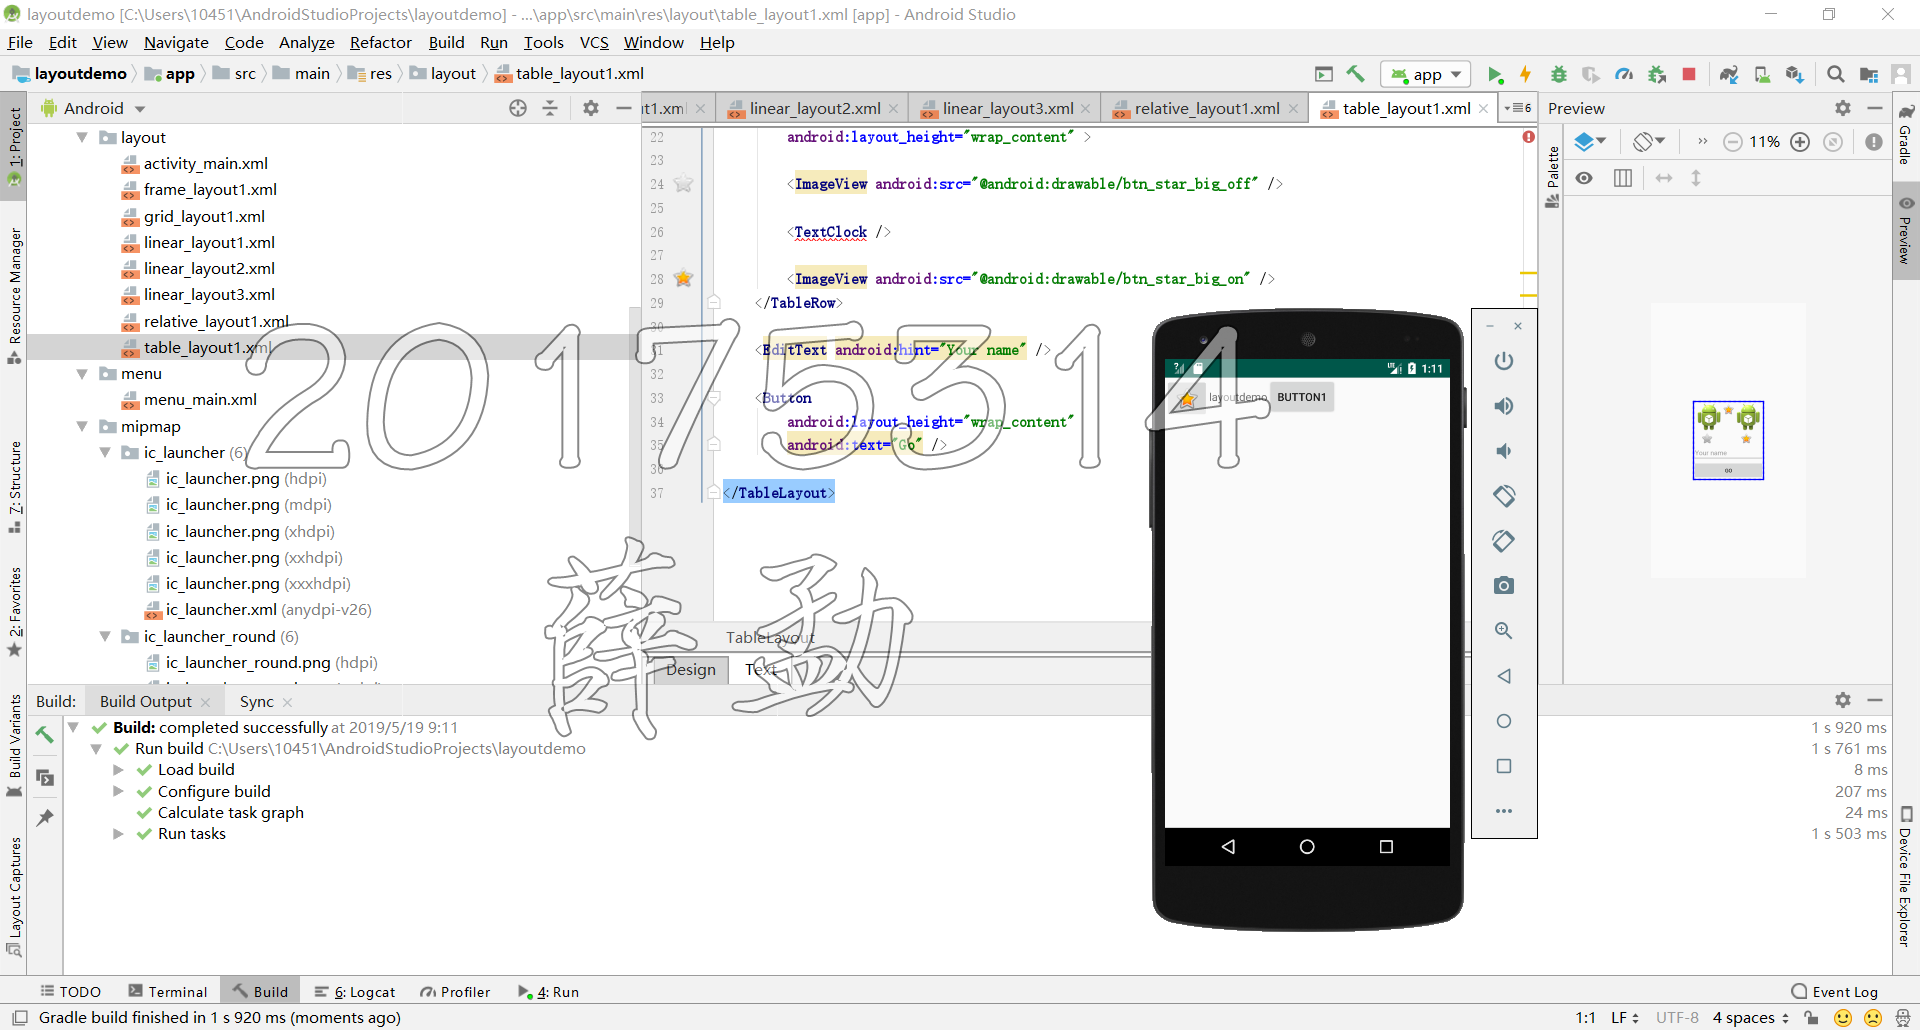
table_layout1.xml
<TableLayout xmlns:android="http://schemas.android.com/apk/res/android"

    android:layout_width="wrap_content"

    android:layout_height="wrap_content"

    android:layout_gravity="center" >

    <TableRow

        android:id="@+id/tableRow1"

        android:layout_width="500dp"

        android:layout_height="wrap_content"

        android:padding="5dip" >

        <ImageView android:src="@drawable/ic_launcher" />

        <ImageView android:src="@android:drawable/btn_star_big_on" />

        <ImageView android:src="@drawable/ic_launcher" />

    </TableRow>

    <TableRow

        android:id="@+id/tableRow2"

        android:layout_width="wrap_content"

        android:layout_height="wrap_content" >

        <ImageView android:src="@android:drawable/btn_star_big_off" />

        <TextClock />

        <ImageView android:src="@android:drawable/btn_star_big_on" />

    </TableRow>

    <EditText android:hint="Your name" />

    <Button

        android:layout_height="wrap_content"

        android:text="Go" />

</TableLayout>
- 运行结果:
(五)事件处理测试
- 参考《Java和Android开发学习指南(第二版)(EPUBIT,Java for Android 2nd)》第二十八章:
- 构建项目,运行教材相关代码
- 提交代码运行截图和码云Git链接,截图要有学号水印,否则会扣分
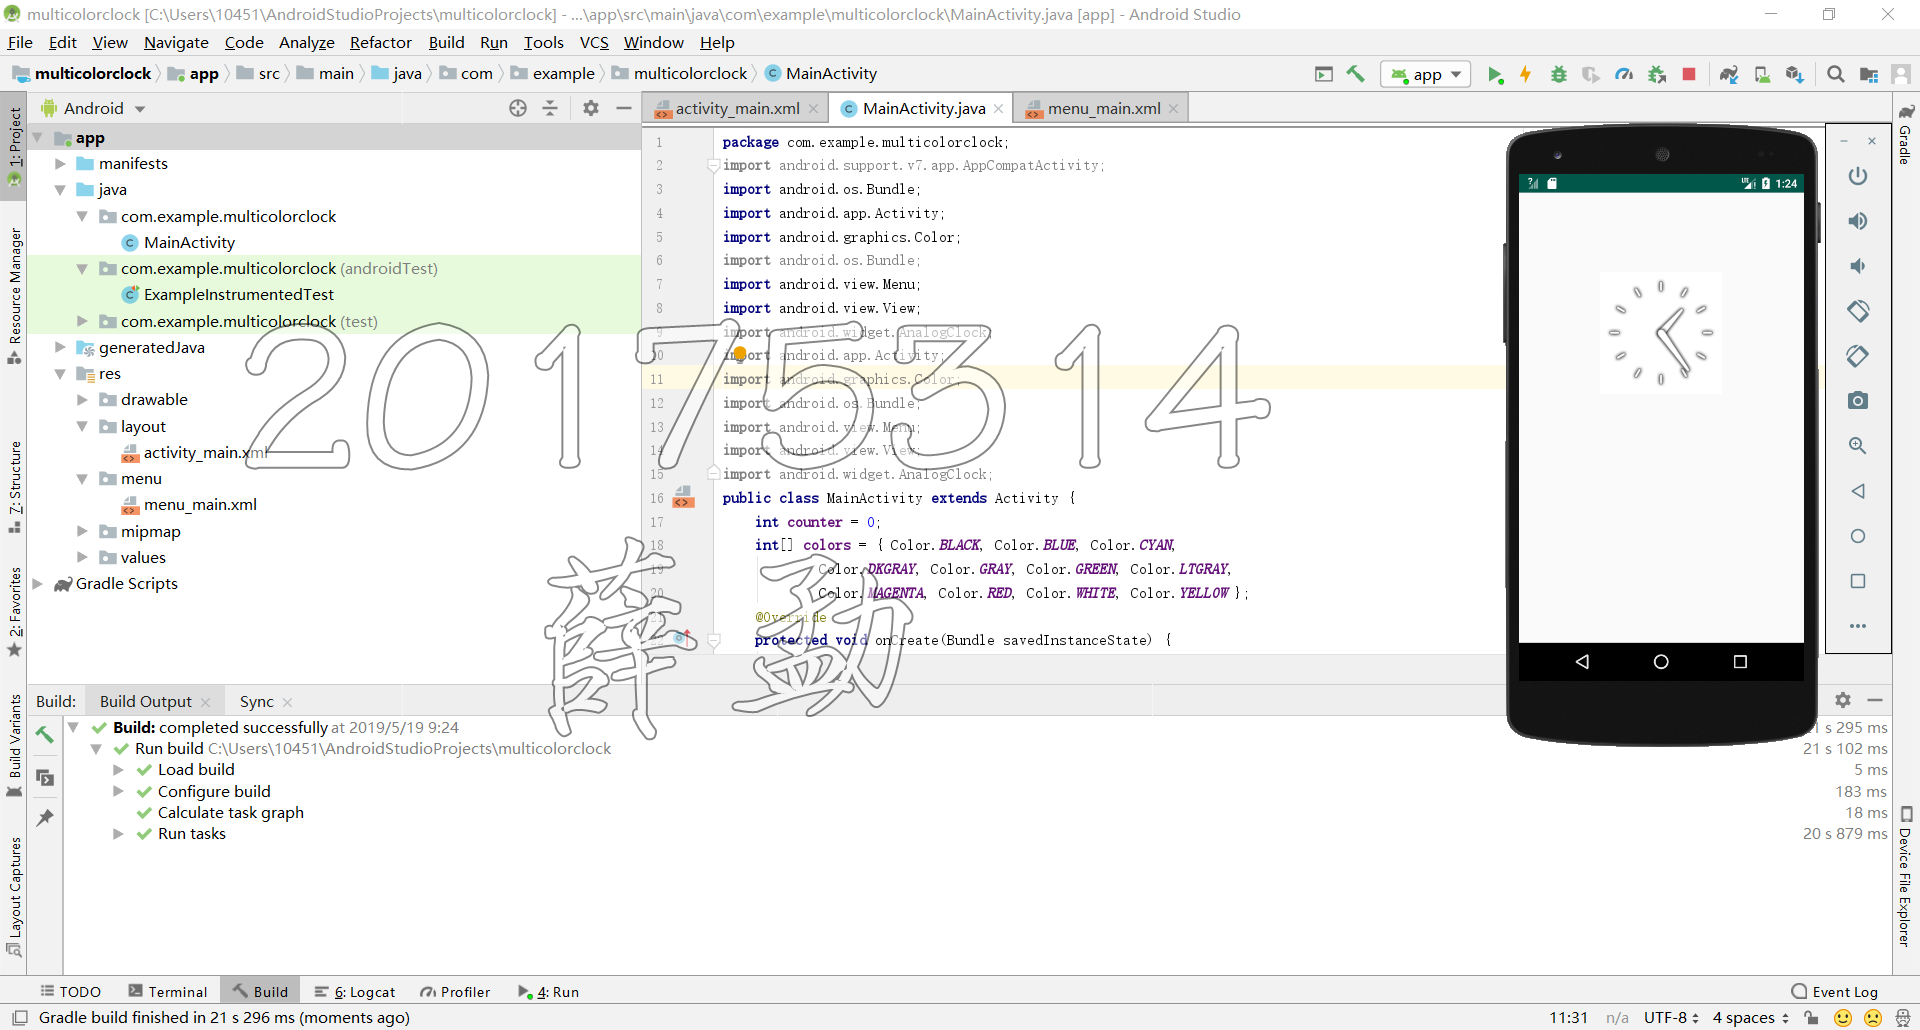
**MainActivity.java**
package com.example.multicolorclock;
import android.support.v7.app.AppCompatActivity;
import android.os.Bundle;
import android.app.Activity;
import android.graphics.Color;
import android.os.Bundle;
import android.view.Menu;
import android.view.View;
import android.widget.AnalogClock;
import android.app.Activity;
import android.graphics.Color;
import android.os.Bundle;
import android.view.Menu;
import android.view.View;
import android.widget.AnalogClock;
public class MainActivity extends Activity {
int counter = 0;
int[] colors = { Color.BLACK, Color.BLUE, Color.CYAN,
Color.DKGRAY, Color.GRAY, Color.GREEN, Color.LTGRAY,
Color.MAGENTA, Color.RED, Color.WHITE, Color.YELLOW };
@Override
protected void onCreate(Bundle savedInstanceState) {
super.onCreate(savedInstanceState);
setContentView(R.layout.activity_main);
}
@Override
public boolean onCreateOptionsMenu(Menu menu) {
// Inflate the menu; this adds items to the action bar if it
// is present.
getMenuInflater().inflate(R.menu.menu_main, menu);
return true;
}
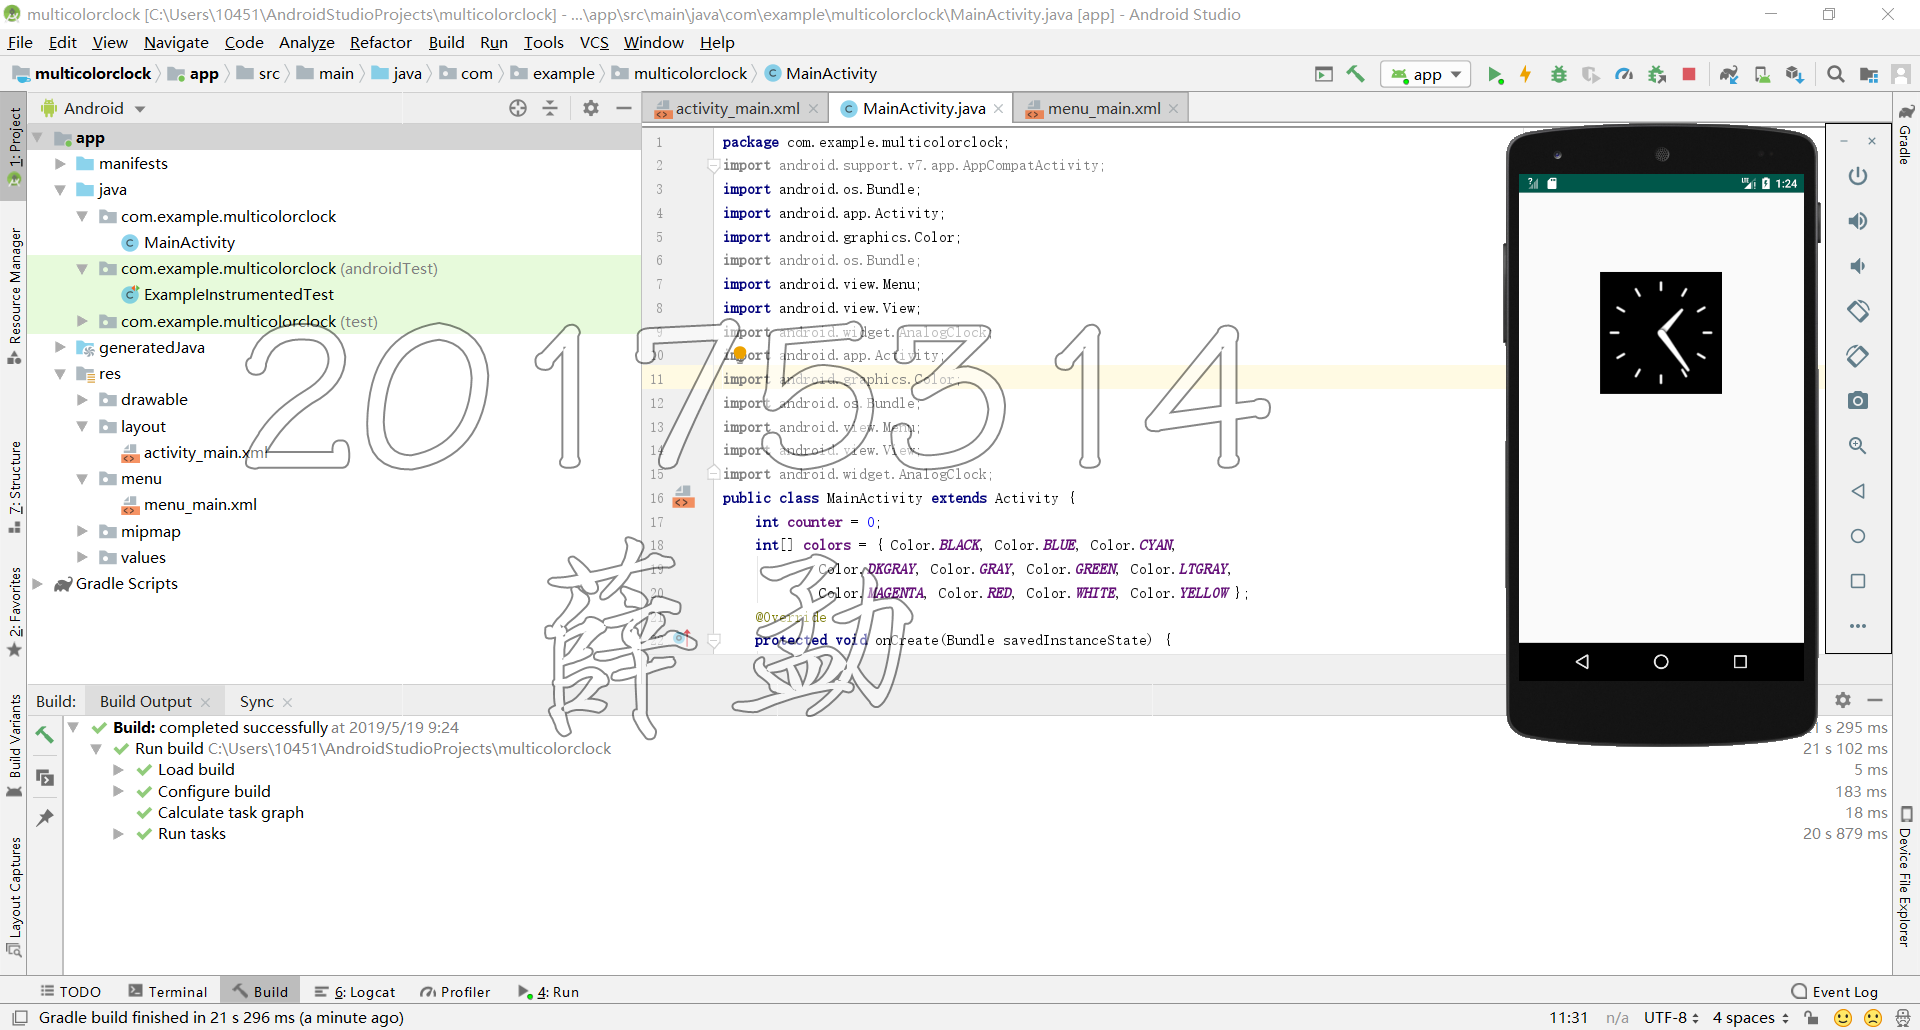
public void changeColor(View view) {
if (counter == colors.length) {
counter = 0;
}
view.setBackgroundColor(colors[counter++]);
}
}
activity_main.xml
<RelativeLayout

    xmlns:android="http://schemas.android.com/apk/res/android"

    xmlns:tools="http://schemas.android.com/tools"

    android:layout_width="match_parent"

    android:layout_height="match_parent"

    android:paddingBottom="10dp"

    android:paddingLeft="10dp"

    android:paddingRight="10dp"

    android:paddingTop="10dp"

    tools:context=".MainActivity">

    <AnalogClock

        android:id="@+id/analogClock1"

        android:layout_width="wrap_content"

        android:layout_height="wrap_content"

        android:layout_alignParentTop="true"

        android:layout_centerHorizontal="true"

        android:layout_marginTop="90dp"

        android:onClick="changeColor"

        />

</RelativeLayout>
- 运行结果:
- 触摸变色:
四、遇到的问题
《Java和Android开发学习指南(第二版)(EPUBIT,Java for Android 2nd)》
pdf格式已存入我的百度网盘,单击此处输入提取码:yky5即可下载
五、感想与收获
因为本周需要准备信安大赛的知识问答环节,还参加系里快闪视频制作导致学习时间非常紧张,而本次实验的周期也仅一周,导致这次实验报告提交时间非常接近deadline。
通过本次实验学习了是AndroidStudio的基本使用,重点在于简单修改代码并运行验证程序。
鉴于未来一年大创NFC访客系统开发项目的完成也需要坚实的Android开发基础,所以即使时间十分有限我还是非常认真的完成了本次实验。
第一次接触Android Studio有很多地方不了解,初期遇到很多问题,但是收获很大,在第一次运行成功后看到虚拟的安卓机上的程序还是很有成就感的,对我而言这可能是实验中最有趣的一次。
六、码云链接
七、Personal Software Process时间
| 步骤 | 耗时 | 百分比 |
|---|---|---|
| 需求分析 | 40 | 10% |
| 设计 | 120 | 30% |
| 代码实现 | 150 | 37.5% |
| 测试 | 40 | 10% |
| 分析总结 | 50 | 12.5% |
八、参考资料
Android新手如何学习开发一款app?
Android开发简易教程
看我是如何快速学习android开发的(一)
20175314 实验四 Android开发基础的更多相关文章
- 20145213 《Java程序设计》实验四 Android开发基础
20145213 <Java程序设计>实验四 Android开发基础 说在前面的话 不同以往实验,对于这次实验具体内容我是比较茫然的.因为点我,打开实验四的链接居然能飘出一股熟悉的味道,这 ...
- 实验四 Android开发基础
实验四 Android开发基础 实验内容 1.安装Android Studio 2.运行安卓AVD模拟器 3.使用安卓运行出虚拟手机并显示HelloWorld以及自己的学号 (一)SDK的安装 (二) ...
- 20145337实验四Android开发基础
20145337实验四Android开发基础 实验内容 基于Android Studio开发简单的Android应用并部署测试; 了解Android组件.布局管理器的使用: 掌握Android中事件处 ...
- 20145225《Java程序设计》 实验四 Android开发基础
20145225<Java程序设计> 实验四 Android开发基础 实验报告 实验内容 安装Android Studio 运行安卓AVD模拟器 使用安卓运行出虚拟手机并显示HelloWo ...
- 20145208 实验四 Android开发基础
20145208 实验四 Android开发基础 安装Android Studio 安装的具体步骤在老师的链接中已经很详细了,在此就不做赘述了. 在此提出我觉得安装的时候需要注意的两个地方 一是安装地 ...
- 20145215实验四 Android开发基础
20145215实验四 Android开发基础 实验内容 基于Android Studio开发简单的Android应用并部署测试; 了解Android组件.布局管理器的使用: 掌握Android中事件 ...
- 20165223 实验四 Android开发基础
实验四 Android开发基础 目录 一.实验报告封面 二.具体实验内容 (一)Android Stuidio的安装测试 (二)Activity测试 (三)UI测试 (四)布局测试 (五)教材代码测试 ...
- 20155324 《Java程序设计》实验四 Android开发基础
20155324 <Java程序设计>实验四 Android开发基础 实验内容 1.基于Android Studio开发简单的Android应用并部署测试; 2.了解Android.组件. ...
- 20155228 实验四 Android开发基础
20155228 实验四 Android开发基础 实验内容 1.基于Android Studio开发简单的Android应用并部署测试; 2.了解Android.组件.布局管理器的使用: 3.掌握An ...
随机推荐
- 从零认识 DOM (一): 对象及继承关系
先上图为敬! 说明: 图中包括了大部分 DOM 接口及对象, 其中: 青色背景为接口, 蓝色背景为类, 灰色背景表示为 ECMAScript 中的对象 忽略了一部分对象, 包括: HTML/SVG 的 ...
- 利用GitHub制作在线炫酷简历
首先我们先体验一下炫酷简历.然后决定我们要不要使用. https://jessezhao1990.github.... 如何使用本项目部署你自己的在线简历 1. 书写简历 在src文件夹里面有个con ...
- 前端开发--nginx篇
安装和启动 Mac上搭建nginx教程 通过Homebrew 安装nginx brew install nginx 配置 添加配置文件在 /usr/local/etc/nginx/servers 目录 ...
- "长辈牌"电子产品:有一种评论朋友圈叫给你打电话
一.长辈们使用电子产品的姿势集合 先问你一个问题:「怎么下载搜狗输入法?」 (非广告) 摁?看到这篇文章的你可能都有点懵,不就下载安装就完了吗?但是,真的就只是这样吗? 前一段时间,当家里的长辈问到我 ...
- java 几种锁实现
public class SyncronizedTest { private int value = 1; private AtomicInteger value1 = new AtomicInteg ...
- disruptor 多生产者多消费者实战 四
一.创建event类 Order public class Order { private String id; private String name; private double price; ...
- SPI总线传输的4种模式
概述 在芯片的资料上,有两个非常特殊的寄存器配置位,分别是 CPOL (Clock POlarity)和 CPHA (Clock PHAse). CPOL配置SPI总线的极性 CPHA配置SPI总线的 ...
- url,href和src的区别,defer和async的区别
URL(Uniform Resource Locator):统一资源定位符,互联网上的每个文件都有一个唯一的URL,基本URL包含协议,IP地址,路径和文件名. 重点:herf和src的区别 href ...
- 使用java短信验证
package cn.geekss.util; import java.io.BufferedReader;import java.io.InputStreamReader;import java.i ...
- seo搜索优化技巧02-seo问答推广怎么做?
问答推广就是以用户的角度去提问,这些问题内容就是用户搜索想要知道的.简单来说通过第三方平台站在用户的角度去帮助客户解答问题,同时附带自身的品牌和产品信息就是问答推广. 常见的问答平台有百度知道. ...