004-Spring boot 快速入门-项目搭建与启动、SpringBootApplication、启动图标
一、官方地址
Spring:http://spring.io/
Spring Project:http://spring.io/projects
Spring boot:https://projects.spring.io/spring-boot/
帮助文档:https://docs.spring.io/spring-boot/docs/1.5.9.RELEASE/reference/htmlsingle/
二、项目搭建
方式一、项目搭建继承父pom方式【不推荐】
1)新建maven项目→使用默认配置即可

定义好项目名称等
这里packaging必须选择jar而不是war,spring boot项目最终会打成一个jar包而不是war包
2)修改jdk版本
    <properties>

        <java.version>1.8</java.version>

        <project.build.sourceEncoding>UTF-8</project.build.sourceEncoding>

        <maven.compiler.source>1.8</maven.compiler.source>

        <maven.compiler.target>1.8</maven.compiler.target>

    </properties>
3)增加父pom引入
    <parent>

        <groupId>org.springframework.boot</groupId>

        <artifactId>spring-boot-starter-parent</artifactId>

        <version>1.5.9.RELEASE</version>

    </parent>
在pom的dependencies增加依赖
        <dependency>

            <groupId>org.springframework.boot</groupId>

            <artifactId>spring-boot-starter</artifactId>

        </dependency>
4)增加启动类
@SpringBootApplication

public class App {

    @Bean

    public Runnable createRunnable() {

        return () -> {

            System.out.println("spring boot is running");

        };

    }

    public static void main(String[] args) {

        ConfigurableApplicationContext context = SpringApplication.run(App.class, args);

        context.getBean(Runnable.class).run();

        System.out.println(context.getBean(User.class));

    }

}
方式二、使用spring-boot-dependencies【推荐】
第一步、第二步、第四步同方式一
3)增加spring-boot-dependencies
    <dependencyManagement>

        <dependencies>

            <dependency>

                <groupId>org.springframework.boot</groupId>

                <artifactId>spring-boot-dependencies</artifactId>

                <version>1.5.9.RELEASE</version>

                <type>pom</type>

                <scope>import</scope>

            </dependency>

        </dependencies>

    </dependencyManagement>
在pom的dependencies增加依赖
        <dependency>

            <groupId>org.springframework.boot</groupId>

            <artifactId>spring-boot-starter</artifactId>

        </dependency>
注意:一般dependency不需要配置版本因为在dependencyManagement已经默认了版本
三、浅析
@SpringBootApplication是spring boot最重要的一个注解,用于快捷配置启动类
默认扫描包的路径是当前包下面的所有路径,可以通过修改scanBasePackages修改扫描路径
exclude:排除
excludeName:根据类名排除
2、三个关键的注解
在注解@SpringBootApplication,上有三个关键的注解
@SpringBootConfiguration

@EnableAutoConfiguration

@ComponentScan(excludeFilters = {

        @Filter(type = FilterType.CUSTOM, classes = TypeExcludeFilter.class),

        @Filter(type = FilterType.CUSTOM, classes = AutoConfigurationExcludeFilter.class) })
@ComponentScan:用注解配置实现自动扫描,默认会扫描当前包和所有子包,和xml配置自动扫描效果一样,@Filter是排除了两个系统类
@EnableAutoConfiguration:实现自动配置
@SpringBootConfiguration:同spring中的@Configuration几乎一致,标记当前类是一个配置类,就像xml配置文件,而现在是用java配置文件,效果是一样的
@Bean:就是在spring配置文件中声明了一个bean,同xml一致。
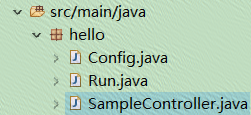
一般项目结构,共三个文件,启动类、配置类、业务类

注意:如果示例比较简单可以直接使用ComponentScan注解即可。没有用到enable特性
@ComponentScan

public class App2 {

    @Bean

    public Runnable createRunnable() {

        return () -> {

            System.out.println("spring boot is running");

        };

    }

    public static void main(String[] args) {

        ConfigurableApplicationContext context = SpringApplication.run(App2.class, args);

        context.getBean(Runnable.class).run();

        System.out.println(context.getBean(User.class));

    }

}
3、启动
方法一、SpringApplication.run(App2.class, args);
这里默认会将第一个参数的类默认变为配置类@Configuration
@ComponentScan

public class App2 {

    @Bean

    public Runnable createRunnable() {

        return () -> {

            System.out.println("spring boot is running");

        };

    }

    public static void main(String[] args) {

        ConfigurableApplicationContext context = SpringApplication.run(App2.class, args);

        context.getBean(Runnable.class).run();

        System.out.println(context.getBean(User.class));

    }

}
方法二、
@ComponentScan

public class App3 {

    @Bean

    public Runnable createRunnable() {

        return () -> {

            System.out.println("spring boot is running");

        };

    }

    public static void main(String[] args) {

        // SpringApplication app = new SpringApplication(App3.class);

        SpringApplication app = new SpringApplication();

        Set<Object> sets = new HashSet<>();

        sets.add(App3.class);

        app.setSources(sets);

        ConfigurableApplicationContext context = app.run(App3.class, args);

        context.getBean(Runnable.class).run();

        System.out.println(context.getBean(User.class));

    }

}
四、启动时候Spring图标控制
1.关闭
application.setBannerMode(Banner.Mode.OFF);
2.改变启动样式文本
默认:在classpath下增加banner.txt文件
短歌行
作者:曹操
对酒当歌,人生几何!
譬如朝露,去日苦多。
慨当以慷,忧思难忘。
何以解忧?唯有杜康。
青青子衿,悠悠我心。
但为君故,沉吟至今。
呦呦鹿鸣,食野之苹。
我有嘉宾,鼓瑟吹笙。
明明如月,何时可掇?
忧从中来,不可断绝。
越陌度阡,枉用相存。
契阔谈,心念旧恩。
月明星稀,乌鹊南飞。
绕树三匝,何枝可依?
山不厌高,海不厌深。
周公吐哺,天下归心。
即可。前提是不关闭。
自定义:也可以在application.properties中修改文件路径以及编码,默认是utf-8
banner.location=mybanner.txt

banner.charset=GBK
3.改变启动样式文件格式图片
springboot支持图片的banner,将图片放置在classpath,图片格式jpg、png、gif
默认:名称是banner.jpg或其他格式
自定义:也可以在application.properties中修改文件路径
banner.image.location=my.jpg
004-Spring boot 快速入门-项目搭建与启动、SpringBootApplication、启动图标的更多相关文章
- Spring Boot 快速入门
Spring Boot 快速入门 http://blog.csdn.net/xiaoyu411502/article/details/47864969 今天给大家介绍一下Spring Boot MVC ...
- Spring Boot快速入门(二):http请求
原文地址:https://lierabbit.cn/articles/4 一.准备 postman:一个接口测试工具 创建一个新工程 选择web 不会的请看Spring Boot快速入门(一):Hel ...
- spring boot入门教程——Spring Boot快速入门指南
Spring Boot已成为当今最流行的微服务开发框架,本文是如何使用Spring Boot快速开始Web微服务开发的指南,我们将使创建一个可运行的包含内嵌Web容器(默认使用的是Tomcat)的可运 ...
- Spring Boot 快速入门 史上最简单
1.Spring Boot 概述 Spring Boot 是所有基于 Spring 开发的项目的起点.Spring Boot 的设计是为了让你尽可能快的跑起来 Spring 应用程序并且尽可能减少你的 ...
- Spring Boot 快速入门(IDEA)
从字面理解,Boot是引导的意思,因此SpringBoot帮助开发者快速搭建Spring框架:SpringBoot帮助开发者快速启动一个Web容器:SpringBoot继承了原有Spring框架的优秀 ...
- 基于Spring boot的web项目搭建教程(一)
前言: 本教程参考了大量前辈的代码,在此不方便一一列举.本教程使用IDEA开发工具搭建项目,对于本人的IDEA已经集成了某些插件,比如Lombok,Thymeleaf,yml等插件,这些插件不在文中提 ...
- 笔记61 Spring Boot快速入门(一)
IDEA+Spring Boot快速搭建 一.IDEA创建项目 略 项目创建成功后在resources包下,属性文件application.properties中,把数据库连接属性加上,同时可以设置服 ...
- spring boot快速入门 1 :创建项目、 三种启动项目方式
准备工作: (转载)IDEA新建项目时,没有Spring Initializr选项 最近开始使用IDEA作为开发工具,然后也是打算开始学习使用spring boot. 看着博客来进行操作上手sprin ...
- Spring Boot 快速入门笔记
Spirng boot笔记 简介 Spring Boot是由Pivotal团队提供的全新框架,其设计目的是用来简化新Spring应用的初始搭建以及开发过程.该框架使用了特定的方式来进行配置,从而使开发 ...
随机推荐
- Flutter——Padding组件
在 html 中常见的布局标签都有 padding 属性,但是 Flutter 中很多 Widget 是没有 padding 属性.这个时候我们可以用 Padding 组件处理容器与子元素直接的间距. ...
- 八:MVC初始化数据库
生成数据库策略: CreateDatabaseIfNotExists:方法会在没有数据库时创建一个,这是默认行为. DropCreateDatabaseIfModelChanges:如果我们在在模型改 ...
- 反编译DLL并修改DLL中的内容
使用场景:针对当前用户因不愿意进行软件版本升级,但又希望可以解决当前问题,此时可以考虑通过反编辑DLL进行修改内容,然后重新生成新的DLL 操作步骤: 1.首先使用ILSpy.exe反编译DLL,查看 ...
- 为什么Microsoft Office 2016安装时不能自选安装组件和安装路径?
使用特别版本的安装镜像文件 SW_DVD5_Office_Professional_Plus_2016_64Bit_ChnSimp_MLF_X20-42426.iso,请自行搜索和下载 文件: SW_ ...
- python打包工具distutils、setuptools的使用
python中安装包的方式有很多种: 源码包:python setup.py install 在线安装:pip install 包名(linux) / easy_install 包名(window) ...
- 鼠标点击自定义文字展现特效JS代码
JS特效使用方法 只需将如下JS代码放到</body>之前就好了 var a_idx = 0; jQuery(document).ready(function($) { $("b ...
- springboot 项目报错问题的解决
报错如下: java.lang.IllegalStateException: Failed to load ApplicationContext at org.springframework.test ...
- use redir to make port redirecting
Step 1: install redir apt-get update apt-get install redir -y Step2 : add port mapping redir --lport ...
- 压测工具ab的简单使用
apache benchmark(ab)是一种常见的压测工具,不仅可以对apache进行压测,也可以对nginx,tomcat,IIS等进行压测 安装 如果安装了apache,那么ab已经自带了,不需 ...
- spring的finishBeanFactoryInitialization方法分析
spring源码版本5.0.5 概述 该方法会实例化所有剩余的非懒加载单例 bean.除了一些内部的 bean.实现了 BeanFactoryPostProcessor 接口的 bean.实现了 Be ...
