Spring Boot 整合视图层技术,application全局配置文件
Spring Boot 整合视图层技术
Spring Boot 整合jsp

Spring Boot 整合Freemarker

Spring Boot 整合 Thymeleaf  (重点讲解,官方推荐)
Spring Boot 整合jsp
步骤:
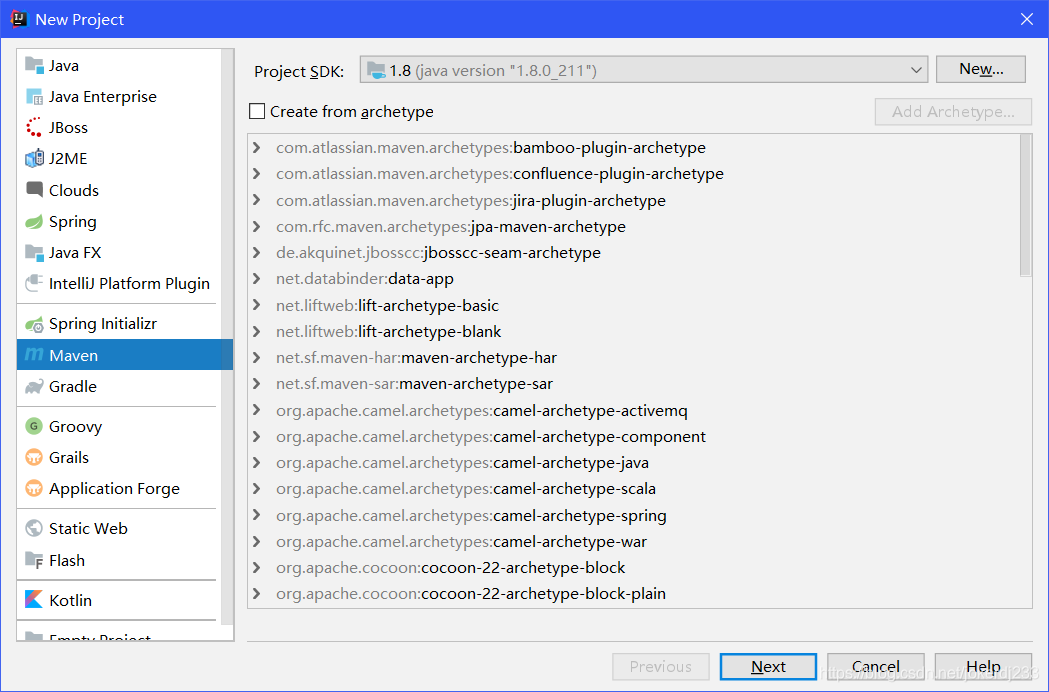
- 新建maven project的Spring Boot 的jar项目
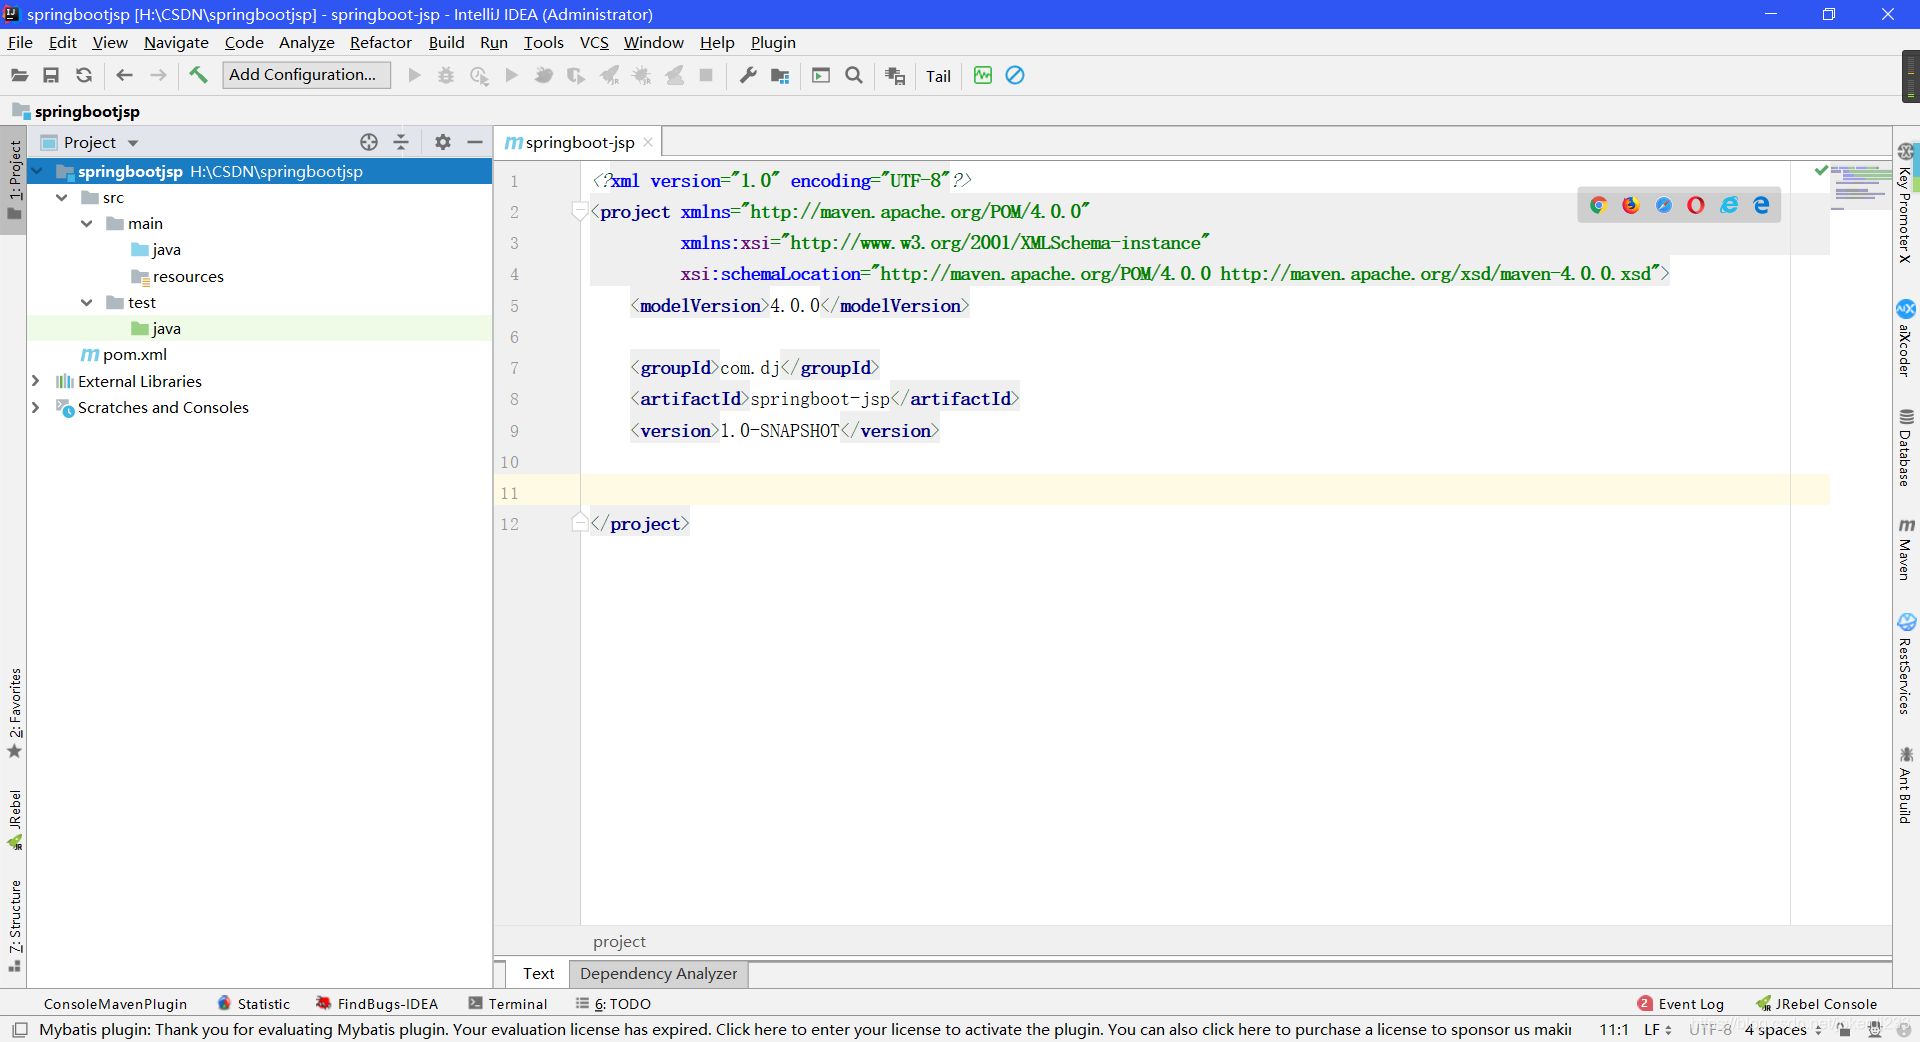
- 打开pom.xml文件 加入jsp依赖
代码如下:
 <parent>

        <groupId>org.springframework.boot</groupId>

        <artifactId>spring-boot-starter-parent</artifactId>

        <version>2.2.4.RELEASE</version>

    </parent>

    <dependencies>

        <!-- spring boot web启动器 -->

        <dependency>

            <groupId>org.springframework.boot</groupId>

            <artifactId>spring-boot-starter-web</artifactId>

        </dependency>

        <!-- jstl -->

        <dependency>

            <groupId>javax.servlet</groupId>

            <artifactId>jstl</artifactId>

        </dependency>

        <!-- jasper:jsp引擎 -->

        <dependency>

            <groupId>org.apache.tomcat.embed</groupId>

            <artifactId>tomcat-embed-jasper</artifactId>

        </dependency>

    </dependencies>
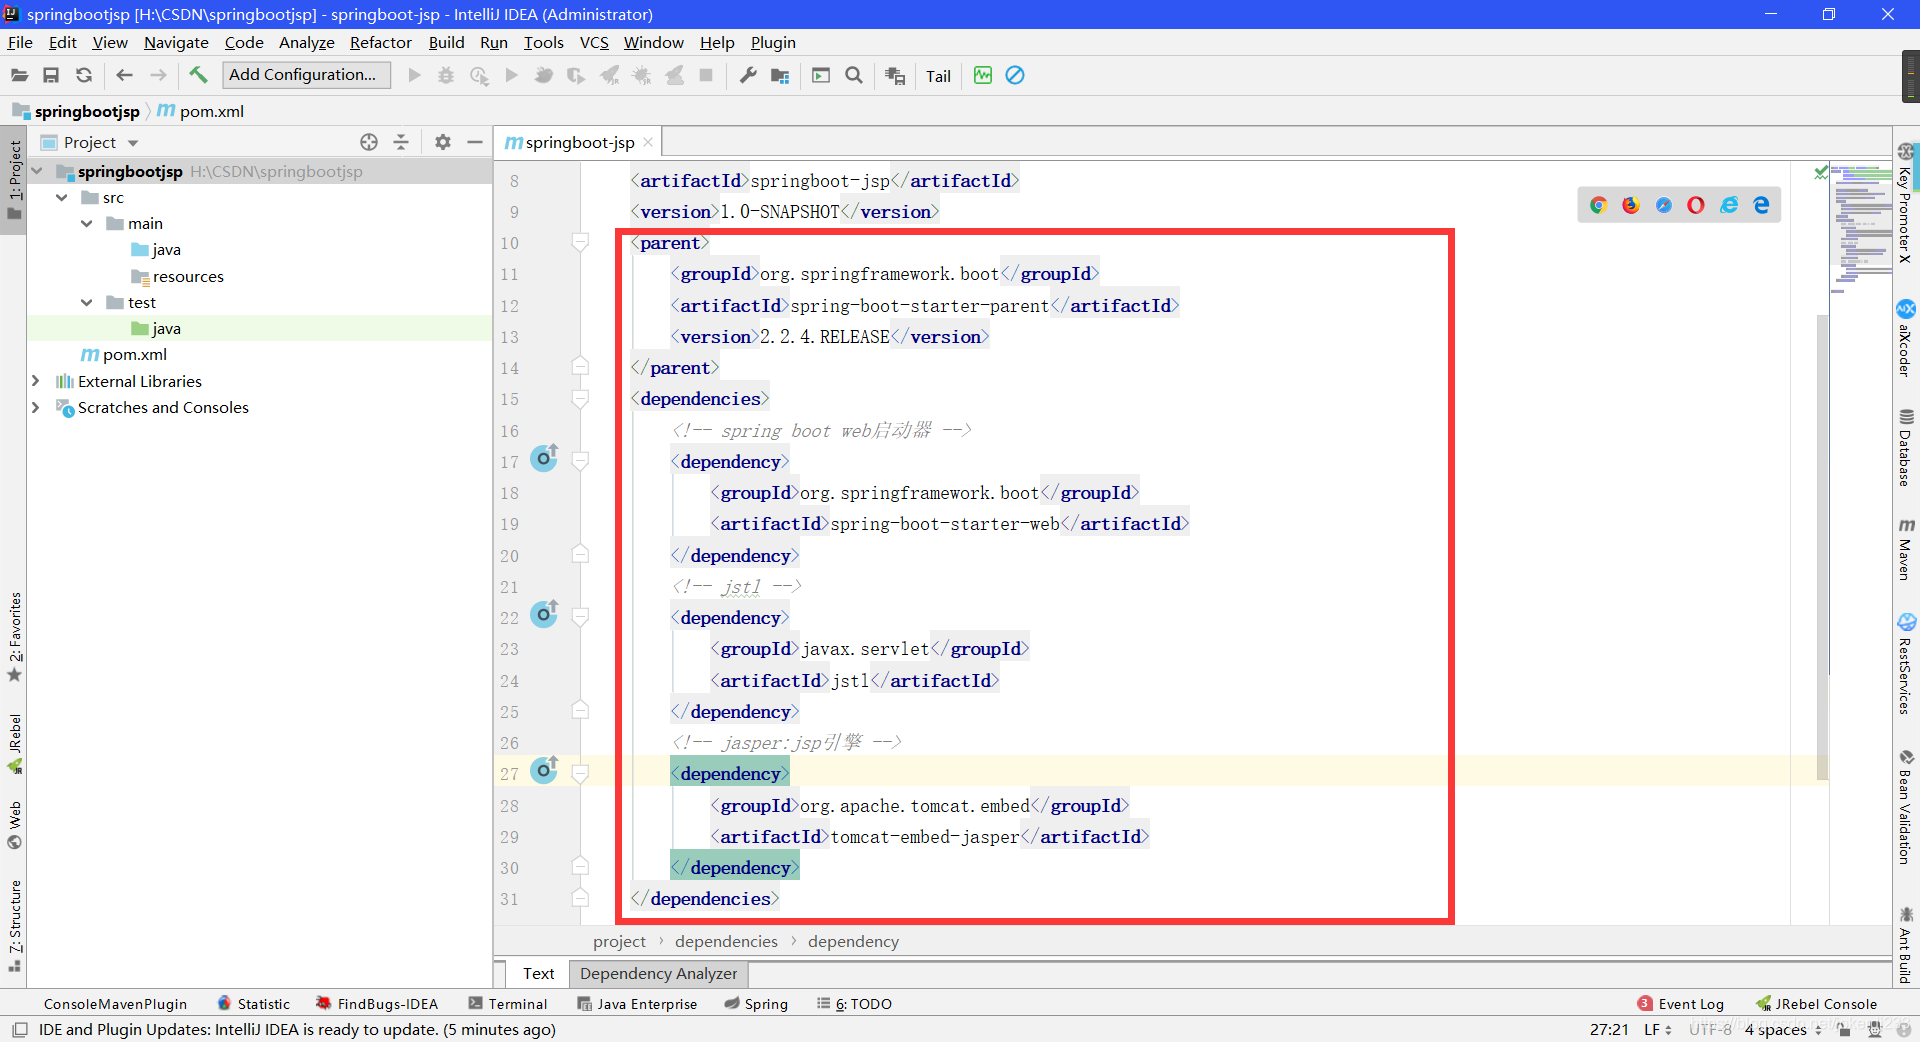
- 编写控制器Controller(不访问数据库)
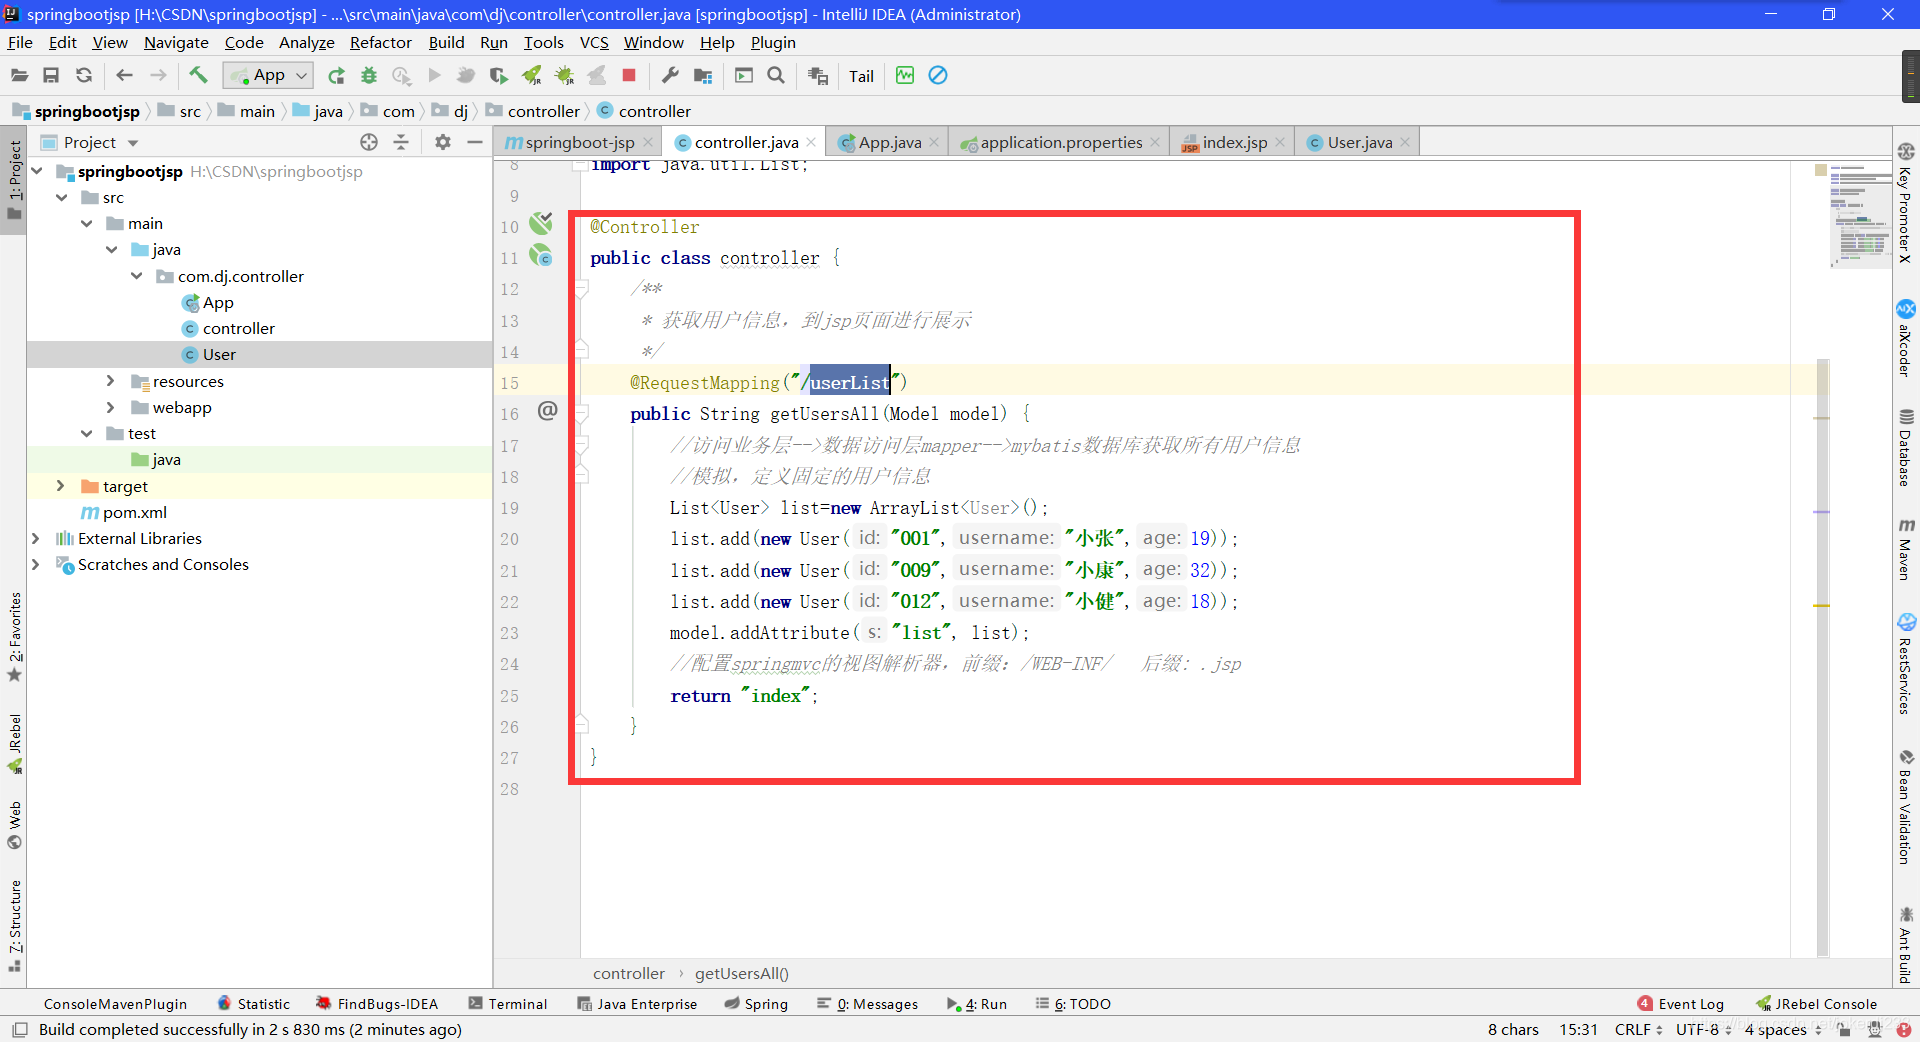
代码如下:
@Controller

public class UserController {

	/**

	 * 获取用户信息,到jsp页面进行展示

	*/

	@RequestMapping("/userList")

	public String getUsersAll(Model model) {

		//访问业务层-->数据访问层mapper-->mybatis数据库获取所有用户信息

		//模拟,定义固定的用户信息

		List<User> list=new ArrayList<User>();

		list.add(new User("007", "小张", 22));

		list.add(new User("009","小康",32));

		list.add(new User("012","小健",18));

		model.addAttribute("list", list);

		//配置springmvc的视图解析器,前缀:/WEB-INF/   后缀: .jsp

		return "index";

	}

}
- 创建Spring Boot的全局配置文件 application.properties
src/main/resources-->创建-->application.properties
Spring boot默认识别两个全局配置文件:application.properties和application.yml
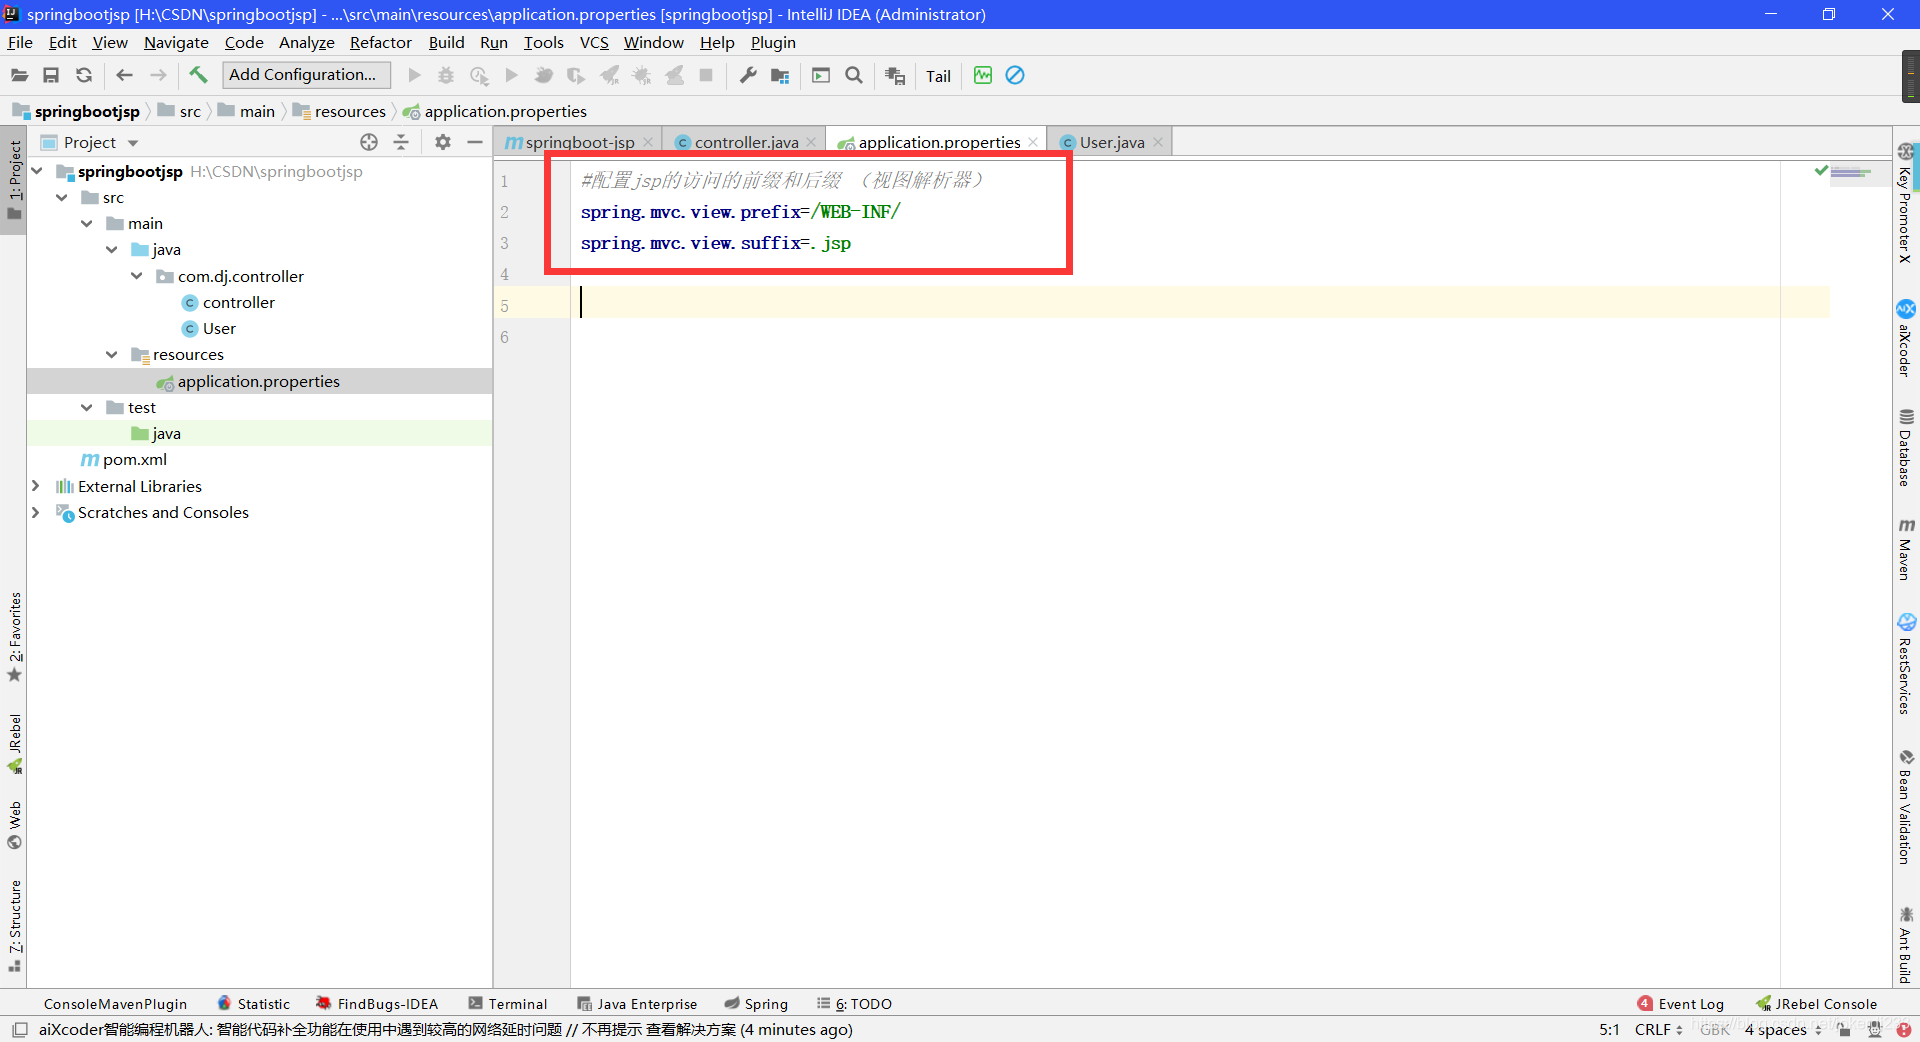
代码:
#配置jsp的访问的前缀和后缀 (视图解析器)

spring.mvc.view.prefix=/WEB-INF/

spring.mvc.view.suffix=.jsp
- 视图层 jsp
src/main-->webapp-->WEB-INF-->index.jsp
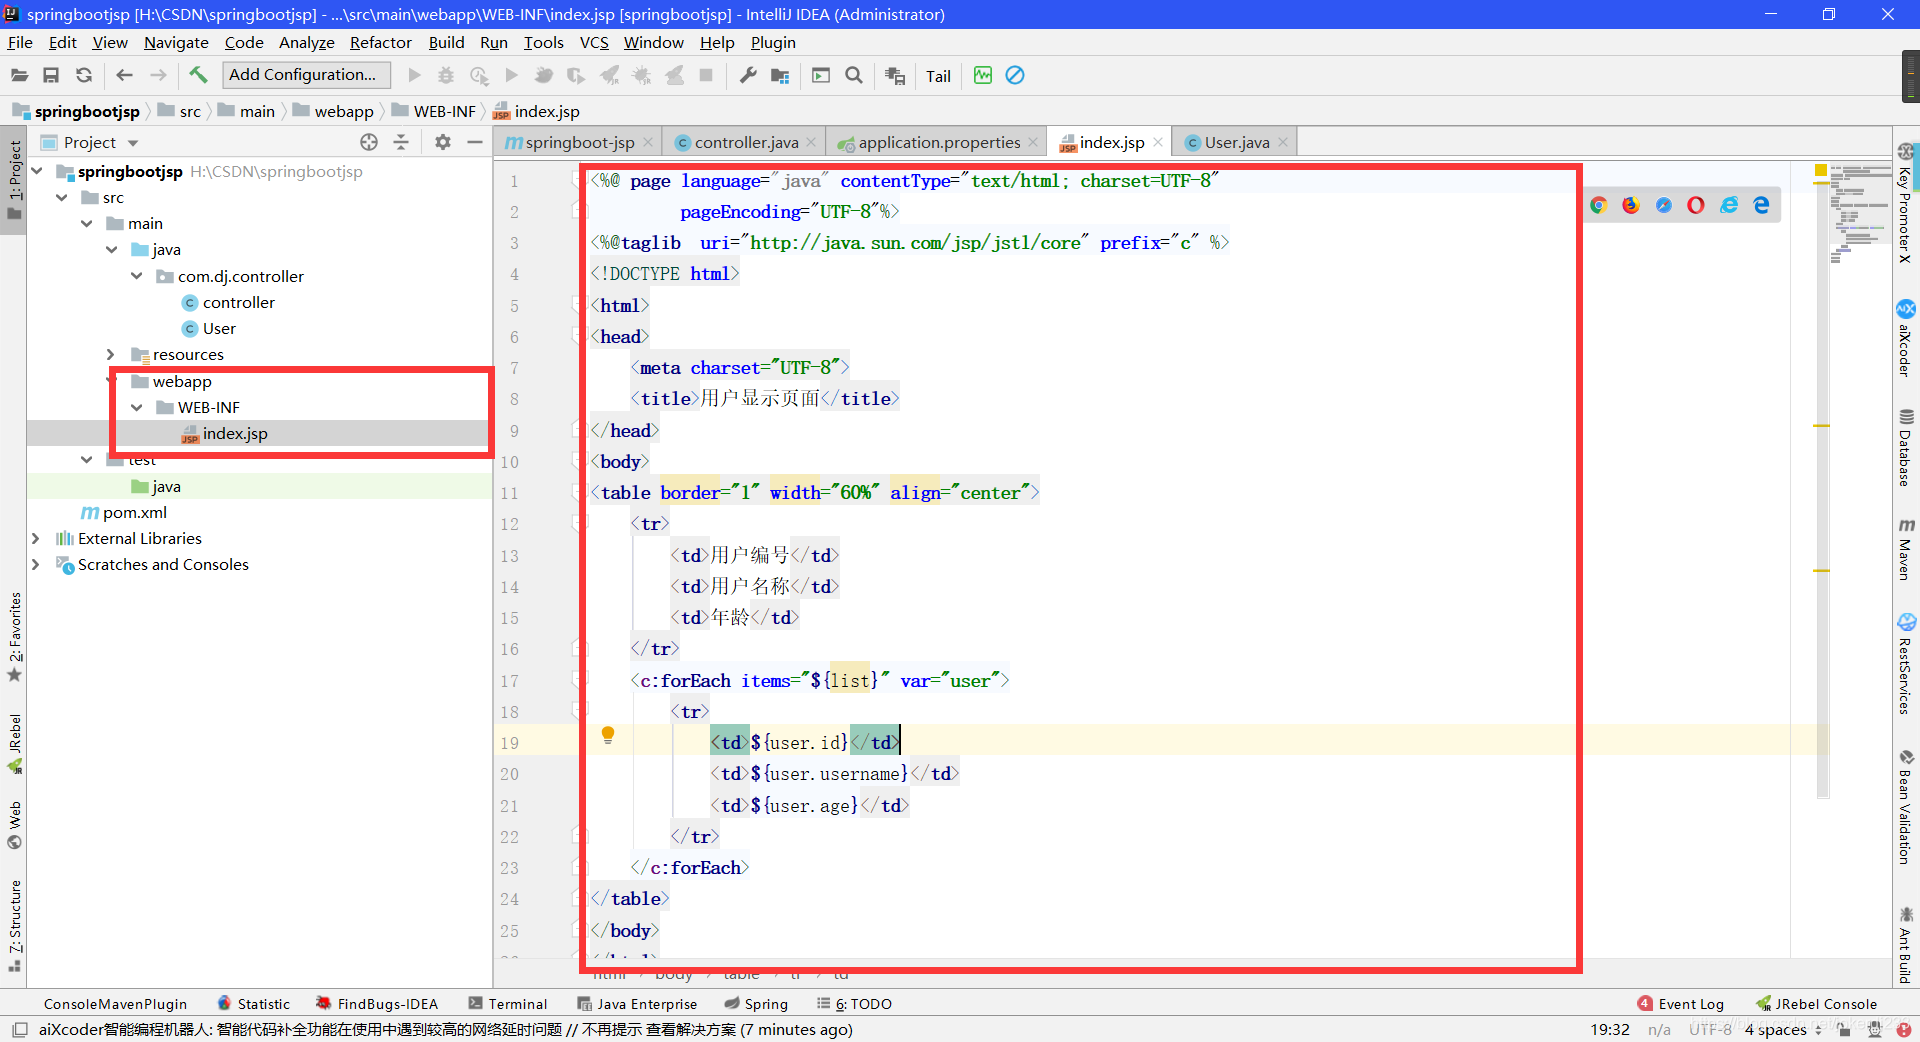
代码:
<%@ page language="java" contentType="text/html; charset=UTF-8"

         pageEncoding="UTF-8"%>

<%@taglib  uri="http://java.sun.com/jsp/jstl/core" prefix="c" %>

<!DOCTYPE html>

<html>

<head>

    <meta charset="UTF-8">

    <title>用户显示页面</title>

</head>

<body>

<table border="1" width="60%" align="center">

    <tr>

        <td>用户编号</td>

        <td>用户名称</td>

        <td>年龄</td>

    </tr>

    <c:forEach items="${list}" var="user">

        <tr>

            <td>${user.id}</td>

            <td>${user.username}</td>

            <td>${user.age}</td>

        </tr>

    </c:forEach>

</table>

</body>

</html>
- 启动类
@SpringBootApplication

public class App {

    public static void main(String[] args) {

        SpringApplication.run(App.class, args);

    }

}
- 运行 浏览器输入 localhost:8080/userList

Spring Boot 整合freemarker
- 创建maven project 的jar 的spring boot 项目 (步骤一样省略)
- 打开pom.xml,加入freemarker相关依赖
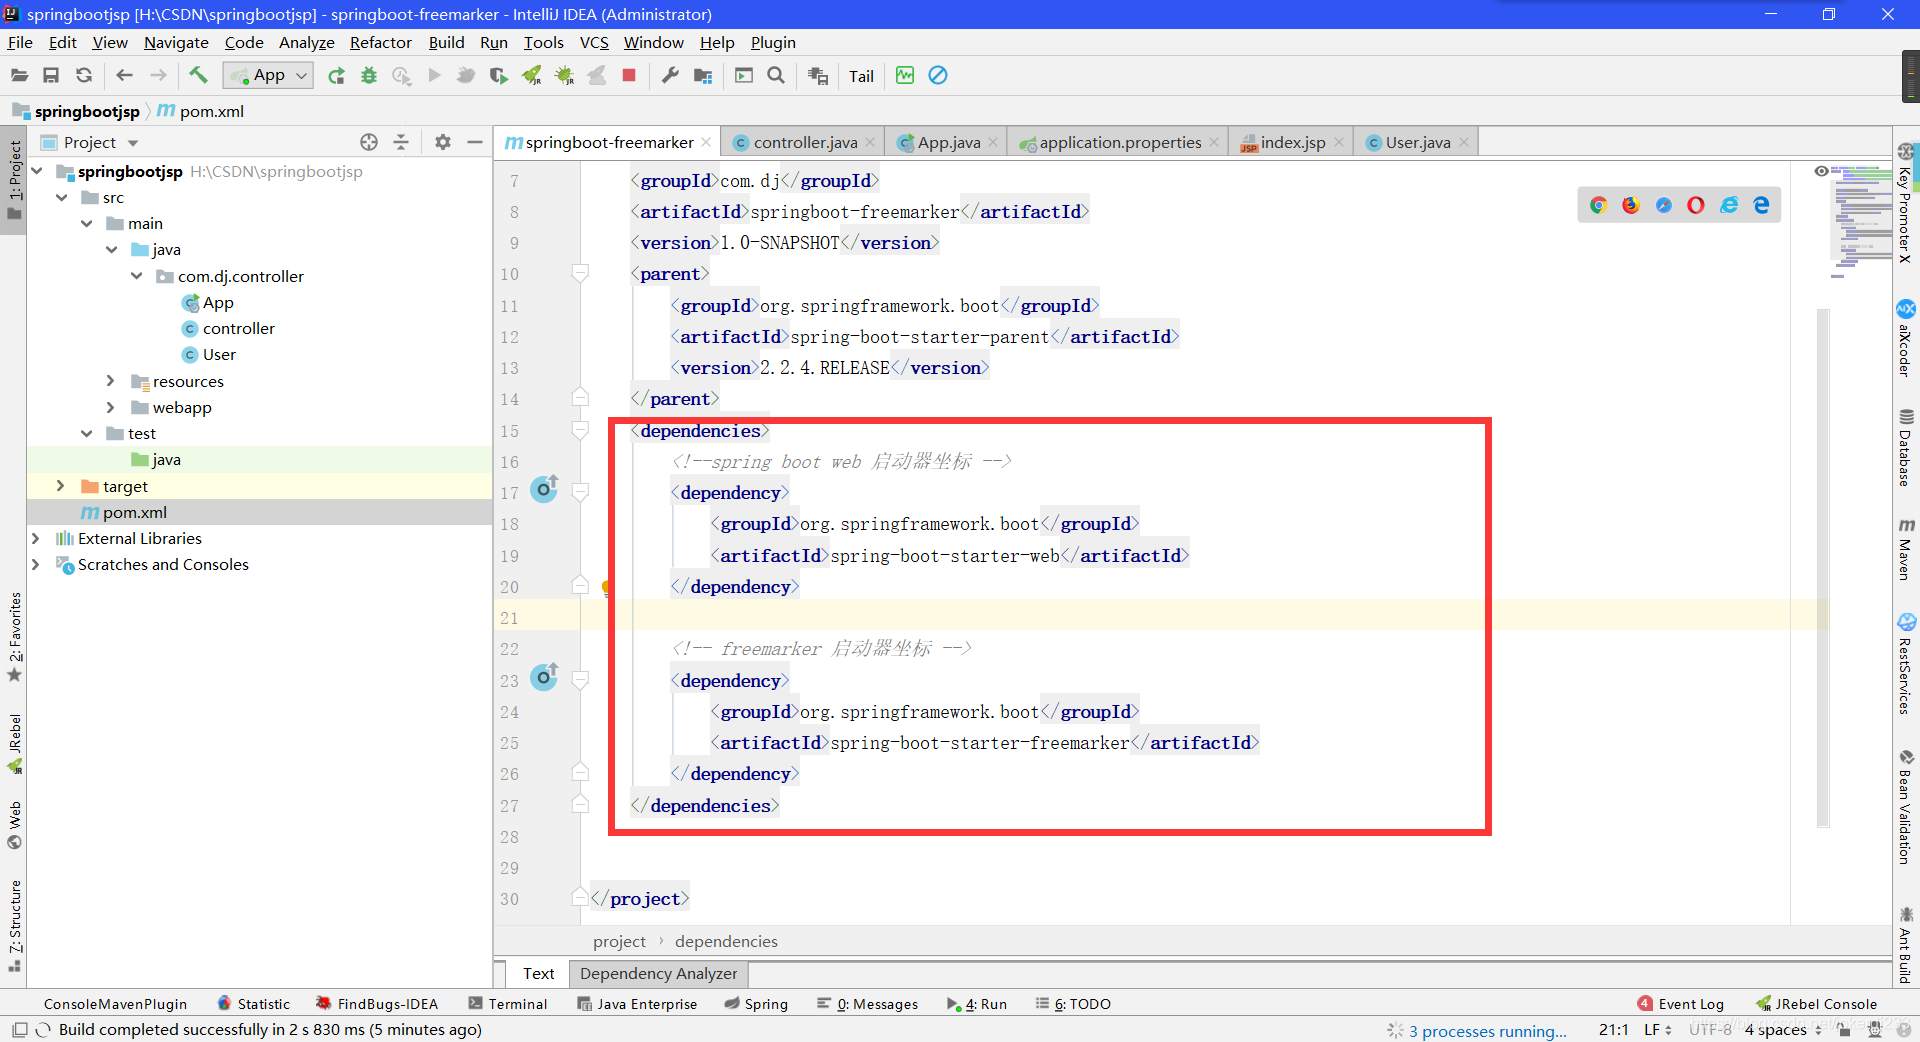
代码:
<dependencies>

     <!--spring boot web 启动器坐标 -->

     <dependency>

     	<groupId>org.springframework.boot</groupId>

    	<artifactId>spring-boot-starter-web</artifactId>

     </dependency>

     <!-- freemarker 启动器坐标 -->

     <dependency>

     	<groupId>org.springframework.boot</groupId>

    	<artifactId>spring-boot-starter-freemarker</artifactId>

     </dependency>

  </dependencies>
- 编写控制器Controller

- 视图层 freemarker
freemarker 页面必须放入src/main/resources下的templates目录下,并且页面的扩展名为:ftl

代码:
<!DOCTYPE html>

<html>

<head>

<meta charset="UTF-8">

<title>用户显示页面</title>

</head>

<body>

   <table border="1" width="60%" align="center">

       <tr>

       	  <td>用户编号</td>

       	  <td>用户名称</td>

       	  <td>年龄</td>

       </tr>

	   <!--freemarker获取request传过来的数据  <#数据类型  key类型 as 遍历元素名称>-->

	   <#list list as user>

	       <tr>

	       	  <td>${user.id}</td>

	       	  <td>${user.username}</td>

	       	  <td>${user.age}</td>

	       </tr>

	   </#list>

   </table>

</body>

<html>
- 创建Spring Boot的全局配置文件 application.properties
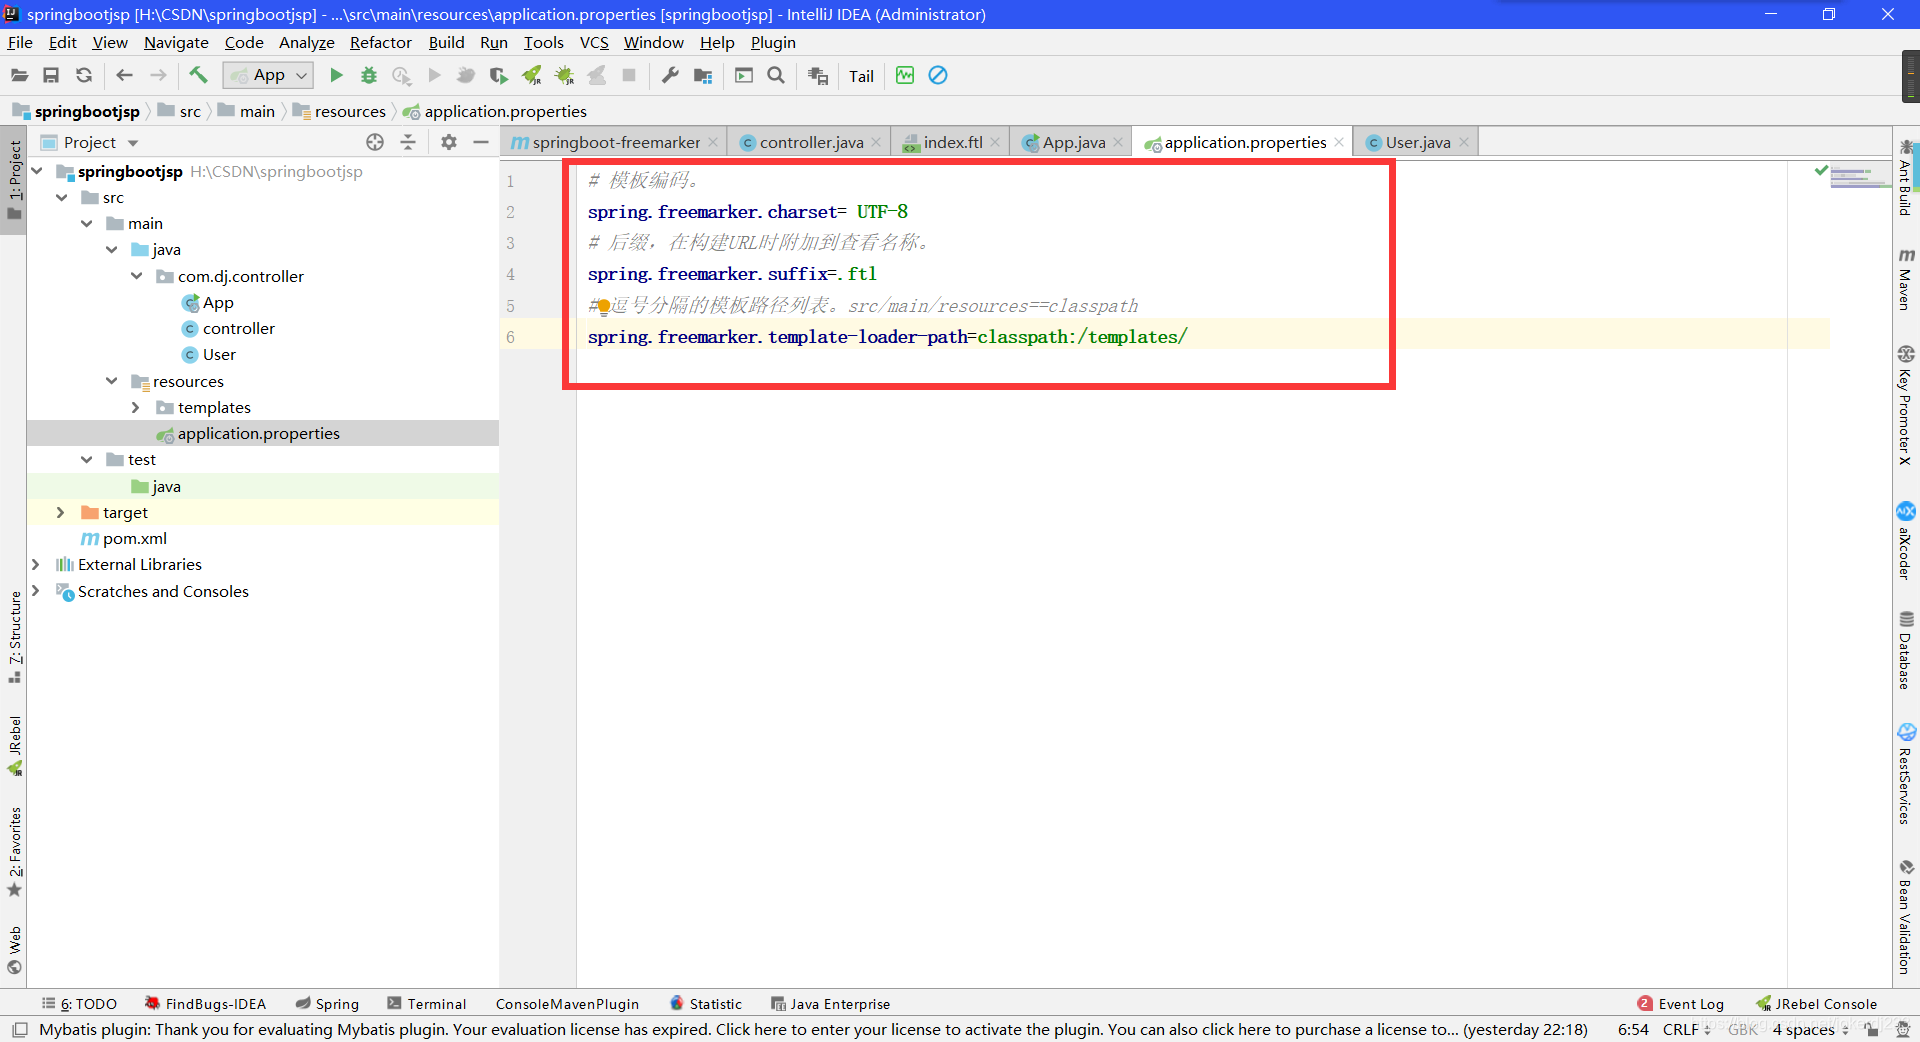
代码:
# 模板编码。

spring.freemarker.charset= UTF-8

# 后缀,在构建URL时附加到查看名称。

spring.freemarker.suffix=.ftl

# 逗号分隔的模板路径列表。src/main/resources==classpath

spring.freemarker.template-loader-path=classpath:/templates/

server.port=8081
- 启动类
@SpringBootApplication

public class App {

	public static void main(String[] args) {

		SpringApplication.run(App.class, args);

	}

}
运行

Spring Boot 整合视图层技术,application全局配置文件的更多相关文章
- Spring Boot 整合视图层技术
这一节我们主要学习如何整合视图层技术: Jsp Freemarker Thymeleaf 在之前的案例中,我们都是通过 @RestController 来处理请求,所以返回的内容为json对象.那么如 ...
- Spring Boot 整合Web 层技术(整合Servlet)
1 整合Servlet 方式一1.1通过注解扫描完成Servlet 组件的注册 1.1.1创建Servlet /*** 整合Servlet 方式一*/@WebServlet(name = & ...
- SpringBoot_整合视图层技术
SpringBoot整合视图层技术 在目前的企业级应用开发中,前后端分离是趋势,但是视图层技术还占有一席之地.Spring Boot对视图层技术提供了很好的支持,官方推荐使用的模板引擎是Thymele ...
- 黑马_13 Spring Boot:05.spring boot 整合其他技术
13 Spring Boot: 01.spring boot 介绍&&02.spring boot 入门 04.spring boot 配置文件 05.spring boot 整合其他 ...
- SpringBoot视图层技术
一.SpringBoot整合jsp 在maven的dependencies的依赖中除了springBoot启动器还要添加对jstl和jsp的依赖. <dependencies> <d ...
- Spring Boot整合Thymeleaf视图层
目录 Spring Boot整合Thymeleaf Spring Boot整合Thymeleaf 的项目步骤 Thymeleaf 语法详解 Spring Boot整合Thymeleaf Spring ...
- Spring Boot 整合 Elasticsearch,实现 function score query 权重分查询
摘要: 原创出处 www.bysocket.com 「泥瓦匠BYSocket 」欢迎转载,保留摘要,谢谢! 『 预见未来最好的方式就是亲手创造未来 – <史蒂夫·乔布斯传> 』 运行环境: ...
- Spring Boot整合Mybatis并完成CRUD操作
MyBatis 是一款优秀的持久层框架,被各大互联网公司使用,本文使用Spring Boot整合Mybatis,并完成CRUD操作. 为什么要使用Mybatis?我们需要掌握Mybatis吗? 说的官 ...
- Spring Boot(十四):spring boot整合shiro-登录认证和权限管理
Spring Boot(十四):spring boot整合shiro-登录认证和权限管理 使用Spring Boot集成Apache Shiro.安全应该是互联网公司的一道生命线,几乎任何的公司都会涉 ...
随机推荐
- python从一个目录中复制全部文件图片至另一个目录中,及删除指定目录中的图片
import shutil import os #目录自己改一下即可,复制 path = "./static/imgs/" new_path = "./static/up ...
- 今夜我懂了Lambda表达式_解析
现在时间午夜十一点~ 此刻的我血脉喷张,异常兴奋:因为专注得学习了一把java,在深入集合的过程中发现好多套路配合Lambda表达式真的是搜椅子,so开了个分支,决定从"只认得", ...
- Yuchuan_linux_C 编程之八 文件操作相关函数
一.整体大纲 st_mode整体介绍: st_mode详细介绍: 二. Linux文件操作相关函数 1. stat 作用:获得文件信息,也可以获取文件大小. 头文件 #include <sys/ ...
- AOP和spring AOP学习记录
AOP基本概念的理解 面向切面AOP主要是在编译期或运行时,对程序进行织入,实现代理, 对原代码毫无侵入性,不破坏主要业务逻辑,减少程序的耦合度. 主要应用范围: 日志记录,性能统计,安全控制,事务处 ...
- MacOS麦克风输入监听的方法
Windows上很多人都知道,然而实际上并没什么用——延迟太大,根本没法用. MacOS上有两种方法: QuickTime Player新建音频录制(不需要真的录音),如下图: 这个方法和Window ...
- markdown简明语法1
目录 Cmd Markdown 简明语法手册 1. 斜体和粗体 2. 分级标题 3. 外链接 4. 无序列表 5. 有序列表 6. 文字引用 7. 行内代码块 8. 代码块 9. 插入图像 Cmd M ...
- 调用系统的loading界面
//在状态栏显示一个圈圈转动 代表正在请求 [UIApplication sharedApplication].networkActivityIndicatorVisible = YES;
- Protocol buffers编写风格指南
原文链接:https://developers.google.com/protocol-buffers/docs/style Style Guide 本文说明了.proto文件的编写风格指南.遵循这些 ...
- OpenMP Programming
一.OpenMP概述 1.OpenMP应用编程接口API是在共享存储体系结构上的一个编程模型 2.包含 编译制导(compiler directive).运行库例程(runtime library). ...
- 基于linux下的NIST数字测试包安装过程
基于linux下的NIST数字测试包安装过程 1. 首先解决windows文件不能粘贴到Ubuntu的问题 选择利用VMware Tools进行解决 打开虚拟机VMware Workstation,启 ...