spring boot+mybatis+quartz项目的搭建完整版
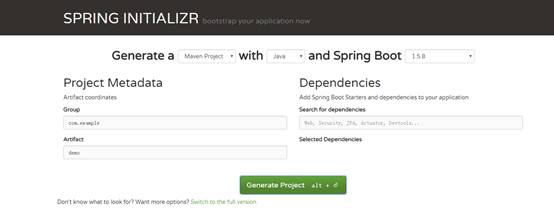
1. 利用spring boot提供的工具(http://start.spring.io/)自动生成一个标准的spring boot项目架构
2. 因为这里我们是搭建spring boot+mybatis+quartz架构,故在pom.xml文件中配置相关依赖
<dependencies>

		<dependency>

			<groupId>org.springframework.boot</groupId>

			<artifactId>spring-boot</artifactId>

			<version>1.5.8.RELEASE</version>

		</dependency>

		<dependency>

			<groupId>org.springframework.boot</groupId>

			<artifactId>spring-boot-starter</artifactId>

			<version>1.5.8.RELEASE</version>

		</dependency>

		<dependency>

			<groupId>org.springframework.boot</groupId>

			<artifactId>spring-boot-starter-web</artifactId>

			<version>1.5.8.RELEASE</version>

		</dependency>

		<dependency>

			<groupId>org.springframework.boot</groupId>

			<artifactId>spring-boot-starter-test</artifactId>

			<version>1.5.8.RELEASE</version>

			<scope>test</scope>

		</dependency>

		<dependency>

			<groupId>org.mybatis.spring.boot</groupId>

			<artifactId>mybatis-spring-boot-starter</artifactId>

			<version>1.0.0</version>

		</dependency>

		<!-- https://mvnrepository.com/artifact/mysql/mysql-connector-java -->

		<dependency>

			<groupId>mysql</groupId>

			<artifactId>mysql-connector-java</artifactId>

			<version>5.1.44</version>

		</dependency>

		<dependency>

			<groupId>com.alibaba</groupId>

			<artifactId>druid</artifactId>

			<version>1.0.11</version>

		</dependency>

		<dependency>

			<groupId>org.quartz-scheduler</groupId>

			<artifactId>quartz</artifactId>

			<version>1.8.5</version>

		</dependency>

		<dependency>

			<groupId>org.slf4j</groupId>

			<artifactId>slf4j-api</artifactId>

			<version>1.7.21</version>

		</dependency>

	</dependencies>
3. spring boot的理念是做到零配置,所以这里没有web.xml,只有一个application.yml的配置,这个时配置数据源及mybatis的mapper扫描路径
spring:

  datasource:

    url: jdbc:mysql://192.168.253.128/scheduler?useUnicode=true&characterEncoding=utf-8&autoReconnect=true&autoReconnectForPools=true

    username: sche

    password: sche

    # 使用druid数据源

    type: com.alibaba.druid.pool.DruidDataSource

    driver-class-name: com.mysql.jdbc.Driver

    filters: stat

    maxActive: 20

    initialSize: 1

    maxWait: 60000

    minIdle: 1

    timeBetweenEvictionRunsMillis: 60000

    minEvictableIdleTimeMillis: 300000

    validationQuery: select 'x'

    testWhileIdle: true

    testOnBorrow: false

    testOnReturn: false

    poolPreparedStatements: true

    maxOpenPreparedStatements: 20

  jobFactory:

    type: com.gary.operation.jobdemo.demo1.MyJobFactory

mybatis:

  mapper-locations: classpath:mapper/*.xml

  type-aliases-package: com.hq.dispach.entity
4. 这些基本的配置完成之后项目的结构如下

这里static目录是存放HTML,JavaScript等前端代码的
5. Spring boot web是不需要部署在Tomcat下的,因为自带了Tomcat,只需要执行主程序Application的main方法就可以了。但需要做些重要的配置
package com.hq.dispach;

import org.mybatis.spring.annotation.MapperScan;

import org.springframework.boot.SpringApplication;

import org.springframework.boot.autoconfigure.EnableAutoConfiguration;

import org.springframework.boot.autoconfigure.SpringBootApplication;

@SpringBootApplication

@EnableAutoConfiguration

@MapperScan("com.hq.dispach.dao")

public class DispachApplication {

	public static void main(String[] args) {

		SpringApplication.run(DispachApplication.class, args);

	}

}
这里的配置@SpringBootApplication是默认,注意第二个和第三个配置,如果缺少@MapperScan("com.hq.dispach.dao")配置则会出现dao无法注入到service的情况,如果@EnableAutoConfiguration缺少则会出现quartz任务调度里无法注入service,这里建议不管是什么应用程序都最好加上这个配置。
5. 接下来就是control,service,dao,mapper,scheduleTask的代码编写了
Control:
package com.hq.dispach.control;

import org.springframework.beans.factory.annotation.Autowired;

import org.springframework.web.bind.annotation.GetMapping;

import org.springframework.web.bind.annotation.PathVariable;

import org.springframework.web.bind.annotation.RequestMapping;

import org.springframework.web.bind.annotation.RestController;

import com.hq.dispach.entity.Sche;

import com.hq.dispach.service.ScheService;

@RestController

@RequestMapping("/scheControl")

public class ScheControl {

	@Autowired

	private ScheService scheService;

	@GetMapping("/addSche/{name}/{password}")

	public Sche findScheByNameAndPassword(@PathVariable("name") String name,

			@PathVariable("password") String password) {

		return scheService.findScheByNameAndPassword(name, password);

	}

}
Sevice:
package com.hq.dispach.service;

import com.hq.dispach.entity.Sche;

public interface ScheService {

	public Sche findScheByNameAndPassword(String name,String password);

	public String test();

}
Service实现
package com.hq.dispach.service.impl;

import org.springframework.beans.factory.annotation.Autowired;

import org.springframework.stereotype.Service;

import com.hq.dispach.dao.ScheMapper;

import com.hq.dispach.entity.Sche;

import com.hq.dispach.service.ScheService;

@Service("scheService")

public class ScheServiceImpl implements ScheService{

	@Autowired

	private ScheMapper scheMapper;

	public Sche findScheByNameAndPassword(String name, String password) {

		return scheMapper.findScheByNameAndPassword(name, password);

	}

	public String test() {

		return "schedules run";

	}

}
Dao:
package com.hq.dispach.dao;

import org.apache.ibatis.annotations.Param;

import com.hq.dispach.entity.Sche;

public interface ScheMapper {

	public Sche findScheByNameAndPassword(@Param("name") String name, @Param("password") String password);

}
Mapper:
<?xml version="1.0" encoding="UTF-8"?>

<!DOCTYPE mapper PUBLIC "-//mybatis.org//DTD Mapper 3.0//EN" "http://mybatis.org/dtd/mybatis-3-mapper.dtd" >

<mapper namespace="com.hq.dispach.dao.ScheMapper">

    <select id="findScheByNameAndPassword" resultType="com.hq.dispach.entity.Sche">

			SELECT t.`age`,t.`department`,t.`gendar`,t.`id`,t.`name`,t.`password`

			FROM sche t

			WHERE t.`name`=#{name} AND t.`password`=#{password}

    </select>

</mapper>
ScheduleTask:
package com.hq.dispach.schedule;

import org.springframework.beans.factory.annotation.Autowired;

import org.springframework.beans.factory.annotation.Configurable;

import org.springframework.scheduling.annotation.EnableScheduling;

import org.springframework.scheduling.annotation.Scheduled;

import org.springframework.stereotype.Component;

import com.hq.dispach.service.ScheService;

@Component

@Configurable

@EnableScheduling

public class ScheduledTasks{

	@Autowired

	private ScheService scheService;

    //每1分钟执行一次

    @Scheduled(cron = "0 */1 *  * * * ")

    public void reportCurrentByCron(){

    	System.out.println(scheService.test());

    }

}
Entity:
package com.hq.dispach.entity;

public class Sche {

	private String id;

	private String name;

	private String password;

	private String age;

	private String department;

	private String gendar;

	public String getId() {

		return id;

	}

	public void setId(String id) {

		this.id = id;

	}

	public String getName() {

		return name;

	}

	public void setName(String name) {

		this.name = name;

	}

	public String getPassword() {

		return password;

	}

	public void setPassword(String password) {

		this.password = password;

	}

	public String getAge() {

		return age;

	}

	public void setAge(String age) {

		this.age = age;

	}

	public String getDepartment() {

		return department;

	}

	public void setDepartment(String department) {

		this.department = department;

	}

	public String getGendar() {

		return gendar;

	}

	public void setGendar(String gendar) {

		this.gendar = gendar;

	}

}
6. 搭建好后启动application的main方法,通过页面访问control的URL可以获取数据库里的数据,同时quartz的定时任务会按照配置的时间定时执行
spring boot+mybatis+quartz项目的搭建完整版的更多相关文章
- spring Boot + MyBatis + Maven 项目,日志开启打印 sql
在 spring Boot + MyBatis + Maven 项目中,日志开启打印 sql 的最简单方法,就是在文件 application.properties 中新增: logging.leve ...
- myEclipse 搭建 Spring boot+myBatis+maven 项目流程
1.新建一个工程 new-->maven project-->next-->next-->在filter中搜索webapp-->group id.Artifact id- ...
- SSM Spring SpringMVC Mybatis框架整合Java配置完整版
以前用着SSH都是老师给配好的,自己直接改就可以.但是公司主流还是SSM,就自己研究了一下Java版本的配置.网上大多是基于xnl的配置,但是越往后越新的项目都开始基于JavaConfig配置了,这也 ...
- spring boot + mybatis + druid
因为在用到spring boot + mybatis的项目时候,经常发生访问接口卡,服务器项目用了几天就很卡的甚至不能访问的情况,而我们的项目和数据库都是好了,考虑到可能时数据库连接的问题,所以我打算 ...
- 【spring boot】5.spring boot 创建web项目并使用jsp作前台页面
贼烦的是,使用spring boot 创建web项目,然后我再idea下创建的,but 仅仅启动spring boot的启动类,就算整个项目都是好着的,就算是能够进入controller中,也不能成功 ...
- java 搭建新项目,最佳组合:spring boot + mybatis generator
java 搭建新项目,最佳组合:spring boot + mybatis generator
- spring boot+mybatis搭建项目
一.创建spring boot项目 1.File->New->Project 2.选择 Spring Initializr ,然后选择默认的 url 点击[Next]: 3.修改项目信息 ...
- 快速搭建一个Spring Boot + MyBatis的开发框架
前言:Spring Boot的自动化配置确实非常强大,为了方便大家把项目迁移到Spring Boot,特意总结了一下如何快速搭建一个Spring Boot + MyBatis的简易文档,下面是简单的步 ...
- Spring boot Mybatis 整合(完整版)
个人开源项目 springboot+mybatis+thymeleaf+docker构建的个人站点开源项目(集成了个人主页.个人作品.个人博客) 朋友自制的springboot接口文档组件swagge ...
随机推荐
- MySQL表与表之间的关系
表与表之间的关系 表1 foreign key 表2 则表1的多条记录对应表2的一条记录,即多对一 利用foreign key的原理我们可以制作两张表的多对多,一对一关系 多对多: 表1的多条记录可以 ...
- LOJ#2087 国王饮水记
解:这个题一脸不可做... 比1小的怎么办啊,好像没用,扔了吧. 先看部分分,n = 2简单,我会分类讨论!n = 4简单,我会搜索!n = 10,我会剪枝! k = 1怎么办,好像选的那些越大越好啊 ...
- python selectsort
# -*- coding: utf-8 -*-"""------------------------------------------------- File Name ...
- Java compiler 并行编译思考
一.问题 最近基于JSR269做的代码插桩有一个编译问题需要定位,而且问题不是每次都能复现,需要多编译几次才行,出问题的项目是Maven构建的,相对较大,每次构建耗时就比较长.所以我就想,是否有什么配 ...
- Apple Tree POJ - 2486 (树形dp)
题目链接: D - 树形dp POJ - 2486 题目大意:一颗树,n个点(1-n),n-1条边,每个点上有一个权值,求从1出发,走V步,最多能遍历到的权值 学习网址:https://blog.c ...
- 前后端分离--ajaxUpload异步上传文件成功,前端获取数据却失败的解决方案
转载:https://blog.csdn.net/baidu_32809053/article/details/78709951
- android的nfc卡模拟开发
这是andorid官方文档对于卡模拟方式的描述: https://developer.android.google.cn/guide/topics/connectivity/nfc/hce 有两种方式 ...
- 2018-2019 20165221 网络对抗 Exp5 MSF基础
2018-2019 20165221 网络对抗 Exp5 MSF基础 实践内容: 重点掌握metassploit的基本应用方式,重点常用的三种攻击方式的思路.具体需要完成: 一个主动攻击实践,如ms0 ...
- 论文笔记:Learning wrapped guidance for blind face restoration
这篇论文主要是讲人脸修复的,所谓人脸修复,其实就是将低清的,或者经过压缩等操作的人脸图像进行高清复原.这可以近似为针对人脸的图像修复工作.在图像修复中,我们都会假设退化的图像是高清图像经过某种函数映射 ...
- SpringBoot文件的上传与下载
⒈文件实体类 package cn.coreqi.security.entities; public class FileInfo { private String path; public File ...