spring boot IDEA 开发微服务(二)
https://www.cnblogs.com/spaceud/p/8097934.html
参考以上微博,自己实际操作步骤如下:
1~开发准备
JDK:1.8
Spring Boot:2.1.0
Spring Coud:Edgware.RELEASE
IDE:IntelliJ IDEA 2018
Maven:3.3.9
2~创建服务注册中心
File->New->Projects->Spring Initializr
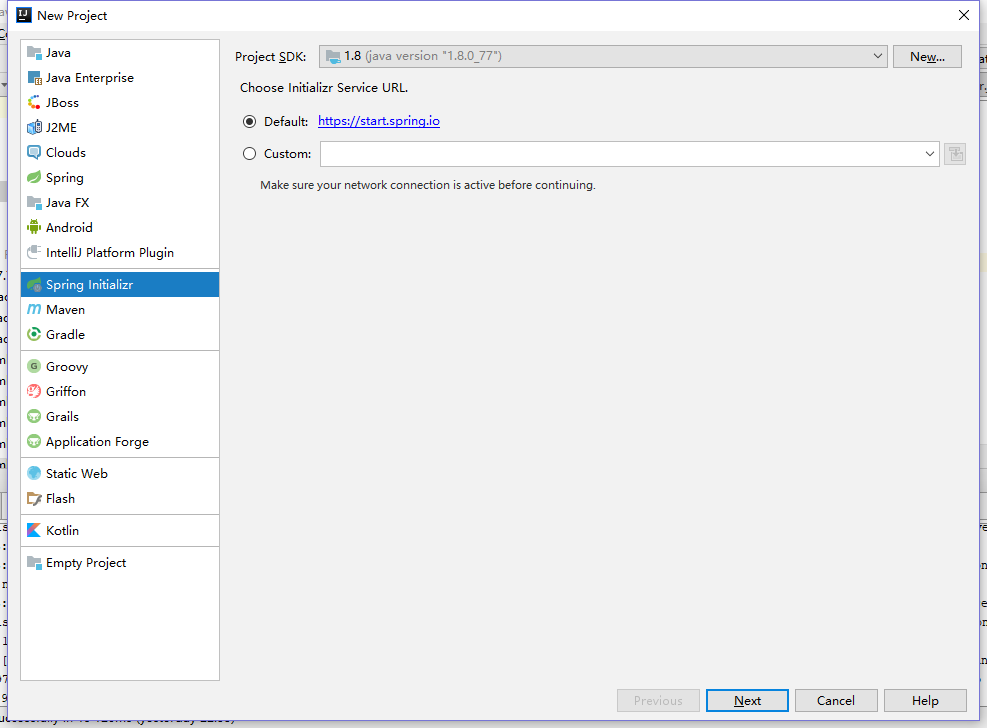
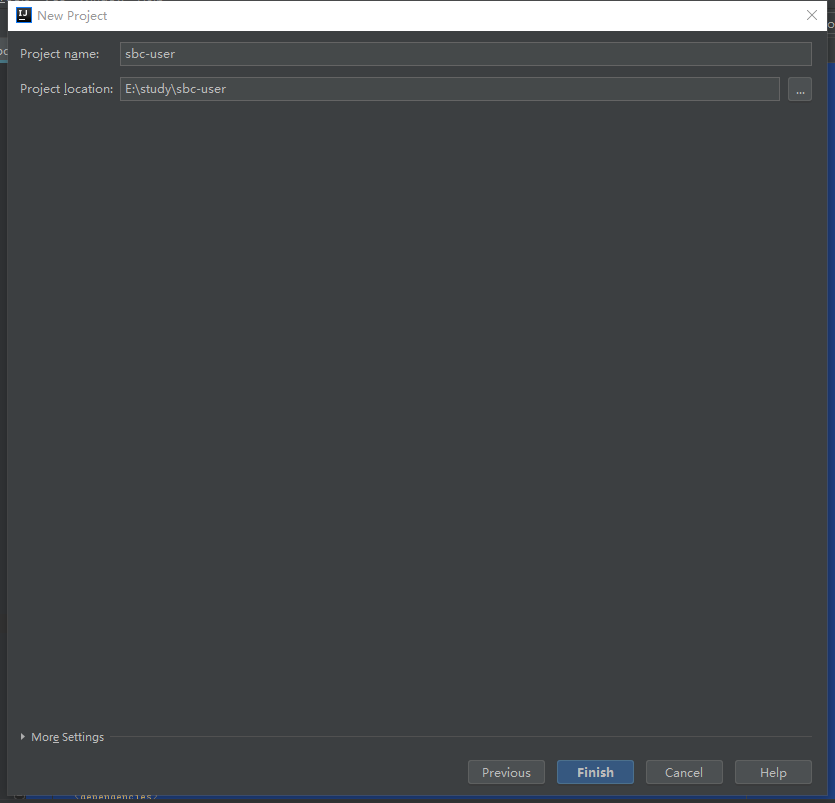
点击Next,填写信息如下:
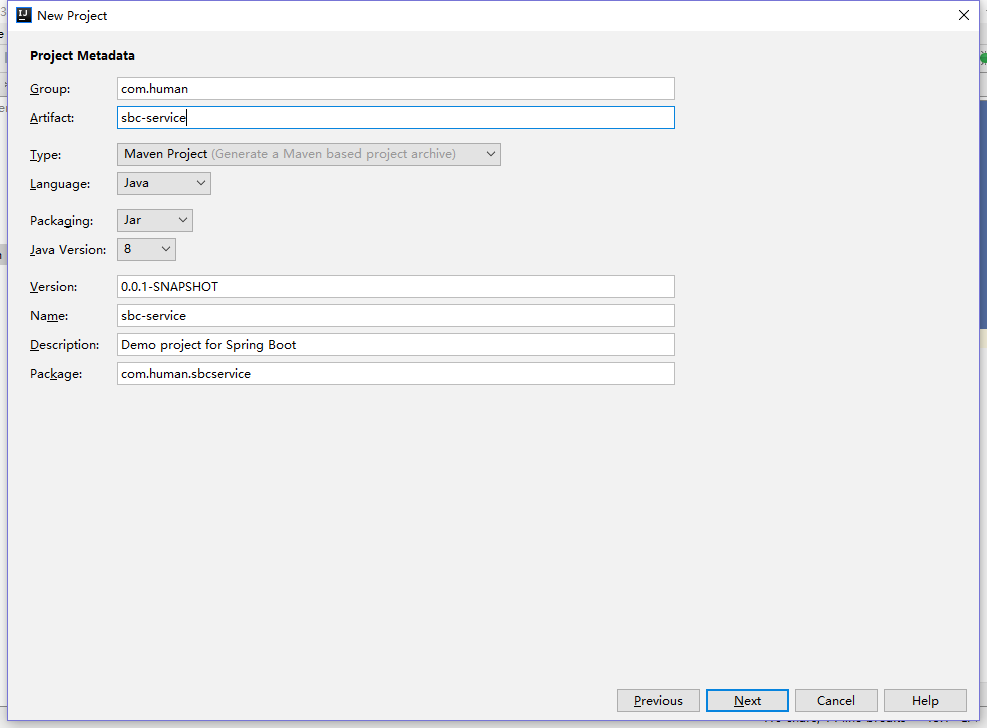
然后点击Next,选择如下:
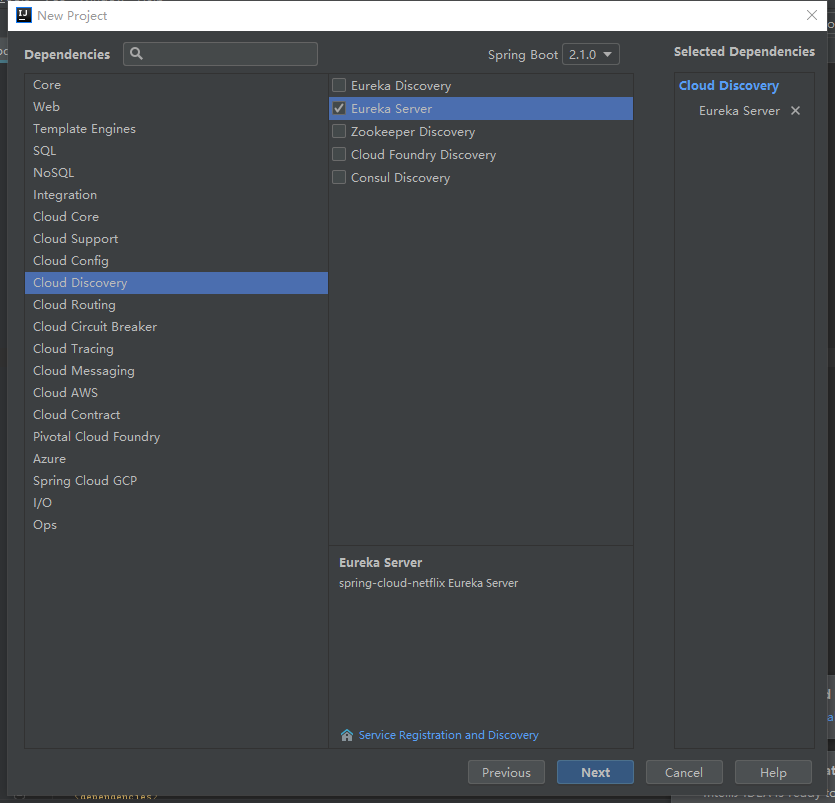
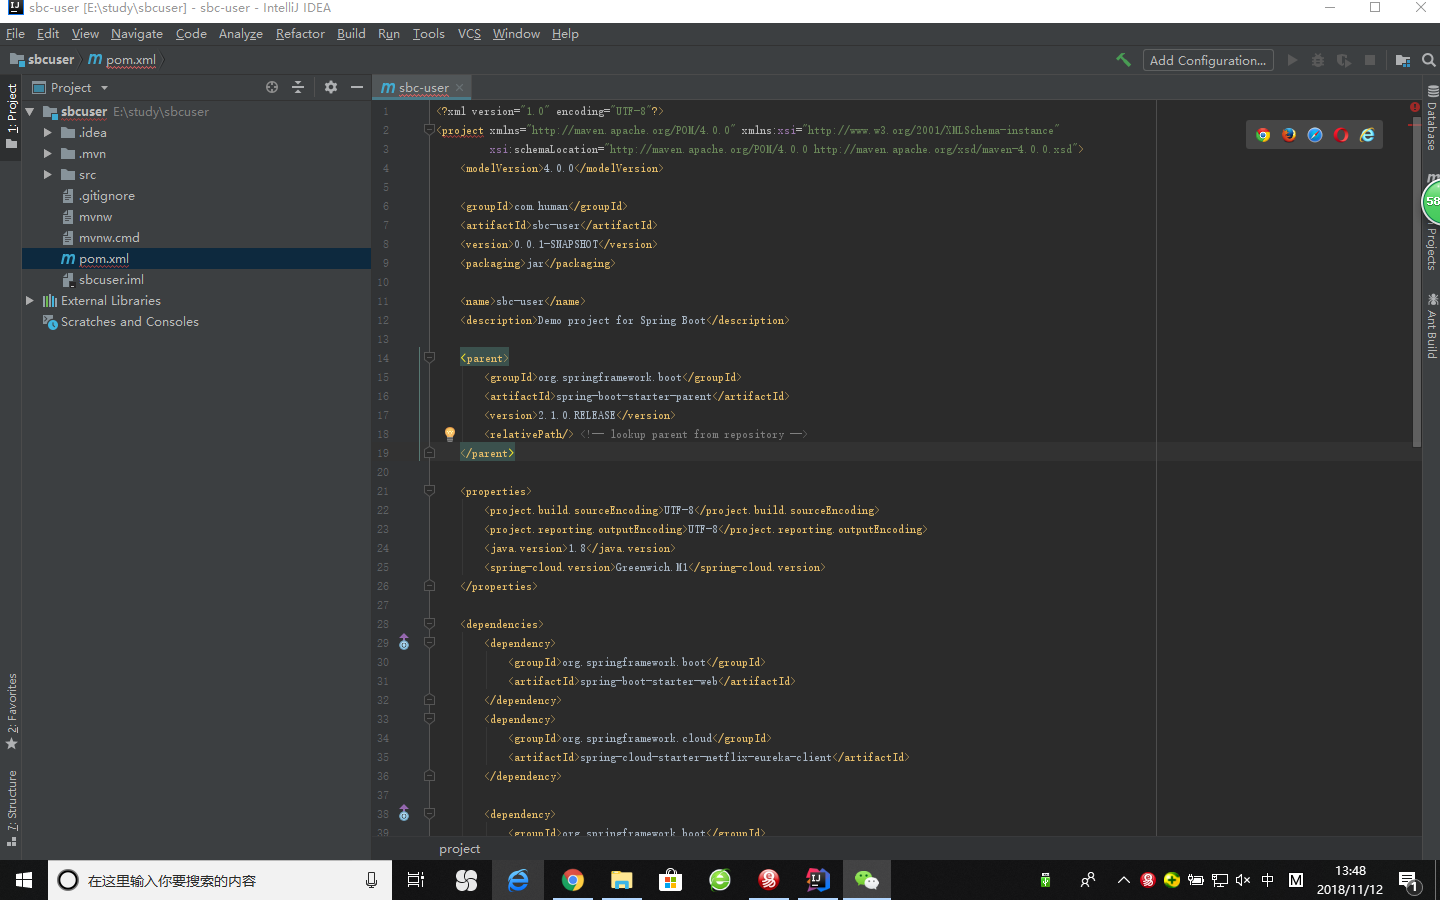
点击Next,然后点击Finish.项目结构如下

其中pom.xml文件内容如下
- <?xml version="1.0" encoding="UTF-8"?>
<project xmlns="http://maven.apache.org/POM/4.0.0" xmlns:xsi="http://www.w3.org/2001/XMLSchema-instance"
xsi:schemaLocation="http://maven.apache.org/POM/4.0.0 http://maven.apache.org/xsd/maven-4.0.0.xsd">
<modelVersion>4.0.0</modelVersion>- <groupId>com.human</groupId>
<artifactId>sbc-service</artifactId>
<version>0.0.1-SNAPSHOT</version>
<packaging>jar</packaging>- <name>sbc-service</name>
<description>Demo project for Spring Boot</description>- <parent>
<groupId>org.springframework.boot</groupId>
<artifactId>spring-boot-starter-parent</artifactId>
<version>2.1.0.RELEASE</version>
<relativePath/> <!-- lookup parent from repository -->
</parent>- <properties>
<project.build.sourceEncoding>UTF-8</project.build.sourceEncoding>
<project.reporting.outputEncoding>UTF-8</project.reporting.outputEncoding>
<java.version>1.8</java.version>
<spring-cloud.version>Greenwich.M1</spring-cloud.version>
</properties>- <dependencies>
<dependency>
<groupId>org.springframework.cloud</groupId>
<artifactId>spring-cloud-starter-netflix-eureka-server</artifactId>
</dependency>- <dependency>
<groupId>org.springframework.boot</groupId>
<artifactId>spring-boot-starter-test</artifactId>
<scope>test</scope>
</dependency>
</dependencies>- <dependencyManagement>
<dependencies>
<dependency>
<groupId>org.springframework.cloud</groupId>
<artifactId>spring-cloud-dependencies</artifactId>
<version>${spring-cloud.version}</version>
<type>pom</type>
<scope>import</scope>
</dependency>
</dependencies>
</dependencyManagement>- <build>
<plugins>
<plugin>
<groupId>org.springframework.boot</groupId>
<artifactId>spring-boot-maven-plugin</artifactId>
</plugin>
</plugins>
</build>- <repositories>
<repository>
<id>spring-milestones</id>
<name>Spring Milestones</name>
<url>https://repo.spring.io/milestone</url>
<snapshots>
<enabled>false</enabled>
</snapshots>
</repository>
</repositories>- </project>
项目初始化完成,修改resources文件夹下application.properties文件,内容如下:

- server.port=8081
- spring.application.name=human-service
- eureka.instance.hostname=localhost
- eureka.client.registerWithEureka=false
- eureka.client.fetchRegistry=false
- eureka.client.serviceUrl.defaultZone=http://${eureka.instance.hostname}:${server.port}/eureka/
然后修改主程序代码如下:
- package com.human.sbcservice;
- import org.springframework.boot.SpringApplication;
- import org.springframework.boot.autoconfigure.SpringBootApplication;
- import org.springframework.cloud.netflix.eureka.server.EnableEurekaServer;
- @SpringBootApplication
- @EnableEurekaServer
- public class SbcServiceApplication {
- public static void main(String[] args) {
- SpringApplication.run(SbcServiceApplication.class, args);
- }
- }
至此,一个微服务注册中心完成
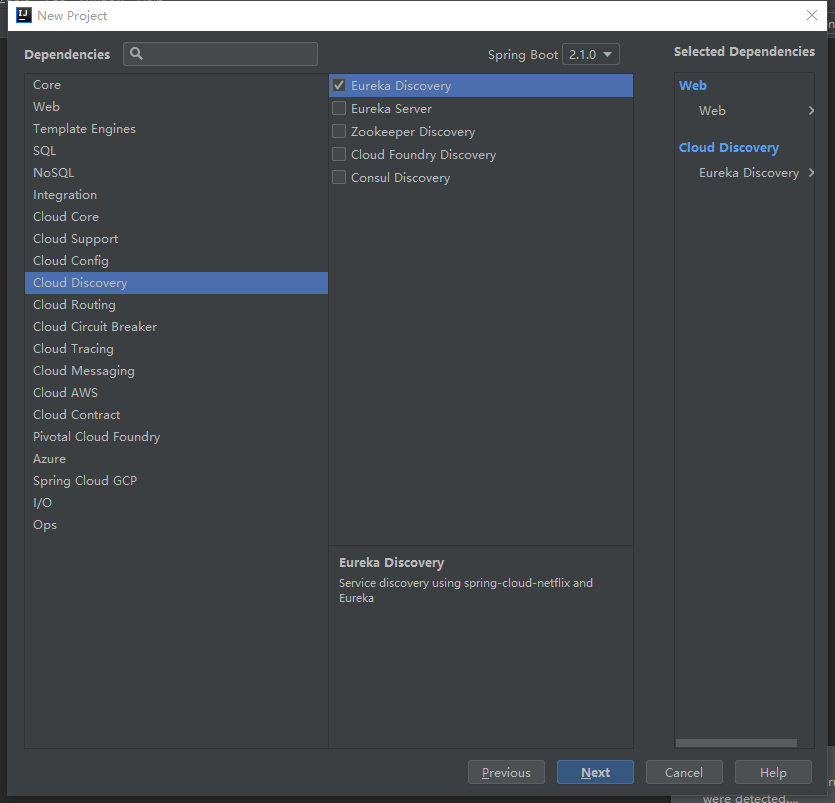
3~创建微服务提供者
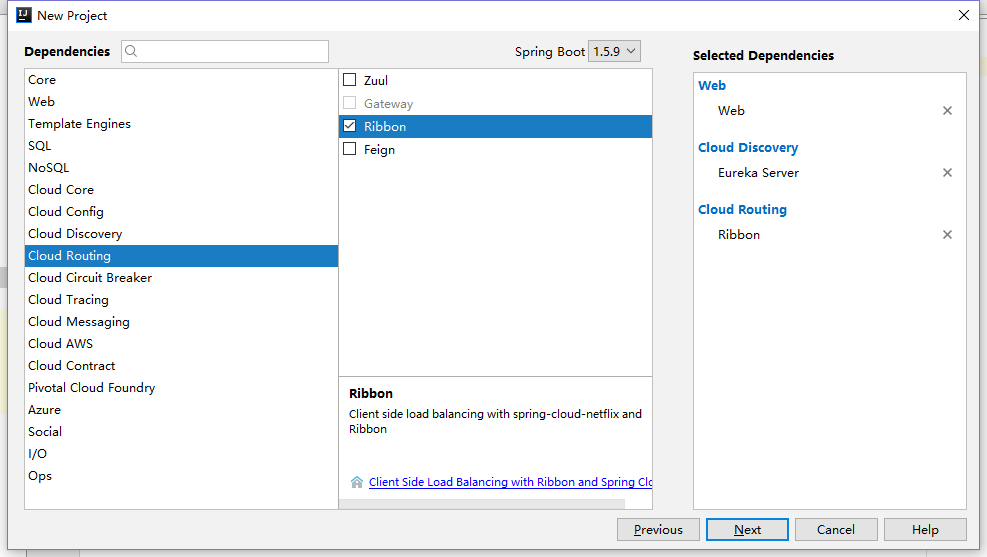
大体上与创建注册中心相同,在选择依赖的时候如下图
选择完毕,点击Next,然后点击Finish,完成后项目结构如图:
pom.xml代码如下:
- <?xml version="1.0" encoding="UTF-8"?>
<project xmlns="http://maven.apache.org/POM/4.0.0" xmlns:xsi="http://www.w3.org/2001/XMLSchema-instance"
xsi:schemaLocation="http://maven.apache.org/POM/4.0.0 http://maven.apache.org/xsd/maven-4.0.0.xsd">
<modelVersion>4.0.0</modelVersion>- <groupId>com.human</groupId>
<artifactId>sbc-user</artifactId>
<version>0.0.1-SNAPSHOT</version>
<packaging>jar</packaging>- <name>sbc-user</name>
<description>Demo project for Spring Boot</description>- <parent>
<groupId>org.springframework.boot</groupId>
<artifactId>spring-boot-starter-parent</artifactId>
<version>2.1.0.RELEASE</version>
<relativePath/> <!-- lookup parent from repository -->
</parent>- <properties>
<project.build.sourceEncoding>UTF-8</project.build.sourceEncoding>
<project.reporting.outputEncoding>UTF-8</project.reporting.outputEncoding>
<java.version>1.8</java.version>
<spring-cloud.version>Greenwich.M1</spring-cloud.version>
</properties>- <dependencies>
<dependency>
<groupId>org.springframework.boot</groupId>
<artifactId>spring-boot-starter-web</artifactId>
</dependency>
<dependency>
<groupId>org.springframework.cloud</groupId>
<artifactId>spring-cloud-starter-netflix-eureka-client</artifactId>
</dependency>- <dependency>
<groupId>org.springframework.boot</groupId>
<artifactId>spring-boot-starter-test</artifactId>
<scope>test</scope>
</dependency>
</dependencies>- <dependencyManagement>
<dependencies>
<dependency>
<groupId>org.springframework.cloud</groupId>
<artifactId>spring-cloud-dependencies</artifactId>
<version>${spring-cloud.version}</version>
<type>pom</type>
<scope>import</scope>
</dependency>
</dependencies>
</dependencyManagement>- <build>
<plugins>
<plugin>
<groupId>org.springframework.boot</groupId>
<artifactId>spring-boot-maven-plugin</artifactId>
</plugin>
</plugins>
</build>- <repositories>
<repository>
<id>spring-milestones</id>
<name>Spring Milestones</name>
<url>https://repo.spring.io/milestone</url>
<snapshots>
<enabled>false</enabled>
</snapshots>
</repository>
</repositories>- </project>
然后打开主程序文件,修改代码如下:
- package com.human.sbcuser;
- import org.springframework.boot.SpringApplication;
- import org.springframework.boot.autoconfigure.SpringBootApplication;
- import org.springframework.cloud.client.discovery.EnableDiscoveryClient;
- @EnableDiscoveryClient//Eureka微服务注解
- @SpringBootApplication
- public class SbcUserApplication {
- public static void main(String[] args) {
- SpringApplication.run(SbcUserApplication.class, args);
- }
- }
修改application.properties文件,内容如下:
- server.port=8082
- eureka.client.service-url.defaultZone=http\://localhost\:8081/eureka/
- spring.application.name=cloud-simple-service
新建一个名为HelloController文件,具体代码:
- package com.human.sbcuser;
- import org.springframework.stereotype.Controller;
- import org.springframework.web.bind.annotation.RequestMapping;
- import org.springframework.web.bind.annotation.ResponseBody;
- @Controller
- public class HelloController {
- @RequestMapping("/")
- @ResponseBody
- public String hello()
- {
- return "hello KinY ~KoKo";
- }
- }
至此,一个简单的服务提供者创建完毕
4~创建微服务消费者
利用Rbbon创建客户端,其中group:com.human,Artifact:sbc-consumer,剩下基本上与创建注册中心相同,其中选择依赖时如下图:
完成后,pom.xml文件内容如下:
- <?xml version="1.0" encoding="UTF-8"?>
<project xmlns="http://maven.apache.org/POM/4.0.0" xmlns:xsi="http://www.w3.org/2001/XMLSchema-instance"
xsi:schemaLocation="http://maven.apache.org/POM/4.0.0 http://maven.apache.org/xsd/maven-4.0.0.xsd">
<modelVersion>4.0.0</modelVersion>- <groupId>com.human</groupId>
<artifactId>sbc-consumer</artifactId>
<version>0.0.1-SNAPSHOT</version>
<packaging>jar</packaging>- <name>sbc-consumer</name>
<description>Demo project for Spring Boot</description>- <parent>
<groupId>org.springframework.boot</groupId>
<artifactId>spring-boot-starter-parent</artifactId>
<version>2.1.0.RELEASE</version>
<relativePath/> <!-- lookup parent from repository -->
</parent>- <properties>
<project.build.sourceEncoding>UTF-8</project.build.sourceEncoding>
<project.reporting.outputEncoding>UTF-8</project.reporting.outputEncoding>
<java.version>1.8</java.version>
<spring-cloud.version>Greenwich.M1</spring-cloud.version>
</properties>- <dependencies>
<dependency>
<groupId>org.springframework.boot</groupId>
<artifactId>spring-boot-starter-web</artifactId>
</dependency>
<dependency>
<groupId>org.springframework.cloud</groupId>
<artifactId>spring-cloud-starter-netflix-eureka-server</artifactId>
</dependency>
<dependency>
<groupId>org.springframework.cloud</groupId>
<artifactId>spring-cloud-starter-netflix-ribbon</artifactId>
</dependency>- <dependency>
<groupId>org.springframework.boot</groupId>
<artifactId>spring-boot-starter-test</artifactId>
<scope>test</scope>
</dependency>
</dependencies>- <dependencyManagement>
<dependencies>
<dependency>
<groupId>org.springframework.cloud</groupId>
<artifactId>spring-cloud-dependencies</artifactId>
<version>${spring-cloud.version}</version>
<type>pom</type>
<scope>import</scope>
</dependency>
</dependencies>
</dependencyManagement>- <build>
<plugins>
<plugin>
<groupId>org.springframework.boot</groupId>
<artifactId>spring-boot-maven-plugin</artifactId>
</plugin>
</plugins>
</build>- <repositories>
<repository>
<id>spring-milestones</id>
<name>Spring Milestones</name>
<url>https://repo.spring.io/milestone</url>
<snapshots>
<enabled>false</enabled>
</snapshots>
</repository>
</repositories>- </project>
修改程序主类,内容如下:
- package com.human.sbcconsumer;
- import org.springframework.boot.SpringApplication;
- import org.springframework.boot.autoconfigure.SpringBootApplication;
- import org.springframework.cloud.client.discovery.EnableDiscoveryClient;
- import org.springframework.cloud.client.loadbalancer.LoadBalanced;
- import org.springframework.context.annotation.Bean;
- import org.springframework.web.client.RestTemplate;
- @EnableDiscoveryClient
- @SpringBootApplication
- public class SbcConsumerApplication {
- @Bean
- @LoadBalanced
- RestTemplate restTemplate(){
- return new RestTemplate();
- }
- public static void main(String[] args) {
- SpringApplication.run(SbcConsumerApplication.class, args);
- }
- }
修改配置文件application.properties,内容如下:
- server.port=8083
- eureka.client.service-url.defaultZone=http\://localhost\:8081/eureka/
- spring.application.name=cloud-simple-consumer
新增HelloController文件,内容如下:
- package com.human.sbconsumer;
- import org.springframework.beans.factory.annotation.Autowired;
- import org.springframework.stereotype.Controller;
- import org.springframework.web.bind.annotation.RequestMapping;
- import org.springframework.web.bind.annotation.ResponseBody;
- import org.springframework.web.bind.annotation.RestController;
- import org.springframework.web.client.RestTemplate;
- @RestController
- public class HelloController {
- @Autowired
- RestTemplate restTemplate;
- @RequestMapping("/")
- public String hello()
- {
- return restTemplate.getForEntity("http://cloud-simple-service/",String.class).getBody();
- }
- }
至此编码完成.
5~运行
先运行注册中心项目(sbc-service),然后运行服务提供者项目(sbc-user),打开浏览器输入地址:http://localhost:8081/,显示内容如下:
其中红色框内,说明服务提供者注册成功,此时访问地址:http://localhost:8082/ 输出文本:hello KinY ~KoKo,说明服务提供者正常运行,下面运行服务消费者(sbc-consumer),再访问http://localhost:8081/ 发现变成如下内容:
说明服务客户端也成功注册,下面直接访问 http://localhost:8083/ 浏览器输出文本:hello KinY ~KoKo 大功告成!!
至此一个简配的微服务架构搭建完毕.
6~补充
①:在选择端口时注意不要与其他程序冲突
②:其中消费者基于Ribbon创建,Ribbon是基于http和tcp的客户端负载均衡器
spring boot IDEA 开发微服务(二)的更多相关文章
- spring boot IDEA 开发微服务
本文是参考:https://blog.csdn.net/u011001084/article/details/79040701 的基础上自己实际操作编写. 在我们开始创建微服务之前,需要安装Cons ...
- Spring boot 零配置开发微服务
2018年12月29日星期六 体验Spring boot 零配置开发微服务 1.为什么要用Spring boot? 1.1 简单方便.配置少.整合了大多数框架 1.2 适用于微服务搭建,搭建的微服务 ...
- Springboot监控之二:Spring Boot Admin对Springboot服务进行监控
概述 Spring Boot 监控核心是 spring-boot-starter-actuator 依赖,增加依赖后, Spring Boot 会默认配置一些通用的监控,比如 jvm 监控.类加载.健 ...
- .net 与 java 开发微服务对比
java+spring boot+maven对比.net 优势: 1. spring 自身带的ioc 比.net 更简单易用. 2. spring actuator的健康检测等运行时状态查看功能很赞. ...
- Spring Boot 揭秘与实战(二) 数据缓存篇 - 快速入门
文章目录 1. 声明式缓存 2. Spring Boot默认集成CacheManager 3. 默认的 ConcurrenMapCacheManager 4. 实战演练5. 扩展阅读 4.1. Mav ...
- 社区活动分享PPT:使用微软开源技术开发微服务
上周六在成都中生代技术社区线下活动进行了一个名为"微软爱开源-使用微软开源技术开发微服务"的技术分享. 也算是给很多不熟悉微软开源技术的朋友普及一下微软最近几年在开源方面所做的努力 ...
- 使用.NET Core+Docker 开发微服务
.NET Core发布很久了,因为近几年主要使用java,所以还没使用过.NET Core,今天正好有一个c#写的demo,需要做成服务,不想再转成java来实现,考虑使用.NET CORE来尝下鲜, ...
- Spring Boot 揭秘与实战(二) 数据缓存篇 - Redis Cache
文章目录 1. Redis Cache 集成 2. 源代码 本文,讲解 Spring Boot 如何集成 Redis Cache,实现缓存. 在阅读「Spring Boot 揭秘与实战(二) 数据缓存 ...
- Spring Boot 揭秘与实战(二) 数据缓存篇 - Guava Cache
文章目录 1. Guava Cache 集成 2. 个性化配置 3. 源代码 本文,讲解 Spring Boot 如何集成 Guava Cache,实现缓存. 在阅读「Spring Boot 揭秘与实 ...
随机推荐
- Python-1 试玩OpenCV
昨天同事说微信更新有跳一跳小游戏,便更新了玩一玩.至于抄袭不抄袭我不讨论,看玩法和色彩都很简洁.想用Python试试摄像头捕捉图像,然后分析距离每次都能跳到中心,有生物机械手指之类的再弄到树莓派上岂不 ...
- django+uwsgi+nginx+sqlite3部署+screen
note:可通过该命令查找文件未知 sudo find / -name filename 一:项目(github) ssh root@server ip # 连接你的服务器 git ...
- [Unity算法]平抛运动
平抛运动: 1.物体以一定的初速度水平方向抛出,如果物体仅受重力作用,这样的运动叫做平抛运动. 2.平抛运动可看作水平方向的匀速直线运动以及竖直方向的自由落体运动的合运动. 水平方向位移:s = v ...
- 14.json文件读取
json文件读取 1.#读取json import json str='''[ { "name":"Tom", "gender":" ...
- [转] 常用的CSS命名规则
(一)常用的CSS命名规则 头:header 内容:content/container 尾:footer 导航:nav 侧栏:sidebar 栏目:column 页面外围控制整体布局宽度 ...
- JavaWeb学习篇--Filter过滤器
Filter过滤器简介 ServletAPI中提供了一个Filter接口,开发web应用时,如果编写的 java 类实现了这个接口,则把这个java类称之为过滤器Filter. WEB服务器每次在调用 ...
- winform 之公共控件
Button 按钮 属性: (一).布局: 1.AutoSize:控件是否根据内容调整大小 2.Location:当前按钮位于界面位置 3.Dock:控件锁定到界面位置 -None:不锁定 4.Mar ...
- wsgiref分析
"""Generic socket server classes. This module tries to capture the various aspects of ...
- ubuntu 上 SSH scp 技巧
参考:https://deepzz.com/post/how-to-setup-ssh-config.html SSH(Secure Shell)是什么?是一项创建在应用层和传输层基础上的安全协议,为 ...
- python内置函数使用
print(abs(1)) #绝对值,正数就是自己 ",''])) #计算可迭代对象中是否为真,其中一个为假,就显示为假 print(all('')) # If the iterable i ...